


Written by Souvik Biswas
Managing app builds for multiple platforms can be quite intensive, even if you are using a CI/CD service. In this article, we’ll look into how to automate builds for multiple platforms using Codemagic.
TL;DR: Create separate workflows for your app based on the platforms you are building for and the VM instance required. Define build triggers by specifying branch patterns to match so that the respective workflow build starts running based on updates in the repository.
As the focus of this article is to automate build triggering for multiple platforms, we won’t go too deep into the details of configuring a workflow. You can check out the following articles for more info about the basic workflow setup for each platform:
- Flutter workflow — mobile & web, macOS, Windows, and Linux
- Android workflow
- iOS workflow
- Unity Android and iOS workflow
Getting started
You need to upload your app to any Git provider for it to be accessible from Codemagic. In this article, we’ll be using GitHub, but you can use any other Git provider as per your choice, such as GitLab or Bitbucket.
Log in to your Git provider (e.g., GitHub), and create a new repository for your app. You can use any name for the repo, and it can be either private or public.
You can use the following to initialize a Git repo, commit the changes, and push it to your Git provider.
cd your_app_directory
git init
git add .
git commit -m "Initial commit"
git branch -M main
git remote add origin git@github.com:GIT_USERNAME/repo_name.git
git push -u origin main
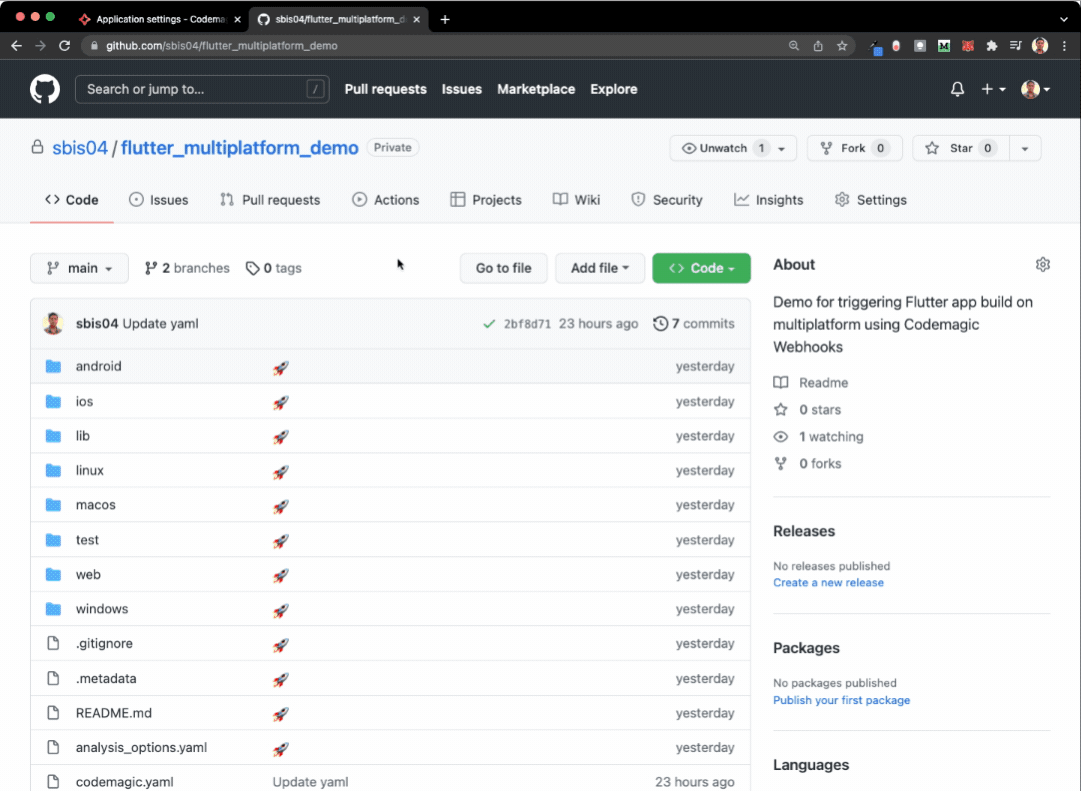
Your project should now be uploaded to the Git provider. Navigate to your repository to view it.
NOTE: We’ll be using a Flutter app (configured for Android, iOS, web, macOS, Linux, and Windows) to demonstrate the automatic build triggering. But you can follow similar steps for any other type of project, such as React Native, Android, iOS, or Unity.
Adding project to Codemagic
Once you have uploaded the project to a Git provider, you can add it to Codemagic by following the steps below:
- Log in to Codemagic. If you’re new to Codemagic, then sign up:
-
On the Applications page, click Add application.

-
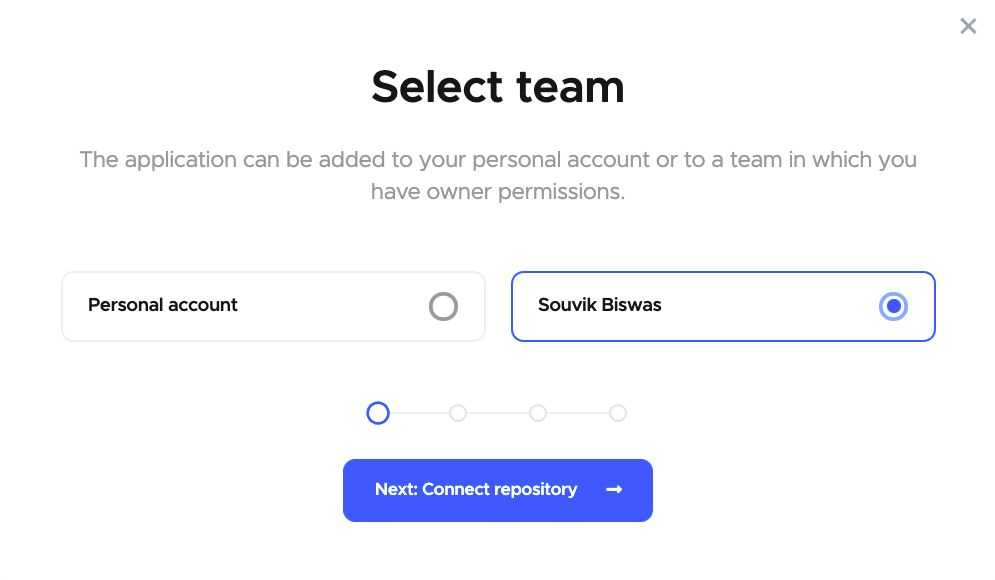
Choose whether to add the application to your personal account or to your team. Click Connect repository.
-
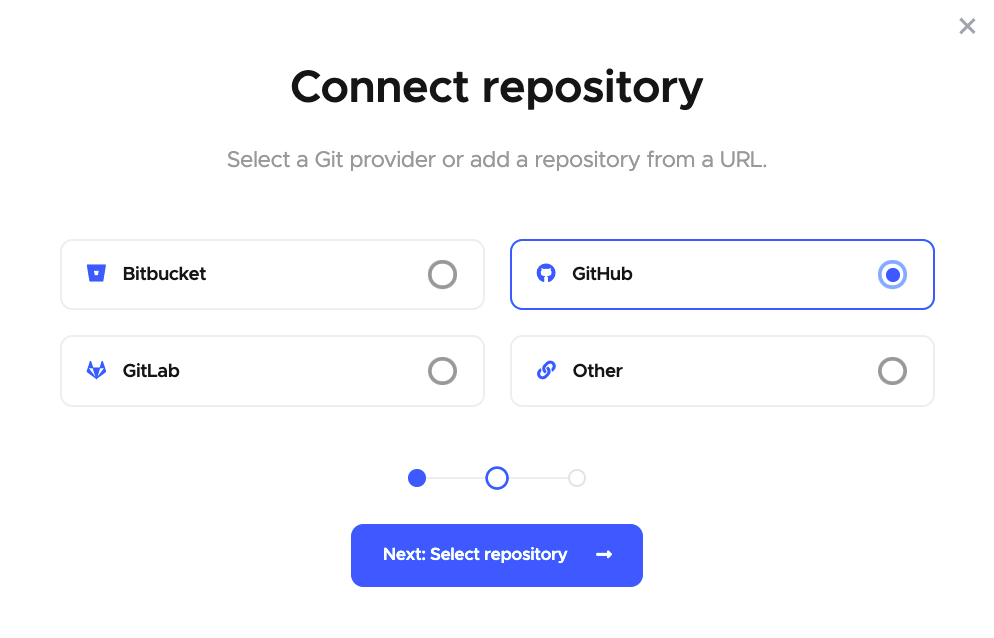
Select the Git provider you want to use (or select Other if you want to add the project using the clone URL of a repository).
-
Click Authorize integration to authorize Codemagic. If you have already authorized your selected Git provider, click Select repository instead.
If you are using GitHub as your Git provider, then you need to complete one additional step before selecting a repository: Click Install GitHub App to set up the integration. Learn more about configuring GitHub app integrations here.
-
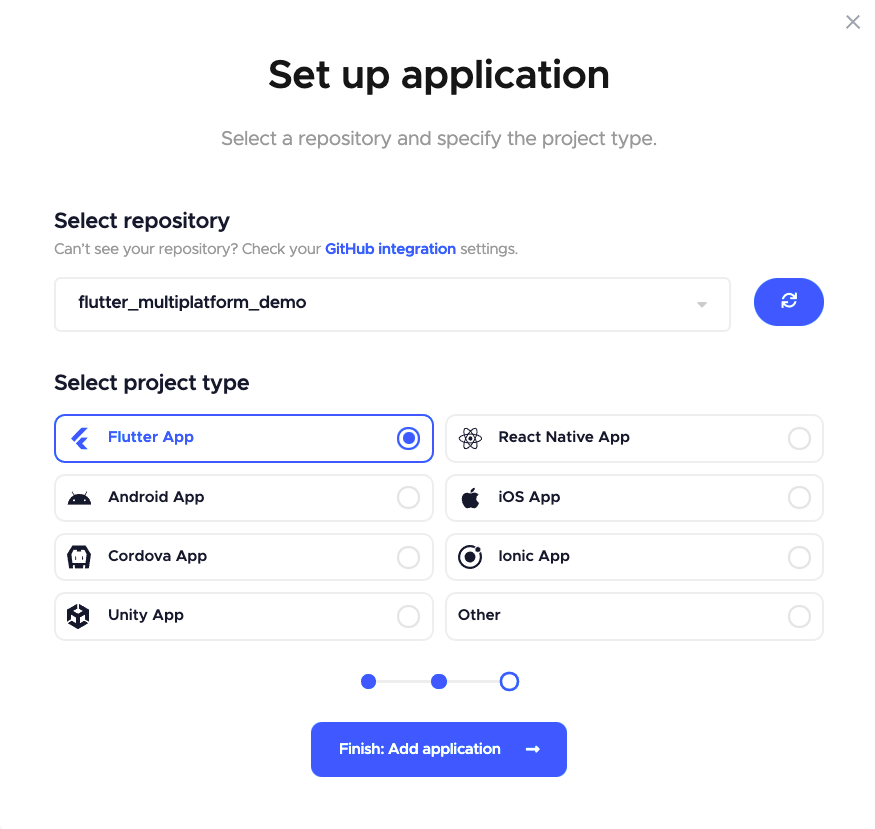
Select your repository (or add the clone URL if using Other) and the project type. Then click Add application.
-
You will be taken to the project settings. The Workflow Editor tab will be selected by default.
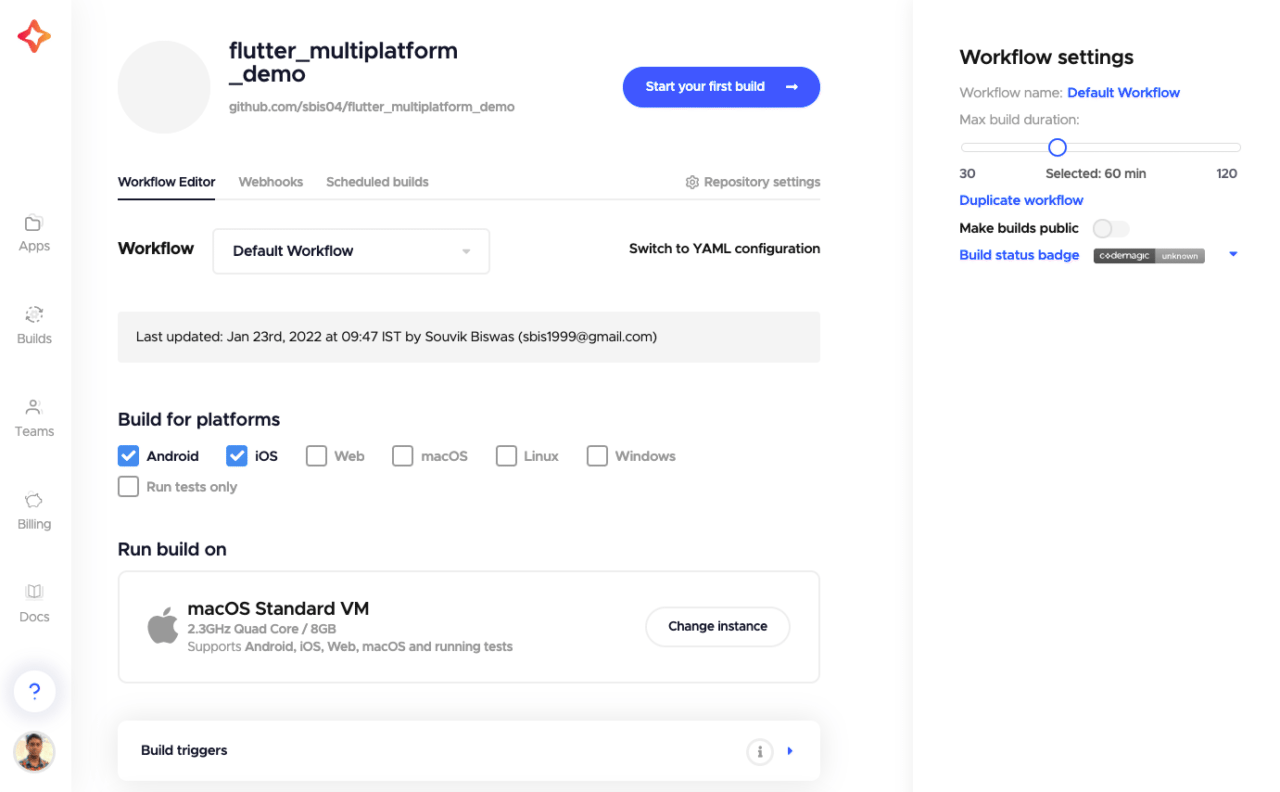
To set up the build workflow of your Flutter project, you can either use the Workflow Editor or the codemagic.yaml file. (Both of these methods will be covered in this article.)
Set up webhooks
Webhooks are the secret sauce behind automatic build triggering in response to events in the repository.
Codemagic automatically adds webhooks to the repositories added via GitHub, GitLab, or Bitbucket via OAuth integration after you have configured automatic build triggering. If the repositories are added via SSH or HTTP/HTTPS, you will have to set up webhooks manually.
To set up webhooks manually for your GitHub project, follow the steps below:
-
Go to your project repository on GitHub.
-
Navigate to the project Settings > Webhooks page.
-
Click Add webhook.
-
Now, go to your Codemagic application settings page, and select the Webhooks tab.
-
Copy the Payload URL, and paste it into the respective field of the GitHub Add webhook page.
-
Both
application/jsonandapplication/x-www-form-urlencodedare supported as the Content type. Select either of them from the dropdown. -
Under “Which events would you like to trigger this webhook?” choose “Let me select individual events.”
-
Select these events: Branch or tag creation, Pull requests, and Pushes.
-
Click Add webhook.
For using webhooks with any other Git provider, follow the steps shown on this page.
Codemagic build machines
Before you dive into configuring the workflow, you should know about the different types of VMs available on Codemagic (this is the machine on which your builds run):
-
macOS VMs (standard VMs & premium VMs): support Android, iOS, web, and macOS apps.
-
Linux VMs (standard VMs & premium VMs): support Android, web, and Linux apps.
-
Windows VMs: support Android, web, and Windows apps.
Learn more about the build machine types available on Codemagic on this page.
So, if you want to build a multiplatform app for macOS and Windows, you need to use two different VMs (a macOS VM and a Windows VM, respectively). But you can only use a single VM inside a workflow on Codemagic.
Next, you’ll learn how to create different workflows based on the platform and configure them accordingly. Separating the workflows based on the platform also makes it simpler to use automatic triggering, as you get to choose which to build for based on the workflow selected.
Configure using Workflow Editor
Let’s start by setting up a workflow for mobile builds only (Android and iOS):
-
Navigate to the project Settings on Codemagic. Make sure the Workflow Editor tab is selected.
-
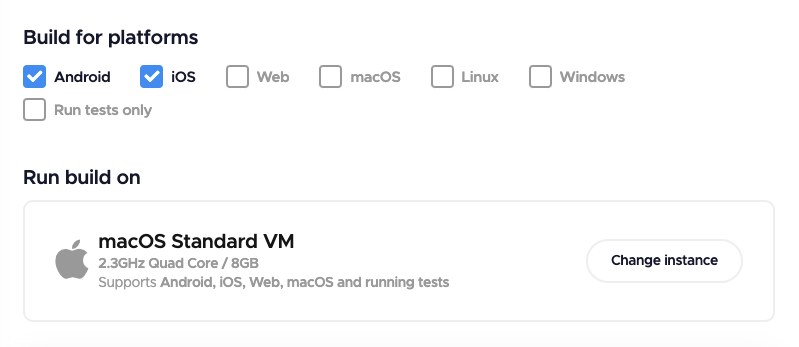
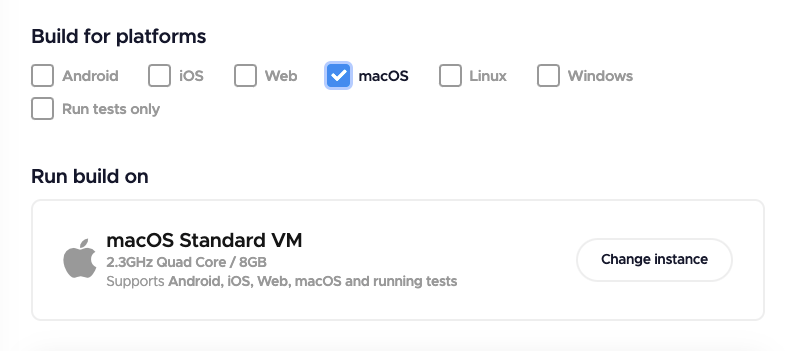
Under Build for platforms, select Android and iOS.
-
Select a macOS instance (as iOS builds can only run inside a macOS VM).
-
Scroll down and expand the Build triggers section.
-
Under Automatic build triggering, select Trigger on push. This will automatically trigger a build of this workflow when it detects a push event on the GitHub repo.
-
You can specify which Git branch events to track by adding a branch pattern under Watched branch patterns and clicking Add pattern. For tips on how to define a pattern, click Show pattern examples.
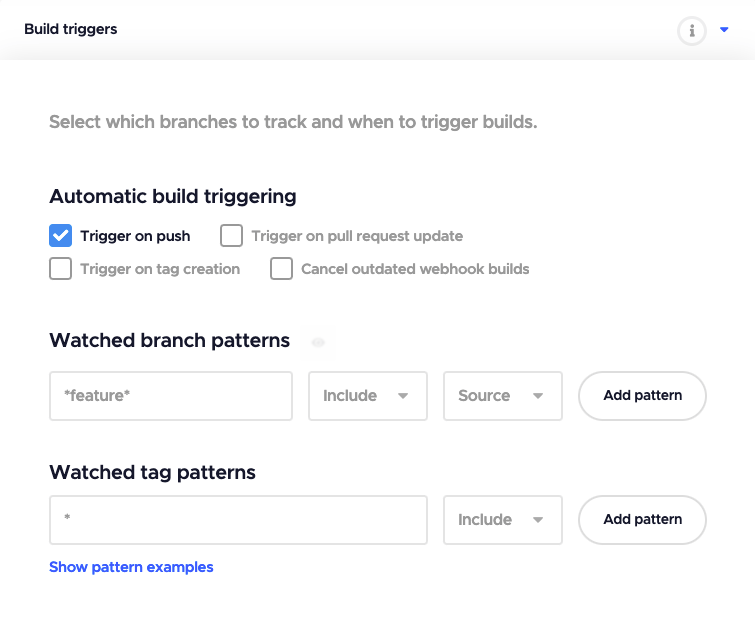
The branch pattern
*feature*would track all branches withfeaturein the name.You can add more than one branch pattern to track.
-
Check the Cancel outdated webhook builds checkbox if you want to cancel all ongoing and queued builds triggered by webhooks when a more recent build has been triggered for the same branch.
-
Complete the rest of the workflow configuration (the Tests, Build, and Distribution sections).
-
Click Save changes.
Here, we are only tracking the push events, but you can also track the pull requests or tag creation by checking the “Trigger on pull request update” or “Trigger on tag creation” checkboxes.
By default, the name of the workflow will be Default Workflow. You can change the name to something more appropriate by clicking on the Workflow name present under the Workflow settings and entering the new name (for example, Mobile Workflow).
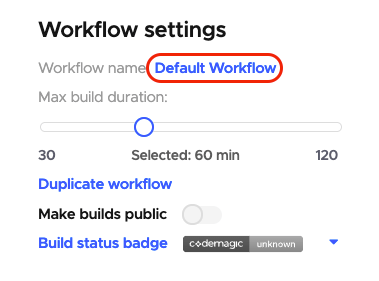
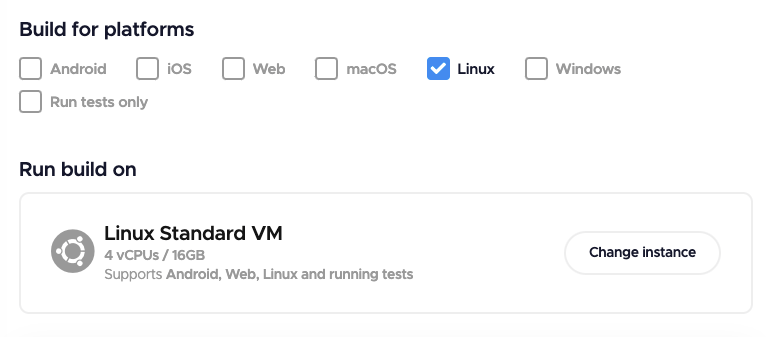
To create another workflow for a different platform, click Duplicate workflow under the Workflow settings. This will create a copy of that workflow. Change the name to something appropriate (for example, Linux Workflow).
Select the platform for which to build the app, and select the VM instance accordingly by clicking on the Change instance button.
For a macOS workflow:
For a Linux workflow:
For a Windows workflow:

Check out the Trying out automatic build triggering section to see how to trigger builds automatically based on a push event to a branch of the Git repository.
Configure using YAML
To define your build workflow using the YAML file, navigate to the root directory of your project, and create a new file called codemagic.yaml.
Add the following template to the file:
workflows:
  workflow-id:
    name: Workflow Name
    instance_type: mac_mini
    max_build_duration: 60
    environment:
      flutter: stable
      xcode: latest
      cocoapods: default
    scripts:
      - ...
    artifacts:
      - ...
    publishing:
      email:
        recipients:
          - name@example.com
Let’s start by defining a workflow for mobile builds only (Android and iOS).
Modify the workflow ID and workflow name to something more appropriate:
workflows:
  mobile-workflow:
    name: Mobile Workflow
We need to use a macOS build machine to run the build (as iOS builds can only be run from a macOS VM). Specify the instance_type as mac_mini or mac_pro.
Define a triggering section along with the type of events to track for in the repository and the branch patterns:
workflows:
  mobile-workflow:
    name: Mobile Workflow
    // ...
    triggering:
      events:
        - push
      branch_patterns:
        - pattern: '*'
          include: true
          source: true
In the above example, a push event is defined, so Codemagic will track all of the push events happening in the repository. You can further specify branch_patterns to only track the branches whose names match the defined pattern.
Using the pattern as '*' will match all branches. For example, if you specify the pattern as *feature*, it will match all the branches containing feature in their name:
triggering:
  events:
    - push
  branch_patterns:
    - pattern: '*feature*'
      include: true
      source: true
There are two more types of events that you can track for: pull_request and tag. Learn more about using build triggers inside a YAML file on this page.
Now, finish specifying the scripts, artifacts, and publishing sections by following the links shown at the beginning of this article.
Similarly, you can define workflows to build for other platforms by specifying the correct instance_type and giving the workflows their appropriate id and name:
workflows:
  // ...
  web-workflow:
    name: Web Workflow
    instance_type: mac_mini
    // ...
  macos-workflow:
    name: macOS Workflow
    instance_type: mac_mini
    // ...
  linux-workflow:
    name: Linux Workflow
    instance_type: linux
    // ...
  windows-workflow:
    name: Windows Workflow
    instance_type: windows_x2
    // ...
Learn more about the different instant types you can specify while using the YAML file on this page.
Trying out automatic build triggering
You can define different branch patterns for each of the workflows so that builds for a certain platform only get triggered if changes are made to the matching branches.
For example, you can define the branch pattern:
-
Inside a Windows workflow as
*windows*and -
Inside a Linux workflow as
*linux*
Now, if changes are pushed to a branch named windows-feature, only the Windows workflow will get triggered.
But if you have defined the same branch pattern for all the workflows, then all the different platform workflows can be triggered at once.
In our example, we have set the same branch pattern, *feature*, to all workflows. So, if any change occurs to a branch that contains feature in the name, then all the workflows will be triggered.
Let’s find out if the automatic triggering is working by pushing a small change to a branch called feature-improve-ui:

This event will trigger all the workflows that we defined in our example. You can navigate to the Codemagic > Builds page to view all the running and queued builds.
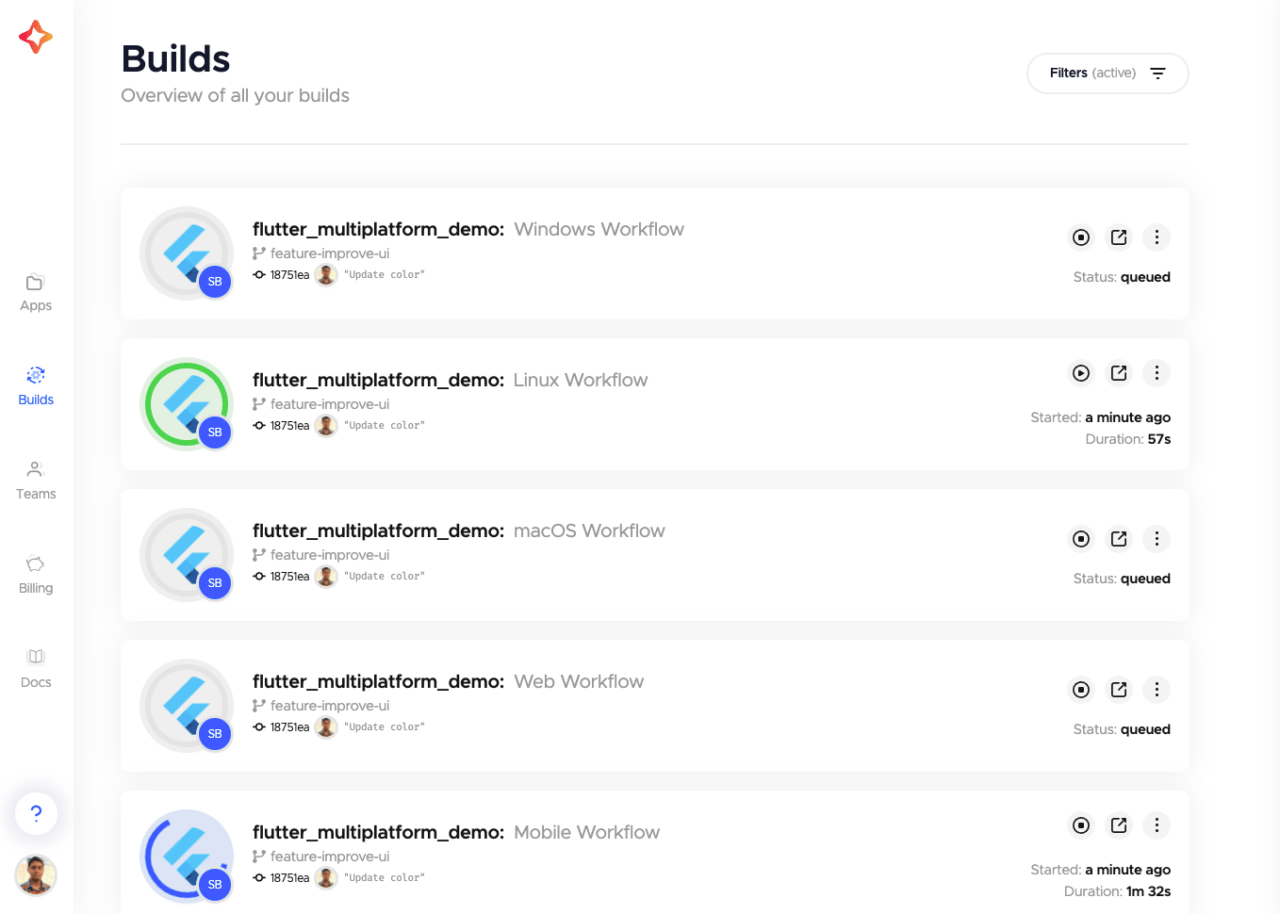
The builds are being run on a team that has two build concurrency, so only two builds can run simultaneously, and the rest will be queued. If you have five build concurrency, then all five workflows can start running at the same time.
Wrapping up
Once you set up the automatic build triggers for your app, it should be much easier to trigger your builds for multiple platforms. Here are some more links that might help you while working with automatic build triggering:
-
More information about build triggering using the Workflow Editor and YAML file.
-
If you are working with monorepos, check out this article.
-
You can find the GitHub repo of the sample project here.
Souvik Biswas is a passionate Mobile App Developer (Android and Flutter). He has worked on a number of mobile apps throughout his journey. Loves open source contribution on GitHub. He is currently pursuing a B.Tech degree in Computer Science and Engineering from Indian Institute of Information Technology Kalyani. He also writes Flutter articles on Medium - Flutter Community.

