


This article is written by Kevin Suhajda
“It’s no use! I can’t run an end to end test with Flutter’s integration tests”, exclaimed one of our customers about 9 months ago. I asked what the problem was and they explained that they were using Google Authentication for logging in and used the google_sign_in package but it wasn’t possible use Flutter’s integration tests to interact with the login screens. I still didn’t quite understand what the problem was, and then it clicked: this plugin uses native UI components which the integration tests don’t work with.
I was quite disappointed that I couldn’t offer a solution at the time and had to leave it at that. However, fast forward to today and an awesome new solution has presented itself called “Patrol” by LeanCode. I’m going to tell you all about it, but before we dive in let’s just recap why it’s important to run tests, what tools you had available until now, and then talk about how to get started with Patrol.
Why test Flutter apps anyway?
One of the main reasons development teams use Continuous Integration (CI) services like Codemagic is to get immediate feedback on the code they are committing to their repo. Tests can be run automatically as part of your pipeline to ensure a level of both quality and stability because bugs or issues can be caught early and rectified straight away. We always encourage customers to implement testing when setting up their workflows, but it’s not uncommon to hear “We haven’t got time to write tests”. Hopefully, you’re not in that boat, and use testing as part of your app development cycle to deliver great quality and bug free apps!
What are the main automated ways to test Flutter apps?
There are four main testing methods that can be automated as part of your CI workflow. Testing is a topic unto itself, so I’ll keep it brief, but using a combination of these testing methods will help you improve the quality of your app and catch problems sooner rather than later.
Firstly, there is “Unit testing” which is commonly used for testing your functions and methods in isolation to make sure they work as expected. Unit tests can also be written to make sure your business logic works in different scenarios without any unexpected results.
Next we have Flutter “Widget tests” which allows you to test your UI components and make sure they render correctly and work as you expect.
Then there is “Integration testing” which is where you test if the units and components of your application work together as expected.
Finally, there is “End-to-End UI testing” where you test the application as if it were being used by a real user. In a CI workflow, this is usually automated using simulators or emulators to test different pathways through your app to make sure there aren’t any issues after you make changes to your code.
This is where the customer I was talking about at the beginning was stuck because they couldn’t run their End-to-End UI tests because it wasn’t possible to log in to the app. At the time they tested a ‘dev’ version that bypassed the log in part.
However, that’s no longer required now that “Patrol” is available!
Enter, stage left, Patrol!
So first of all, what is Patrol? Well, I think the docs say it best:
“Patrol is a new and open-source UI testing framework for Flutter developed by LeanCode. It builds on top of Flutter’s existing test tooling to let you do things which were previously impossible. Patrol lets you access native features of the platform that the Flutter app is running on”
The most important part here is that it lets you access the native features of the platform your Flutter app is running on.
This means that you can now do things such as:
- Interact with Permission Request dialogs to dismiss or accept requests.
- Interact with WebViews.
- Minimize and maximize your app.
- Interact with authentication flows like Google or Apple authentication.
- Interact with other native features such as opening the Notifications tray, pressing the Home button, turning Wi-Fi connectivity on or off, or changing the device to dark mode, etc.
Okay, this sounds great, but what’s the catch?
Well, there isn’t one! And what’s more, it’s not only free but also open source!
Moreover, Patrol also introduces ‘custom finders’ which gives you a more concise syntax for writing your tests. You can read more about them here
Installing and setting up Patrol
To get started with Patrol you will need to install the CLI, add the patrol dependency to your pubspec.yaml and set up some configurations in your iOS and Android projects.
LeanCode has created some great documentation here which takes you through the process for each platform which you can find here. Their step-by-step guide will take you through the setup for both iOS and Android.
If you run into any problems, the best place to get help is in the Patrol Community Discord server which you can join here.
If you find any bugs, then you can raise an issue here.
Writing native feature tests with Patrol
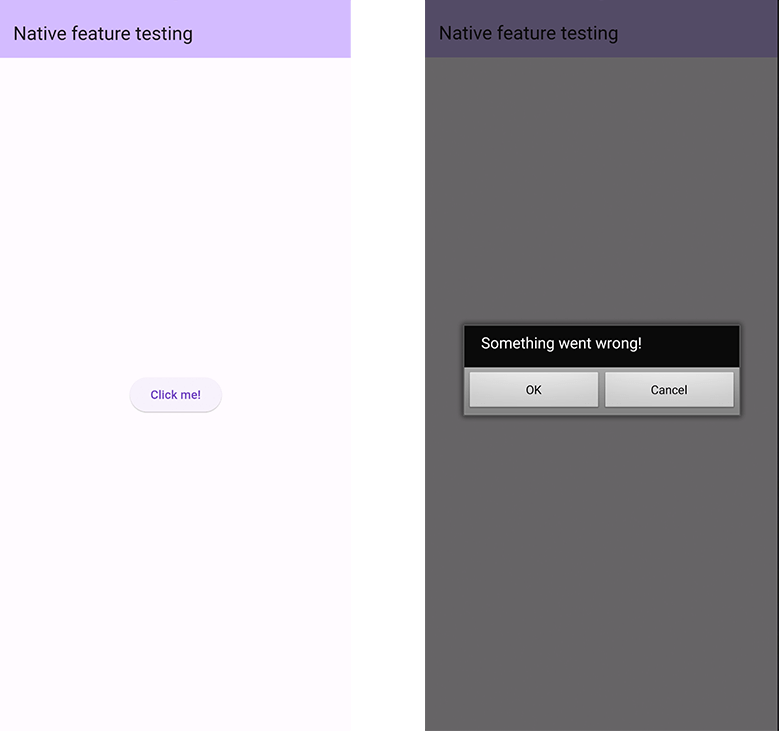
Now you are all set up, lets start testing some native features. To try it myself, I set up a simple Flutter app with an elevated button that when clicked opens a native alert dialog.
Clicking “OK” or “Cancel” simply dismisses the dialog.
Again, I would recommend using Patrol’s own documentation which you can find here to get your first test file added.
So for my test, I wanted to click on the elevated button that has the text “Click me!”. It’s a standard Flutter widget so it can be tapped using the following Patrol finder:
await $('Click me!').tap();
The native dialog should then be displayed, so we can now start interacting with a native UI component. So let’s add the native finder that will allow us to tap the “OK” button:
await $('Click me!').tap();
await $.native.tap(Selector(text: 'OK'));
That was easy! I also want to test the “Cancel” button, so let’s tap on the “Click me!” button again and then tap on the native dialog’s “Cancel” button by adding a couple more lines as follows:
await $('Click me!').tap();
await $.native.tap(Selector(text: 'OK'));

await $('Click me!').tap();
await $.native.tap(Selector(text: 'Cancel'));
Your completed test file should look like this:
import 'package:cmpatrol/main.dart';
import 'package:patrol/patrol.dart';

void main() {
  patrolTest(
    'Native tests',
    nativeAutomation: true,
    ($) async {
      await $.pumpWidgetAndSettle(const MyApp());

      await $('Click me!').tap();
      await $.native.tap(Selector(text: 'OK'));

      await $('Click me!').tap();
      await $.native.tap(Selector(text: 'Cancel'));

      await $('Click me!').tap();
      await $.native.tap(Selector(text: 'NO'));
    },
  );
}
You should now be able to run that test on your emulator or a real device using the command to launch the test. My integration test file was called button_test so I started the tests from Terminal as follows:
patrol test -t integration_test/button_test.dart
You’ll see if your tests pass or fail directly in the Terminal. If the tests fail you will get a link to the full test report. Alternatively, If you are running your tests on Android like I did then this should you can access the report by clicking the index.html in the following directory:
./build/app/reports/androidTest/connected
You can experiment further with other native features such as opening the notifications tray, disabling the Wi-Fi, enabling dark mode, minimizing and maximizing the app:
// minimize app
await $.native.pressHome();

await $.native.openNotifications();

await $.native.disableWifi();

await $.native.enableDarkMode();

// maximize app
await $.native.openApp();
⚠️ Note that it is not possible to completely close your app and then re-open it because doing so would end the whole test and, therefore, make it fail.
Consult the Patrol documentation for more examples.
Using Patrol in your Codemagic workflows
To incorporate Patrol into your workflows, you’ll first have to install the Patrol CLI on the build machine. This only takes a few seconds and once that’s done, you can run your test script. Below is an example of how you would add these steps to the “scripts” section of your codemagic.yaml configuration file. I would recommend running the script to install the Patrol CLI as one of the first script steps and then you can run your Patrol tests either immediately after that, or after any other tests you might also want to run beforehand.
Before running your Patrol tests you will need to start the emulator so we’ll a script to launch the emulator and wait for it to be fully booted. Note that the Android emulators are not available on machines using Apple Silicon M1 or M2 machines due to the Apple Virtualization Framework not supporting nested virtualization. Therefore, I would recommend using a linux instance when testing Android apps.
The scripts section of your codemagic.yaml should look something like this:
scripts:
  ...
  - name: Install Patrol CLI
    script: dart pub global activate patrol_cli
  - name: Launch Android emulator
    script: |
      cd $ANDROID_HOME/tools
      emulator -avd emulator &
      adb wait-for-device
  - name: Run tests with Patrol
    script: patrol test -t integration_test/your_test.dart
    ignore_failure: true
  ...
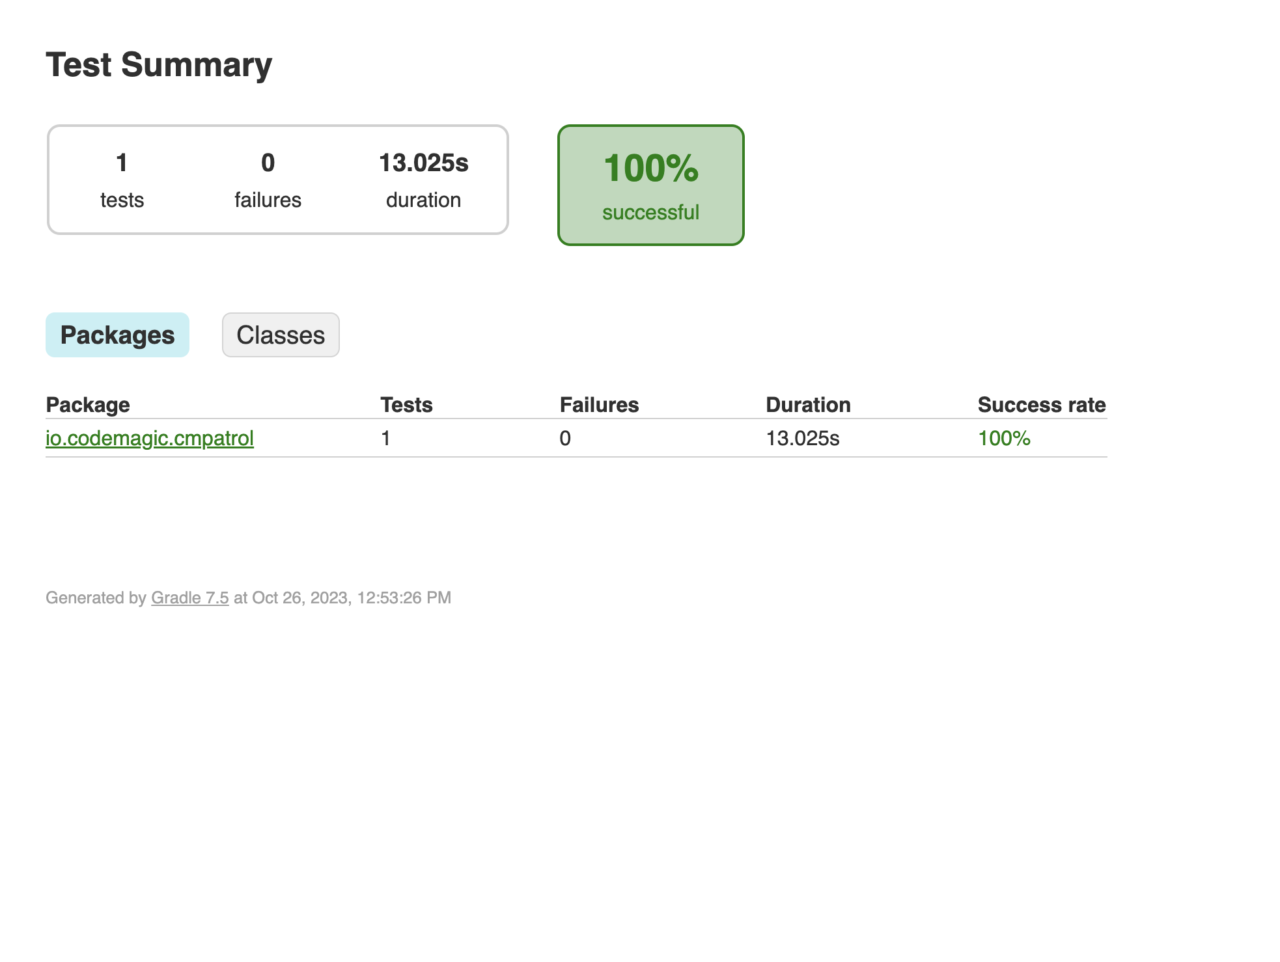
Showing Patrol test results in the Codemagic build logs
The Patrol test results are also available in JUnit XML format, which means they can be displayed in the build logs on the Codemagic build overview screen. You just need add the test_report property pass in the path to the JUnit XML file that is generated. You can use the ignore_failure property with a boolean to control whether you want the rest of the workflow to continue running or not. If you want to upload your results to a test management system as described in the next section, you should set this to true.
Here’s an example of what your script should look like:
scripts:
  ...
  - name: Run tests with Patrol
    script: |
      patrol test -t integration_test/your_test.dart
      test_report: build/app/outputs/androidTest-results/connected/*.xml
      ignore_failure: true
  ...
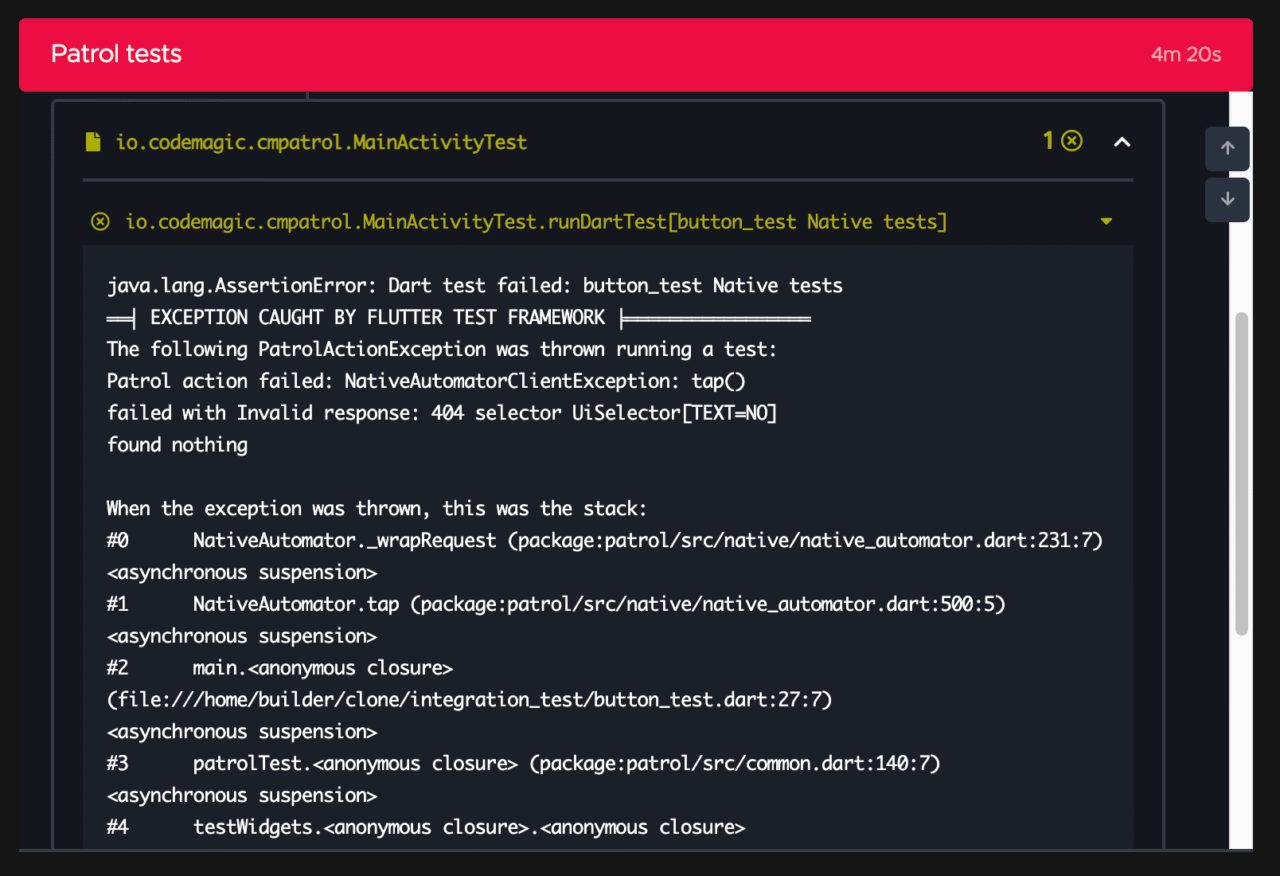
A failing test might look something like this:
Gathering the Patrol test report as a build artifact
One additional thing you might want to do is gather the test report output as a build artifact so you can view the full report should any errors occur. Doing this will make the report available for download as a zip file on the build overview screen in the “Artifacts” section on the left-hand side. The easiest way to do this is to copy the directory the report files are in to the directory Codemagic uses to export artifacts. There’s an built-in environment variable called $CM_EXPORT_DIR that references this directory which you can use in your script.
The script to do this should be like this:
scripts:
  ...
  - name: Export Patrol test report
    script: |
      cp  -r build/app/reports/androidTests/connected $CM_EXPORT_DIR/report
  ...
Conclusion
Patrol has finally overcome the problem of running UI and integration tests that involve native features. It’s now possible test native features and interact with authentication flows, native dialogs and even toggle native features like Wi-Fi, cellular, dark mode, and even minimize your app and maximize it. Additionally, it’s both free and open source and and provides a solution to a real a problem that’s been around since Flutter was launched. What’s more, it’s straightforward to add and use it in your Codemagic workflows. If you want to support the great work LeanCode is doing, give Patrol a like on pub.dev here and give the Patrol GitHub repository a star here.

