


Written by Lewis Cianci
Registering iOS test devices is quite a boring, manual, repetitive process that’s easy to get wrong. It becomes even worse if your testers are on the other side of the world, as trying to get them to follow a set of steps with a wide margin of error isn’t a task any developer enjoys.
This is exacerbated by the fact that you can normally only find a UDID by plugging it into a computer and using iTunes or Finder. So, people whom you want to add as your testers need to have a computer, find the USB cable, connect their device, and have a sufficient level of knowledge or technical assistance to retrieve the UDID in the first place. After all that, you still have to log in to the Apple Developer Portal, add the device, and complete the process of wiring it up. All this takes time. Time you’d rather spend developing, right?

Well, don’t worry about those UDIDs anymore – Codemagic’s got you covered. Now, iOS test devices can be easily added to your team and are automatically added to the Apple Developer Portal as well. This results in a much easier deployment experience.
Let’s see how to do it.
Getting set up with Codemagic and Apple Developer Portal
To get started, head over to your Team in Codemagic, and find the iOS test devices. If you have not yet configured Apple Developer Portal integration, you’ll need to do that now. If you have already done this, you can skip to the “Creating a tester group in Codemagic and inviting testers” section of this article.
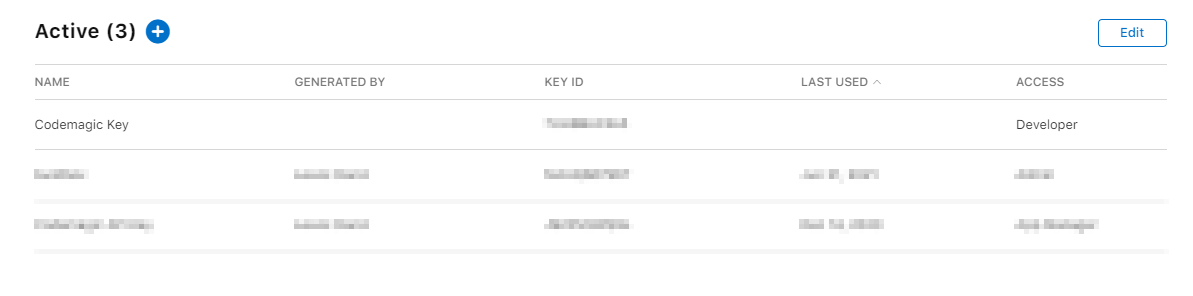
If you haven’t, don’t let the next ten screenshots scare you off. You only have to do this once, so invest in your future. In an unconfigured state, it should look like this:
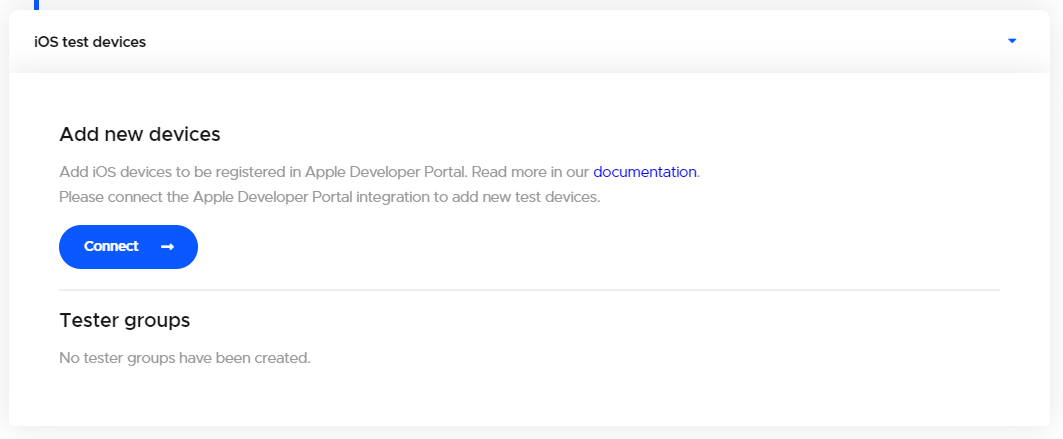
Let’s go ahead and click on that “Connect” button. We’ll be prompted to complete some initial setup…
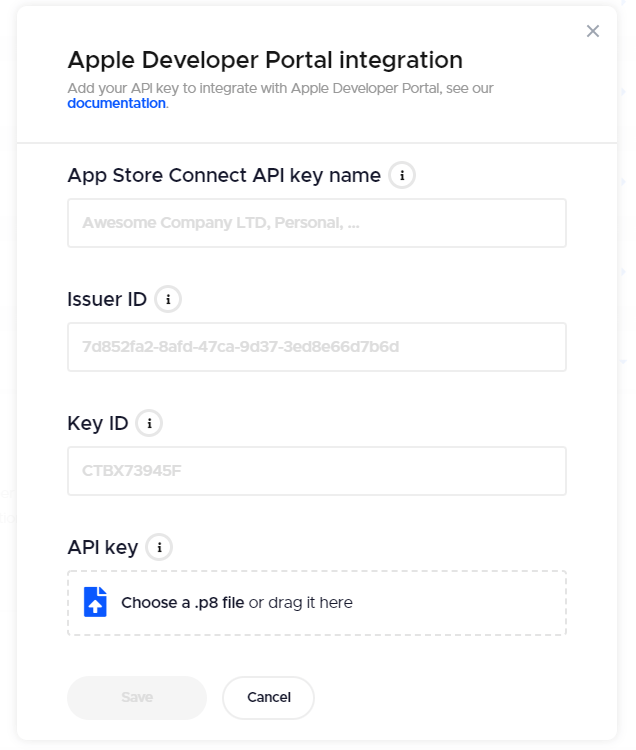
Connecting Apple Developer Portal allows us to use Codemagic to interact with it. Fortunately for us, there is some great documentation on how we can do this here, but we’ll outline the major points in this article as well.
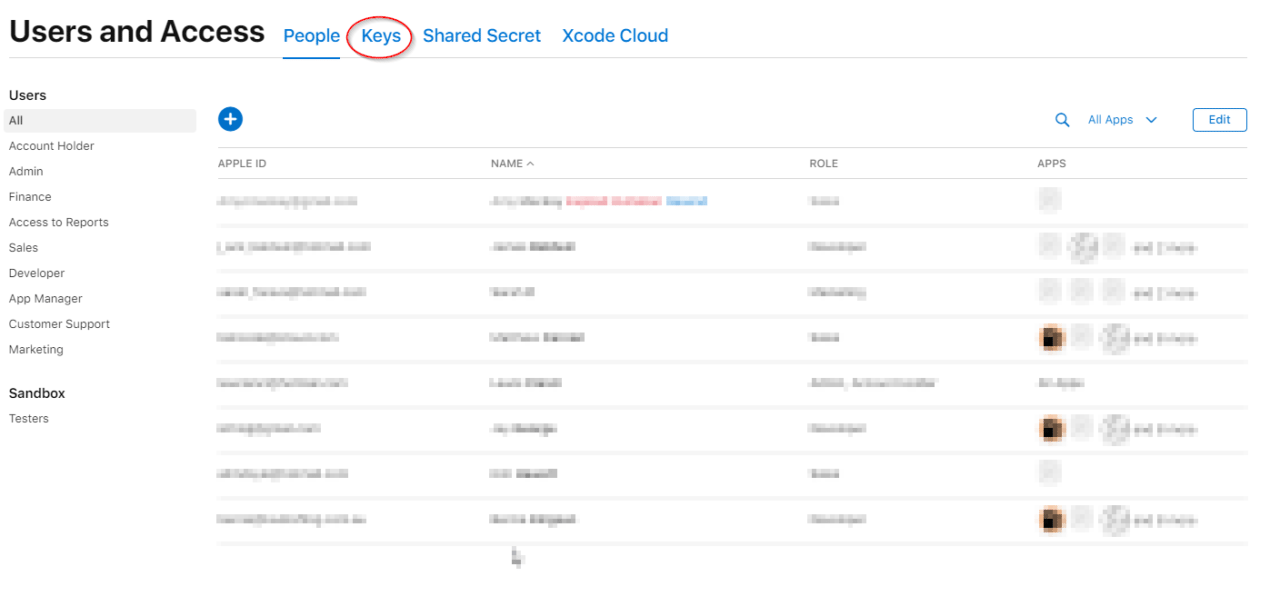
Head to the Users and Access page.
Click on the “Keys” heading up at the top.
- Click on the “Add” button to add a new API key.

- In the box that pops up, give our API key a name, and choose the appropriate role. We’ll choose Developer.
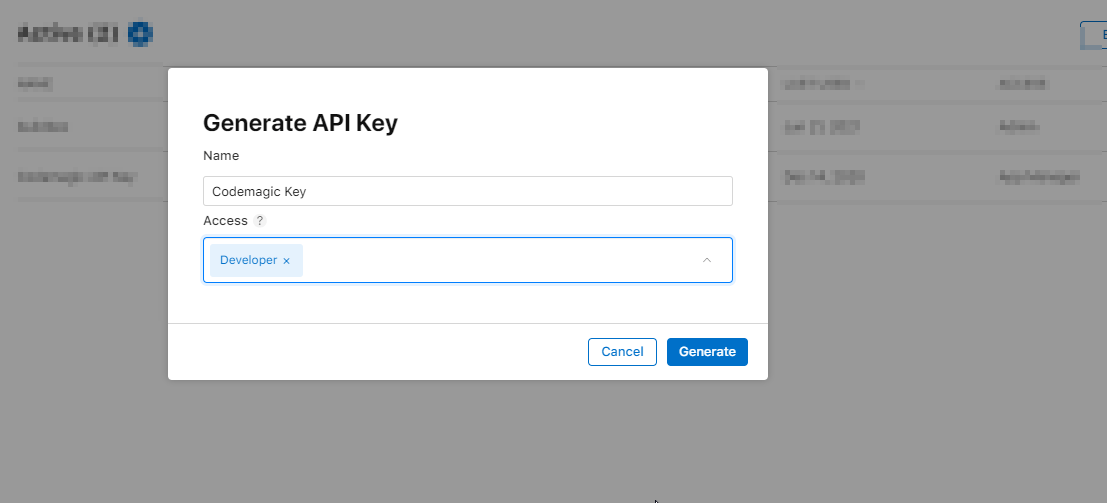
- And now, hit Generate. After a little while, you’ll be brought back to the Key screen, and your new key will be at the top.
- Now, refresh your page. After doing so, an option will appear that says “Download API Key”.
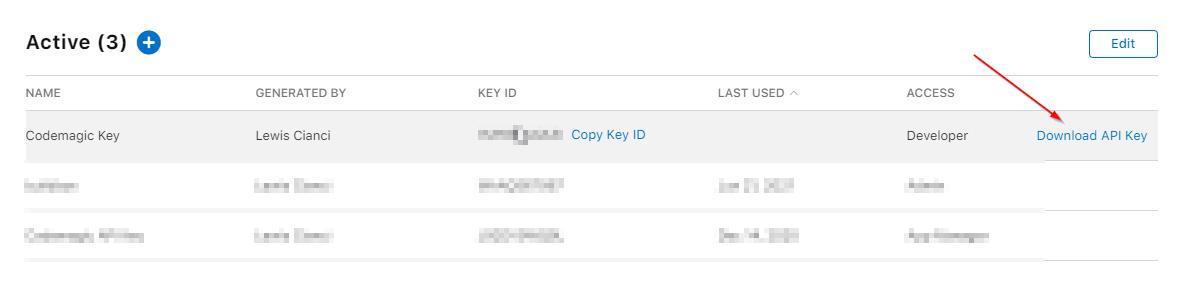
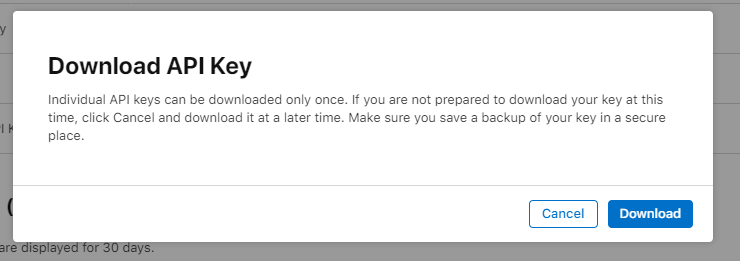
- We’ll receive the standard warning telling us that API keys can only be downloaded once and that we should keep them secure. We should heed this warning – don’t lose this key or let it get into unauthorized people’s hands. Click on Download to get the key.
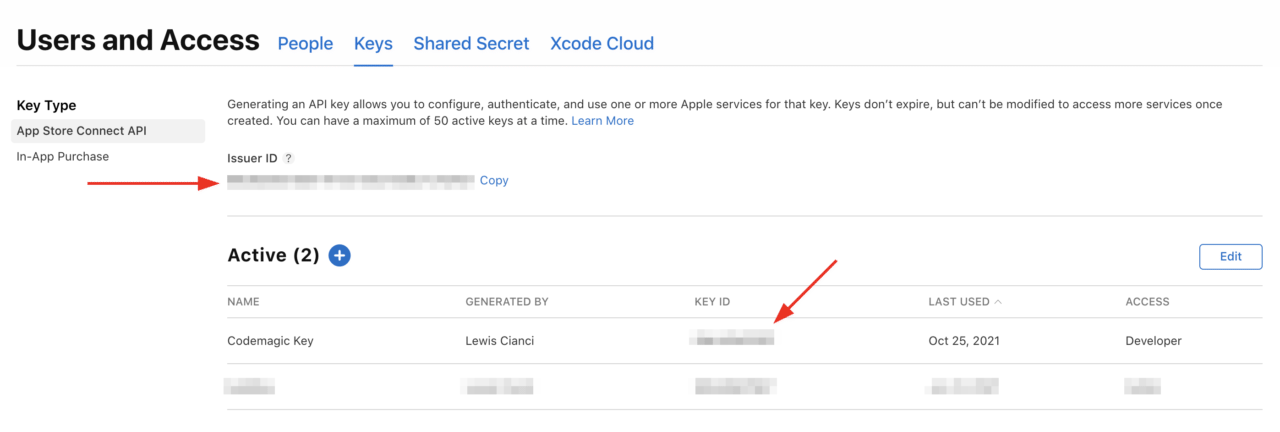
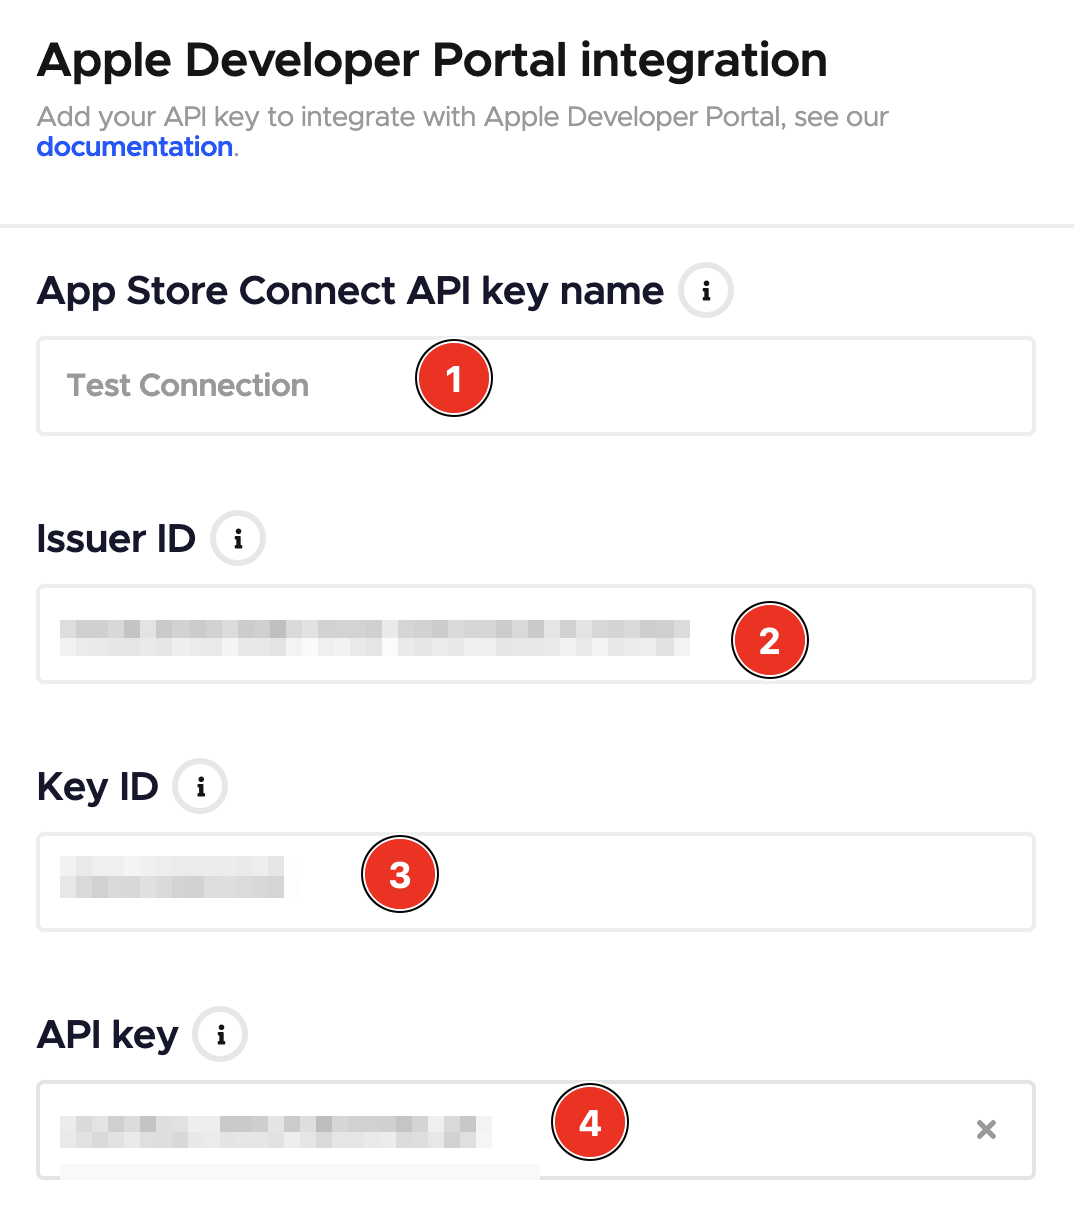
- Now would also be a good time to note down the Issuer ID and Key ID.
- Enter all our details into the “Apple Developer Portal integration” prompt in Codemagic (noting that all values are required and available to you on the Keys page) and click Save.
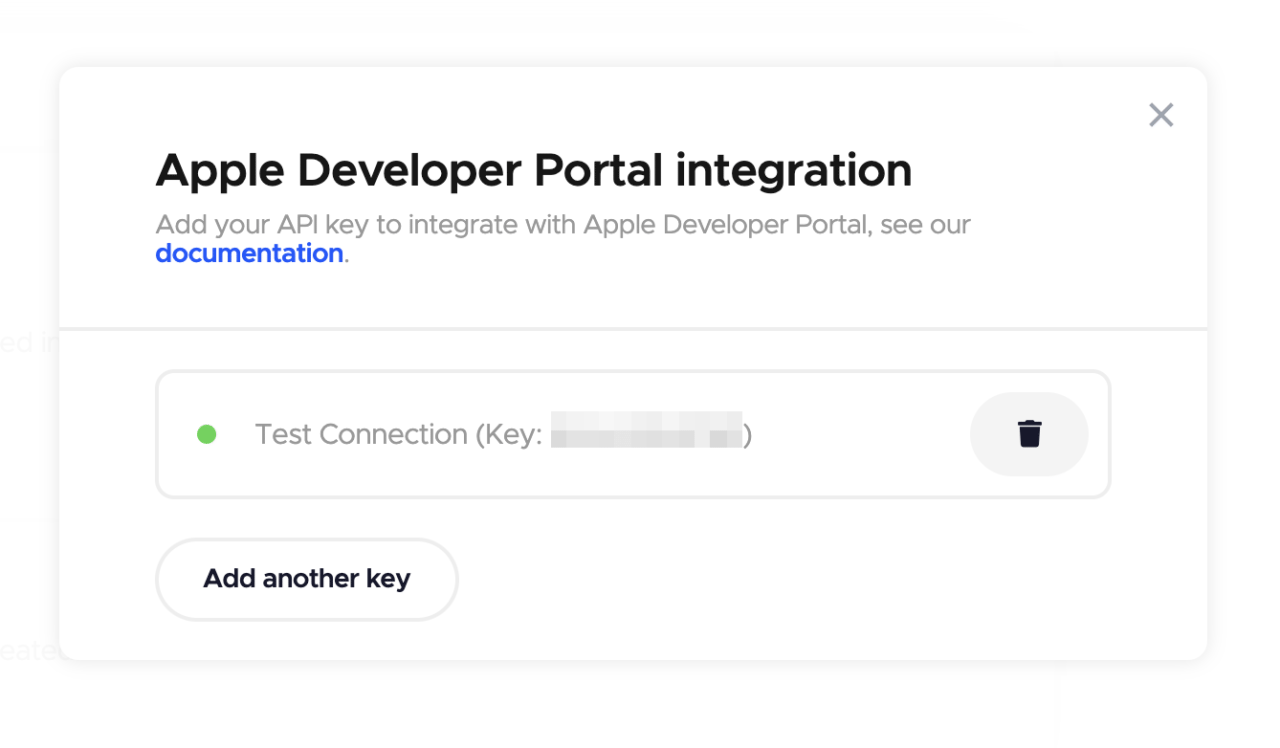
After that, you should have your connection to the Apple Developer Portal functional. Yay, you have successfully integrated Codemagic with Apple Developer Portal! Let’s move on.
Creating a tester group in Codemagic and inviting testers
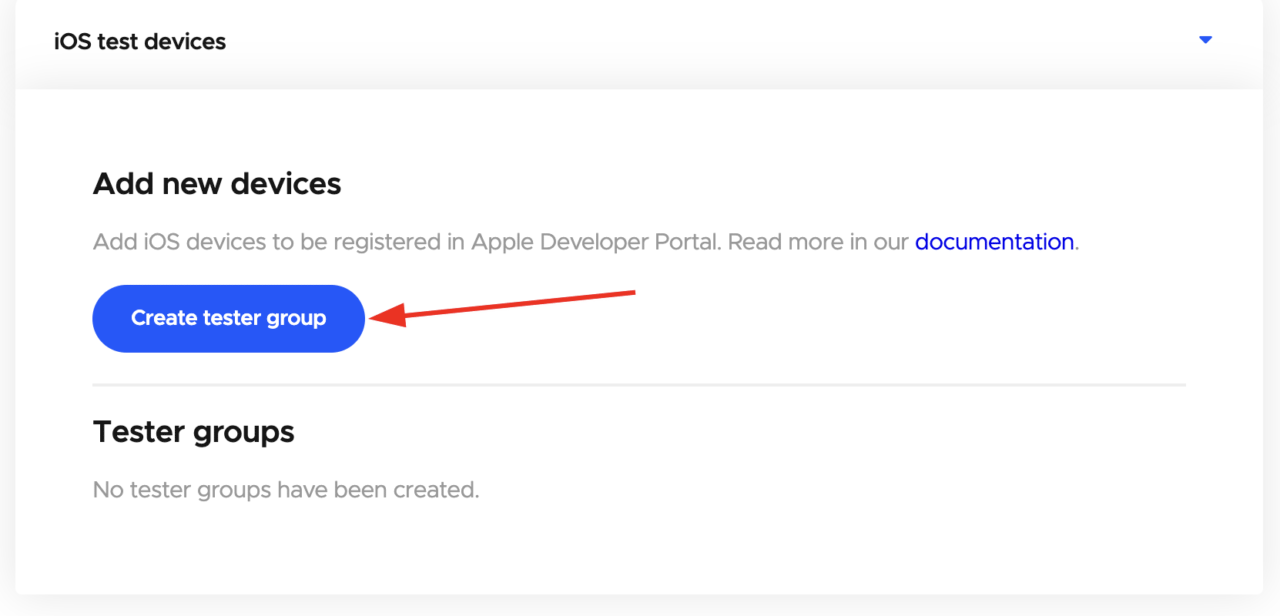
Now we can use Codemagic to interact with Apple Developer Portal without revisiting that configuration again, which is great. We can now head back to the iOS test devices section within our Team settings and create a tester group. From this group, we’ll be able to invite people to test our app much more easily, without the usual ceremony that the Apple Developer Portal requires.
We can start doing this by clicking on “Create tester group” from the iOS test devices section in our team. Let’s do that now.
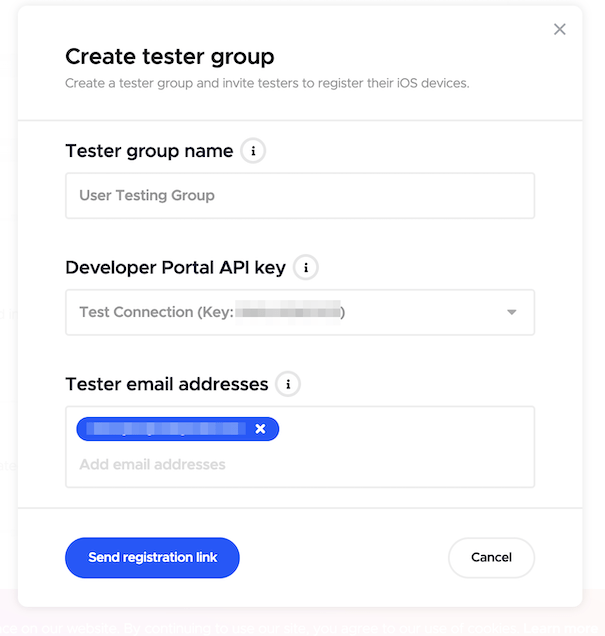
We can now configure our brand-new tester group, including its name, what API key to use, and what people should be invited. Email addresses become individual items as they are added, so feel free to add as many as you like before finally tapping on “Send registration link”.
Shortly thereafter, your nominated tester(s) should receive an email with a link to tap and, as an alternative, a QR code to scan. Both work the same way – this just allows them to choose the option they find more convenient. The email should look like this, and all they have to do is tap on the link (or scan the QR).
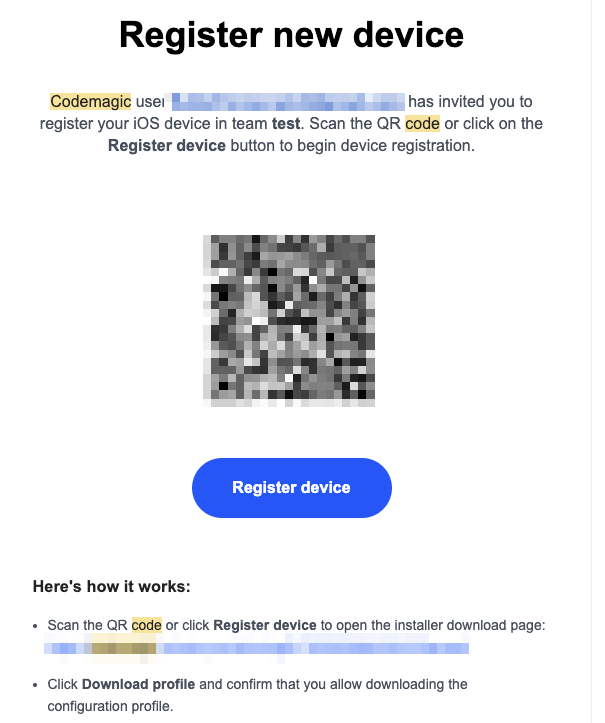
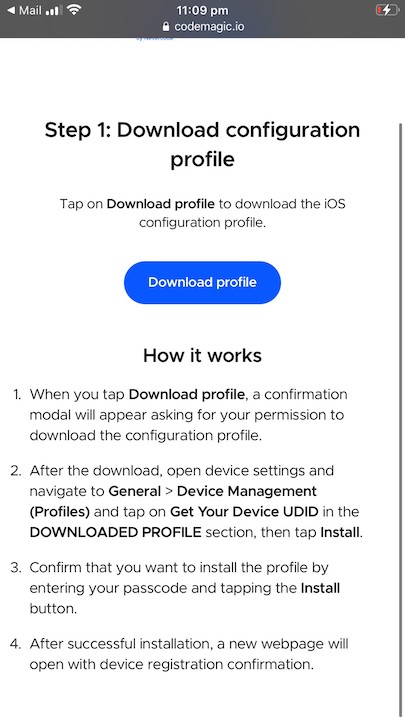
Now it’s time to add our test device! Tap on “Download profile” to start the process.
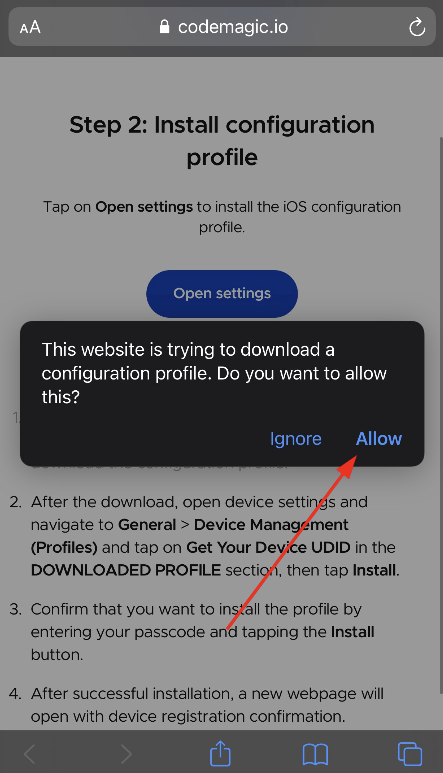
We have to allow the configuration profile to be downloaded by tapping Allow.
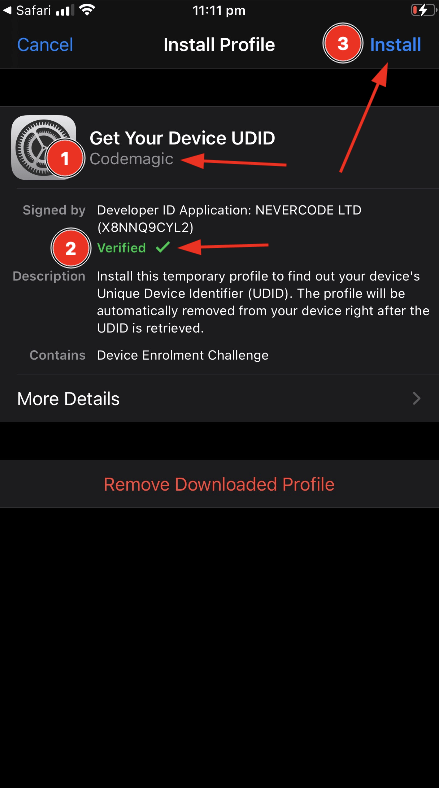
After this, you’ll notice the button changes to “Open settings”. Tap that, and then navigate to General > Device Management (Profiles). You’ll notice a new “Downloaded Profile”, helpfully named “Get Your Device UDID”, like this:
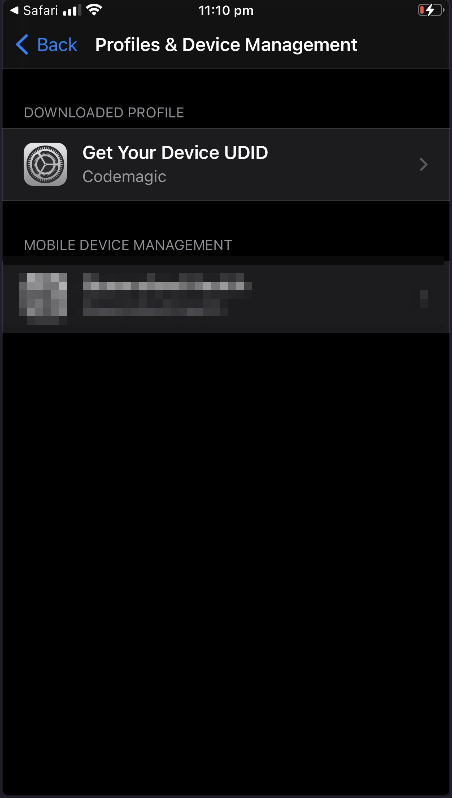
Tap on that, and then review the details. Basically, you just want to be sure that you’re installing a profile from Codemagic that is signed by NEVERCODE LTD. Then tap on install.
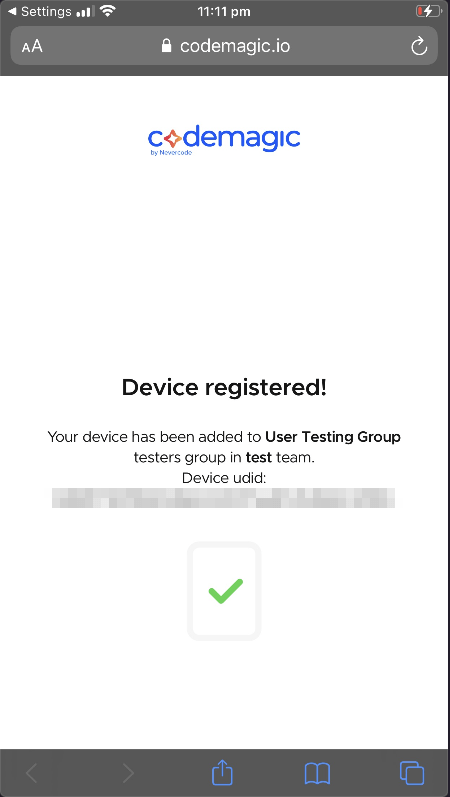
And that’s it! Your device has been registered as a test device for your team.
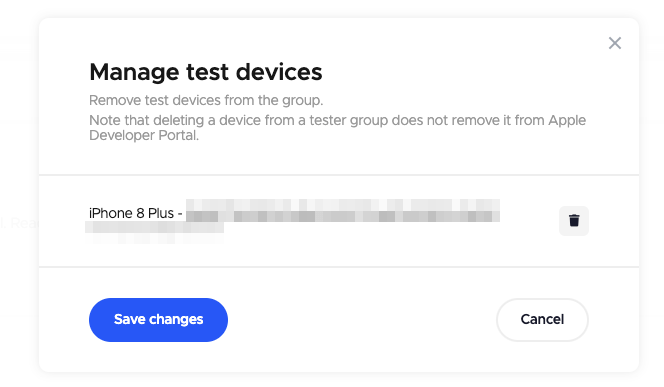
We should also see that our test devices appear within our “test devices” list within Codemagic itself.
You should also be able to observe the test device in the list within the Certificates, Identifiers & Profiles part of the Apple Developer Portal.
And the best part? The UDID automatically added itself to Codemagic, as well as the Apple Developer Portal. The person with the device doesn’t even have to try to copy and paste the long series of numbers and letters into an email or something like that. It all just works.
Conclusion
Normally, getting the UDID of a device and adding it to the Apple Developer Portal can be a drag. But with Codemagic, it’s significantly easier and faster, so your users will greatly prefer this method over trying to do it manually.
Lewis Cianci is a software developer in Brisbane, Australia. His first computer had a tape drive. He’s been developing software for at least ten years, and has used quite a few mobile development frameworks (like Ionic and Xamarin Forms) in his time. After converting to Flutter, though, he’s never going back. You can reach him at his blog, read about other non-fluttery things at Medium, or maybe catch a glimpse of him at your nearest and most fanciest coffee shop with him and his dear wife.


