


This article is written by Masaki Sato.
Have you ever found it a bit tedious to enter the same release notes text every time you submit an app for review in the stores?
In this article, I’ll introduce a method to automate this small but repetitive task.
It’s very easy to implement, so please read on 💡
What you’ll achieve in this article
As shown below, the text for release notes managed with Git will be automatically entered when uploading apps to the stores.


What is Codemagic
First, let me briefly introduce Codemagic.
Codemagic is a CI/CD tool specialized for Flutter development that automates testing, building, and deployment. It can be used for various projects such as iOS, Android, and React Native, but for Flutter projects, you can use a GUI tool called Workflow Editor. This allows intuitive development without creating a dedicated configuration file in the .yaml format.
You can start using it for free for personal use, with a sufficient free tier (500 minutes per month). For more details on pricing, please see here.
Requirements
- Your released app is registered with App Store Connect and Google Play Console
- Distribution process is enabled in Codemagic’s Workflow Editor
- For iOS, please refer to this article 👉 Publish your Flutter app to App Store with Codemagic CI/CD
- For Android, please refer to this article 👉 Publish your Flutter app to Google Play Store with Codemagic CI/CD
Creating Files
Now, let’s create the release notes.
The files you need to prepare will differ depending on your language code settings in the stores. Please choose from the following procedures based on whether you have set up only en-US (English - United States) or other languages.
If only en-US is configured
Create a release_notes.txt file in your project’s working directory (the repository’s root directory, or if you have a monorepo configuration, the directory set as the Project path in the Build section of the Workflow Editor).
In the file, write the content of the release notes as a string, for example:
Bug fixes and performance improvements.
If other language codes are configured
If you specify languages other than en-US, create files in the format release_notes_<language_localization_code>.txt for each target language in your project’s working directory.
For example, for Japanese, the file name would be release_notes_ja.txt.
Please check the language codes for each store:
※ Note that some codes differ between stores
Instead of preparing multiple text files, you can also consolidate them into a single file called release_notes.json as follows:
[
    {
        "language": "en-US",
        "text": "Bug fixes and performance improvements."
    },
    {
        "language": "ja",
        "text": "不具合修正および性能改善を行いました。"
    }
]
For the language field, specify the corresponding language code.
For text, write the body of the release notes.
Distribution
Now, let’s upload the release content to each store console.
App Store Connect
For various settings in the Workflow Editor, please refer to this article as needed.
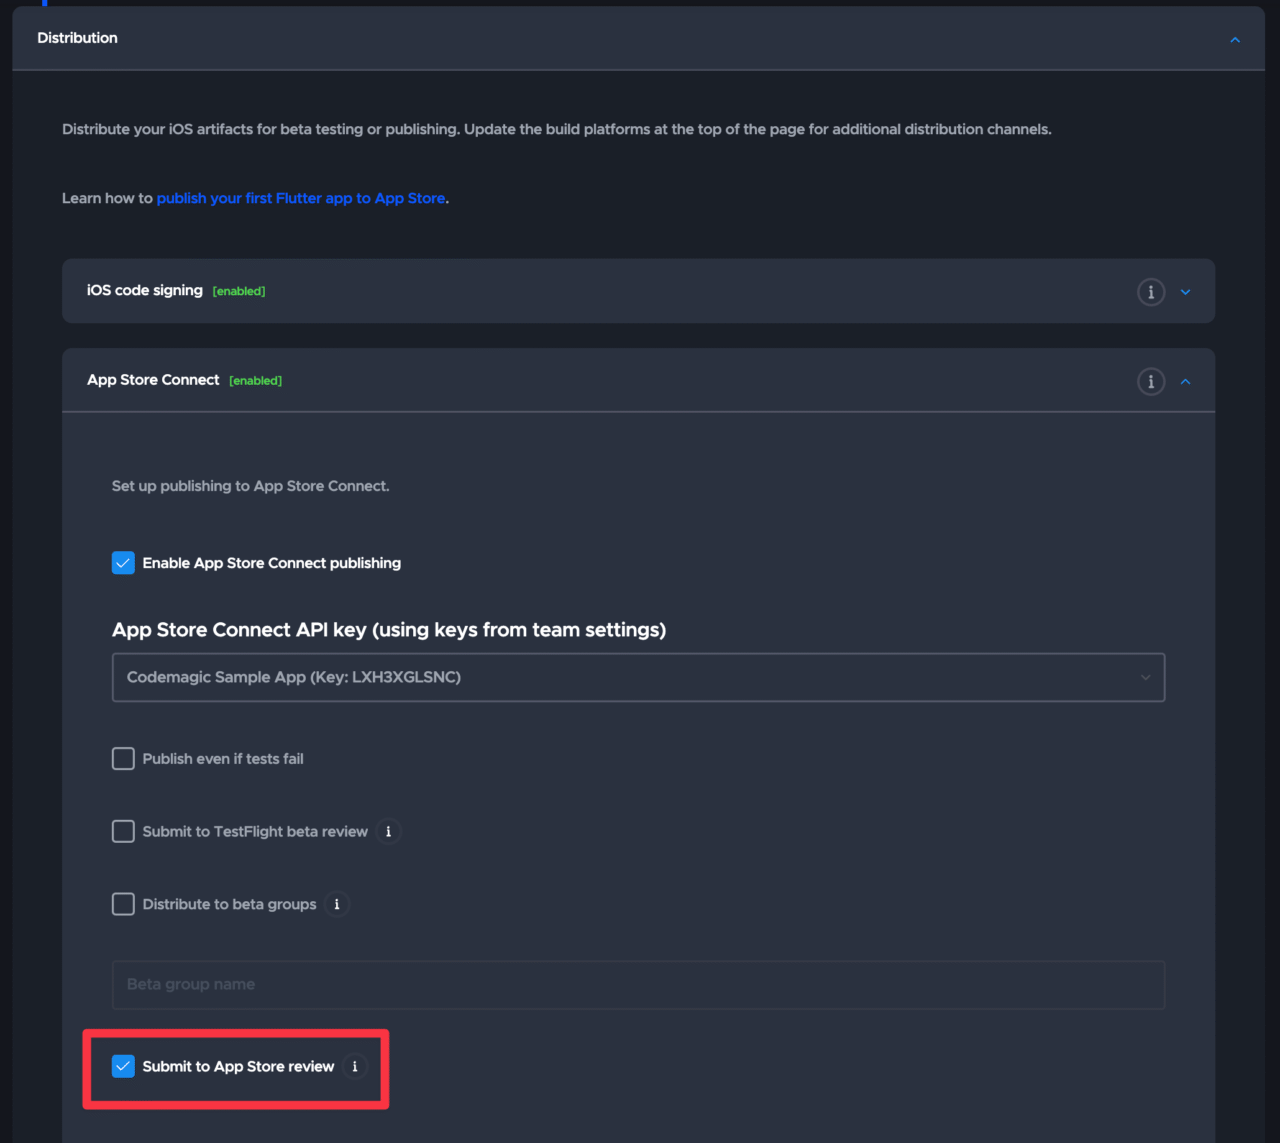
To reflect the content in the store, check Submit to App Store review in Distribution > App Store Connect:
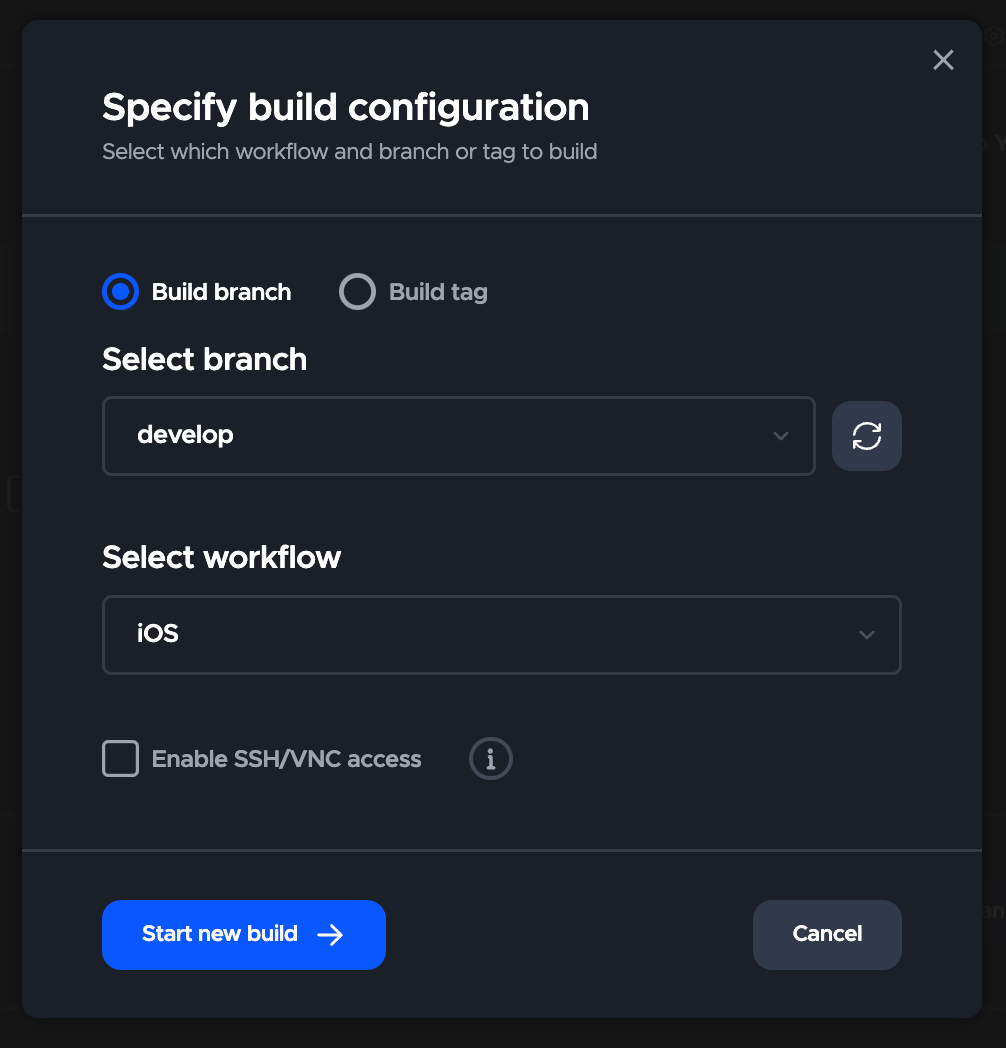
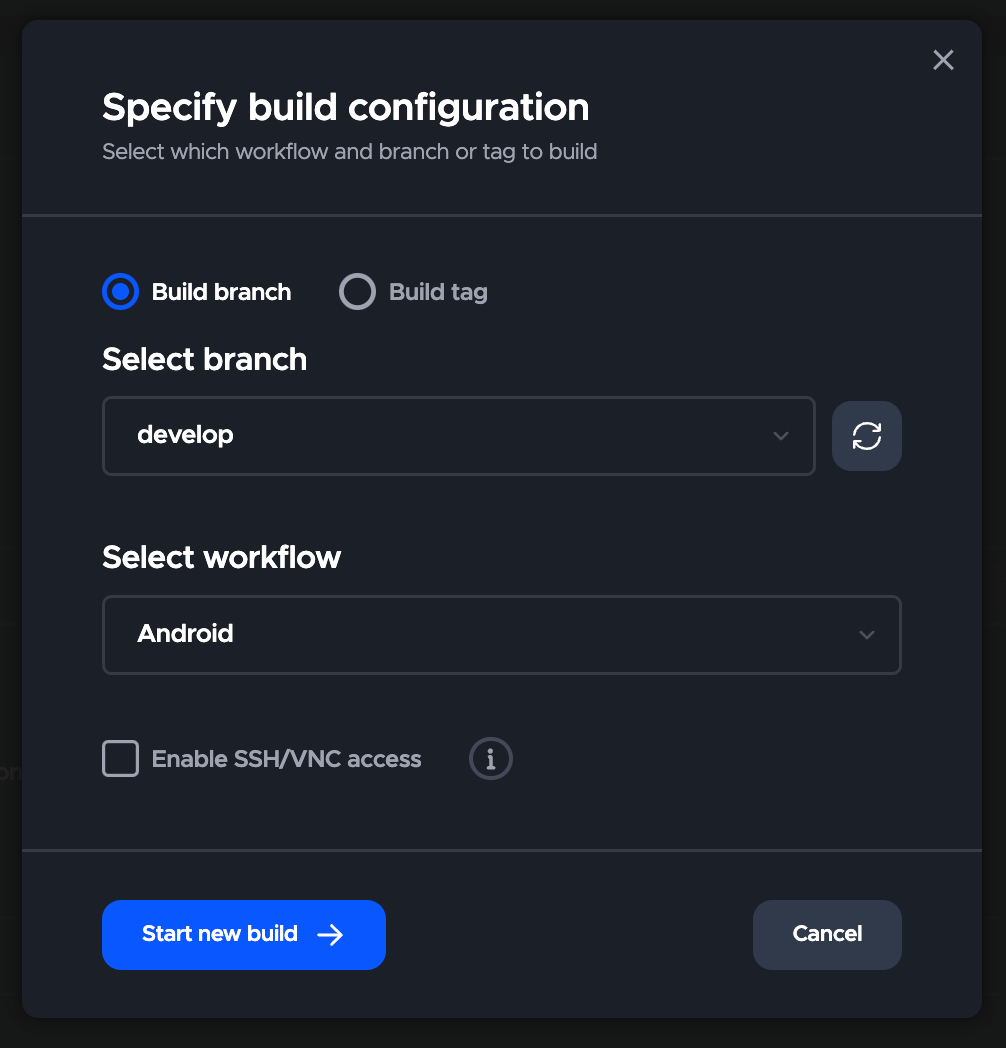
Then, build the source branch:
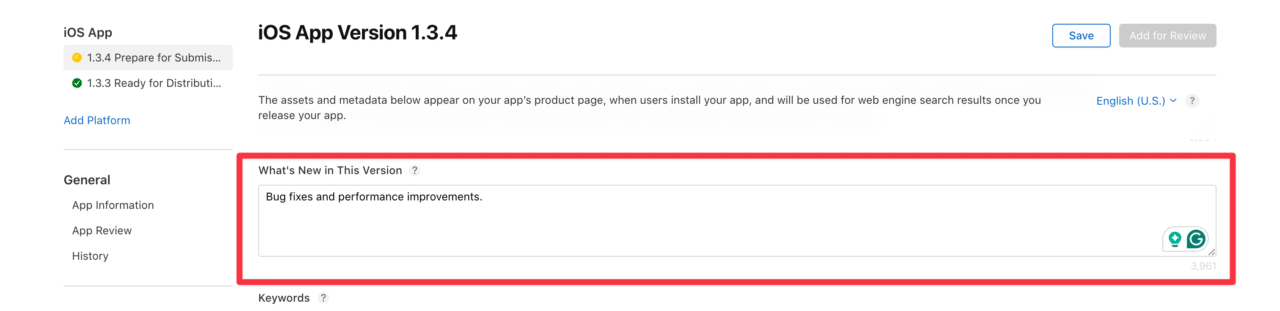
After that, you’ll see that the release notes text content is reflected in App Store Connect 🎉
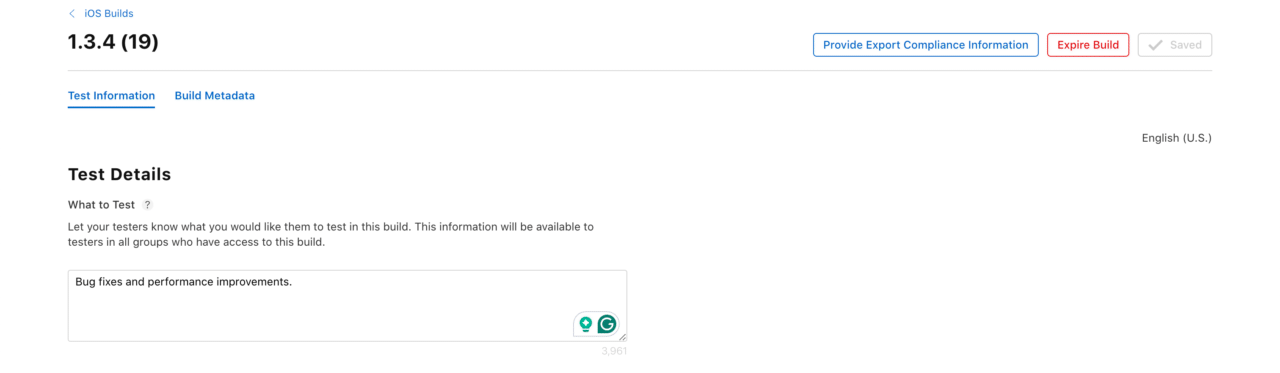
You can also use the same text content for TestFlight reviews:
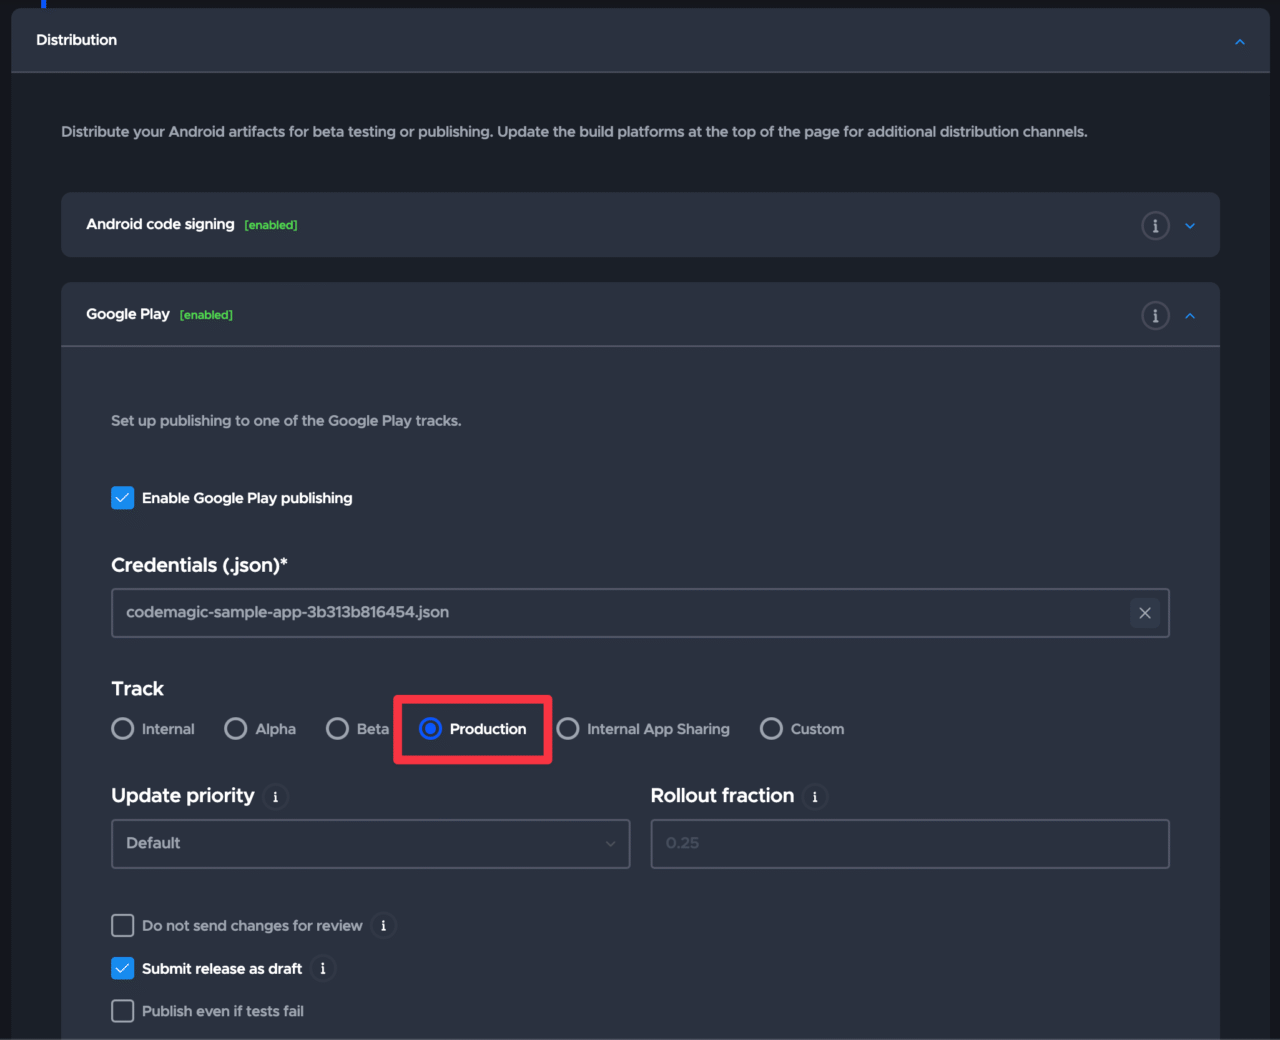
Google Play Console
For various settings in the Workflow Editor, please refer to this article as needed.
In the Distribution > Google Play section, confirm that it’s set to upload to Production as follows:
Build the source branch:
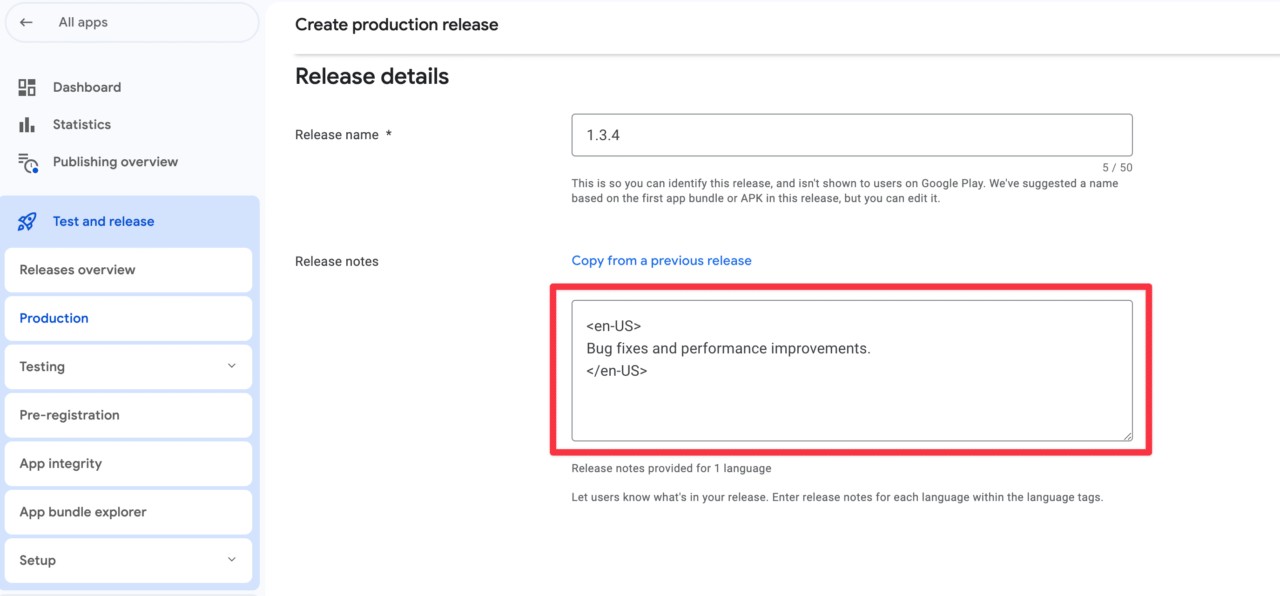
The release notes are reflected in the Google Play Console as follows:
Conclusion
Great job 🙌
I hope this article helps reduce the burden of your daily release tasks even a little.
If you have any questions or concerns, please consult the support community 💡
- GitHub Discussion: https://github.com/orgs/codemagic-ci-cd/discussions
- Discord Community: https://discord.com/invite/pefznye93R
If you’ve already enabled billing, you can also get support from the in-app chat widget in the bottom right corner of the page.
Let’s continue to enjoy developing comfortably with Codemagic!


