


In this article we will go through how to build a highly performant React Native app with Redux and Reselect.
Written by Ifeanyi Dike
Memoization (or caching) is one of the most important concepts in computer science. It usually comes to the rescue whenever high performance is needed, especially when the application increases in complexity. We can achieve this in React Native (or React) using the useMemo Hook; however, Reselect comes in very handy when working with Redux.
Although React is performant on its own, it becomes necessary to improve performance as the UI grows in complexity. When working with Redux, we often have to deal with selectors. In the Hooks era, we make use of the useSelector Hook to select pieces of our state from the Redux store. Reselect is useful in building memoized selectors. This can help to minimize or prevent irrelevant recalculations and re-renderings in our components.
Here is a summary of what we will cover:
- What we will be building
- Setting up our React native app and installing dependencies
- Setting up Redux – reducers, actions and store
- Building memoized selectors
- Using selectors in our app
Let’s get started.
What we will be building
To demonstrate the use of Redux and Reselect in creating a performant React Native application, we will be building a simple user profile and posts app using Dummy API.
This API allows us to access the Users List, Full User Profile, Posts List, User Posts, Comment List and Tags. We will be making a GET HTTP request to the API that will allow us to fetch these contents. Redux will be used for state management and Reselect for building memoized selectors.
Setting up our React Native app and installing dependencies
It is fairly easy to create a React Native app. If you are new to React Native, you can follow the step-by-step instructions here to correctly set up a blank React Native (Expo) project.
Installing dependencies for the React Native app
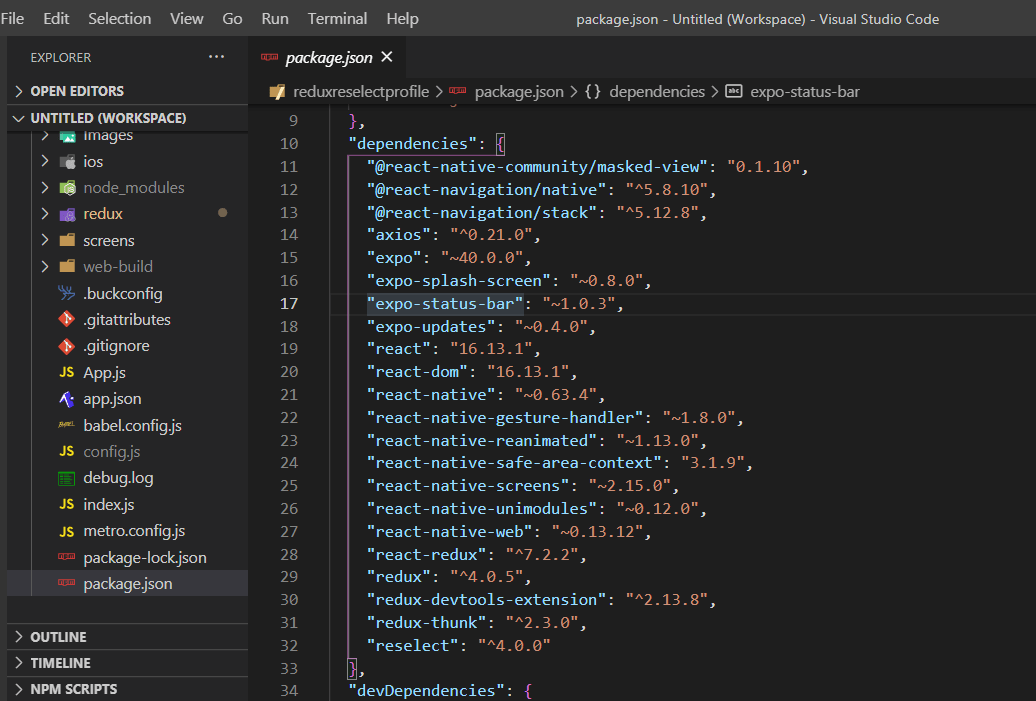
We will be using eight dependencies for our project, namely, Redux, Redux Thunk, the Redux Dev Tools Extension, Reselect, Axios and React Navigation. Open your terminal at the root of your project directory, and enter the following commands.
npm install redux react-redux redux-thunk redux-devtools-extension reselect axios @react-navigation/stack @react-navigation/native
Once you are done, enter the command below to open Visual Studio Code.
code .
Your dependencies in the package.json will look like this (although the version for each of the libraries might differ).
Setting up the project
React Native allows us to separate concerns in our application. We can organize our apps into reusable components by creating folders for each concern.
To achieve this, we’ll create four folders: components, images, screens and redux.
The components folder will store our reusable components, images will store our images, screens will comprise components that will be rendered to the user and redux will contain the Redux logic.
Navigate to your application’s root directory in your terminal, and enter the following commands.
mkdir components images screens redux
Setting up Redux
Redux is a popular state management library used mainly with React and other JavaScript frameworks, such as Angular. Although it involves some rigorous setup, the process becomes a lot easier once the setup is complete.
Building the Redux store
We can get started by setting up the Redux store. Under the redux directory, create a file called store.js.
Enter the following code in the store.js file to set up the Redux store.
import {createStore, applyMiddleware} from "redux"
import thunk from "redux-thunk"
import {composeWithDevTools} from "redux-devtools-extension"
import reducers from "./reducers/rootReducers"

const initialState = {}

const middleware = [thunk]

export default createStore(
    reducers,
    initialState,
    composeWithDevTools(applyMiddleware(...middleware))
)
Setting up the constants
Before delving into other parts of the Redux workflow, we need to create constants for each of the operations we will be carrying out. The constants are very instructive, as they determine the actions to be performed.
Since we need to fetch all users, each user’s profile, all posts, each user’s post and each post’s comments, we ought to set actions that represent these. Moreover, our actions should determine when the API is requested, is successful or has failed.
Create a folder named constants inside the redux directory; inside this folder, create a file named constants.js to hold our constants. Open this file and enter the following code.
export const FETCH_USERS_REQUEST = 'FETCH_USERS_REQUEST'
export const FETCH_USERS_SUCCESS = 'FETCH_USERS_SUCCESS'
export const FETCH_USERS_FAIL = 'FETCH_USERS_FAIL'

export const FETCH_USER_REQUEST = 'FETCH_USER_REQUEST'
export const FETCH_USER_SUCCESS = 'FETCH_USER_SUCCESS'
export const FETCH_USER_FAIL = 'FETCH_USER_FAIL'

export const FETCH_POSTS_REQUEST = 'FETCH_POSTS_REQUEST'
export const FETCH_POSTS_SUCCESS = 'FETCH_POSTS_SUCCESS'
export const FETCH_POSTS_FAIL = 'FETCH_POSTS_FAIL'

export const FETCH_POST_REQUEST = 'FETCH_POST_REQUEST'
export const FETCH_POST_SUCCESS = 'FETCH_POST_SUCCESS'
export const FETCH_POST_FAIL = 'FETCH_POST_FAIL'

export const FETCH_COMMENTS_REQUEST = 'FETCH_COMMENTS_REQUEST'
export const FETCH_COMMENTS_SUCCESS = 'FETCH_COMMENTS_SUCCESS'
export const FETCH_COMMENTS_FAIL = 'FETCH_COMMENTS_FAIL'
Here, we are creating and exporting actions for each request we will be making.
Building the actions
The word actions is quite intuitive in Redux. Creating actions allows us to define operations that will be carried out. They are plain JavaScript objects that are required to have a type attribute to indicate the type of action/operation.
We will be creating actions for fetching all users, a user’s profile data, all posts, a user’s posts and all comments.
Navigate to the redux subdirectory in the terminal, and enter the following commands.
mkdir actions
This allows us to make a new directory named actions.
We also need to create three files under actions, namely, userActions.js, postActions.js and commentActions.js.
Navigate to the actions subdirectory, and enter the following bash commands to create these files.
touch userActions.js postActions.js commentActions.js
User actions
Open the userActions.js file and enter the following code.
import axios from "axios"
import {
        FETCH_USERS_FAIL,
        FETCH_USERS_REQUEST,
        FETCH_USERS_SUCCESS,
        FETCH_USER_FAIL,
        FETCH_USER_REQUEST,
        FETCH_USER_SUCCESS
} from "../constants/constants"
import {app_id_1, app_id_2, app_id_3} from "../../config"

const usersEndpoint = 'https://dummyapi.io/data/api/user'

export const listAllUsers = (limit = 10, page=1) => async(dispatch) => {
    try {
        dispatch({
            type: FETCH_USERS_REQUEST
        })

        const config = {
            headers:{
                'Content-Type': 'application/json',
                'app-id': app_id_2
            }
        }

        const { data } = await axios.get(`${usersEndpoint}?limit=${limit}&page=${page}`,
                                config)

        dispatch({
            type: FETCH_USERS_SUCCESS,
            payload: data
        })

    } catch (error) {
        dispatch({
            type: FETCH_USERS_FAIL,
            payload: error.message
        })
    }
}


export const getUserProfile = (id) => async(dispatch) => {
    try {
        dispatch({
            type: FETCH_USER_REQUEST
        })

        const config = {
            headers:{
                'Content-Type': 'application/json',
                'app-id': app_id_2
            }
        }

        const { data } = await axios.get(`${usersEndpoint}${id}`, config)

        dispatch({
            type: FETCH_USER_SUCCESS,
            payload: data
        })


    } catch (error) {
        dispatch({
            type: FETCH_USER_FAIL,
            payload: error.message
        })
    }
}
DummyAPI requires us to have an APP ID. Here, I’ve stored mine in a config file and imported it into the project.
In the above code, we’re using Axios to fetch data from the API. Firstly, we dispatched an action of type FETCH_USERS_REQUEST or FETCH_USER_REQUEST. This allows us to determine when the app is loading and to probably set an indicator.
We also set a config object that allows us to set our content type and the APP ID, and then we make the Axios request. Notice that this is an asynchronous call and therefore used the async/await method.
If the operation succeeds, we will dispatch an action of type FETCH_USERS_SUCCESS or FETCH_USER_SUCCESS, attaching a payload of the data we received from the HTTP request. This allows us to pass the data.
If the method fails, we will dispatch an action of type FETCH_USERS_FAIL or FETCH_USER_FAIL and a payload of the error message. Notice that we are using Redux Thunk, which allows us to return a function instead of an action object.
This is the basic workflow we will use for all of our actions.
Post actions
Our post actions follow the same explanation as above. The basic workflow is the same, with the only difference being the type of actions we are dispatching. This is shown below.
Open the postActions.js file and enter the following code.
import axios from "axios"
import {
    FETCH_POSTS_FAIL,
    FETCH_POSTS_REQUEST,
    FETCH_POSTS_SUCCESS,
    FETCH_POST_FAIL,
    FETCH_POST_REQUEST,
    FETCH_POST_SUCCESS,
} from "../constants/constants"
import {app_id_1, app_id_2, app_id_3} from "../../config"

const userEndpoint = 'https://dummyapi.io/data/api/user/'
const postsEndpoint = 'https://dummyapi.io/data/api/post'


export const listAllPosts = (limit) => async(dispatch) => {
    try {
        dispatch({
            type: FETCH_POSTS_REQUEST
        })

        const config = {
            headers:{
                'Content-Type': 'application/json',
                'app-id': app_id_2
            }
        }

        const { data } = await axios.get(postsEndpoint + `?limit=${limit}`, config)

        dispatch({
            type: FETCH_POSTS_SUCCESS,
            payload: data
        })


    } catch (error) {
        dispatch({
            type: FETCH_POSTS_FAIL,
            payload: error.message
        })
    }
}

export const listUserPosts = (id) => async(dispatch) => {
    try {
        dispatch({
            type: FETCH_POST_REQUEST
        })

        const config = {
            headers:{
                'Content-Type': 'application/json',
                'app-id': app_id_2
            }
        }

        const { data } = await axios.get(`${userEndpoint}${id}/post?limit=100`, config)

        dispatch({
            type: FETCH_POST_SUCCESS,
            payload: data
        })


    } catch (error) {
        dispatch({
            type: FETCH_POST_FAIL,
            payload: error.message
        })
    }
}
Comment actions
The comment actions also follow the same concept. Open the commentActions.js file and enter the following code.
import axios from "axios"
import {
    FETCH_COMMENTS_FAIL,
    FETCH_COMMENTS_REQUEST,
    FETCH_COMMENTS_SUCCESS,
} from "../constants/constants"
import {app_id_1, app_id_2, app_id_3} from "../../config"

const postsEndpoint = 'https://dummyapi.io/data/api/post'

export const listPostComments = (id) => async(dispatch) => {
    try {
        dispatch({
            type: FETCH_COMMENTS_REQUEST
        })

        const config = {
            headers:{
                'Content-Type': 'application/json',
                'app-id': app_id_2
            }
        }

        const { data } = await axios.get(`${postsEndpoint}/${id}/comment?limit=100`, config)

        dispatch({
            type: FETCH_COMMENTS_SUCCESS,
            payload: data
        })

    } catch (error) {
        dispatch({
            type: FETCH_COMMENTS_FAIL,
            payload: error.message
        })
    }
}
Reducers
The concept of reducers is central in every global state management library, especially Redux. Reducers take the previous state and an action and then determine the next state. In other words, reducers determine state changes in a React or React Native application.
We will need reducers for each of the actions. To do this, create three files in the reducers folder in the redux sub-directory.
In the reducers folder, open the terminal and enter the following bash commands.
touch userReducers.js postReducers.js commentReducers.js rootReducers.js
User reducers
This file will hold the reducers for the user actions. Open the file and enter the following code.
import{
    FETCH_USERS_REQUEST,
    FETCH_USERS_SUCCESS,
    FETCH_USERS_FAIL,
    FETCH_USER_REQUEST,
    FETCH_USER_SUCCESS,
    FETCH_USER_FAIL,
} from "../constants/constants"

const initialState = {
    loading: false,
    users: []
}

export const getUsersReducer = (state = initialState, action) =>{
    switch(action.type){
        case FETCH_USERS_REQUEST:
            return{
                ...state,
                loading: true,
            }

        case FETCH_USERS_SUCCESS:
            return{
                ...state,
                loading: false,
                users: action.payload
            }

        case FETCH_USERS_FAIL:
            return {
                ...state,
                loading: false,
                error: action.payload
            }

        default:
            return state
    }
}


export const getUserReducer = (state = {loading: false, user: { data: []}}, action) =>{
    switch(action.type){
        case FETCH_USER_REQUEST:
             return{
                ...state,
                loading: true,
            }

        case FETCH_USER_SUCCESS:
            return{
                ...state,
                loading: false,
                user: action.payload
            }

        case FETCH_USER_FAIL:
            return {
                ...state,
                loading: false,
                error: action.payload
            }

        default:
            return state
    }
}
The reducers take the state and the action. If the action is of type REQUEST, it returns loading to enable us to show a loader to the user. However, if it is of type SUCCESS, we need to return a payload that is the required data. Similarly, if it is of type FAIL, we will return a payload that is an error message.
This concept or workflow applies to all our reducers.
Post reducers
Open the postReducers.js file and enter the following code.
import{
    FETCH_POSTS_REQUEST,
    FETCH_POSTS_SUCCESS,
    FETCH_POSTS_FAIL,
    FETCH_POST_REQUEST,
    FETCH_POST_SUCCESS,
    FETCH_POST_FAIL,
} from "../constants/constants"


export const getPostsReducer = (state = {loading: false, posts:[] }, action) =>{
    switch(action.type){
        case FETCH_POSTS_REQUEST:
             return{
                ...state,
                loading: true,
            }

        case FETCH_POSTS_SUCCESS:
            return{
                ...state,
                loading: false,
                posts: action.payload
            }

        case FETCH_POSTS_FAIL:
            return {
                ...state,
                loading: false,
                error: action.payload
            }

        default:
            return state
    }
}


export const getPostReducer = (state = {loading: false, post: { }}, action) =>{
    switch(action.type){
        case FETCH_POST_REQUEST:
             return{
                ...state,
                loading: true,
            }

        case FETCH_POST_SUCCESS:
            return{
                ...state,
                loading: false,
                post: action.payload
            }

        case FETCH_POST_FAIL:
            return {
                ...state,
                loading: false,
                error: action.payload
            }

        default:
            return state
    }
}
Comment reducers
Enter the following code in the commentReducers.js file.
import{
    FETCH_COMMENTS_REQUEST,
    FETCH_COMMENTS_SUCCESS,
    FETCH_COMMENTS_FAIL
} from "../constants/constants"


export const getCommentsReducer = (state = {loading: false, comments: { }}, action) =>{
    switch(action.type){
        case FETCH_COMMENTS_REQUEST:
             return{
                ...state,
                loading: true,
            }

        case FETCH_COMMENTS_SUCCESS:
            return{
                ...state,
                loading: false,
                comments: action.payload
            }

        case FETCH_COMMENTS_FAIL:
            return {
                ...state,
                loading: false,
                error: action.payload
            }

        default:
            return state
    }
}
Combining the reducers
Since we are using more than one reducer, it is customary in Redux to combine them into one reducer for easy access in our application. This is done with the combineReducers provided by Redux.
To use this package, you need to import it from Redux. Here is the syntax:
import {combineReducers } from "redux"
Open the rootReducers.js file and enter the following code.
import {
    getUsersReducer,
    getUserReducer,
} from "./userReducers"

import {
    getPostsReducer,
    getPostReducer,
} from "./postReducers"

import {
    getCommentsReducer
} from "./commentReducers"
import {combineReducers } from "redux"

export default combineReducers({
    getUsers: getUsersReducer,
    getUser: getUserReducer,
    getPosts: getPostsReducer,
    getPost: getPostReducer,
    getComments: getCommentsReducer
})
Building memoized selectors
React Redux allows us to create selectors that can be easily used with Redux. It provides the useSelector Hook, which can be used in selecting pieces of state from the Redux store.
Although useSelector makes getting a piece of state from the store easy, if we need to create a memoized selector, we can consider using a library like Reselect.
Reselect offers several benefits. A few of these are outlined below.
- It helps us to abstract the data selection in a file, maintaining separation of concerns.
- It boosts performance by remembering the argument passed to it the last time it was called. If the arguments are unchanged, no additional computation or re-rendering will occur.
- Reselect is very useful when we need to perform some heavy computations on the selectors.
- We can chain or compose more than one selector together.
To use this library, we need to import createSelector from it and then create memoized selectors by calling the function.
We will need to create a new file named reselect.js under the redux directory to store our selectors. Open the file and enter the following code.
import {createSelector} from "reselect"
import _ from "lodash"

export const getEveryUser = (state) => state.getUsers
export const getAUser = (state) => state.getUser
export const getEveryUserData = (state) => state.getUsers.users.data
export const getEveryPostData = (state) => state.getPosts.posts.data
export const getAUserData = (state) => state.getUser.user
export const getAUserPostData = (state) => state.getPost.post.data
export const getCommentsData = (state) => state.getComments.comments.data

export const getTopLikes = (likes) => createSelector(
    getEveryPostData,
    ele => ele && _.filter(ele, (d) => d.likes >= likes)
                    .sort((a, b) => (b.likes > a.likes))
)

export const getUsersFromLikes = (likes) => createSelector(
    getTopLikes(likes),
    ele => ele && _(ele).map((d)=> d.owner).uniqBy(d => d.id).value()
)

export const getFemaleSelector = () => createSelector(
    getEveryUserData,
    (ele) =>  ele && ele.filter(d => d.title === 'ms' || d.title === 'miss')
)

export const getMaleSelector = () => createSelector(
    getEveryUserData,
    (ele) =>  ele && ele.filter(d => d.title === 'mr')
)
We started by importing createSelector from the reselect library, and then we imported lodash. Note that lodash is included in every React or React Native application, so we don’t need to install it to use it in our application.
Next, we created normal (non-optimized) selectors directly from our states. These selectors will serve as precursors for our memoized selectors.
We then created a memoized getTopLikes selector. This selector takes the getEveryPostData selector as a precursor, filters the data for likes above a stated value (say, 50) and then sorts the data by the likes. This operation may be expensive, so it makes sense to perform it in a memoized selector.
The getUsersFromLikes selector is very similar to the aforementioned selector. It takes the getTopLikes selector as a precursor and then uses lodash to select the unique owners of the posts with the specified number of likes.
The same concept is applied in creating the getFemaleSelector and getMaleSelector, as shown in the code above.
Using selectors in our app
To use Redux in our React Native app, we need to wrap the entire application with the Redux Provider and pass our store as a prop. This allows the store to be accessible anywhere in our component tree, making global state management possible.
Open the App.js file in our application, and add the following code.
import 'react-native-gesture-handler';
import React from 'react';
import {Provider} from "react-redux"
import store from "./redux/store"
import { NavigationContainer } from '@react-navigation/native';
import StackNavigator from "./components/StackNavigator"

export default function App() {
  return (
    <Provider store={store}>
      <NavigationContainer>
        <StackNavigator />
      </NavigationContainer>
    </Provider>
  );
}
Here, we imported react-native-gesture-handler and @react-navigation/native to enable navigation in our React Native app. We set up the Stack Navigation in a separate component named StackNavigator.js in the components folder.
This is shown below.
import React from 'react'
import { createStackNavigator  } from '@react-navigation/stack';
import HomeScreen from "../screens/Home"
import UsersProfileScreen from "../screens/UsersProfile"
import UserCommentsScreen from "../screens/Comments"
import PostScreen from "../screens/PostScreen"
import TopPostsScreen from "../screens/TopPostsScreen"
import TopUsersScreen from "../screens/TopUsersScreen"
import GenderScreen from "../screens/Gender"

const Stack = createStackNavigator()

const StackNavigator = () => {
    return (
        <Stack.Navigator
            screenOptions={{
                headerStyle: {
                backgroundColor: "#bb1e1e",
            },
            headerTintColor: "white",
            headerBackTitle: "Back",
            }}
        >
          <Stack.Screen
            name="Home"
            component={HomeScreen}
            headerMode="screen"
            screenOptions={{
              headerTintColor: 'white',
              headerStyle: { backgroundColor: 'tomato' },
            }}
            options={{
              title: 'Home',
            }}
          />
          <Stack.Screen
            name="Profile"
            component={UsersProfileScreen}
            options={{
              title: 'User Profile',
            }}
          />
          <Stack.Screen
            name="Comments"
            component={UserCommentsScreen}
            options={{
              title: 'Post Comments',
            }}
          />
          <Stack.Screen
            name="Posts"
            component={PostScreen}
            options={{
              title: 'All Posts',
            }}
          />
          <Stack.Screen
            name="TopPosts"
            component={TopPostsScreen}
            options={{
              title: 'Most Trending Posts (By Likes)',
            }}
          />
          <Stack.Screen
            name="Gender"
            component={GenderScreen}
            options={{
              title: 'Users By Gender',
            }}
          />
          <Stack.Screen
            name="TopUsers"
            component={TopUsersScreen}
            options={{
              title: 'Top Users By Post Likes',
            }}
          />
        </Stack.Navigator>
    )
}

export default StackNavigator
Using the selectors
The memoized selectors are used in much the same way as any other selector in a React or React Native application.
We start by importing useDispatch and useSelector from react-redux. While useDispatch is used for dispatching the actions, useSelector is used for retrieving the piece of state from the Redux store.
The following structure is used in retrieving a piece of state from the store.
const getUsers = useSelector(state => state.getUsers)
To retrieve states from the getTopLikes selector, we would use the following syntax:
const topLikes = useSelector(getTopLikes())
The code below shows the use of selectors and dispatch in TopPostsScreen.js.
import React, { useEffect } from 'react'
import { View, FlatList } from 'react-native'
import { useDispatch, useSelector } from "react-redux"
import { listAllPosts } from "../redux/actions/postActions"
import { getTopLikes } from "../redux/selectors"
import Posts from "../components/Posts"
import HeaderItems from "../components/HeaderItems"
import Loading from "../components/Loading"
import Error from "../components/Error"

const TopPostScreen = ({navigation}) => {

    const dispatch = useDispatch()

    useEffect(() => {
        dispatch(listAllPosts(100))
    }, [dispatch])

    const { loading: postsLoading, error: postsError } = useSelector(state => state.getPosts)
    const posts = useSelector(getTopLikes(50))

    const renderItem = ({item}) => (
        <Posts item={item} navigation={navigation} />
    )

    return (
        <View>
            {
                postsLoading ? <Loading />
                    : postsError ? <Error>{postsError}</Error>
                        :
                        <View >
                            <FlatList
                                ListHeaderComponent={
                                    <HeaderItems />
                                }
                                data={posts}
                                renderItem={renderItem}
                                keyExtractor={item => item.id}
                            />
                        </View>
            }
        </View>
    )
}

export default TopPostScreen
Conclusion
I hope this article has helped you understand how to build performant applications with React Native, Redux and Reselect. Redux is a very powerful tool for building large-scale React Native applications, but it is even more powerful and efficient when combined with Reselect.
These concepts can be applied in most React Native applications, especially those that require global state management. It is also possible to achieve improved performance with tools like the useMemo Hook, but Reselect makes it a lot more seamless when using Redux.
The complete source code is available on GitHub here.
Ifeanyi Dike is a software developer in Abuja, Nigeria. He started coding with Microsoft Visual Basic in 2005 but soon after delved into Python and JavaScript.
He’s been actively developing software for over seven years now and has used several web and mobile frameworks/libraries, like React.js, React Native, Node.js, Redux, Express.js, etc. You can reach him on his website and @ifeanyidike87.


