


Written by Daniel Schroeder
So, you’ve succumbed to the temptation to try Google’s native toolkit for mobile development: Flutter. Me too, because maybe it’s going to be the future in mobile development, or maybe it will be obsolete in a year. Nonetheless, we as developers are hungry to pour hours of our time into learning new things and implementing new workflows built on beta frameworks. My organization decided to jump in headfirst and develop our newest product in Flutter, more specifically Flutter Web. With all the trepidation in the world hovering in front of me, I took the lead in developing a CI/CD pipeline for this new project.
In this post, I will outline the steps I took to create a seamless CI/CD pipeline thats deploys Flutter Web applications to an AWS S3 data store for hosting static web content using CodeMagic as a deployment tool. I had 3 main goals for my pipeline:
I wanted a QA-ready link to a static webpage reflecting changes to my
stagingbranch with every new commit/push.I wanted to push one. single. button. and have my changes deployed.
I wanted to use CodeMagic’s new YAML support to define my workflow for CI/CD.
With those conditions set forth, here’s the [code]magic.

Step 1: A Flutter project in a repository
An obvious preliminary step, first we need a flutter project deployed to a repository. All of this is well-documented on Flutter’s website, but we need a web-enabled flutter project.
With Flutter installed, run the following commands:
flutter channel dev
flutter upgrade
flutter config --enable-web
cd <into project directory>
flutter create .
flutter run -d chrome
*https://flutter.dev/docs/get-started/web
Note: At the time this article was written, Flutter Web was only supported on the Dev channel of Flutter.*
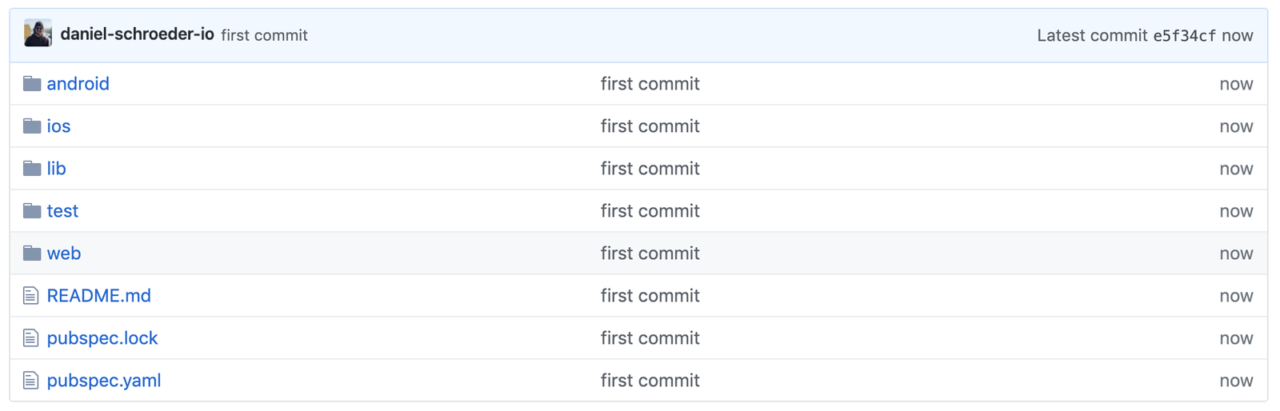
You should have a chrome browser open with the base raised-button counter Flutter project open. Next, push this to GitHub so we have a repository that looks like:
git add *
git commit -am "flutter repo"
git push origin master
Step 2: Codemagic
Log In with GitHub.
Select the repository we just created and hit the gear box next to “Start your first build.”
Scroll down to the build section and click to open up the configuration options.
Like in the photo below: change channel to dev, only check the
Webcheckbox, and choose the –releaseoption as a build argument.
Hit “Save” and then hit “Run your first build” at the top of the page.
All of these options dictate the different Flutter commands and scripts that Codemagic will run while building your project. We will see these commands later in this article when we go over the YAML configuration.
Step 3: AWS S3
For S3 we need to do 2 things specifically, create a bucket where we are going to store our build files and create an IAM user that we will use to grant Codemagic write-access to that bucket.
Note: You can do the following steps inside the AWS console, but for brevity and simplicity, I chose to provide the CLI commands that accomplish the same goal.
- Create an S3 bucket
aws s3api create-bucket — bucket <BUCKET-NAME>
- Create an IAM user with write permissions and list permissions for that bucket
First let’s define a policy for the user. Create a file called policy.json that defines S3 put object and S3 list bucket access for the bucket you just created.
{
    "Version": "2020-01-20",
    "Statement": [
        {
            "Sid": "VisualEditor0",
            "Effect": "Allow",
            "Action": [
                "s3:PutObject",
                "s3:ListBucket"
            ],
            "Resource": [
                "arn:aws:s3:::[YOUR-BUCKET]",
                "arn:aws:s3:::[YOUR-BUCKET]/*"
            ]
        }
    ]
}
- Next, run a CLI command to create the policy outlined in the JSON file. Make sure to point it at the correct path to the JSON file we just created.
aws iam create-policy --policy-name codemagic-s3-access --policy-document file://policy.json
https://docs.aws.amazon.com/cli/latest/reference/iam/create-policy.html#examples
You will receive a JSON response string from AWS containing the ARN for the policy you created. We will use this ARN in following steps.
- Now we want to create a very limited user [call it the Codemagic Deployment Wizard] that will publish our build artifacts to S3. Let’s create the user and attach our newly created policy.
aws iam create-user --user-name CodeMagicWizard
And now attach the policy we just created using the ARN returned in the JSON response
aws iam attach-user-policy --policy-arn arn:aws:iam::[YOUR-ARN] --user-name CodeMagicWizard
- Now we want to create access keys for our new user that we will use as Codemagic Environment Variables
aws iam create-access-key --user-name CodeMagicWizard
Be sure to save this JSON response somewhere as secret keys cannot be re-accessed without creating a new access key altogether.
Step 4: Configure Codemagic Workflow
To recap what we’ve done so far: we’ve created and uploaded a Flutter Web project to a Github repository, synced Codemagic with our GitHub repo and deployed our first build, created an AWS S3 bucket, and created a limited AWS user with permissions for reading and listing our S3 bucket.
Now, we want to push our Flutter web build to our S3 bucket through Codemagic.
We have to use the Codemagic UI for a couple more steps, then we can do everything inside the YAML file. Back in CodeMagic, go to the build configuration (gear box) for your flutter app and find the section for Environment Variables. We are going to add two environment variables to our workflow to allow Codemagic access to the AWS CLI and to use our CodeMagicWizard user as the means to writing to the S3 bucket.

We want to add the AWS_ACCESS_KEY and the AWS_SECRET_ACCESS_KEY environment variables as “SECURE” variables to our workflow.
Type in the variable names AWS_ACCESS_KEY and AWS_SECRET_ACCESS_KEY, copy and paste the access keys from the JSON response payload that you saved from the aws iam create-access-key CLI command, check the secure box, and hit add. This will add a layer of encryption around our environment variables when we export the workflow as a YAML file. Codemagic has great documentation about how it handles environment variable you can read about.
Hit “Save.” Now we have encrypted environment variables that will act as our AWS CLI credentials when we publish to S3 in the build script.
>> Read more about how to build Flutter web apps with Codemagic
Step 5: YAML File Configuration
At the top of your Codemagic build configurations page, find the section Advanced configuration (beta) and hit the “Download configuration” button. This will download a codemagic.yaml file which we want to add to the root directory of your flutter app. We want to strip out everything that does not pertain to Flutter-Web and our specific build so we have a file that looks like this:
workflows:
  default-workflow:
  name: Default Workflow
  environment:
    vars:
    AWS_ACCESS_KEY_ID: Encrypted(XXXXXXXXX)
    AWS_SECRET_ACCESS_KEY: Encrypted(XXXXXXXXX)
    flutter: dev
  triggering:
    events:
    - push
    branch_patterns:
    - pattern: 'master'
      include: true
      source: true
  scripts:
    - flutter packages pub get
    - flutter config --enable-web
    - flutter test
    - |
    # build web
    flutter build web --release
    cd build/web
    7z a -r ../web.zip ./*
    cd $CM_BUILD_DIR/build/
    sudo pip3 install awscli --upgrade
    aws s3 sync web/ s3://[YOUR_BUCKET]/
  artifacts:
    - build/**/outputs/**/mapping.txt
    - build/web.zip
    - flutter_drive.log
Note:
There are some specific things to note in this YAML file. Firstly, we are only publishing for web, so I omitted all of the android and iOS deployment scripts. Second, in the last bit of the scripts section is a pip install for the AWS CLI and an S3 sync call.
Be sure to use the s3 link to your own bucket we created in step 3.1.
This will use the environment variables that we defined at the top of the YAML file as AWS credentials that will allows us to Put-Objects to our specific bucket.
>> Read more about what is Codemagic YAML and what are the advantages of using it
Step 6: Pushing to Repository and Initiating Build
Now that we have a workflow defined in our YAML file we can initiate our Codemagic build process by pushing to our repository. Notice on lines 9–15 of our YAML file, a section called “triggering.” We have defined that with every “push” to the “master” branch, we want Codemagic to execute a build according to our workflow. Lets do that:
git add codemagic.yaml
git commit -am "yaml file"
git push origin master
Here’s the moment of truth, if all things work as expected, once the Codemagic build process completes, we should see our web build artifact published inside of our S3 bucket that we defined at the end of the scripts section in our YAML file:
...
sudo pip3 install awscli --upgrade
aws s3 sync web/ s3://[YOUR_BUCKET]/
...
… and Voilà! We can follow our build process in Codemagic to see all the different stages run and complete, but our end goal is we want to see the web build files inside our S3 bucket. Upon build completion, navigate to your AWS Console and look at the objects inside your S3 bucket.
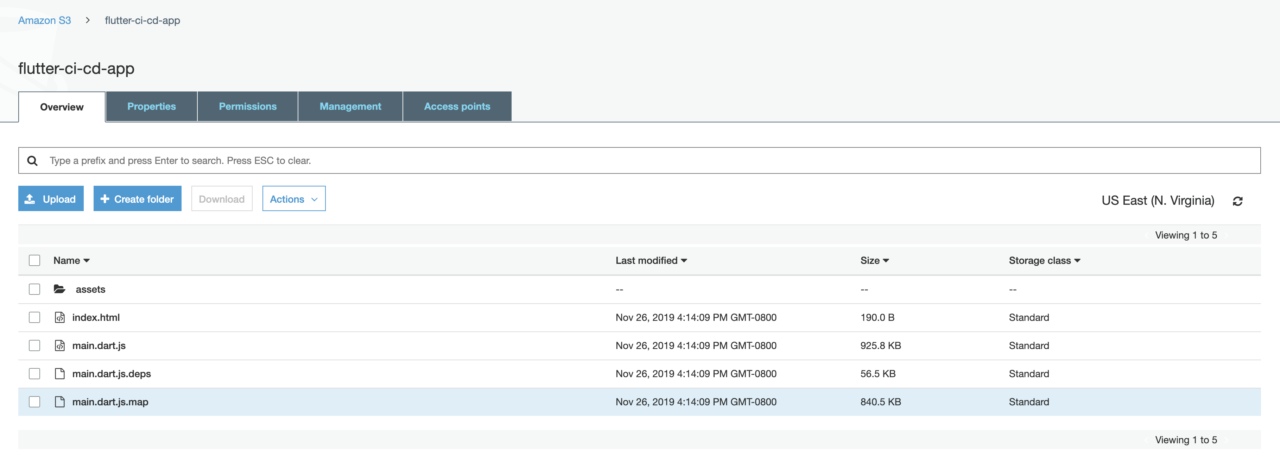
Note: we can’t see the objects from the CLI because we never gave our user list-bucket or list-object permissions. This was intentional, we only wanted our CodeMagic “wizard” user to have the ability to write to our bucket, and nothing else.
Conclusion
From here, we have a static website build published to S3 streamlined from a single Git push command. Now, we can easily host a static website using S3’s built-in static website hosting capabilities. Similarly, we can set up a CloudFront distribution and point our origin to the S3 bucket to publish a more robust solution. There will be a follow-up article where I walk through how to use the S3 bucket we just made as the source for a CloudFront distribution to create an even more robust web experience. Thanks!
Daniel Schroeder Portland, Oregon Determined developer, aspiring educator. You can discuss and follow him on Medium


