


Written by Souvik Biswas
Choosing a CI/CD service from the large pool of available options is pretty difficult. There are various factors you should consider in order to make the right decision. Ultimately, the best choice also depends on your team’s preference and the type of project you are working on.
To make this decision a bit simpler for you, we will look into Codemagic and CircleCI in this article, comparing their services based on some key factors you should consider while choosing the proper CI/CD for your project.
Keep in mind that CircleCI is mainly a continuous integration (CI) platform, so it does not focus as much on continuous delivery or continuous deployment (CD).
Overview
Continuous integration (CI) and continuous delivery (CD) services can be broadly classified into two types:
- Cloud-based
- Self-hosted
Both Codemagic and CircleCI offer cloud-based CI/CD services. For those who want to use their own infrastructure, CircleCI provides an option to use their self-hosted service.
CircleCI is a general CI/CD solution that can be used to build any type of project. On the other hand, Codemagic provides a more mobile-focused CI/CD solution that offers an easier code-signing and deployment process. It supports most of the popular frameworks, like Android, iOS, Flutter, React Native, Cordova and Ionic.
Onboarding
Let’s start by taking a look at the onboarding processes of both platforms.
Codemagic onboarding
You can sign up to Codemagic using a GitHub, Bitbucket or GitLab account or via email. Get started by going to Codemagic’s Signup page.
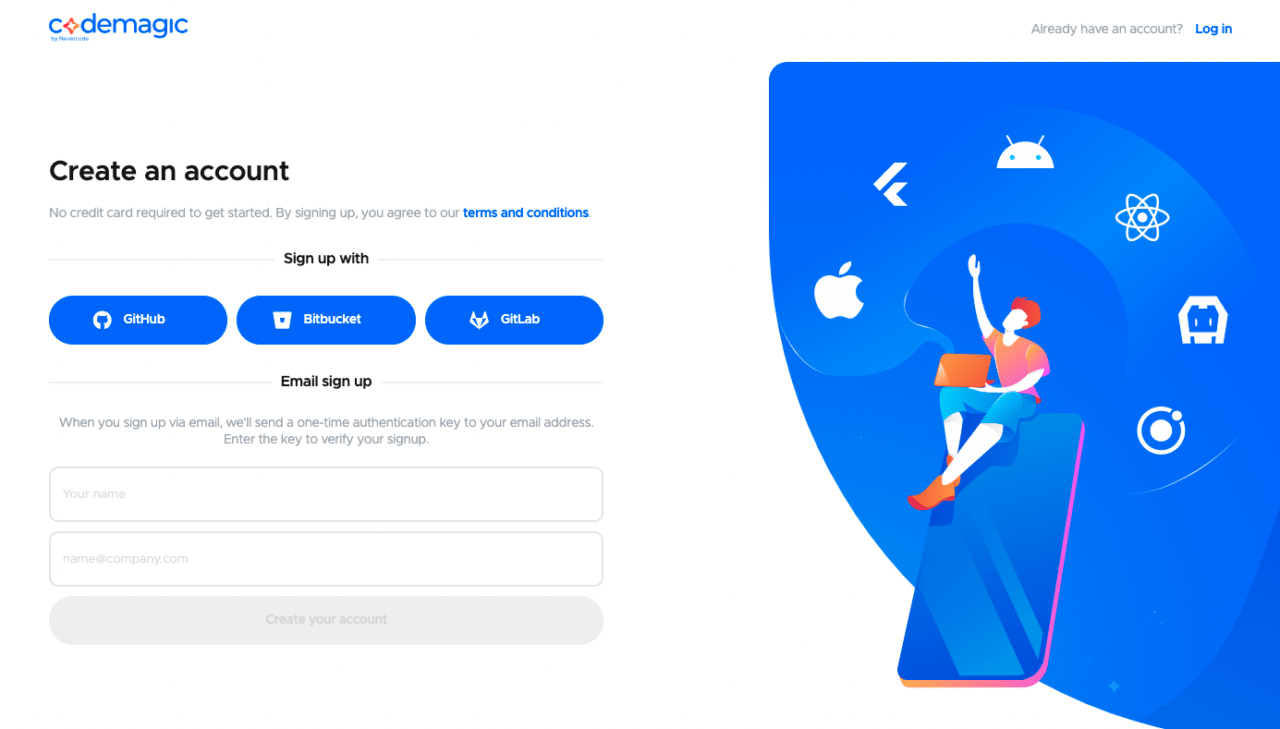
Codemagic uses GitHub app integration to connect with GitHub and OAuth to connect with your Bitbucket or GitLab account.
Get more information about the Codemagic signup process here or just sign up:
After the authentication process, you will be navigated to the Codemagic Applications page.
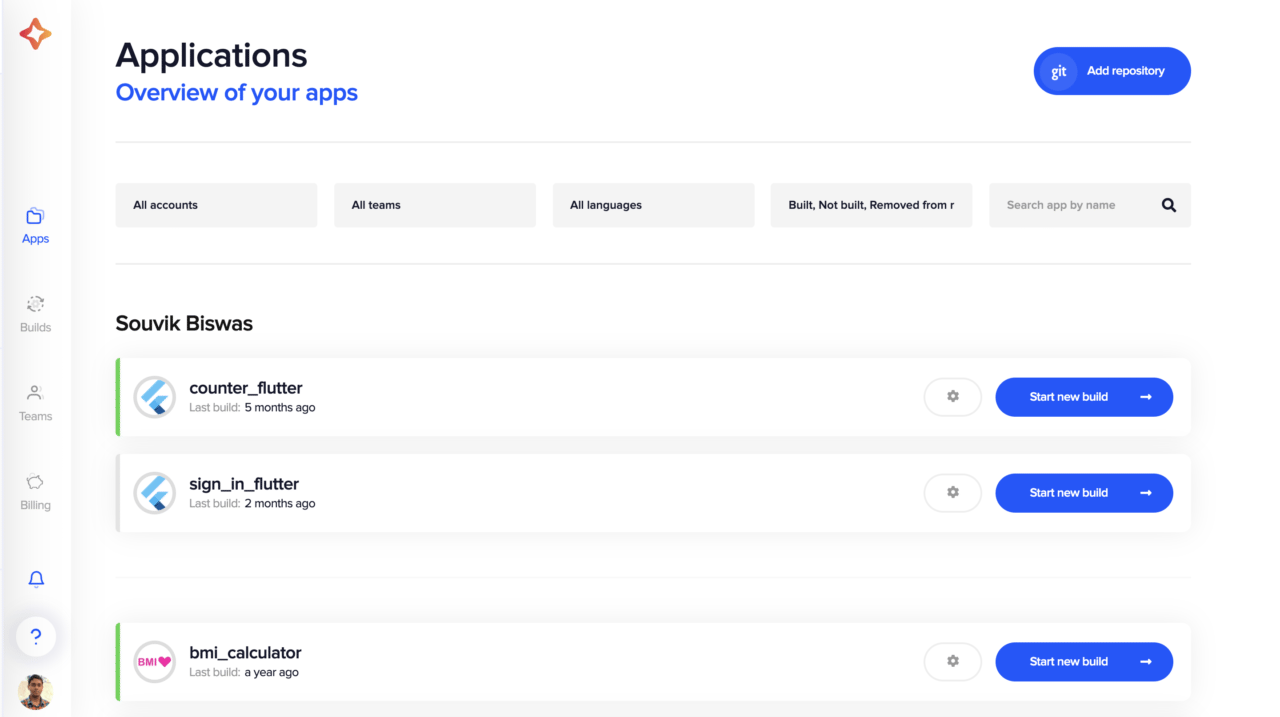
You can connect Codemagic to multiple version control services at once, and all the apps will show up in one place – on the Applications page.
CircleCI onboarding
To get started with CircleCI, you first have to go to the Signup page.
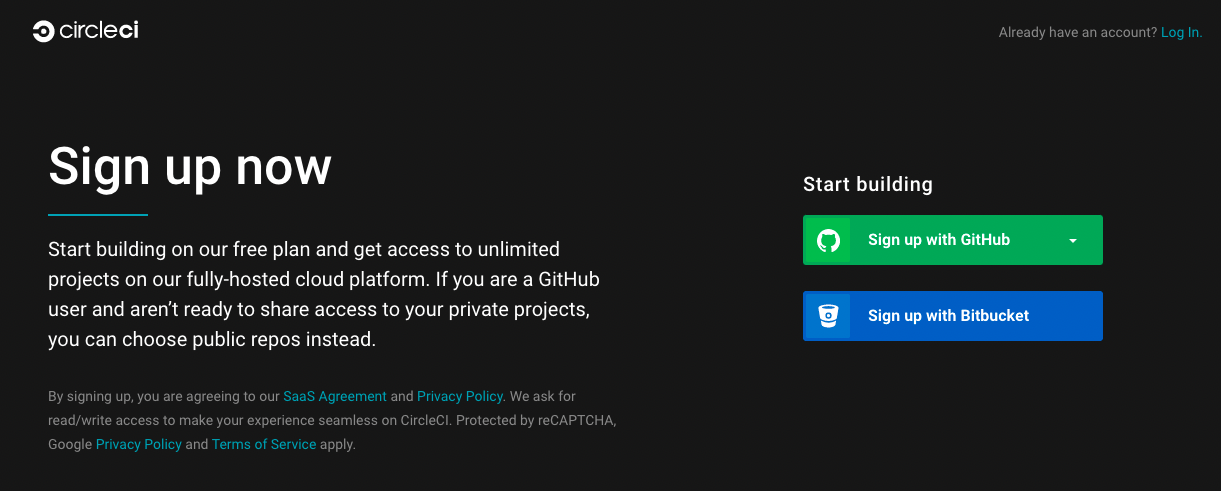
Here, you can either Sign up with GitHub or Sign up with Bitbucket to authenticate CircleCI and give it access to your projects. If you are using GitHub, CircleCI allows you to prevent access to your private repositories. CircleCI doesn’t support Gitlab repositories.
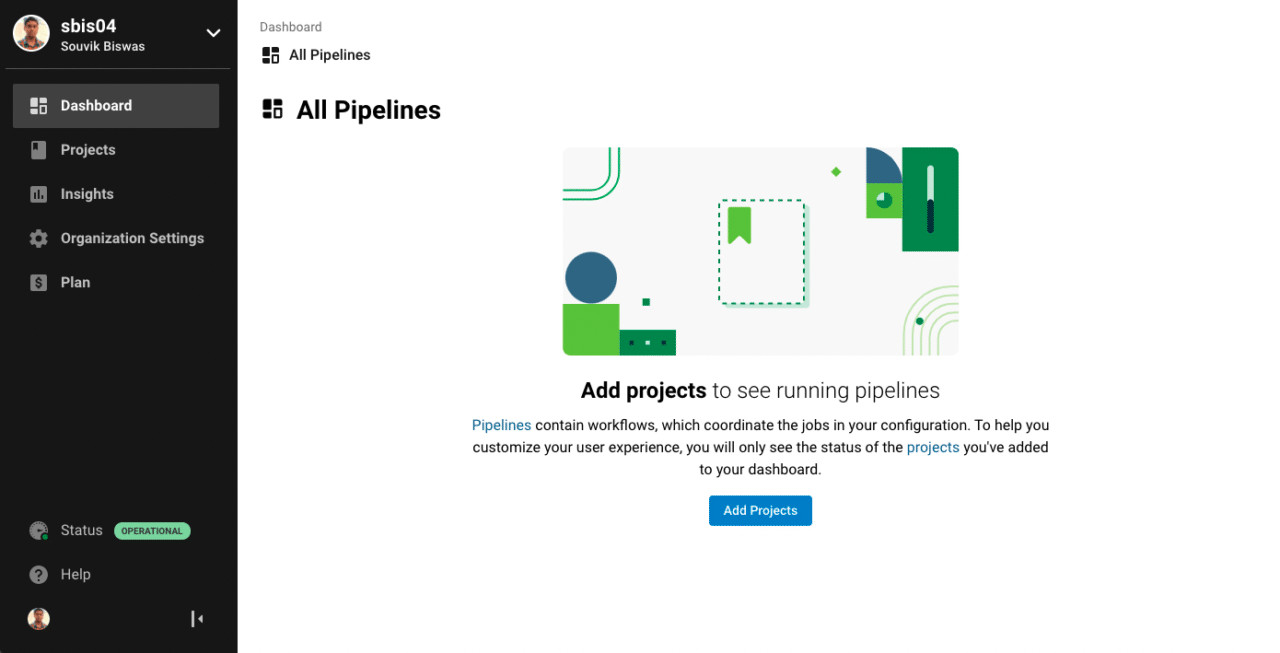
After the authentication process, you will be redirected to the CircleCI Dashboard.
Adding projects
Before starting the build process, you have to add the project that you want to build to the CI/CD platform. Here, we’ll take a look at both platforms’ project-adding processes.
Adding projects to Codemagic
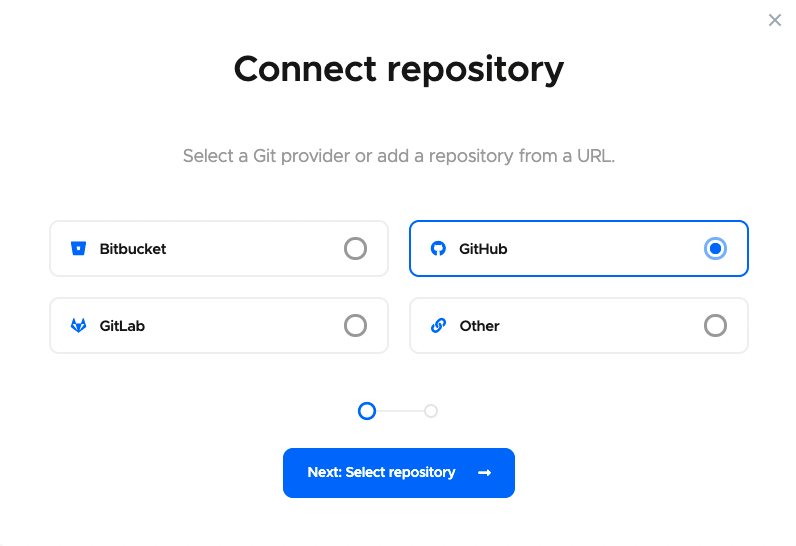
On the Codemagic Applications page, you will find an Add application button. Click on it.

Select a Git provider or add a repository using a URL.
Choose the repository that you want to add, and select the project type.
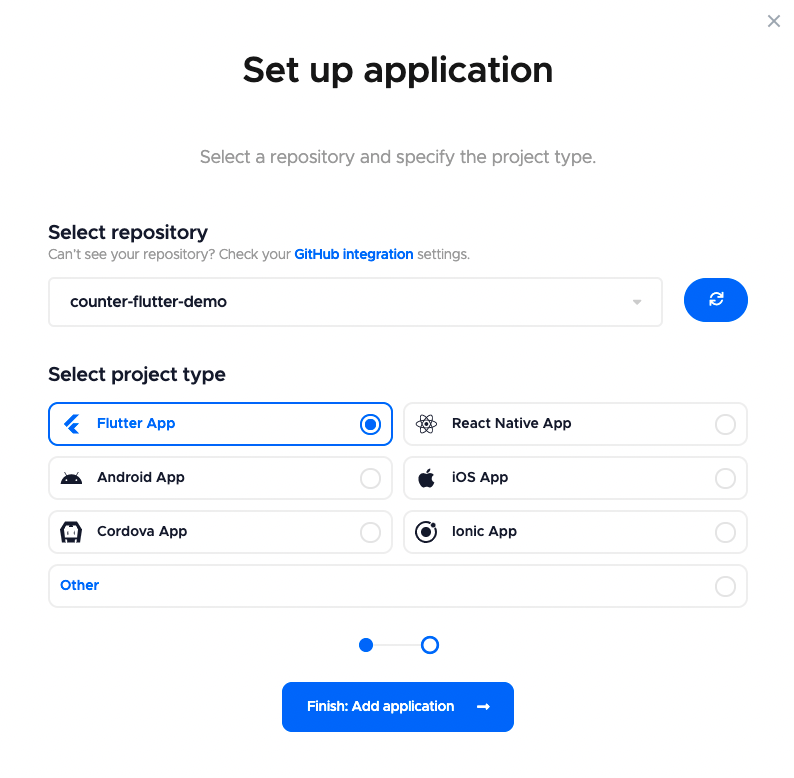
This will take you to the project settings page of the repository that you just added.
Adding projects to CircleCI
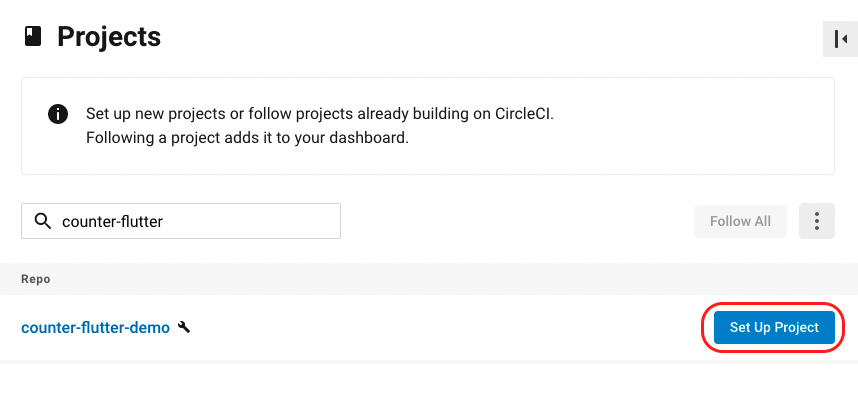
To add your projects to CircleCI, you have to go to the Projects page by either clicking on the Add Projects button on the dashboard page (if you are adding your first project) or by selecting Projects from the menu on the left side of the screen.
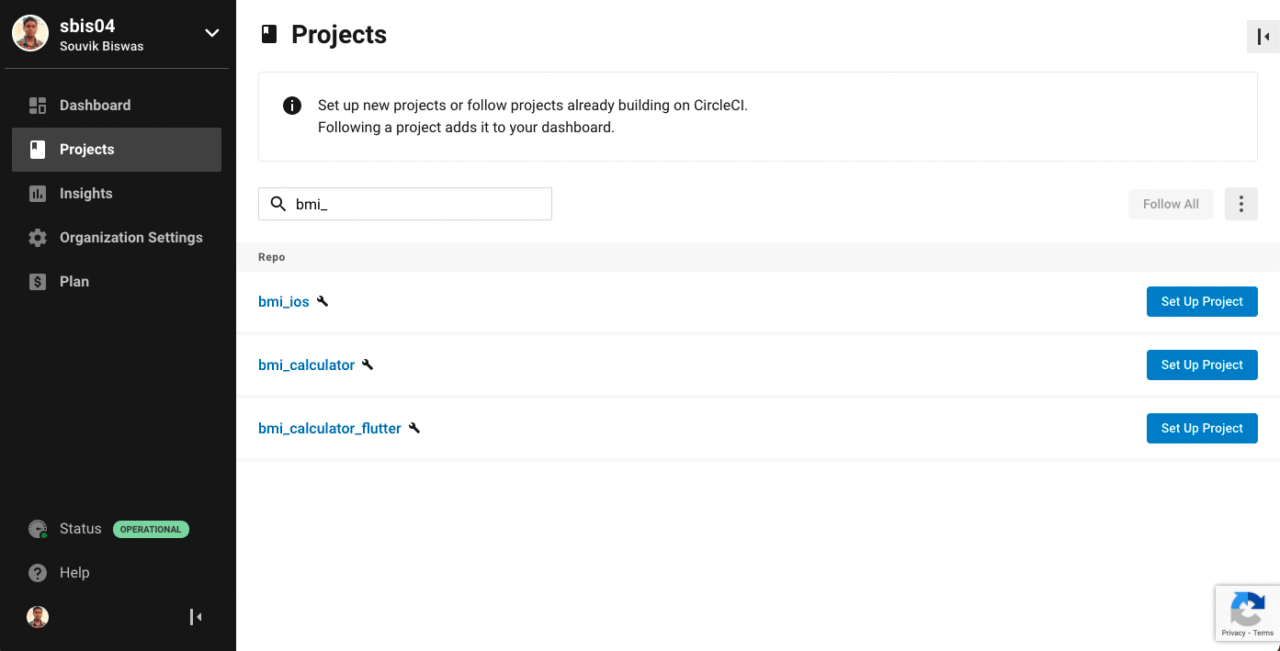
Search for the project that you want to add, and click on Set Up Project.
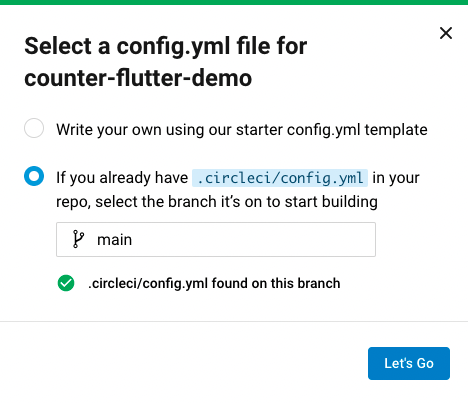
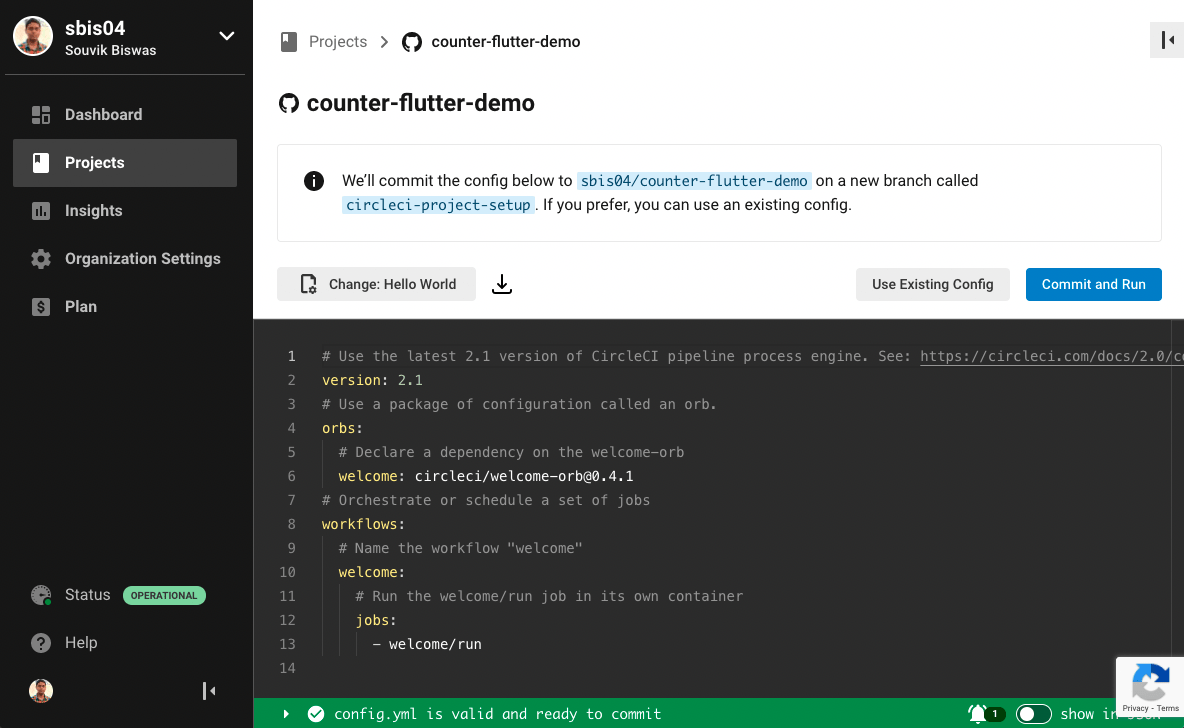
A dialog box will appear. If .circleci/config.yml is already in your repository, then just enter the branch name. Otherwise, you can start writing your first config.yml file. Then click on Let’s Go.
We will take a look at how you can define the
config.ymlfile for CircleCI builds in the next section.
This will add the project and take you to that project’s information page.
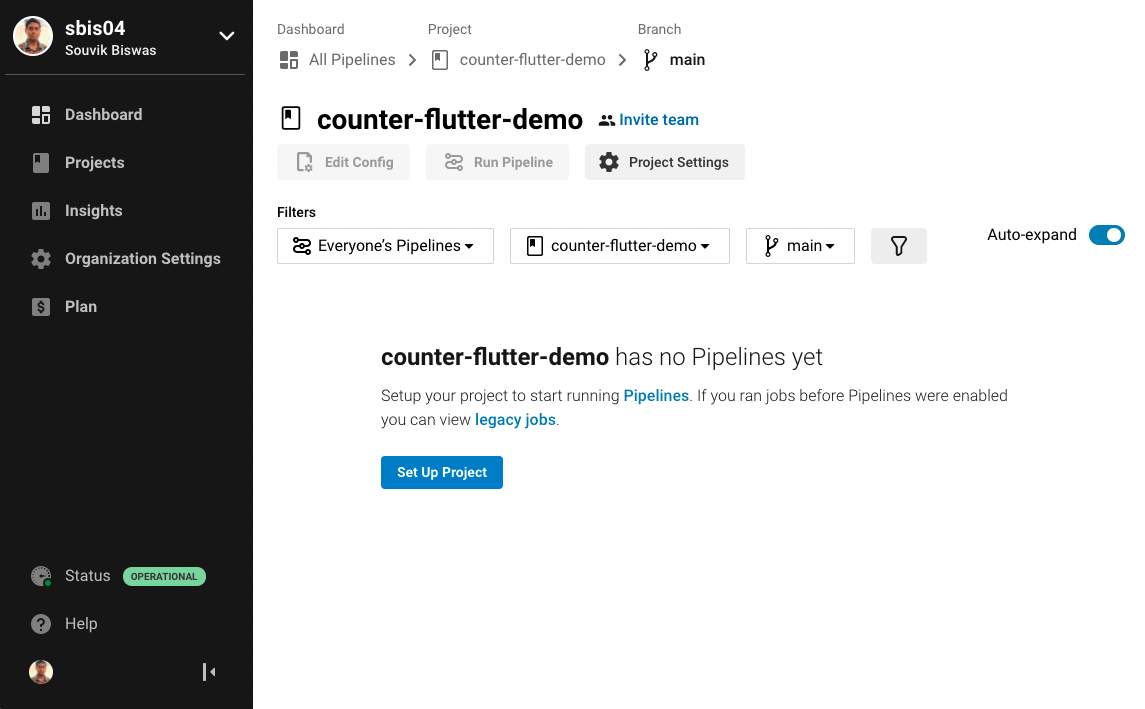
You can learn more about how to run a build in the Running build section.
Configuring workflow
Codemagic: Configuring workflow
On Codemagic, you can configure your build workflow using the codemagic.yaml file. This file should be stored in the root directory of the repository. If you are working with Flutter projects, you can also configure your workflow using the Workflow Editor.
Get to know more about the
codemagic.yamlfile here.
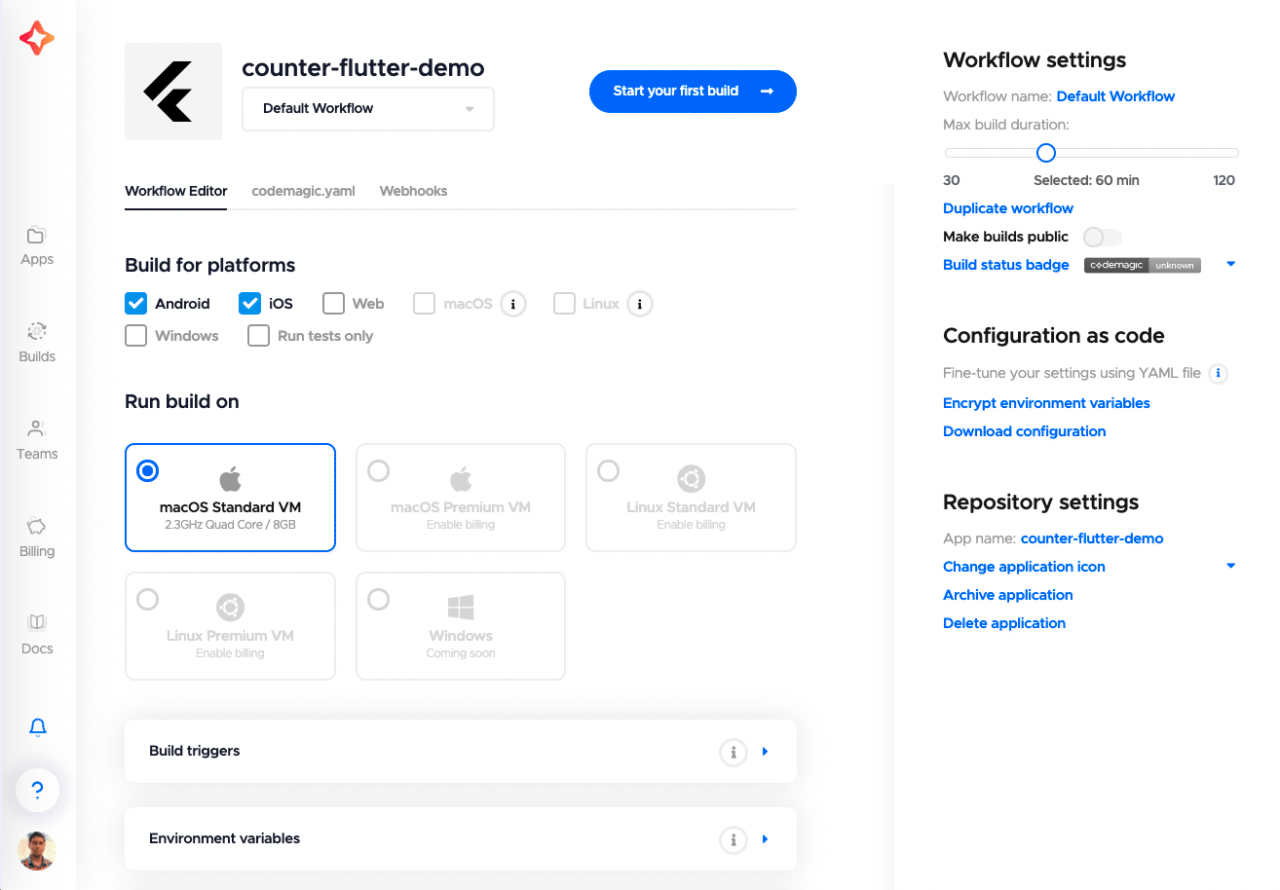
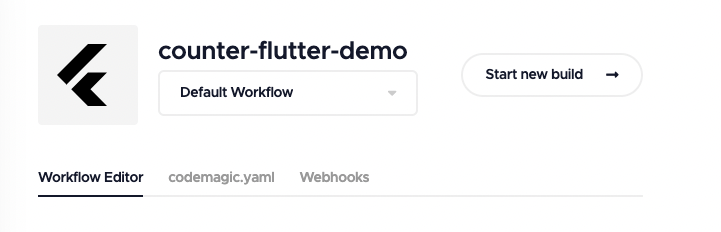
To start configuring your workflow, go to your project settings. If it is a Flutter project, then the Workflow Editor tab will be selected by default. Otherwise, the codemagic.yaml tab will be selected.
The Workflow Editor helps you to define and customize your build workflow directly on the Codemagic web app. After the configuration is complete, don’t forget to save it by clicking on Save changes.
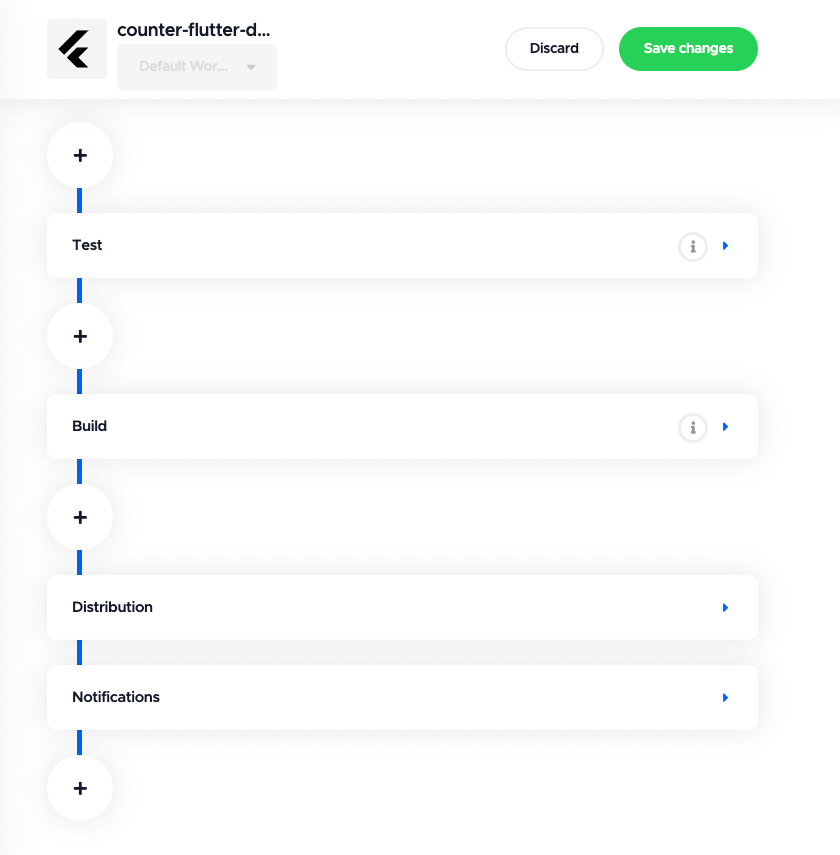
To use codemagic.yaml, place the file in the root directory of your project, and commit it to your version control server. Now, if you navigate to the codemagic.yaml tab, you will see the YAML file’s contents.
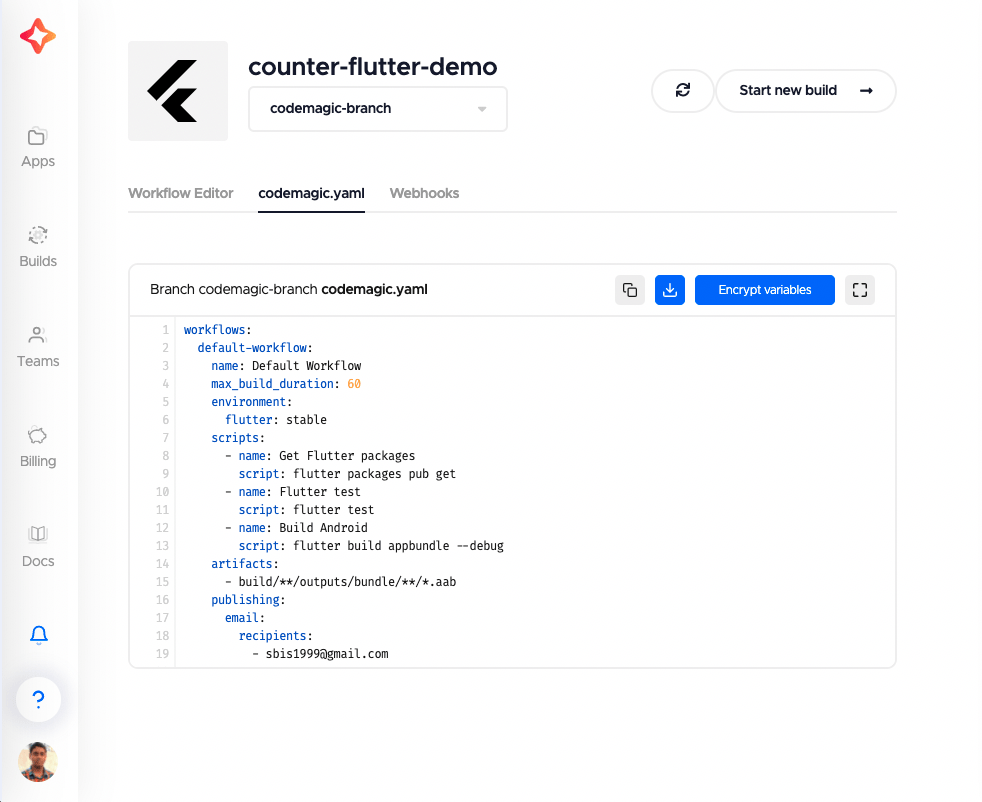
Here’s an example codemagic.yaml file for building and testing a Flutter project for only the Android platform and generating build artifacts:
workflows:
  default-workflow:
    name: Default Workflow
    max_build_duration: 60
    environment:
      flutter: stable
    scripts:
      - name: Get Flutter packages
        script: flutter packages pub get
      - name: Flutter test
        script: flutter test
      - name: Build Android
        script: flutter build appbundle --debug
    artifacts:
      - build/**/outputs/bundle/**/*.aab
    publishing:
      email:
        recipients:
          - sbis1999@gmail.com
CircleCI: Configuring workflow
You can configure the build pipeline on CircleCI using the .circleci/config.yml file. This folder should be stored in the root directory of the project. You can either edit the config.yml file locally or by using the editor present on the CircleCI web app.
If you are setting up a new project and it doesn’t contain a config.yml file, you will be taken to the editor. There, you can choose from various templates and modify them. After you are done modifying the template, click on Commit and Run. This will commit the file to a new branch and start your first build.
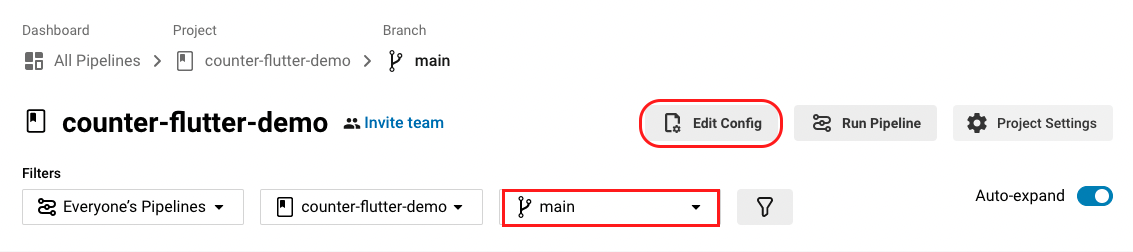
If you already have a project set up, you can edit the config.yml file by going to the project page. Select the branch containing the configuration file, and click on Edit Config. This will take you to the editor on the CircleCI web app.
Here’s an example .circleci/config.yml file for building and testing a Flutter project for only the Android platform and generating build artifacts:
version: 2.1
executors:
  flutter:
    docker:
      - image: cirrusci/flutter
jobs:
  test:
    executor: flutter
    steps:
      - checkout
      - run:
          name: Get Flutter packages
          command: flutter packages pub get
      - run:
          name: Flutter test
          command: flutter test
  build:
    executor: flutter
    steps:
      - checkout
      - run:
          name: Build Android
          command: flutter build appbundle --debug
      - store_artifacts:
          path: build/app/outputs/bundle/debug
workflows:
  version: 2
  flutter-build:
    jobs:
      - test
      - build:
          requires:
            - test
CircleCI offers the interesting concept of Orbs, which are basically reusable, pre-written pieces of configuration that can be used with just a single line of code.
Build platforms
Codemagic-supported platforms
Codemagic offers macOS, Linux and Windows VMs for running your build pipeline.
Codemagic is the first CI/CD provider who made Apple M1 Mac mini available for developers. You can use M1 machines even on free tier and as you know – M1-based Macs are just super fast compared with Intel ones.
You can find more information regarding build machine types offered by Codemagic here. If you’re interested in learning more about how much faster M1 Macs are, then see this article that compares VMs.
Linux machines are only available for users who have enabled billing.
CircleCI-supported platforms
On CircleCI, you can choose your build executor type while defining your workflow. CircleCI primarily offers macOS, Linux and Windows VMs.
The CircleCI macOS machines are part of their paid plan. We’ll discuss their plans more in a later section.
Deploying
Code signing your build artifacts is an important step that you must complete before you can publish them on any app store. Let’s take a look at how these platforms handle code signing and deployment of artifacts.
Codemagic: Deploying
Codemagic provides direct support for generating code-signed build artifacts natively on the platform.
For Flutter projects, you can either use the Workflow Editor or codemagic.yaml file to code sign and deploy the build artifacts to Google Play Store, Apple App Store or Firebase App Distribution.
For any other projects, you have to use the codemagic.yaml file to configure the deployment.
You can check out the following links to get instructions on code signing and publishing:
- Android code signing
- iOS code signing
- macOS code signing
- Publish to Google Play Store
- Publish to App Store Connect
- Publish to Firebase App Distribution
CircleCI: Deploying
As a continuous integration (CI) tool, CircleCI doesn’t provide direct support for code signing and deployment on its platform. However, it provides integration with some third-party tools that help in deployment, the recommended one being fastlane.
Remote access
Remote access to the build machines helps with debugging the running build on the platform. Both Codemagic and CircleCI allow remote access to their build systems.
Codemagic allows remote access to the build machines using either SSH or VNC client. While the build is running, navigate to the project’s build page. There, you will see a tab containing the remote access credentials.
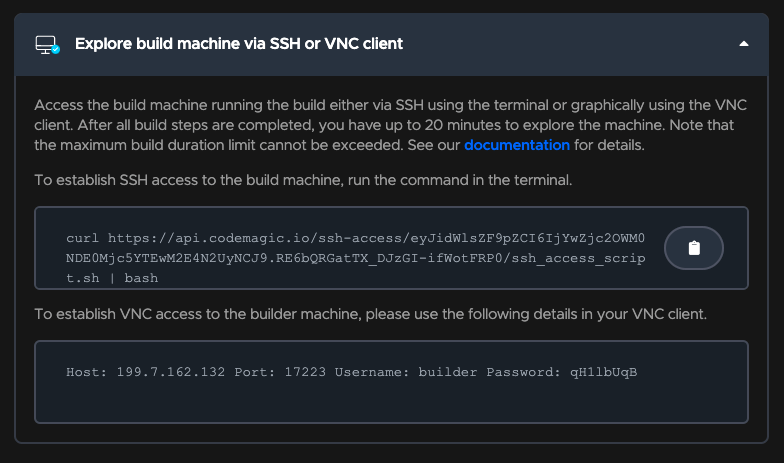
Learn more about remote access on Codemagic here.
CircleCI doesn’t include SSH access to normal builds. To get SSH access, you have to select the Rerun job with SSH option from the Rerun Workflow dropdown menu in the dashboard.
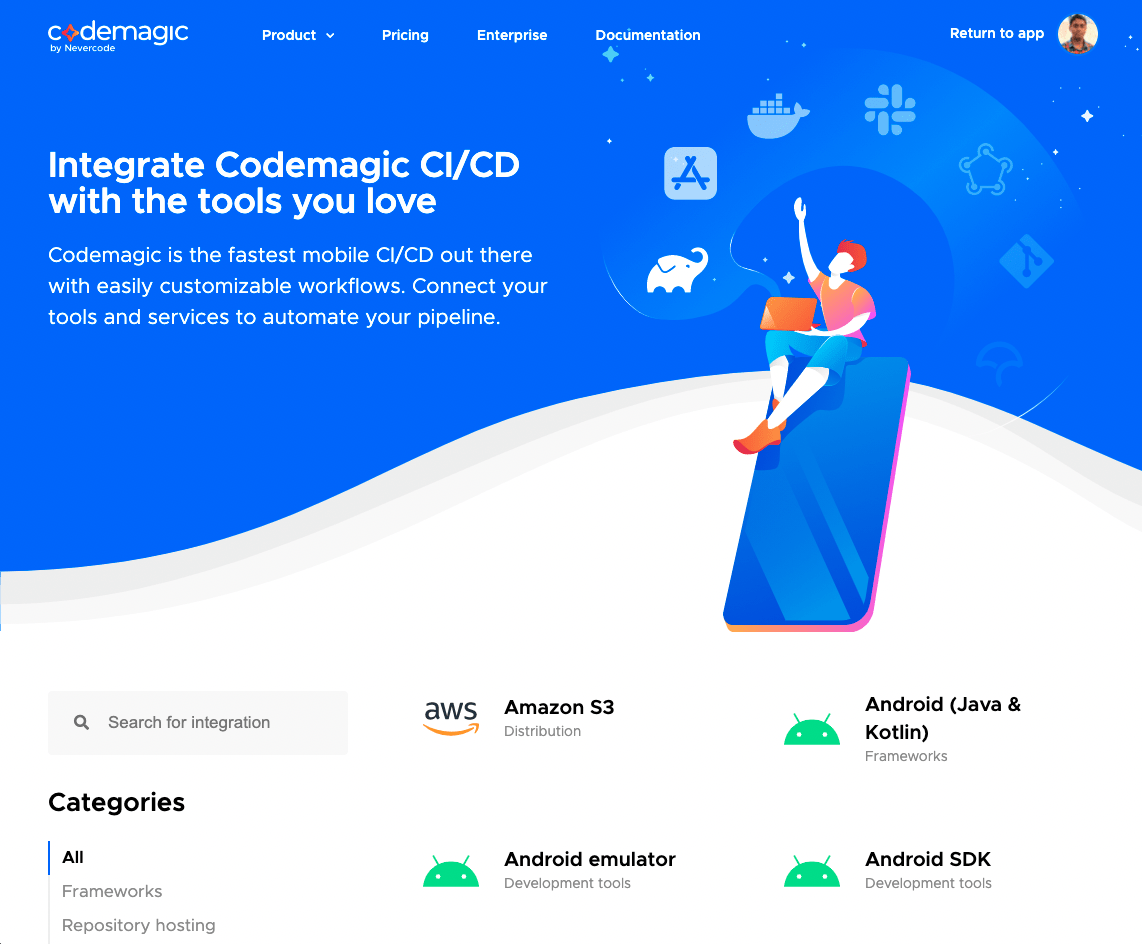
Integrations
Codemagic
Codemagic has an amazing range of integrations available to use on the platform. They can be easily added to the codemagic.yaml file under the scripts section as normal CLI commands.
Here is an example of a Codecov integration added to the codemagic.yaml file:
- name: Coverage Test
  script: |
    #!/bin/bash
    flutter test --coverage
    bash <(curl -s https://codecov.io/bash) -t $CODECOV_TOKEN
CircleCI
As a general CI platform, CircleCI has a large number of integrations with various services. The integrations are accessible in the form of an Orb that can be added to the .circleci/config.yml file.
Here’s an example of the Codecov orb added to the config.yml file:
version: '2.1'
orbs:
  codecov: codecov/codecov@1.2.4
workflows:
  upload-to-codecov:
    jobs:
      - checkout
      - codecov/upload
fastlane setup
What’s fastlane?
fastlane is an open-source platform aimed at simplifying Android and iOS deployment. Its main features include the following:
- Automatically generates localized screenshots for the app store
- Easily distributes beta builds to testers
- Publishes a new release to the app store in seconds
- Reliably and consistently code signs your app
Codemagic + fastlane
Codemagic has fastlane preinstalled, so you can easily run your fastlane scripts as part of the Codemagic build process.
Getting started
fastlane recommends having an App Store Connect API key so that you don’t have to use 2FA.
Step 1: Adding environment variables
It is mandatory to add the following environment variables for fastlane to work correctly:
- MATCH_PASSWORD — the password for encrypting/decrypting the repository used to store your distribution certificates and provisioning profiles.
- MATCH_KEYCHAIN — an arbitrary name to use for the keychain on the Codemagic build server, e.g., “fastlane_keychain”.
- MATCH_SSH_KEY — an SSH private key used for cloning the match repository that contains your distribution certificates and provisioning profiles. The public key should be added to your GitHub account. Here, you can find more information about accessing Git dependencies with SSH keys.
- APP_STORE_CONNECT_PRIVATE_KEY — the App Store Connect API key. Copy all of the contents of the .p8 file, and paste them into the environment variable value field.
- APP_STORE_CONNECT_KEY_IDENTIFIER — the key identifier of your App Store Connect API key.
- APP_STORE_CONNECT_ISSUER_ID — the issuer of your App Store Connect API key.
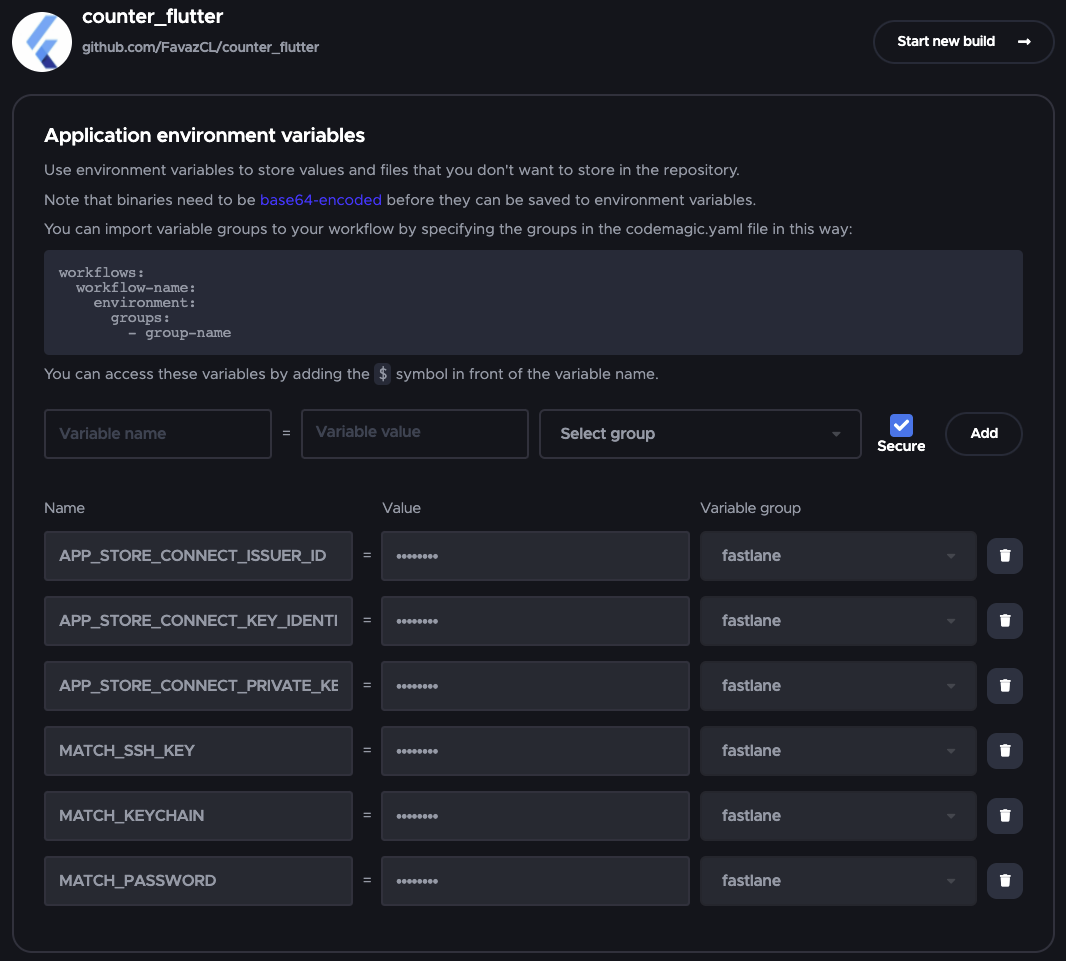
To add these environment variables in Codemagic, we need to open the Environment variables section in our application and then create a new group. In this case, I used the name fastlane (but you can use any name).
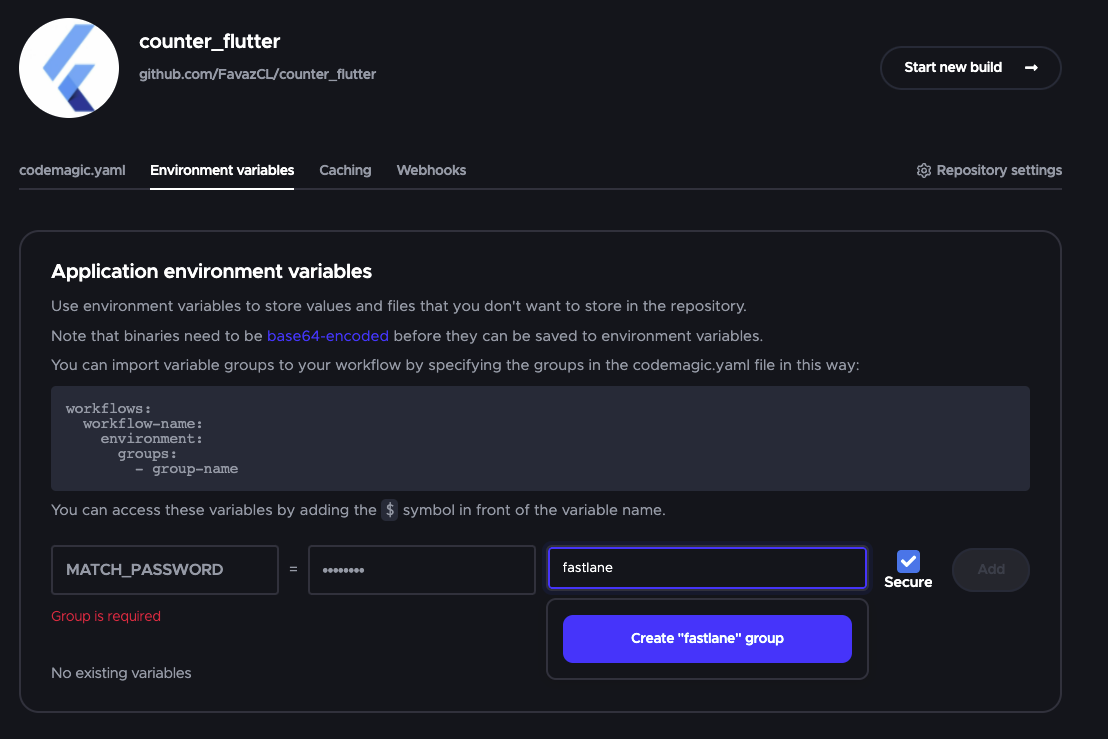
After that, we can add all the environment variables. Here is the result:
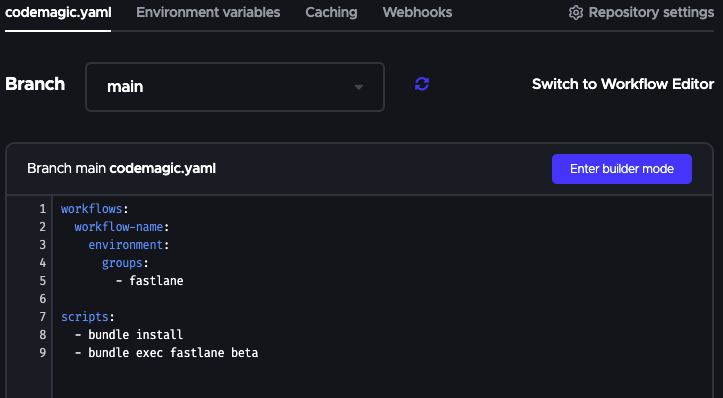
Step 2: Update codemagic.yaml
The last step is to simply edit our codemagic.yaml file, adding the environment variables and the group that was created.
You can check out all of the documentation here.
CircleCI + fastlane
CircleCI doesn’t have fastlane preinstalled, so we need to perform some additional steps.
Step 1: Create a Gemfile
We need to create a Gemfile at the root of our project:
# Gemfile
source "https://rubygems.org"

gem "fastlane"
Then we need to run the following:
gem install bundler && bundle update
This command will create a Gemfile.lock, which you need to add to your commit.
Step 2: Update our fastlane file
We need to modify our fastlane file by adding this code:
# fastlane/Fastfile

...
platform :ios do
  before_all do
    setup_circle_ci
  end
  ...
end
Step 3: Create a CircleCI directory
Finally, we must create a new directory in our project and add a file (.circleci/config.yml) that contains the following content:
# .circleci/config.yml

version: 2.1

orbs:
  ruby: circleci/ruby@1.2.0

jobs:
  build:
    macos:
      xcode: "13.1.0"
    working_directory: /Users/distiller/project
    environment:
      FL_OUTPUT_DIR: output
      FASTLANE_LANE: test
    shell: /bin/bash --login -o pipefail
    steps:
      - checkout
      - ruby/install-deps
      - run:
          name: fastlane
          command: bundle exec fastlane $FASTLANE_LANE
      - store_artifacts:
          path: output
      - store_test_results:
          path: output/scan
You can find all of the documentation here.
fastlane setup conclusion
As you can see, it’s easier to work with fastlane in Codemagic for these main reasons:
- Codemagic has fastlane preinstalled, and it’s faster to build with Codemagic than CircleCI
- Codemagic has a specific section for adding environment variables
- In CircleCI, you need to follow a longer process that involves creating different files, and it’s easy to make a mistake
Pricing
Let’s take a look at the pricing plans offered by these two platforms. One of the differences these two platforms have, is that CircleCI paid plans are pre-paid and Codemagic paid plans are post-paid.
Codemagic pricing
Codemagic is free to get started, and then you can opt for their pay-as-you-go plan (post-paid) or annual plan which is perfect for teams who need fixed costs.
Codemagic’s free plan offers the following features:
- 500 build minutes per month
- 120-minute build timeout
- 1 concurrent build
- Community support
- macOS M2 machine
The number of concurrent builds can be increased by opting for their pay-as-you-go plan.
Codemagic’s pay-as-you-go plan prices:
- macOS (M2) VM – $0.095 / minute
- Linux & Windows VMs – $0.045 / minute
Codemagic also has annual plan for teams who need fixed costs, or customized enterprise plan.
Learn more about Codemagic’s pricing options here.
CircleCI pricing
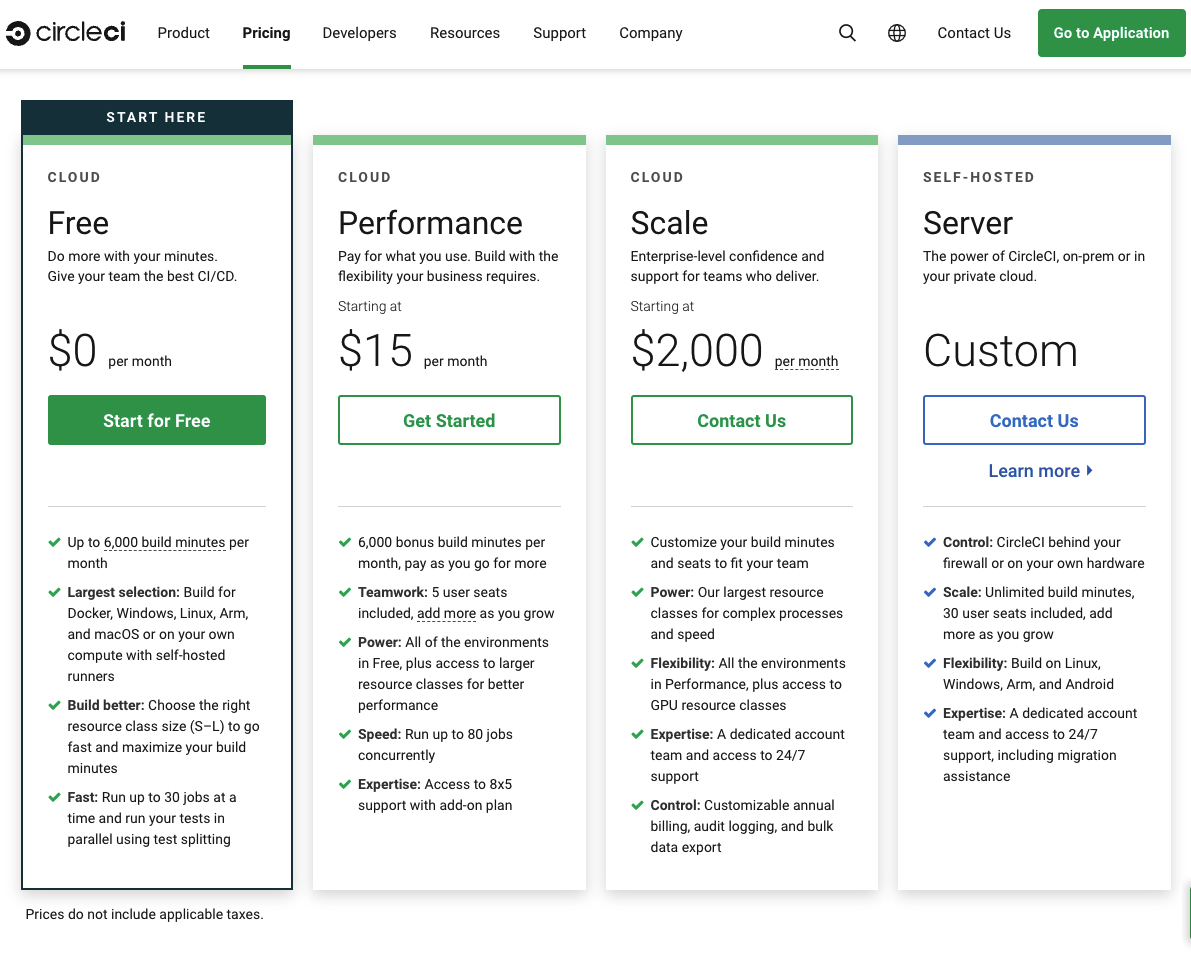
CircleCI provides a free plan to get started. They offer three more plans (pre-paid) under their cloud-hosted CI/CD service: Performance (15$/month), Scale(2000$/month) and Server.
CircleCI’s free plan offers the following features:
- 30,000 credits per month
- 1 concurrent build
- 1 member
- Build platforms:
- Linux VM (Dual Core/7.5 GB) – 10 credits/min
- Windows VM (Quad Core/15 GB) – 40 credits/min
- MacOS VM (Quad Core/8 GB) - 50 credits/min
Performance (15$/month) plan includes the following:
- 55,000 credits per month
- 5 users
API access
Having access to the API allows you to retrieve useful build information, manage projects, run/stop builds on the platform and much more with just an API call. It also helps you to easily integrate the CI/CD platform with other tools.
Both of the platforms have API access. You can learn more about their APIs from the links below:
- CircleCI API v2
- Codemagic REST API
Conclusion
As Codemagic is a mobile-focused continuous integration (CI) and continuous deployment (CD) platform, it has advantages over CircleCI in terms of code signing and publishing of build artifacts. Also, it’s easier to use fastlane with Codemagic than with CircleCI.
Codemagic provides native support for deployment to major platforms, like Google Play Store and Apple App Store. One more way in which Codemagic shines is by making the macOS build platform available as a part of its free plan, allowing you to easily code sign and publish iOS and macOS apps. Premium VMs on Mac Pro are a paid feature, which you can use with either the Pay as you go plan or the unlimited plan.
References
- Getting Started with Codemagic
- Codemagic documentation
- Codemagic integrations
- Codemagic YAML cheat sheet

Souvik Biswas is a passionate Mobile App Developer (Android and Flutter). He has worked on a number of mobile apps throughout his journey. Loves open source contribution on GitHub. He is currently pursuing a B.Tech degree in Computer Science and Engineering from Indian Institute of Information Technology Kalyani. He also writes Flutter articles on Medium - Flutter Community.


