


Written by Rudrank Riyam
Automating the testing and delivery of your code is essential to focus on building the best experience for your user. With a plethora of options in the market, choosing a CI/CD service can be difficult for your project. Although, based on your use case and preferences, you can narrow it down to one service.
To help you make a sound decision, we’ll compare GitHub Actions with Codemagic. This article presents some factors to consider while choosing a CI/CD service.
GitHub Actions is a CI/CD tool to automate your workflows, right from GitHub. You can build, test and deploy your code. Integration with GitHub helps you make code reviews, branch management and issue triaging work all in one place.
Codemagic provides a mobile-focused solution offering an easier code-signing and deployment process. You can automate the whole build, test and release pipeline of your iOS apps to get to the market in record time. It also supports popular frameworks like Android, Flutter, React Native, Cordova and Ionic.
In this post, we’ll compare each using the following seven criteria:
- Setup/onboarding
- Configuring workflow
- Running a build
- Notification integration
- Team collaboration
- Community support
- Pricing
Setup/Onboarding
Onboarding on the CI/CD platform should be as seamless as possible so you or your team can get to work.
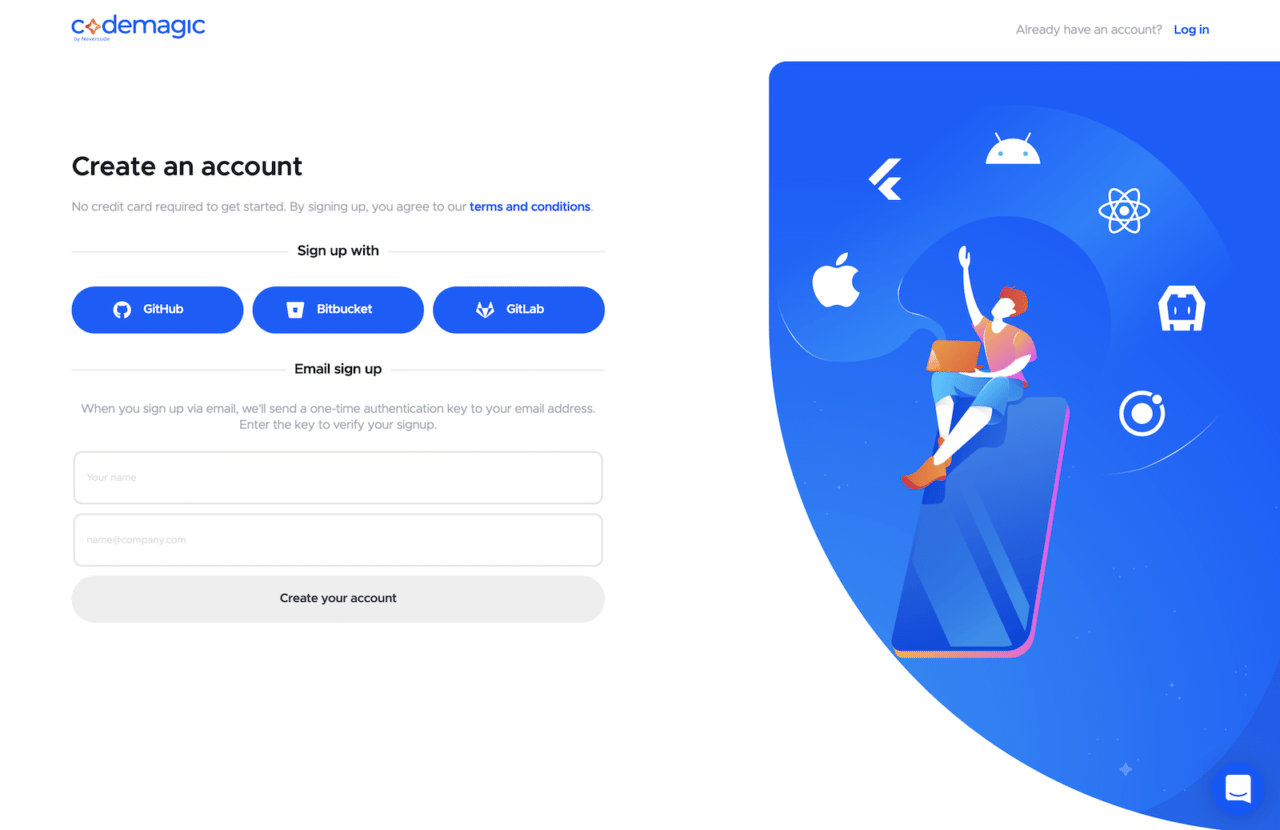
Codemagic
You can sign-up with your mail or use git-based services like GitHub, Bitbucket or GitLab. To connect with GitHub, you provide read access. For Bitbucket or GitLab account, you’ve to provide both read and write access. This is because GitHub integration is done via the GitHub app, while other providers use OAuth authentication, which does not have a scope to allow granular access control. Codemagic pulls all the projects present on the respective account. With a seamless process, you can learn more out here.
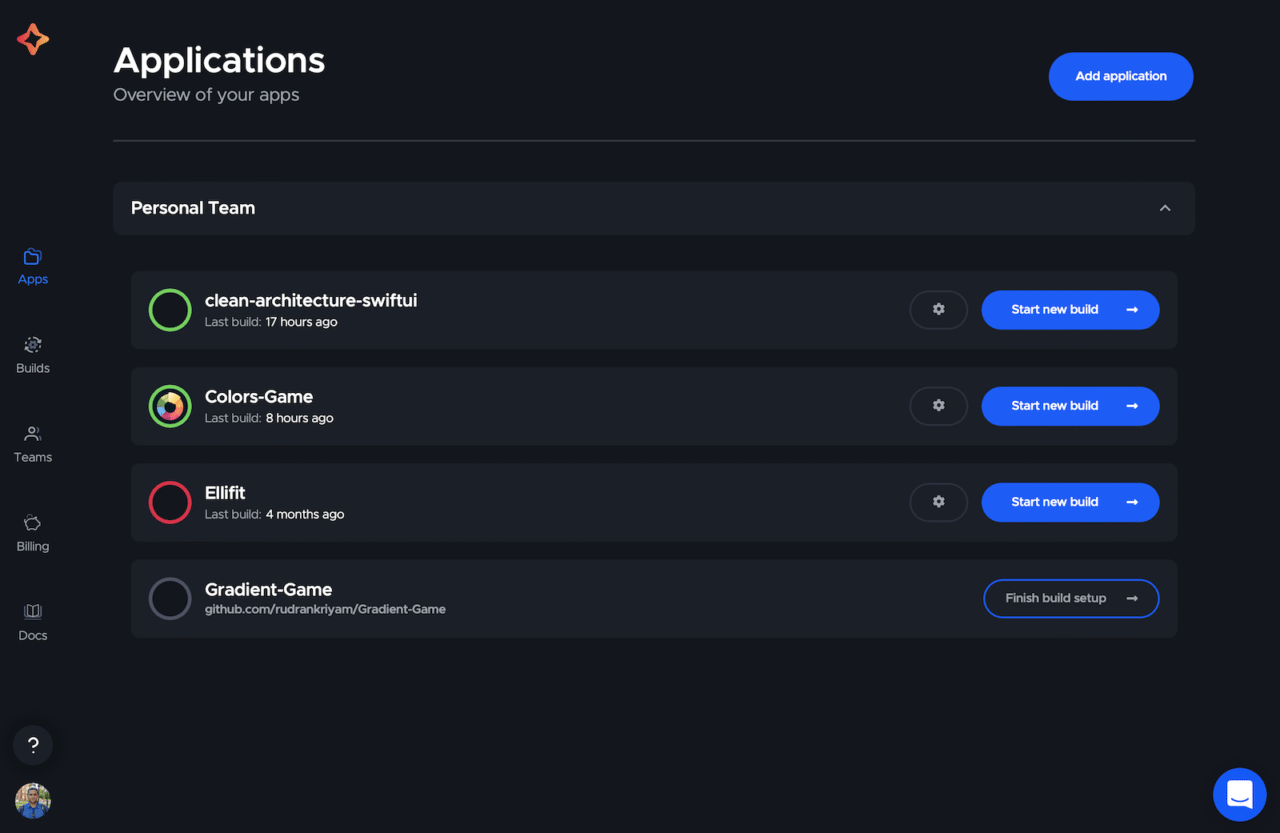
After the authentication, you’re navigated to the Applications page. So, to build any project, go to the page from the left menu, configure the workflow and start the build. All the relevant projects will show under the Apps from various accounts. You can add a new application by selecting the Add Application button.
Codemagic provides sample projects with ready-made templates to get going. These are continuously growing with feedback from the community.

GitHub Actions
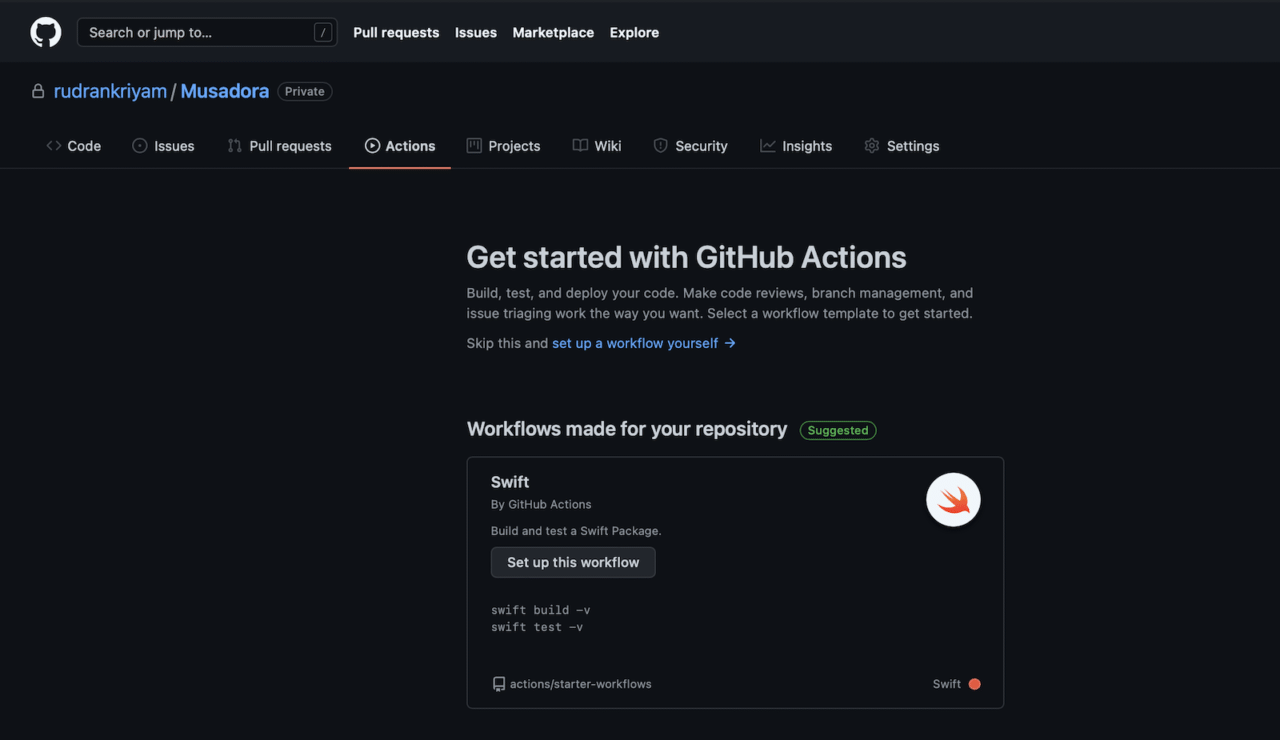
GitHub Actions can be set up with a repository hosted on GitHub. You can connect an Action to any repo via shell scripts. To use repositories hosted in private servers or other git providers is more complicated.
You navigate to your repository and select the Action tab. After setting up the workflow, you’ll find your project’s actions and previous builds on this page. You may create different flows for staging and production as well.
Both provide an easy workflow to integrate the service into our project. GitHub only provides access to the repository hosted on its sites. Whereas, in Codemagic, you can have different projects from different services under one account.
Configuring workflow
For both the services, you can configure the respective YAML file for storing the build configuration.
Codemagic
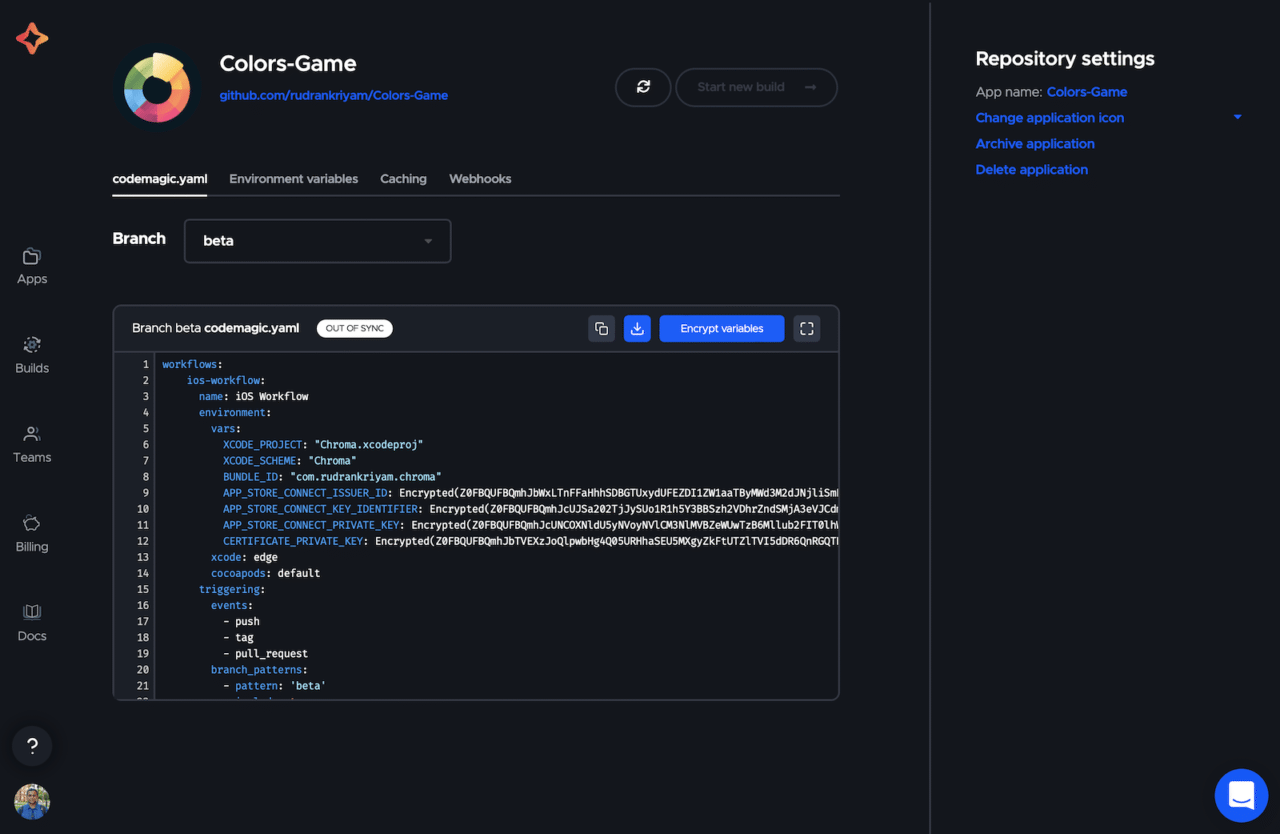
For configuring the build workflow, Codemagic uses the codemagic.yaml file. For macOS and iOS development, Codemagic has example code snippets and sample projects to get you started with. It also includes a detailed template for automatic code signing. You add this file to the root directory of the repository. This stores the configuration and commits it to the repository.
Learn more about setting up automatic code signing here.
Codemagic provides direct support for generating code-signed build artifacts on the platform. You use the codemagic.yaml file to configure the deployment. Check out the following links for code signing and publishing documentation:
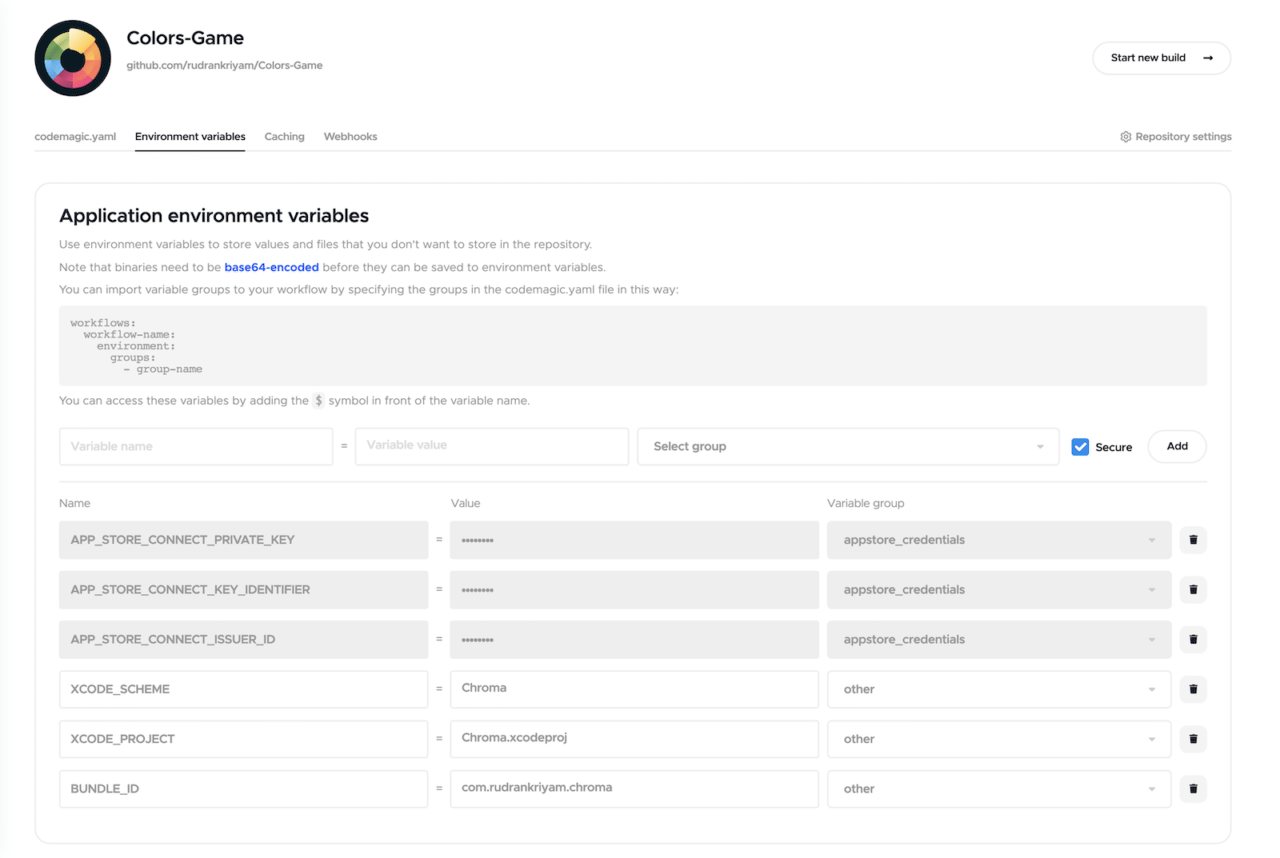
For accessing your App Store account, you can encrypt the variables that’ll be decrypted during the build. You add these under the Environment Variable tab and define an Environment variable group. You can access these variables by adding the $ symbol in front of the variable name. Learn more about Environment variable group here.
An example codemagic.yaml file for testing, automatic code signing, and deploying to TestFlight:
workflows:
    ios-workflow:
      name: iOS Workflow
      environment:
        groups:
          - appstore_credentials
          - certificate_credentials
          - other
        xcode: edge
        cocoapods: default
      triggering:
        events:
          - push
          - tag
          - pull_request
        branch_patterns:
          - pattern: 'main'
            include: true
            source: true

      scripts:
        - name: Testing the project
          script: xcode-project run-tests --project "$XCODE_PROJECT" --scheme "$XCODE_SCHEME"
        - name: Setting up keychain
          script: keychain initialize

        - name: Fetching signing files
          script: app-store-connect fetch-signing-files $BUNDLE_ID --type IOS_APP_STORE --create

        - name: Using system default keychain
          script: keychain add-certificates

        - name: Setting up code signing settings on Xcode project
          script: xcode-project use-profiles --project "$XCODE_PROJECT"

        - name: Incrementing build number
          script: |
            #!/bin/sh
            set -e
            set -x
            cd $CM_BUILD_DIR
            agvtool new-version -all $(($BUILD_NUMBER + 1))

        - name: Building ipa for distribution
          script: xcode-project build-ipa --project "$XCODE_PROJECT" --scheme "$XCODE_SCHEME"

      artifacts:
        - build/ios/ipa/*.ipa
        - $HOME/Library/Developer/Xcode/DerivedData/**/Build/**/*.dSYM

      publishing:
        app_store_connect:
          api_key: $APP_STORE_CONNECT_PRIVATE_KEY
          key_id: $APP_STORE_CONNECT_KEY_IDENTIFIER
          issuer_id: $APP_STORE_CONNECT_ISSUER_ID
          submit_to_testflight: true

        email:
            recipients:
              - rudrankriyam@gmail.com
            notify:
              success: true
              failure: true
Get to know more about the
codemagic.yamlfile here.
Do note the Xcode version is edge that uses the latest Xcode 13.0. Codemagic is one of the few CI/CD services offering Xcode 13.0. From next month, Xcode 13 will be on the latest channel.
GitHub Actions
It suggests a workflow template based on the repository’s content. In the case of an iOS project, it’ll suggest you build and test a Swift package. This ideally doesn’t help build and test an iOS project. But, if you got a Swift package, you can select this option.
You can skip this and select “set up a workflow yourself” for a blank template. On the right side, you can search for actions in the Marketplace. The Marketplace is big and it is important to make sure you use actions from trusted maintainers.
Select the workflow desired for your project and update the yaml file. You’ll find many actions in the Marketplace for a template workflow. Finally, commit the changes to your repository. For installing an Apple certificate on macOS runners, refer to this guide.
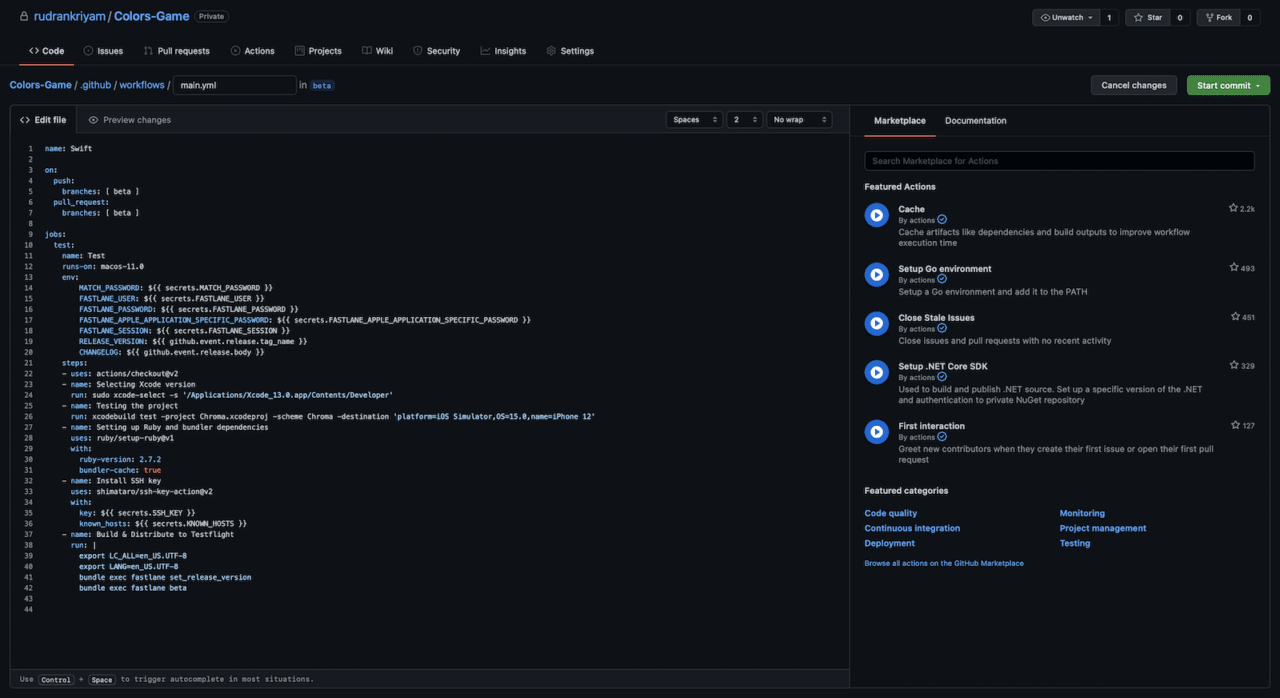
It is cumbersome to add the required scripts, especially for code signing. It is recommended to use fastlane if you’re using GitHub Actions. Also, you should take advantage of the numerous Actions in the marketplace
An example yaml file for testing, automatic code signing, and deploying to TestFlight. It uses two different third-party actions and fastlane:
name: deploy

on:
  push:
    branches: [ main ]
  pull_request:
    branches: [ main ]

jobs:
  test:
    name: Test
    runs-on: macos-11.0

    env:
        MATCH_PASSWORD: ${{ secrets.MATCH_PASSWORD }}
        FASTLANE_USER: ${{ secrets.FASTLANE_USER }}
        FASTLANE_PASSWORD: ${{ secrets.FASTLANE_PASSWORD }}
        FASTLANE_APPLE_APPLICATION_SPECIFIC_PASSWORD: ${{ secrets.FASTLANE_APPLE_APPLICATION_SPECIFIC_PASSWORD }}
        FASTLANE_SESSION: ${{ secrets.FASTLANE_SESSION }}
        RELEASE_VERSION: ${{ github.event.release.tag_name }}
        CHANGELOG: ${{ github.event.release.body }}

    steps:
    - uses: actions/checkout@v2

    - name: Selecting Xcode version
      run: sudo xcode-select -s '/Applications/Xcode_13.0.app/Contents/Developer'

    - name: Testing the project
      run: xcodebuild test -project CICDExample.xcodeproj -scheme CICDExample -destination 'platform=iOS Simulator,OS=15.0,name=iPhone 12'

    - name: Setting up Ruby and bundler dependencies
      uses: ruby/setup-ruby@v1
      with:
        ruby-version: 2.7.2
        bundler-cache: true

    - name: Install SSH key
      uses: shimataro/ssh-key-action@v2
      with:
        key: ${{ secrets.SSH_KEY }}
        known_hosts: ${{ secrets.KNOWN_HOSTS }}

    - name: Build & Distribute to Testflight
      run: |
        export LC_ALL=en_US.UTF-8
        export LANG=en_US.UTF-8
        bundle exec fastlane set_release_version
        bundle exec fastlane beta
Since Codemagic is focused on mobile, whereas GitHub Actions is mainly utilised by all kinds of development teams, the documentation and videos provided by Codemagic are much more detailed and highlight the issues that mobile developers face when setting up iOS workflows. Hence, configuring the workflow is a breeze relative to GitHub Actions.
Running Build
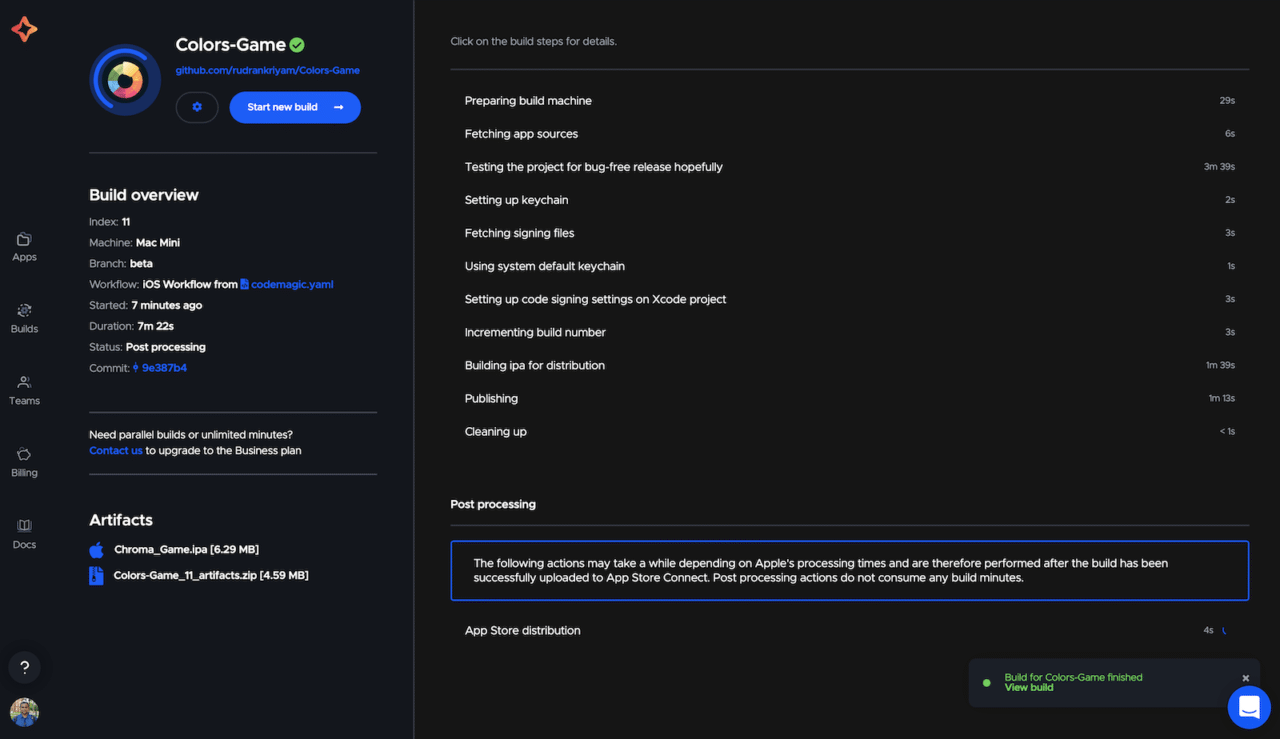
Codemagic
After configuring the codemagic.yaml file, you start the build process. You can click on the build steps for details. Running builds on Codemagic is simple with visual UI. After all the steps finishes, it processes the build and uploads it on TestFlight. All App Store Connect operations that happen after upload, e.g. adding release notes, submitting to beta review and external testers, are done asynchronously, which is a huge time saver. See details https://blog.codemagic.io/post-processing-of-app-store-distripution/.
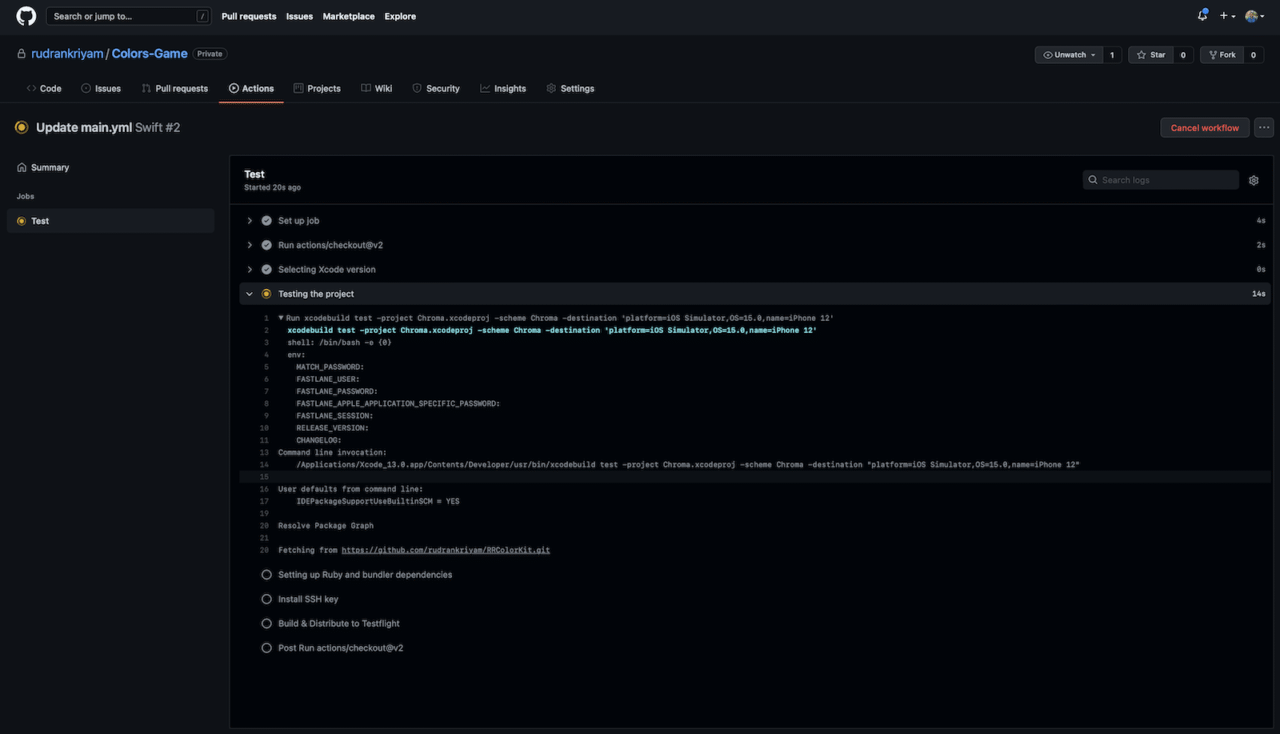
GitHub Actions
After configuring the yaml file, the build process starts on a push, pull request or a release change made in the repository. You can click on the build steps for details.
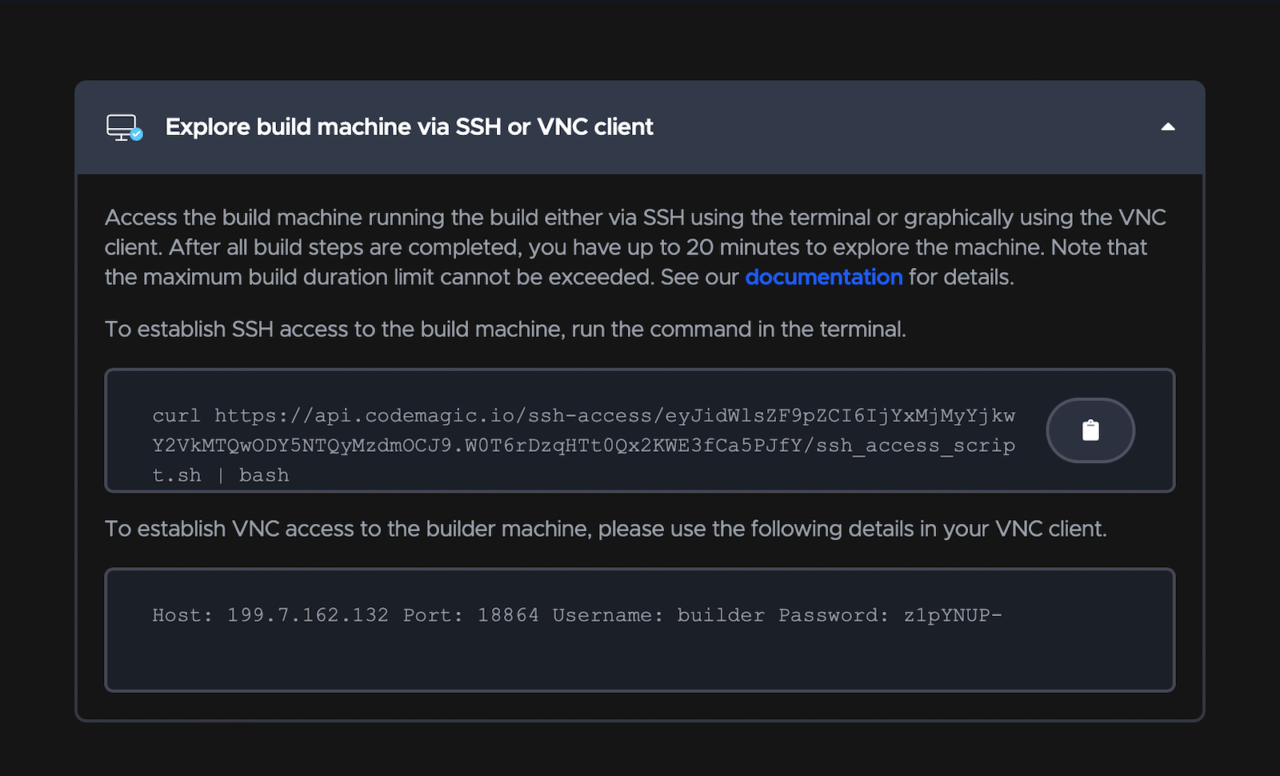
Remote Access
Codemagic
It allows remote access to build machines that helps you with debugging. You can either use SSH or a VNC client. While the build is running, navigate to the project’s build page. You’ll find a tab containing the remote access credentials on the top of the page.
GitHub Actions
Although remote access is not inbuilt, you can use an action from the marketplace for debugging the host system. One of the examples is Debugging with tmate.
Deploying
Both Codemagic and GitHub Actions allow you to publish Apple platform builds to the Apple App Store. They also support the code signing of the artifacts (required to be eligible for publishing). The most painful part is iOS code signing, but both platforms support automation to make the process much easier and faster.
Codemagic
It provides you with an option for automatic code signing by connecting to your Apple Developer Portal account. Codemagic CLI tools contain various utility tools to simplify your builds. We’ve already seen the ease of using run-tests and build-ipa command options of the xcode-project executable path.
GitHub Actions
Although automatic code signing automatically eases the pain, it is more complicated for GitHub Actions as signing certificates, and provisioning profiles aren’t stored in the repository. After getting the IPA file from the workflow, you upload it to the Apple App Store for review by using the upload-app command:
xcrun altool --upload-app -t ios -f "$PRODUCT_NAME.ipa" -u "$APP_STORE_CONNECT_USERNAME" -p "$APP_STORE_CONNECT_PASSWORD"
Notification Integration
Codemagic
Codemagic can publish the generated artifacts to external services. The available integrations currently are email, Slack, and App Store Connect. It is also possible to publish elsewhere with custom scripts.

You can get email notifications on the build status and the generated artifacts. The service provides easy integration with fastlane, Firebase App Distribution, Jira, Trello, Slack, etc.
To set up publishing to Slack, connect your Slack workspace in User settings > Integrations > Slack for personal apps. For team apps, Teams > Your_team > Team integrations > Slack. After authenticating and allowing access, update the codemagic.yaml file as follows -
publishing:
  slack:
    channel: '#channel-name'
    notify_on_build_start: true
    notify:
      success: true
      failure: true
GitHub Actions
You can receive notifications in the inbox of the GitHub web or GitHub for mobile or an email client that uses a verified email address.
GitHub Actions doesn’t have native integration for Slack but you can integrate GitHub for Slack. You can also find an action from the marketplace like Slack Notify. Similarly, you’ll find hundreds of action in the marketplace for you to explore.
Team Collaboration
Codemagic
In Codemagic, you can have a Team account. This makes it easier for a streamlined workflow when many developers work on a project. It provides great integration with GitHub. Also, you can have projects from different git services under one team.
Codemagic also provides a nice feature called public dashboards. Using a public link, the team can share the list of builds, release notes, and artifacts with people outside of Codemagic.
GitHub Actions
If you or your team has projects on GitHub itself, then it offers the best integration with the service provider. You can create an organisation for free with full access to unlimited public repositories.
Community Support
Codemagic
It provides fantastic community support through its Slack Workspace, accessible to the public. Someone may have already asked the question about the issue you faced and got an answer. Developers can ask about issues they may face while using Codemagic. They can even propose features or improvements to the team.
Codemagic has detailed open-source documentation. Developers can refine the documentation or contribute by sending a pull request to the GitHub repository.
Codemagic also maintains a blog that has articles related to its CI service. It includes articles about various features and implementations of the frameworks.
Join the Codemagic Slack workspace here.
GitHub Actions
You can find hundreds of actions created by the open-source community, although there are a limited ones related to Apple platforms development. If you face an issue, there are chances you may find them under Issues of that particular action. Overall, the support is relatively not at par with Codemagic as the latter has a dedicated team to help you with your queries..
GitHub Actions has detailed open-source documentation as well. Developers can refine the documentation or contribute by sending a pull request to the GitHub repository.
Pricing
Both platforms have free and paid options. Let’s do a quick comparison between the two.
Codemagic
The starter free plan is ideal for personal or hobby projects with everything to get you started. After that, you may opt for the pay-as-you-go plan.
The free plan offers the following:
- 500 build minutes per month
- 120-minute build timeout
- 1 concurrent build
- macOS M2 machines by default
The number of concurrent builds can be increased by opting for the pay-as-you-go plan. With Pay-as-you-go plan, you only pay for what you use. Billed on the first of each month for the previous month usage.
Codemagic also has annual plan for teams who need fixed costs.
Learn more about Codemagic pricing plans here.
GitHub Actions
For public repositories, GitHub Actions is free and has unlimited build minutes and storage. The build minutes and storage limit are based on your subscription in the case of private repositories. GitHub Free provides 500MB storage and 2,000 minutes per month. The storage used by a repository is the total storage used by GitHub Actions artifacts and GitHub Packages.
Suppose the account’s usage surpasses these limits, and you’ve set a spending limit above $0. In that case, you’ll pay $0.25 per GB of storage per month and per-minute usage depending on the operating system used by the GitHub-hosted runner. Pro plans get more minutes and storage, and enterprise plans the most.
Also, they’ve got a “minute multipliers rule” where jobs running on macOS runners consume minutes at 10 times the Linux runners’ rate. Using 1,000 macOS minutes would consume 10,000 minutes included in your account. Keep this in mind for mobile-focused development, especially Apple platforms development. You can use a self-hosted runner to overcome this limitation.
Artifact Storage on Codemagic is free, while you’ve to consider storage limits in GitHub Actions. This means if you’ve projects that are sitting idle for some time, you always pay for storage.
Conclusion
Arriving at choosing the ideal CI/CD service for you or the team is definitely a complex task. We hope this article gave a direction to pick the finest one according to your workflow.

GitHub Actions is excellent for open-source projects to take advantage of the unlimited build times. It offering various third-party actions for you to select from.
Codemagic, with its pre-installed tools, is well suited for a mobile app development workflow. It provides easy code-signing and deployment of apps to major services. Also, you can access projects across many git repository services. Third-party integrations help you tailor your workflow to be more productive and streamlined.
Concluding, if setting up a CI/CD workflow focused on mobile apps is your goal, then Codemagic (with support for all significant app development frameworks and tools) is an ideal choice. On the other hand, if you’re an open-source enthusiast, then GitHub Actions might be a better choice for you.
About the author: Rudrank is an aspiring technical author and Apple platforms developer. You can mostly find him on Twitter (@rudrankriyam) or on his personal blog (rudrank.blog).


