


Ideally, apps for iOS are developed and distributed from macOS. It’s tough to imagine the development of apps for the iOS platform without macOS. However, with the combination of React Native and Codemagic, you can develop and distribute iOS apps without using macOS. In this post, we will set up the development and distribution of iOS apps without Mac. We will use Linux and perform custom/manual code signing with Codemagic. You can also use Flutter and Codemagic to develop apps for iOS without a Mac.
Written by Sneh Pandya
Use M1 Mac mini VMs by default with Codemagic🚀 Build faster
Developing React Native apps on Linux
Since 2015, React Native has been widely adopted by mobile developers, and its popularity has been growing ever since. React Native is a cross-platform mobile application development framework that allows the development of iOS and Android apps from a single piece of source code.
React Native is based on JavaScript, and it unlocks opportunities for web developers, as they can also develop mobile apps using React Native. The largest hurdle for developing iOS apps is that native iOS components and macOS are required for development and distribution. However, the inception of React Native has made it possible to develop and distribute apps even for iOS without fully relying on a macOS environment.
Ways to develop React Native apps on Linux
iOS apps can be built and published from Linux with the help of the React Native platform. In this article, we will use the project named ReactNativeAppSigning. The app will showcase how to build Android and iOS apps on Linux using React Native. It is important to note that Linux does not natively allow apps to be built in iOS. Hence, an Android app will be built, and we will use the same codebase to generate and deploy iOS apps with minimal changes compared with the Android version. There are primarily three ways to proceed:
- Build apps using a Linux machine
- Build apps using a Docker container
- Build apps using Codemagic
Build apps using a Linux machine
If you already have a Linux machine handy, then this is the easier way to proceed. To begin, you need to install Android SDK and React Native on the Linux machine. After that, you need to clone the ReactNativeAppSigning repository to proceed.
Build apps using a Docker container
If you do not have a Linux machine handy, using a Docker container is the ideal and easiest way to proceed. If you are already familiar with the Docker ecosystem, you can directly create a Dockerfile that includes Android SDK and React Native already installed. If you are not familiar with the Docker ecosystem, then follow the steps below:
- Set up Docker and create a
Dockerfileandpackage.jsonto populate the React Native environment into the Docker container. Thepackage.jsonfile includes the minimum packages required to run React Native Expo CLI.
{
  "main": "node_modules/expo/AppEntry.js",
  "private": true,
  "scripts": {
    "android": "expo-cli start --android",
    "ios": "expo-cli start --ios",
    "start": "expo-cli start"
  },
  "dependencies": {
    "expo": "30.0.0",
    "expo-cli": "2.2.4",
    "react": "16.3.1",
    "react-native": "https://github.com/expo/react-native/archive/sdk-30.0.0.tar.gz"
  }
}
2. The Dockerfile will help set up and run the React Native environment. Here we will use the official node.js Docker image. It will have dependencies already installed, such as yarn and npm. This configuration exposes the ports and lets the Docker container know that it can access the data on these ports. The package.json and yarn.lock are used to install the dependencies, and app.json is required by Expo as a bare minimum. The Dockerfile for our ReactNativeAppSigning app will look like this:
FROM node:latest
LABEL version=1.2.1
ENV ADB_IP="192.168.1.1"
ENV REACT_NATIVE_PACKAGER_HOSTNAME="192.255.255.255"
EXPOSE 19000
EXPOSE 19001
RUN mkdir /reactnativeappsinging
WORKDIR /reactnativeappsinging
ADD . /reactnativeappsinging
RUN apt-get update && \
apt-get install android-tools-adb
WORKDIR /app
COPY package.json yarn.lock app.json ./
RUN yarn --network-timeout 100000
CMD adb connect $ADB_IP && \
yarn run android
3. The environment variables of the Docker container can also be set up at runtime. This code snippet is just for illustration purposes, but you can customize the Dockerfile as per your needs. Once you have the Dockerfile and Docker installed, you can get the app using Docker.
docker build -t reactnativeappsigning .
docker run -e ADB_IP=192.168.112.101 \
            -e REACT_NATIVE_PACKAGER_HOSTNAME=192.168.1.1 \
            -p 19000:19000 \
            -p 19001:19001 \
 name expo-ios
Once we run these commands, we will have the Docker container running with the React Native environment.

Build apps using Codemagic
When it comes to CI/CD, Codemagic has a lot of exciting things to offer to a developer, including workflows for cross-platform frameworks like React Native. You can easily sign up for Codemagic here (for free):
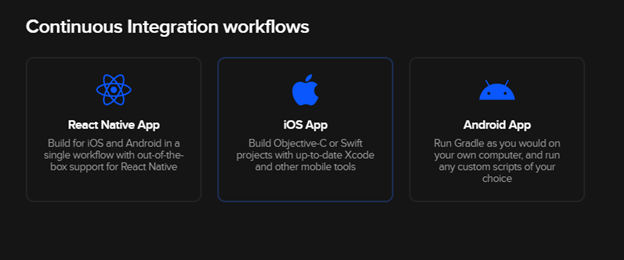
You can use these workflows by creating a new project in Codemagic and simply selecting the React Native App from the options.
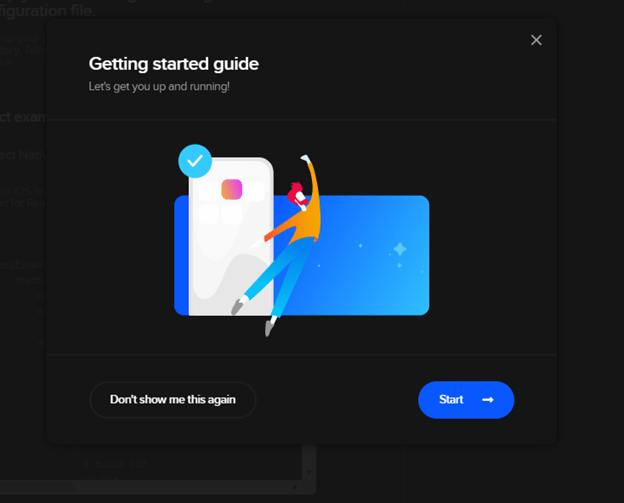
Clicking on it will open up the “Getting started guide” for React Native:
Hitting Next shows us our codemagic.yaml file. We can download this and add it to our local repository. This configures our Codemagic pipelines, so Codemagic knows how to run our React Native build on its build servers.
The next step in this process is to modify our codemagic.yaml file to get it to build our solution:
workflows:
    react-native:
        name: reactnativeappsigning
        environment:
            vars:
                XCODE_WORKSPACE: "{{ ADD WORKSPACE NAME HERE }}"
                XCODE_SCHEME: "{{ ADD SCHEME NAME HERE }}"
            node: latest
        scripts:
            - npm install
            - echo "sdk.dir=$ANDROID_SDK_ROOT" > "$CM_BUILD_DIR/android/local.properties"
            - |
                # build Android
                cd android
                ./gradlew assembleDebug
            - |
                # build iOS
                cd ios
                pod install
                xcodebuild build -workspace "$XCODE_WORKSPACE.xcworkspace" -scheme "$XCODE_SCHEME" CODE_SIGN_IDENTITY="" CODE_SIGNING_REQUIRED=NO CODE_SIGNING_ALLOWED=NO
        artifacts:
            - android/app/build/outputs/**/**/*.apk
            - $HOME/Library/Developer/Xcode/DerivedData/**/Build/**/*.app
In order for our builds to complete successfully, we need to load both our certificate and the mobile provision file from App Store Connect onto the build agent. In this example, I have encrypted the signing certificate as CM_CERTIFICATE, the password for the certificate as CM_CERTIFICATE_PASSWORD, and the provisioning profile as CM_PROVISIONING_PROFILE.
Here’s what we’re doing in this build:
- Running keychain initialize to import our signing certificate into the build agent
- Setting
PROFILES_HOMEto where our mobile provisioning certificate will be - Setting
PROFILE_PATHto a temporary location withinPROFILES_HOME - Writing our
PROVISIONING_PROFILEtoPROFILE_PATH, with a temporary name - Writing our signing certificate (
CM_CERTIFICATE) to/tmp/certificate.p12 - Adding this certificate to the build box’s local certificate store, using
CM_CERTIFICATE_PASSWORDto do so - Running the
xcode-project use-profilescommand - Then, just basically changing into the iOS directory, running
pod install, and usingxcode-project build-ipato build our app, while specifying a workspace and scheme to use
- keychain initialize
- |
  # set up provisioning profiles
  PROFILES_HOME="$HOME/Library/MobileDevice/Provisioning Profiles"
  mkdir -p "$PROFILES_HOME"
  PROFILE_PATH="$(mktemp "$PROFILES_HOME"/$(uuidgen).mobileprovision)"
  echo ${CM_PROVISIONING_PROFILE} | base64 --decode > $PROFILE_PATH
  echo "Saved provisioning profile $PROFILE_PATH"
- |
  # set up signing certificate
  echo $CM_CERTIFICATE | base64 --decode > /tmp/certificate.p12
  keychain add-certificates --certificate /tmp/certificate.p12 --certificate-password $CM_CERTIFICATE_PASSWORD
- xcode-project use-profiles
- |
  # build iOS
  cd ios
  pod install
- xcode-project build-ipa --workspace "ios/$XCODE_WORKSPACE.xcworkspace" --scheme "$XCODE_SCHEME"
Generate code signing assets from App Store Connect
In order to code sign iOS apps, you need an Apple developer account, a development and a distribution certificate, your app ID, and provisioning profiles created for the app. In order to configure manual code signing for the development or debug builds of iOS apps on Codemagic, we need the following things:
- A development or distribution certificate in
.P12format. We can download the certificates and the provisioning profiles by navigating to the Certificates, Identifiers and Profiles section in the Apple Developer Portal. - A downloaded provisioning profile from App Store Connect or the Apple Developer Portal. We need both a certificate and a provisioning profile to code sign our iOS app on Codemagic, so save these files for later use.
- A bundle identifier of the iOS app, which you can again collect from the Apple Developer Portal dashboard.
Update the Xcode project files
After gathering all the code signing assets from the Apple Developer Portal, we will sort and update the Xcode project files so as to use manual code signing with the correct team and provisioning profile. We need to update the following fields in the ios/YOUR_APP.xcodeproj/project.pbxproj file on our repository for the manual code signing to work:
DevelopmentTeam = YOUR_DEVELOPMENT_TEAM_ID
ProvisioningStyle = Manual
PROVISIONING_PROFILE_SPECIFIER = NAME_OF_YOUR_PROVISIONING_PROFILE
We have to make sure to perform the changes in the debug configuration for internal builds and in the release configuration for App Store builds. Once the values are set in project.pbxproj, we are ready to deploy the iOS app from Codemagic!
Set up code signing with Codemagic
When we are ready to distribute the apps, we can easily set up CI/CD for the app using Codemagic—see the Getting Started Guide.
Manual code signing
Manual code signing for the iOS apps in Codemagic was previously available by navigating to Settings → Publish → iOS code signing → Manual to upload your certificate and provisioning profile there. Now the easier approach of automatic code signing has been introduced to make the process hassle-free.
Automatic code signing
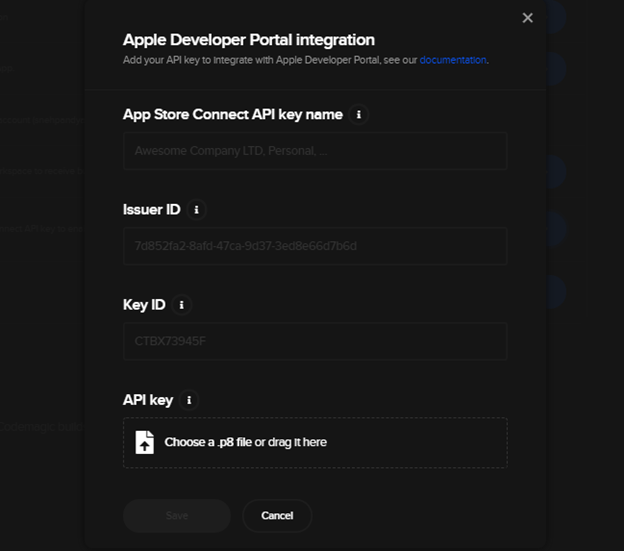
Apple Developer Portal integration for automatic code signing now uses App Store Connect API keys for authentication. This means there will be no more expiring sessions or hassle with two-factor authentication. It is possible to set up several keys for code signing and select the right key in workflow settings. Codemagic has automatically migrated most of their users, but if you’re asked to connect the Apple Developer Portal integration, follow the instructions in the documentation.
Now, when you run the build, you will get the iOS app in the form of the IPA file, which can be deployed on the provisioned devices. We can install this app on any iOS device that has been added to the provisioning profile and test our iOS app. If we see any bugs there, we can always go back to the Linux environment and fix those bugs.
Distribution of the iOS app to the Apple App Store
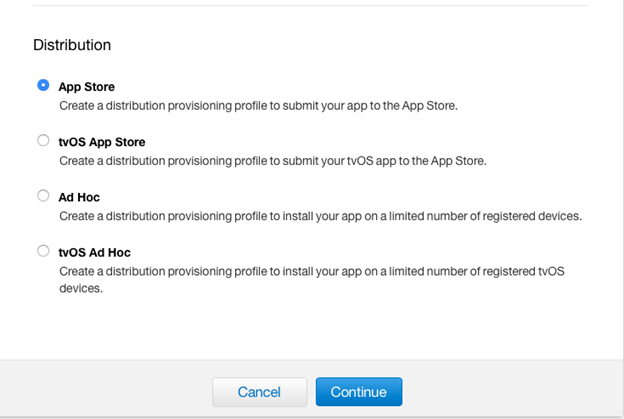
As of now, we have built the debug version of the iOS app for testing internally. Similarly, we can distribute the iOS app to the App Store. When we are ready to deploy the app to the App Store, we need to build the app in release mode using the distribution certificate and production provisioning profile. We can generate the certificate and profiles in a similar way, but we have to make sure to choose App Store distribution while creating the provisioning profile. The distribution provisioning profile will run the iOS app on any device, and we don’t need to add the devices explicitly in the provisioning profile.
Once we have the iOS distribution certificate and the production provisioning profile on hand, we can select the Release mode in the Build section in Codemagic, as shown.
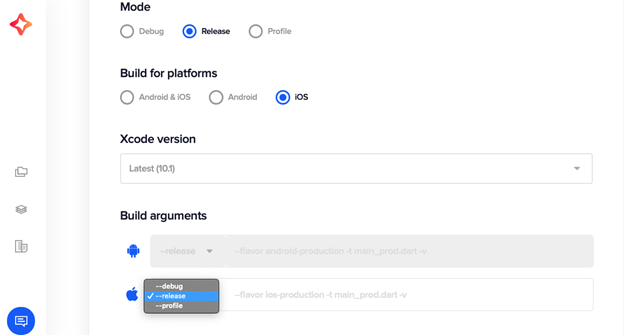
We have also set the build arguments to release instead of debug. In the Publish section, we need to upload the distribution certificate and the production provisioning profile to generate the App Store version of the app.
Once Codemagic generates the build artifacts, we can add the build to App Store Connect, formerly known as iTunesConnect, following the App Store Guidelines and submit the app for review.
Conclusion
With the combination of a cross-platform mobile application development framework and a magical CI/CD solution like Codemagic, owning a Mac for iOS app development isn’t mandatory at all. There might be some issues in debugging the app while developing for iOS, but it’s completely possible to develop and publish iOS apps to the App Store using the combination of React Native and Codemagic.
Sneh is a Senior Product Manager based in Baroda. He is a community organizer at Google Developers Group and co-host of NinjaTalks podcast. His passion for building meaningful products inspires him to write blogs, speak at conferences and mentor different talents. You can reach out to him over Twitter (@SnehPandya18) or via email (sneh.pandya1@gmail.com).


