


Written by Souvik Biswas
In this article, I will be showing how to distribute Native Android project containing Flutter modules using Codemagic CI/CD.
There are two main steps for distribution:
- Code signing
- Publishing to Google Play store
This article is follow-up to how to add FLutter modules to native Android project and test it on Codemagic
Code signing
You have to complete the code signing in order to distribute to your Android app to Google Play store. It helps to identify who is the developer of the app, so that when you push your future updates to the app it can ensure that they are coming from you only.
First of all, for code signing you will need a keystore.
A keystore can hold multiple keys, where each key is identified with its alias. Both the keystore and the alias are protected by passwords.
- Every app must be signed using the same key throughout its lifespan.
- If you’re using Android app bundles, then you will also need to enroll your app into app signing by Google Play.
Generating a keystore
You can create a keystore for signing your release builds with the Java Keytool utility by running the following command:
keytool -genkey -v -keystore keystore_name.keystore -alias alias_name -keyalg RSA -keysize 2048 -validity 10000
Please run this command in the directory where you want to store this keystore file. This is a very important file for an app, as you will need this file in order to publish your future app updates to Google Play store.
The above command will generate a keystore file with the name keystore_name and with an alias name of alias_name. This key will be valid for 10,000 days.
Replace the keystore_name with the name that you want to give to the keystore file. Also replace the alias_name with a name that you want to give to this alias and please remember this alias name as you will be needing this for further configurations.
You can follow this video in order to generate the keystore file:
Preparing your project for code signing
You have to first setup the normal code signing for the native Android project as the native project imports the Flutter module as a dependency.
The example project that I will be using for this tutorial is Court Counter and it is available on GitHub here.
The full tutorial for adding Flutter module to native Android project is here.
Open your native Android project using Android Studio.
Switch to the Project View.
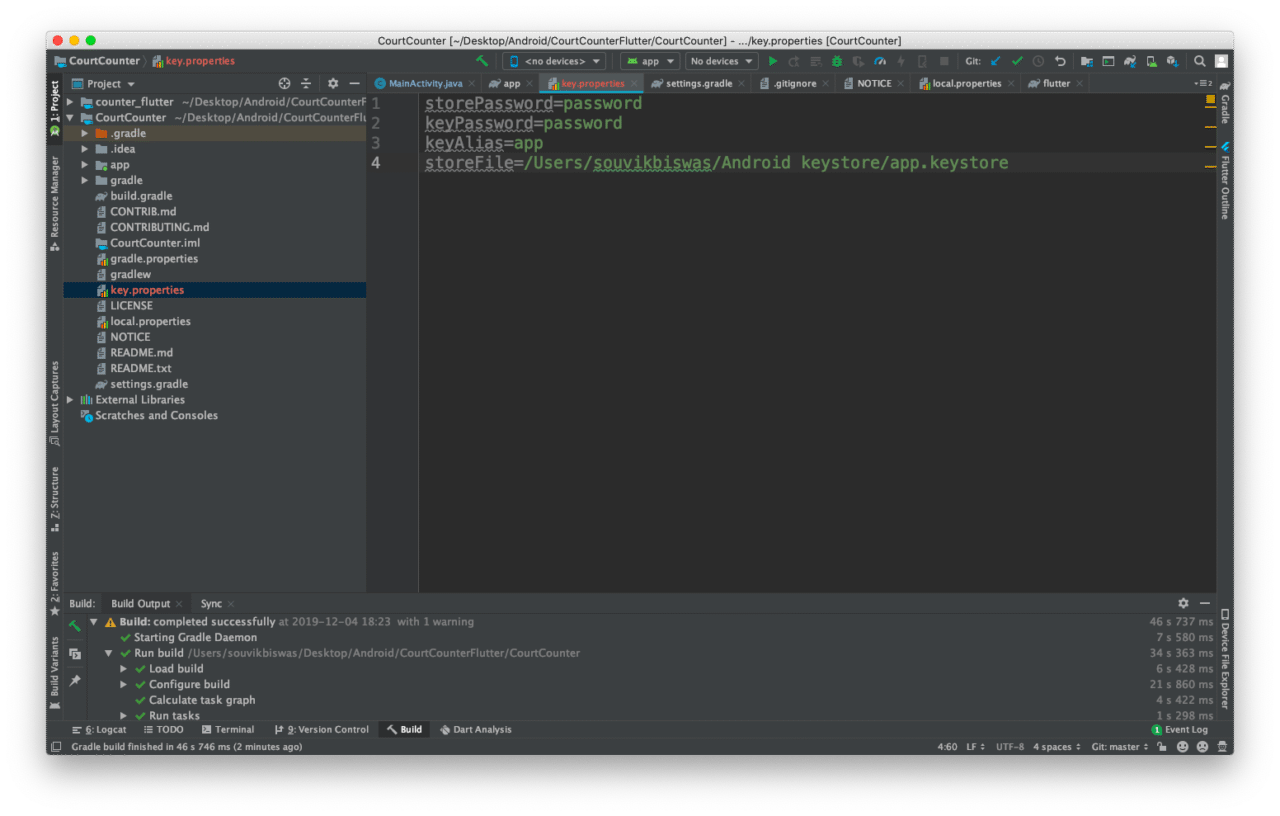
Here, inside your Android project folder create a new file called
key.properties.Added the following to this file:
storePassword=<enter keystore password>
keyPassword=<enter key alias password>
keyAlias=<enter key alias name>
storeFile=<enter .keystore file path>
Repalce the angle brackets and its content with the appropriate values.
Save this file, but don’t commit this file to your Version Control. Add this file to
.gitignoreso that you don’t commit it by mistake.Then switch to the Android View, and go to the app level
build.gradle.Replace the following:
android {With the keystore information from your properties file:
def keystorePropertiesFile= rootProject.file("key.properties")
def keystoreProperties = new Properties()
keystoreProperties.load(new FileInputStream(keystorePropertiesFile))

android {
Add the signingConfigs:
signingConfigs {
     config {
         keyAlias keystoreProperties['keyAlias']
         keyPassword keystoreProperties['keyPassword']
         storeFile file(keystoreProperties['storeFile'])
         storePassword keystoreProperties['storePassword']
     }
 }
Inside buildTypes release, add the following:
buildTypes {
    release {
        //...
        signingConfig signingConfigs.config
    }
}
Now, your project is finally ready for release builds.
Configuring code signing on Codemagic
In order to receive signed builds from Codemagic we need to set up code signing on Codemagic. In this case, as we have to get the signed builds for the native Android project containing the Flutter modules, so we have to use codemagic.yaml for this.
Before downloading the codemagic.yaml file, we have to add some Environment variables using the Codemagic UI.
Login to Codemagic.
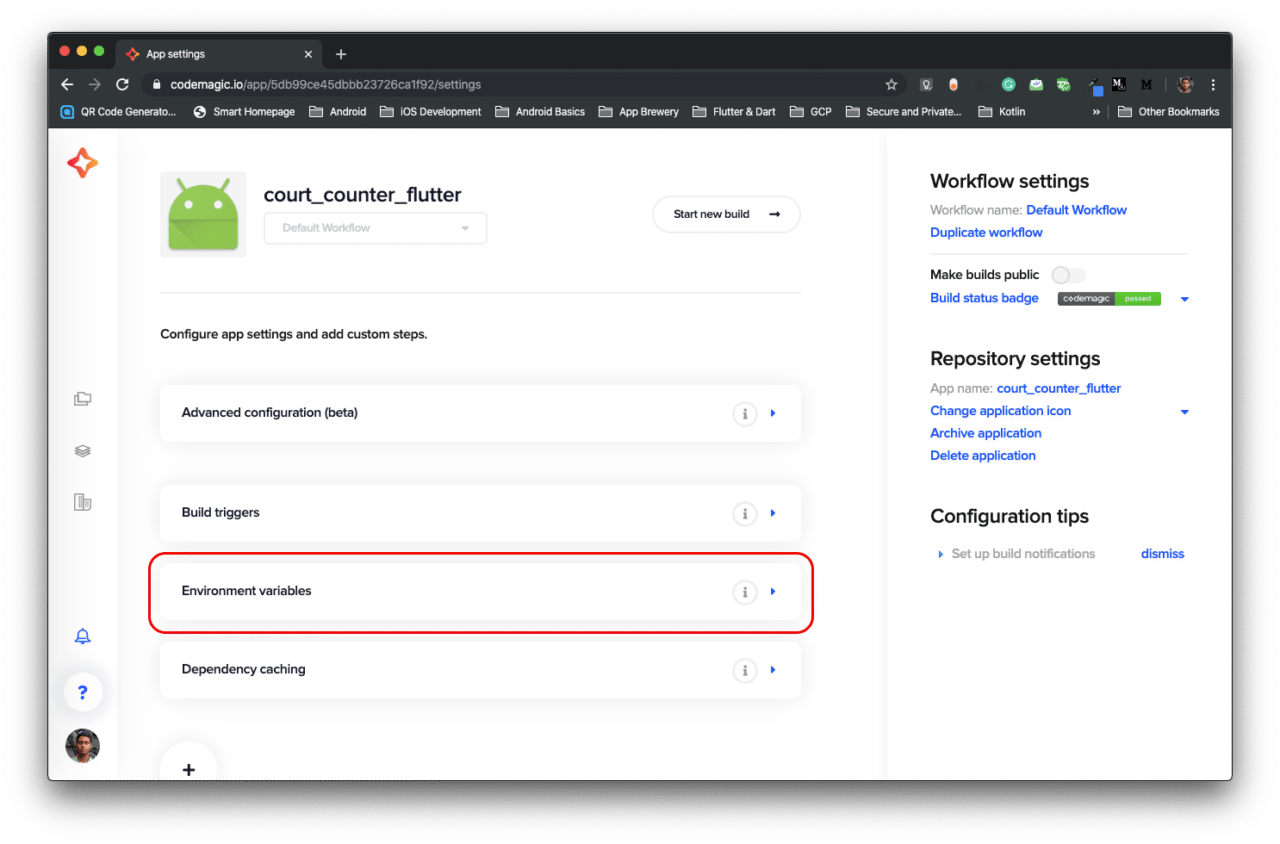
Go to the Settings of your project from the Applications dashboard.
Now, go the Environment variables tab.
Here, you have to add four environment variables with the variable names:
- CM_KEYSTORE (containing the encoded keystore file)
- CM_KEYSTORE_PASSWORD (containing the keystore password)
- CM_KEY_ALIAS_PASSWORD (containing the alias password)
- CM_KEY_ALIAS_USERNAME (containing the alias username)
The
CM_KEYSTOREwill contain the encoded.keystorefile.You can generate the encoded version of the keystore by running the following command in the folder containing the keystore file:
openssl base64 -in app.keystoreNow, copy and paste the generated encoded content to the variable value of
CM_KEYSTORE.Don’t forget to check the Secure checkbox for each field, as these are all very sensitive information.
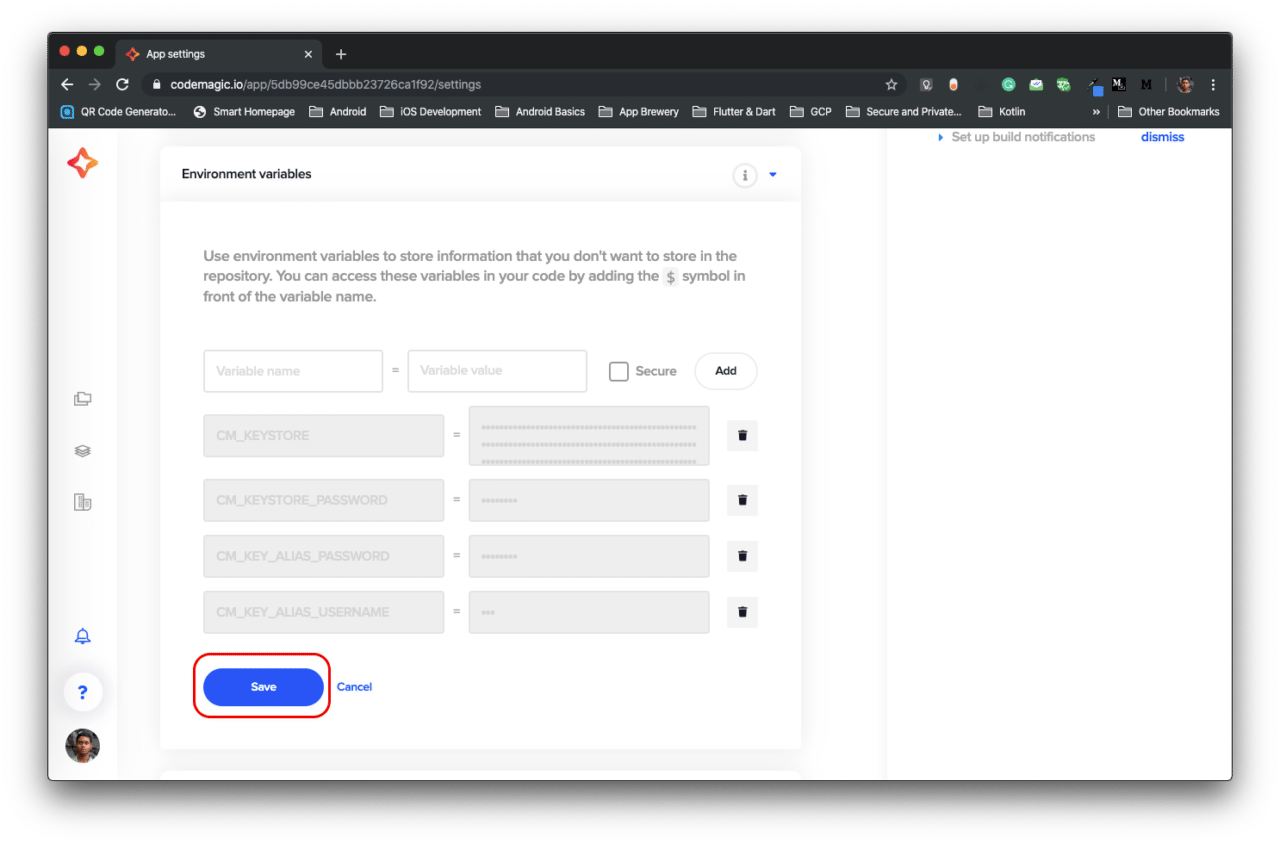
Click on Save.
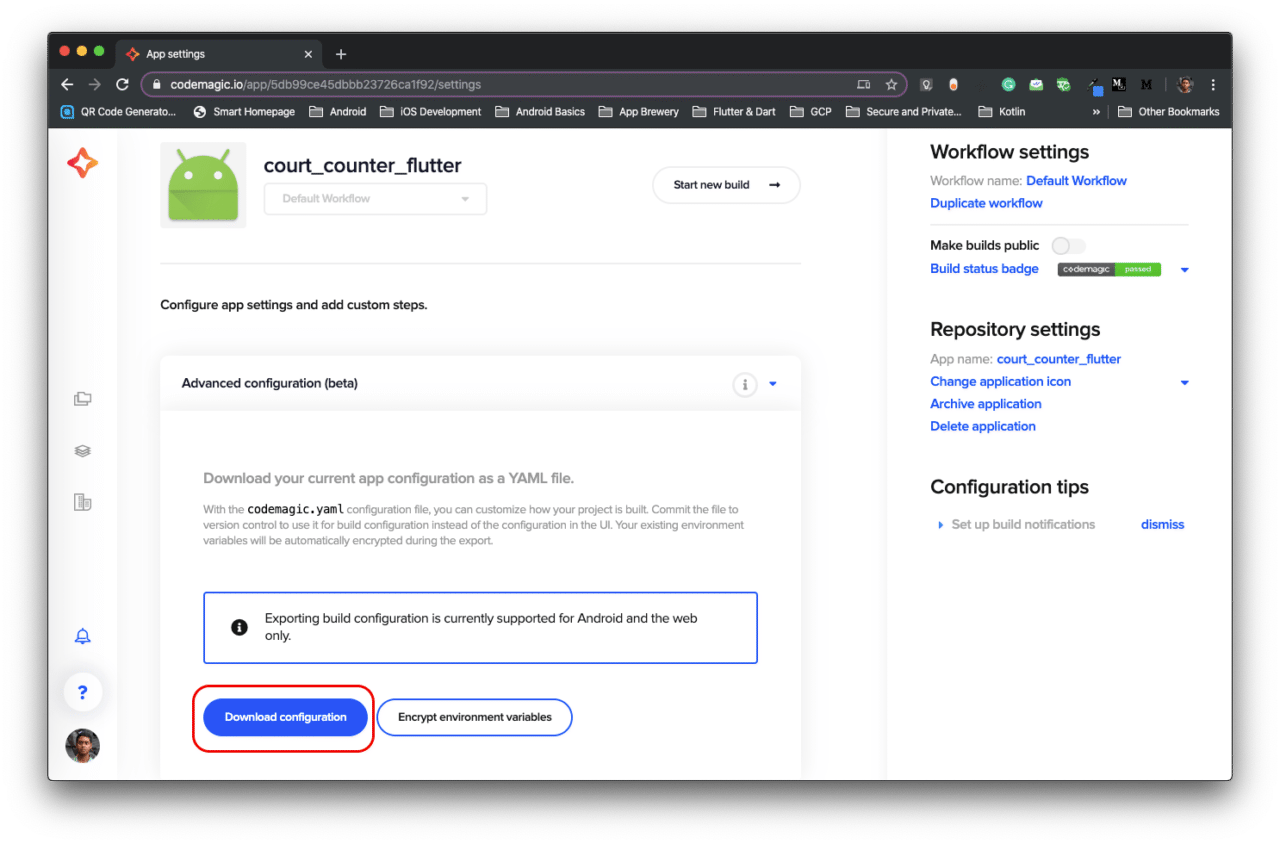
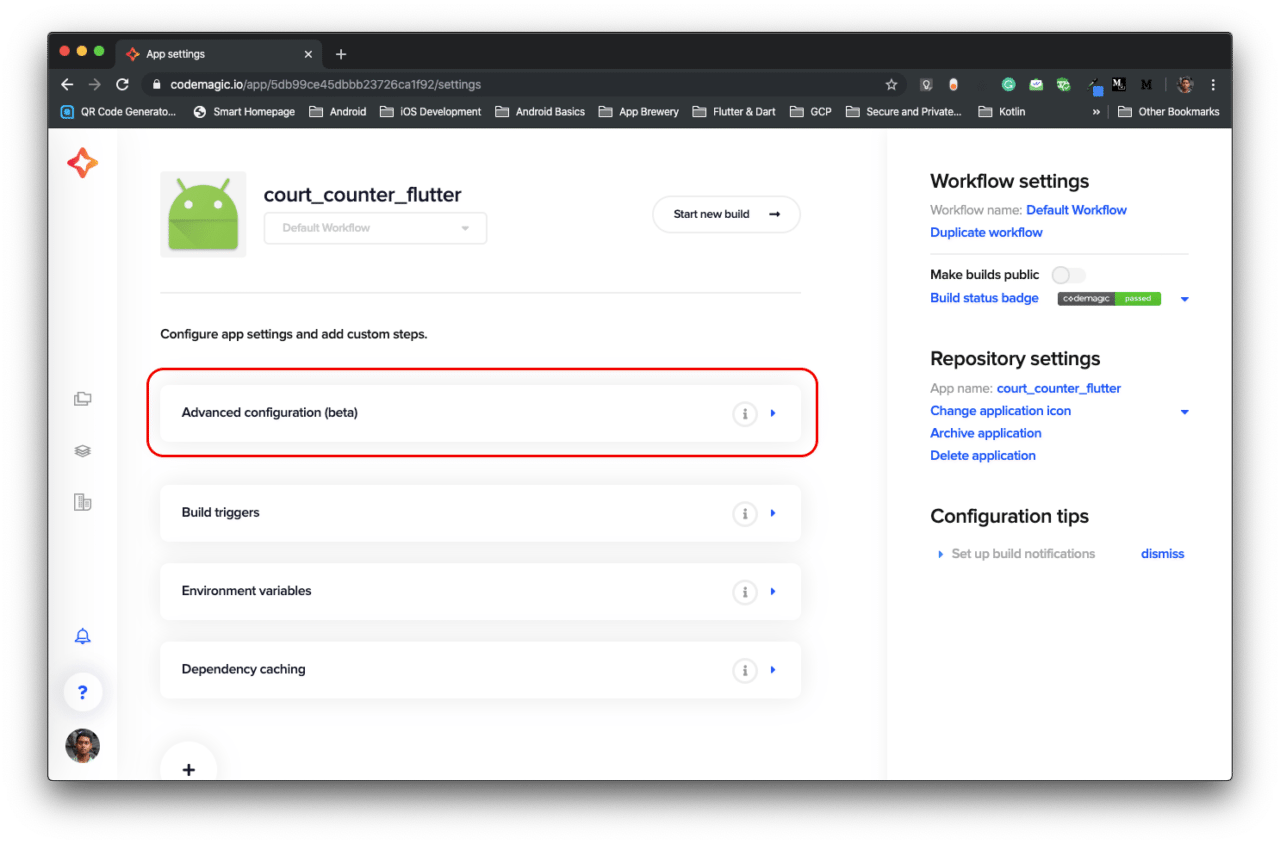
Go to Advanced configuration (beta) and click on Download configuration to download the
codemagic.yamlfile.
Modifying Codemagic YAML
Open the codemagic.yaml file with any Code Editor. You will see that the downloaded file will look like this:
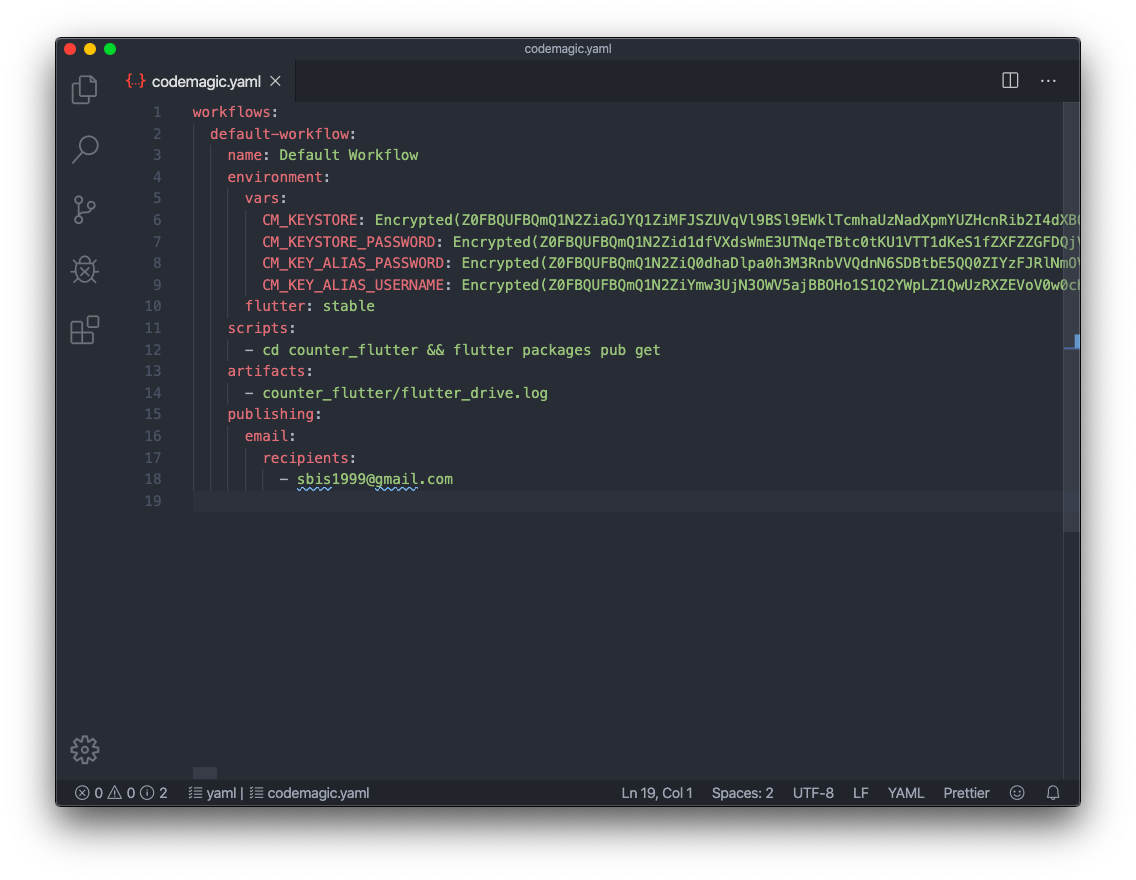
You will see that the file will contain the encrypted version of the Environment variables. We have to make a lot to changes to this file in order to properly configure it for native Android project with Flutter modules.
Replace the contents of the script:
scripts:
  - cd counter_flutter && flutter packages pub get
With this:
scripts:
  - |
    # set up release key.properties
    echo $CM_KEYSTORE | base64 --decode > /tmp/keystore.keystore
    cat >> "$CM_BUILD_DIR/CourtCounter/key.properties" <<EOF
    storePassword=$CM_KEYSTORE_PASSWORD
    keyPassword=$CM_KEY_ALIAS_PASSWORD
    keyAlias=$CM_KEY_ALIAS_USERNAME
    storeFile=/tmp/keystore.keystore
    EOF
  - |
    # set up local properties
    echo "flutter.sdk=$HOME/programs/flutter" > "$CM_BUILD_DIR/counter_flutter/.android/local.properties"
  - cd $CM_BUILD_DIR/counter_flutter && flutter packages pub get
  - cd $CM_BUILD_DIR/counter_flutter && flutter test
  - cd $CM_BUILD_DIR/CourtCounter && ./gradlew assembleRelease
At first, we are generating the
key.propertiesfile as it would be required by our gradle and we had not included it in the version control.Then after generating the
key.propertiesfile, we have to get the packages for Flutter, run Flutter tests and start the Android release build.As we have two folders, one containing the native Android project and the other containing the Flutter module, so we have to run the commands in the correct folders.
Add the following line to artifacts:
- CourtCounter/app/build/**/outputs/**/*.apkThis will retrieve the generated .apk file after build.
The modified
codemagic.yamlfile will look like this: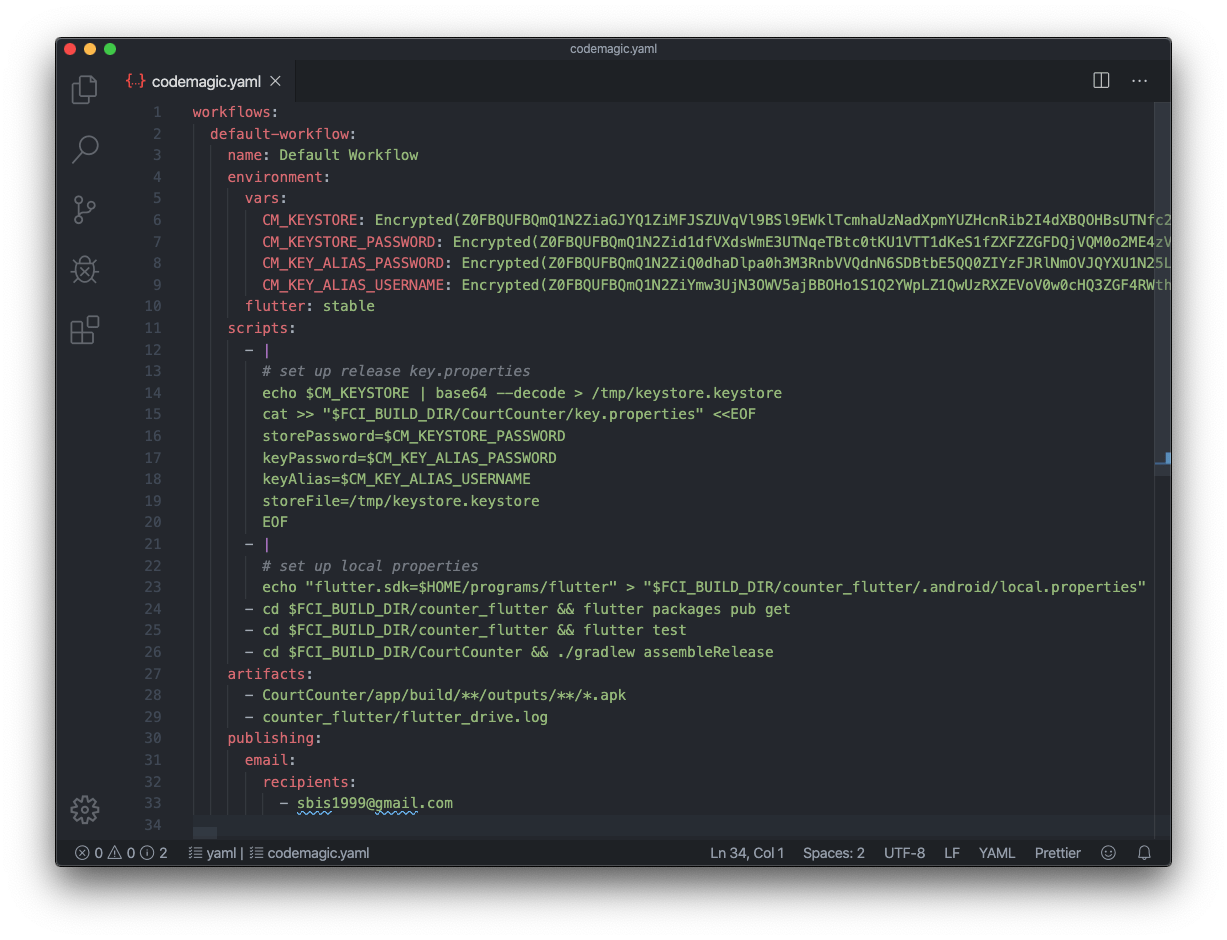
Include the YAML to project
Place the modified codemagic.yaml in the root project directory containing both the native Android project folder and the Flutter module folder. Also commit it to the version control system.
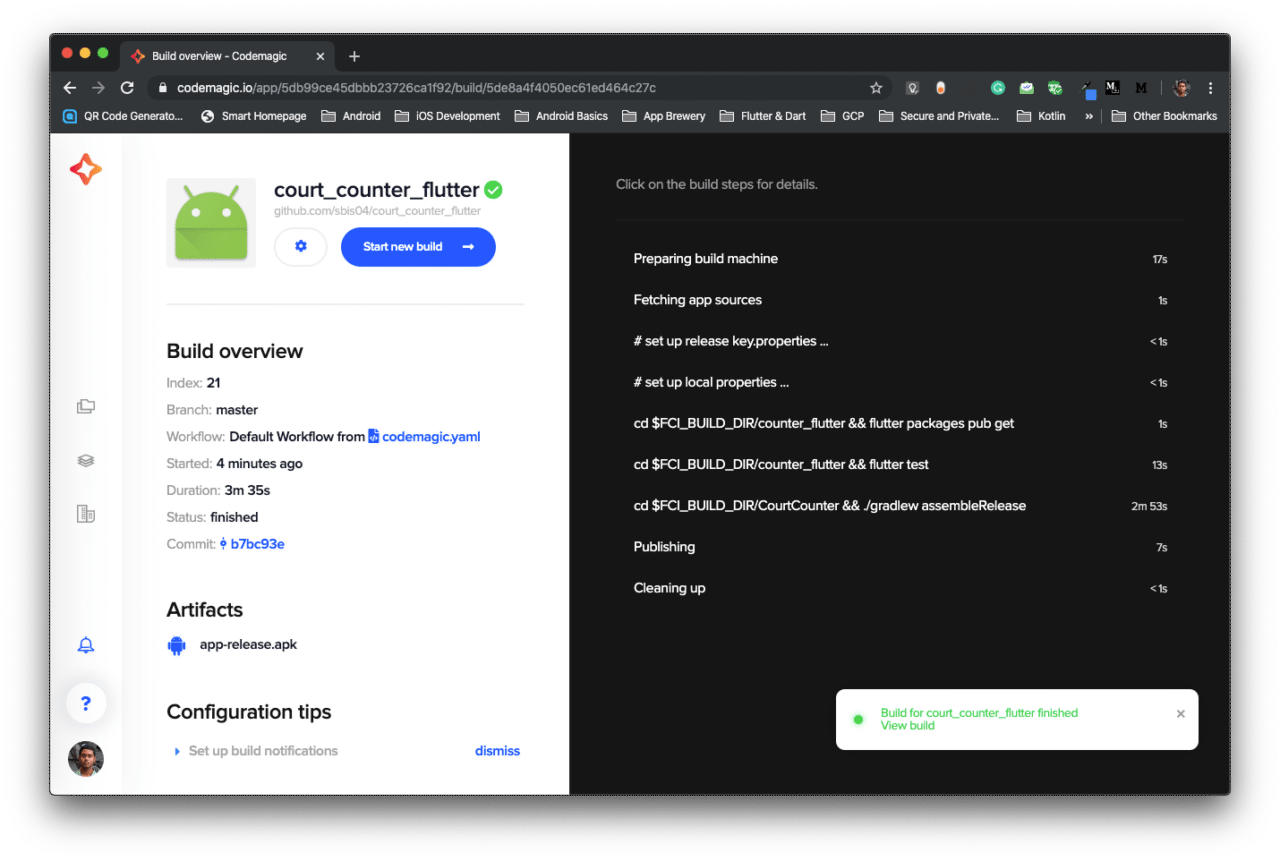
Building on Codemagic
Now, you can use this codemagic.yaml file to generate a release build.
- Just go your project from Codemagic UI and click on Start new build.
- Click on Select workflow from codemagic.yaml and select the workflow from the dropdown menu.
- Click on Start new build to start the build.
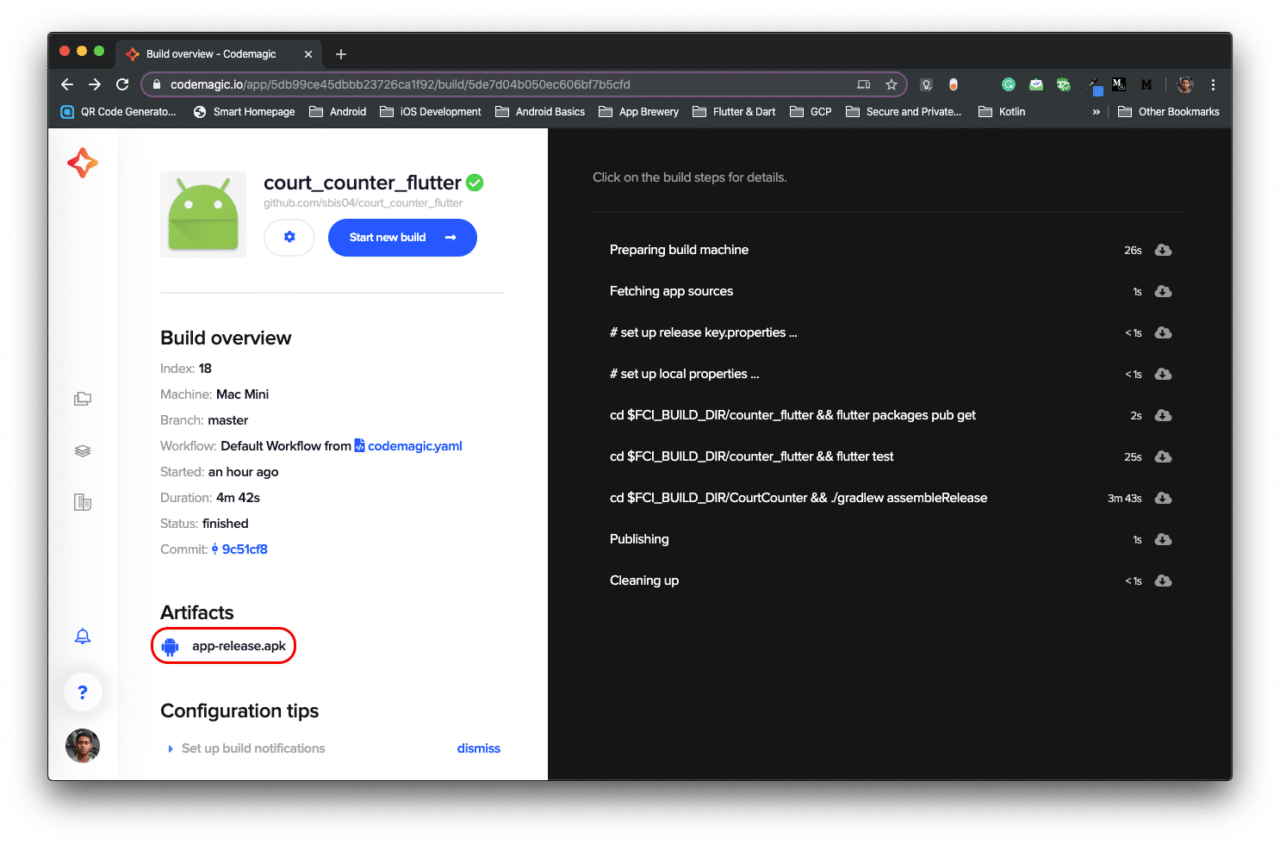
- After the build you will get the generated release version of the apk.
- You can download the release apk from the Artifacts.
Publishing to Google Play store
To setup automatic publishing to the Google Play store from Codemagic, you will first need to configure publishing in Google Play.
NOTE: You have to upload the very first version fo the app manually to Google Play store. You can download the app-release.apk file from the Artifacts and upload it to Play store.
Create a service account
In order to get access for publishing using any CI/CD tool, you will need a service account in Google Play Console. You will also obtain the JSON credentials file after creating the service account required by Codemagic for auto publishing.
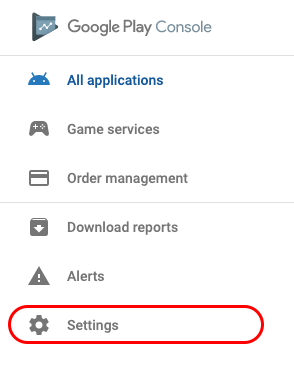
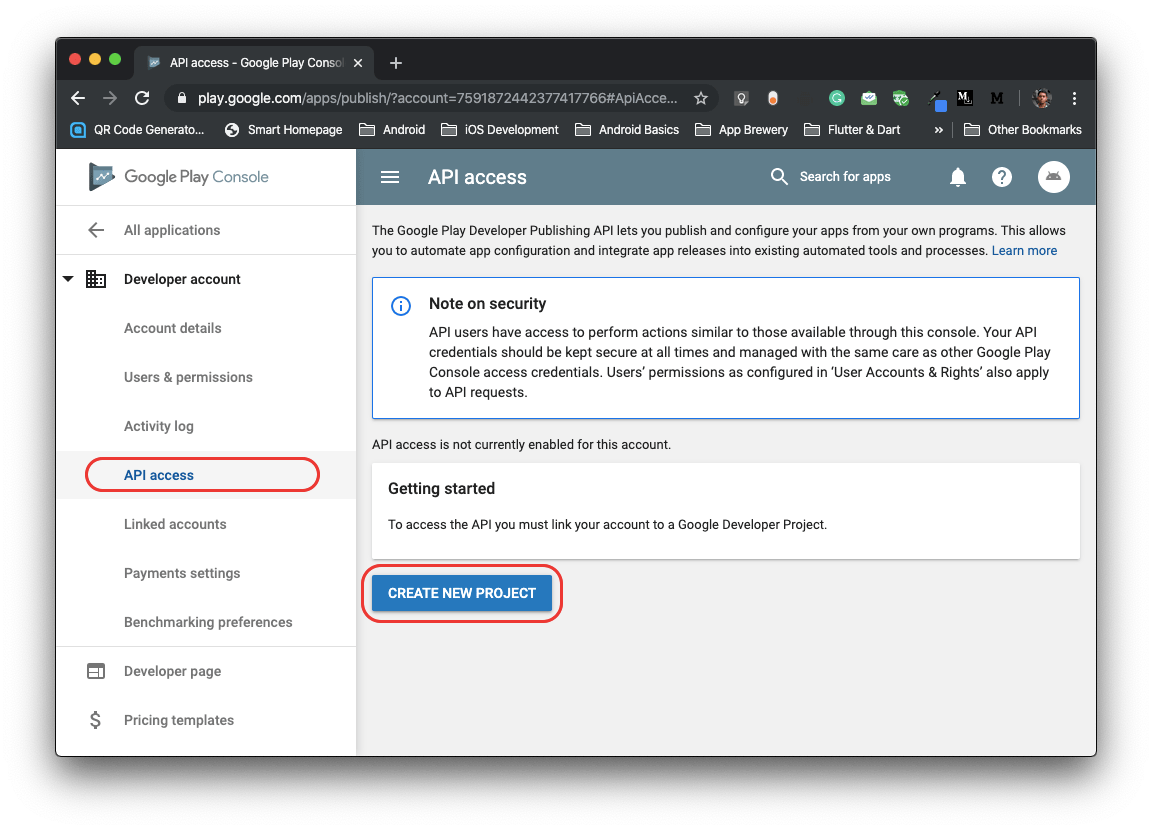
Go to Google Play Console
Navigate to the Settings
Go to the option API access and click on CREATE NEW PROJECT button.
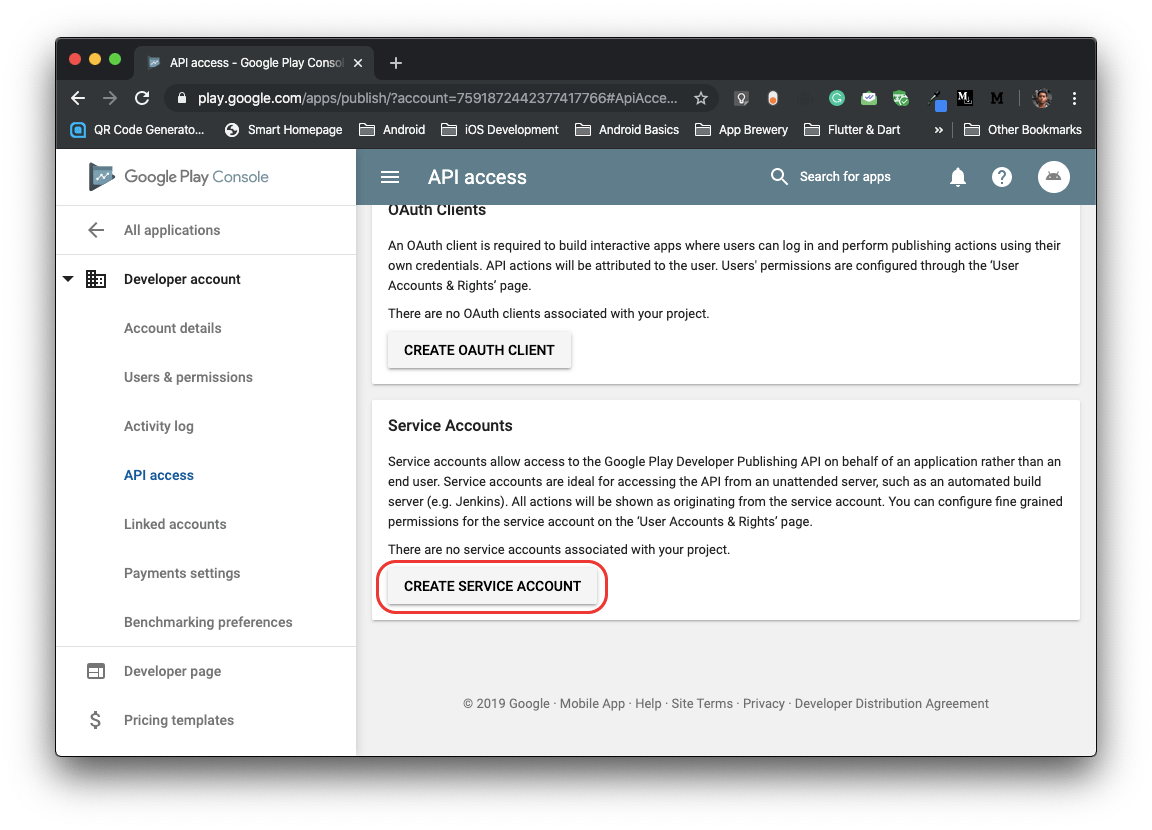
Then click on CREATE SERVICE ACCOUNT button.
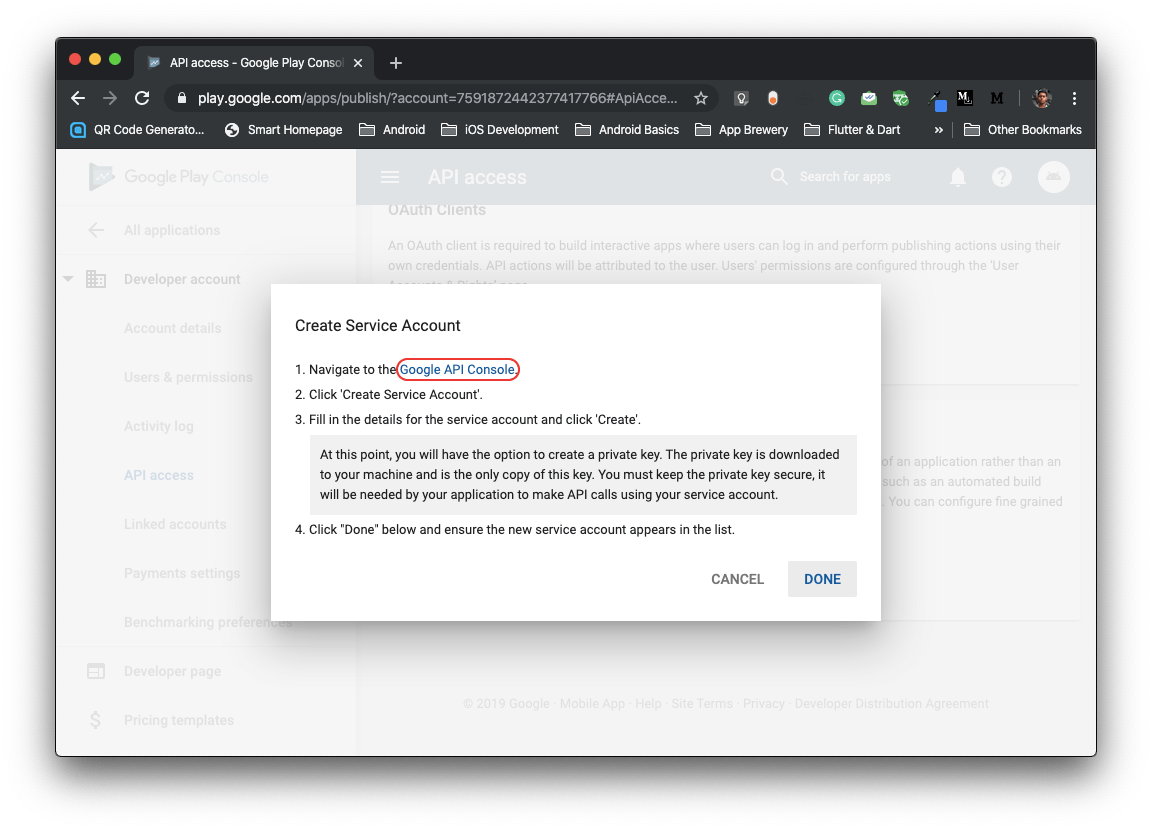
You will see that a dialog box pop-up, click on the link Google API Console given in the first step.
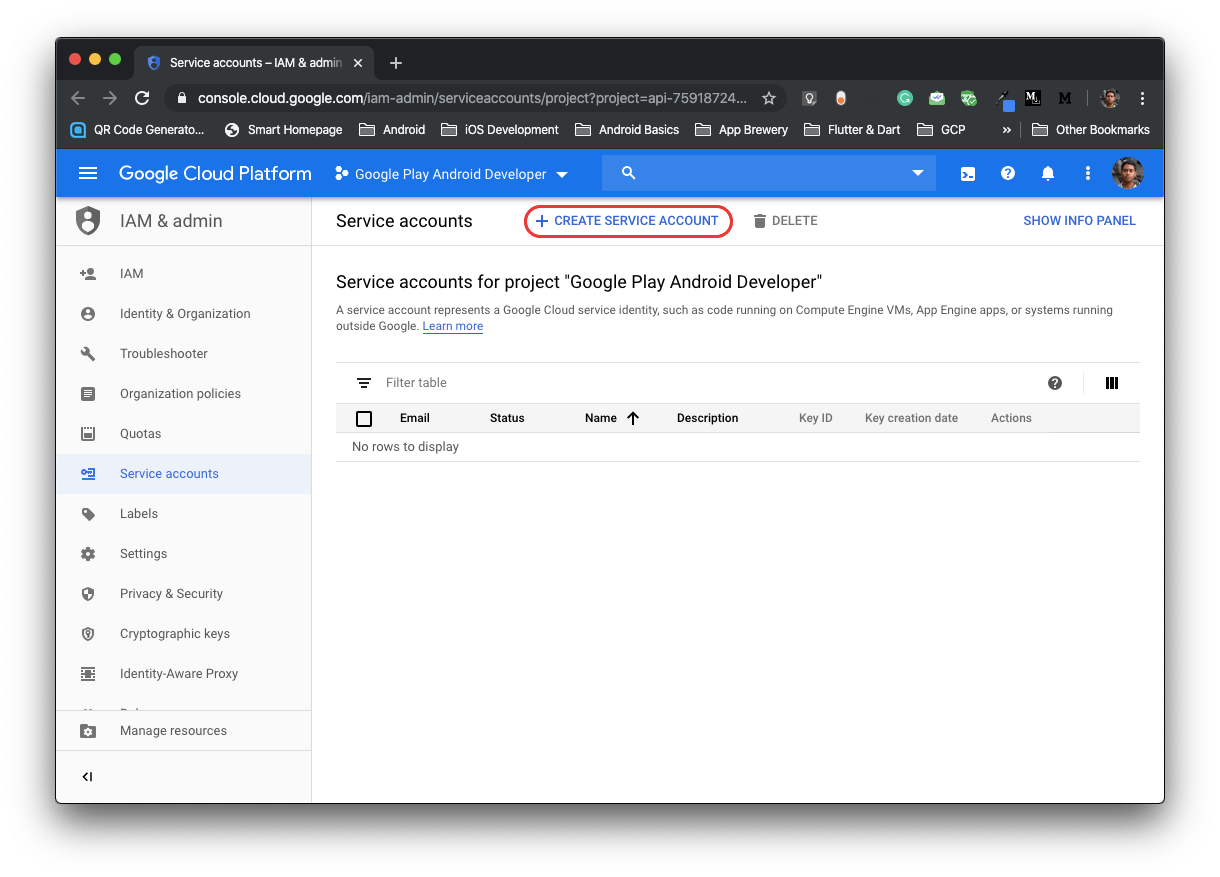
This will lead you to the Google Cloud Platform, inside Service accounts. Make sure that on top, inside the dropdown menu you have Google Play Android Developer selected. Then click on CREATE SERVICE ACCOUNT.
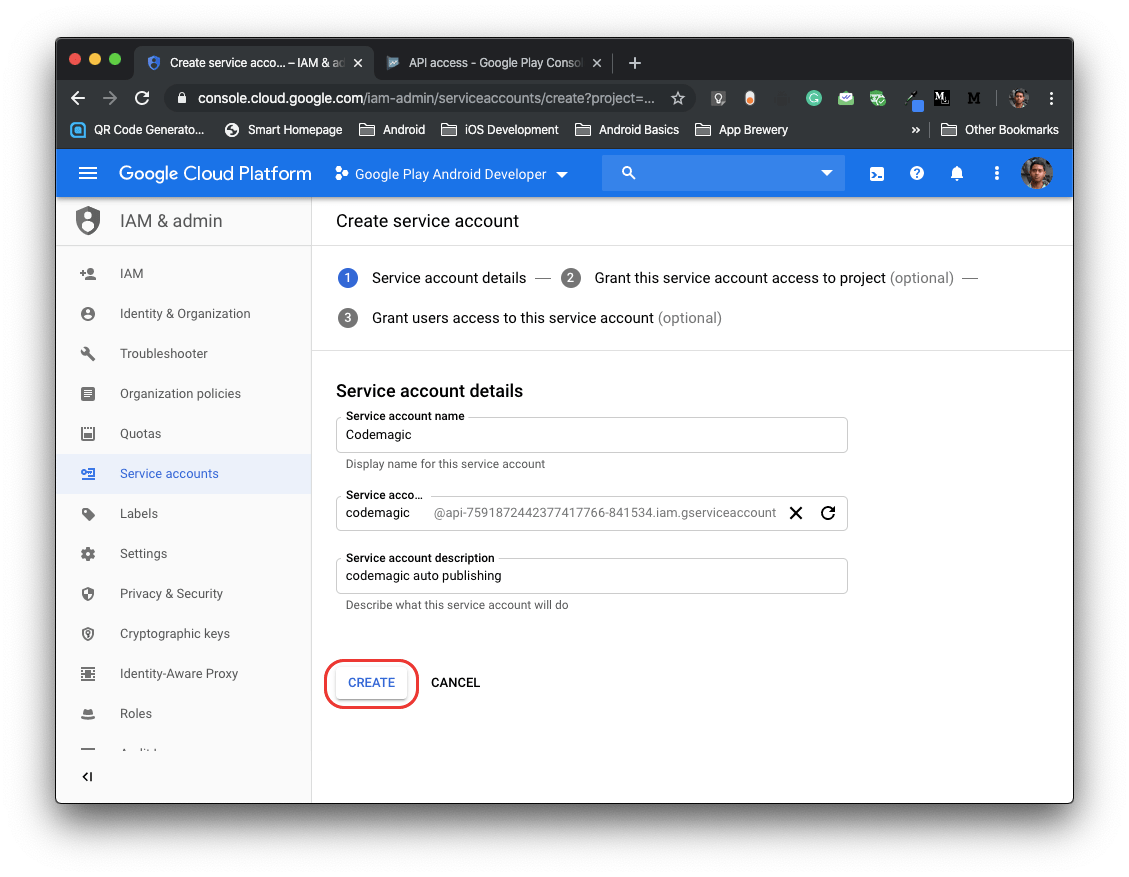
In the first step, you will have to fill the details. Enter the Service account name and its description. Click on CREATE.
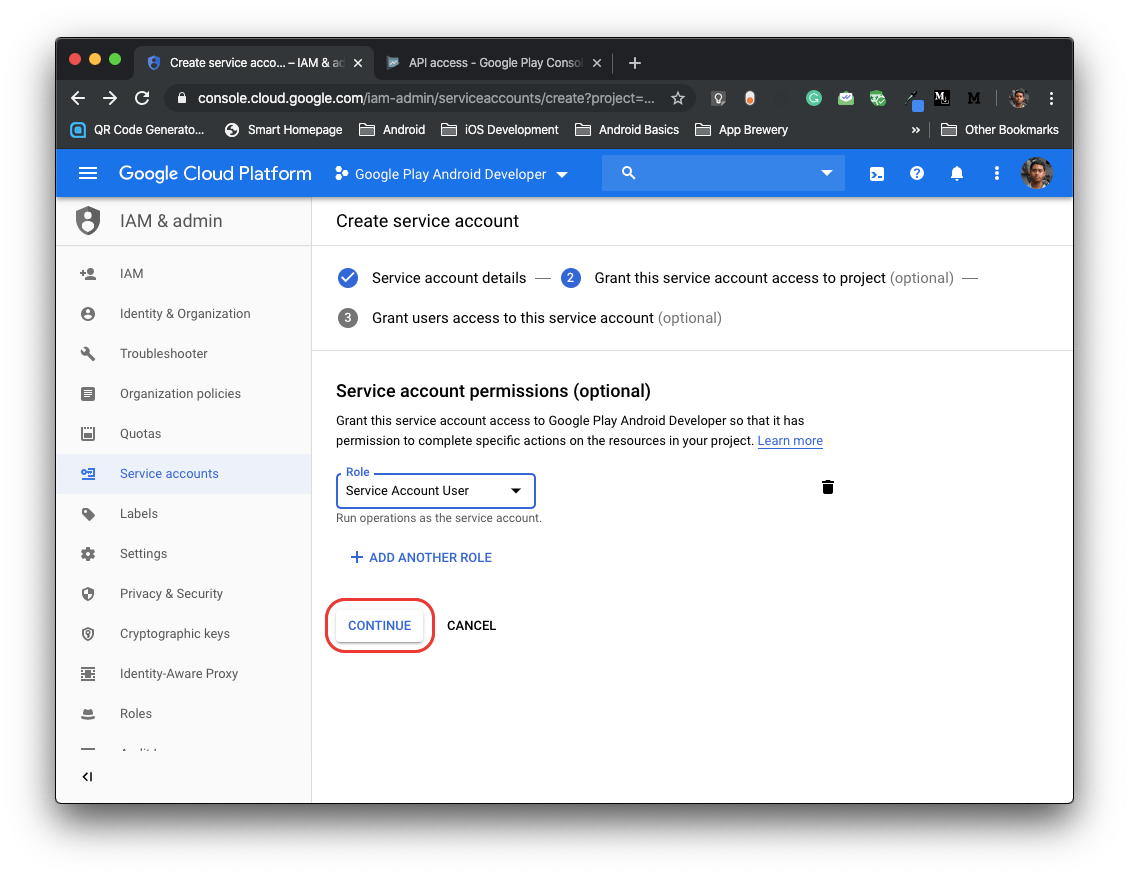
In the second step, you have to select Role from the dropdown menu. Choose Service Account > Service Account User. And click on CONTINUE.
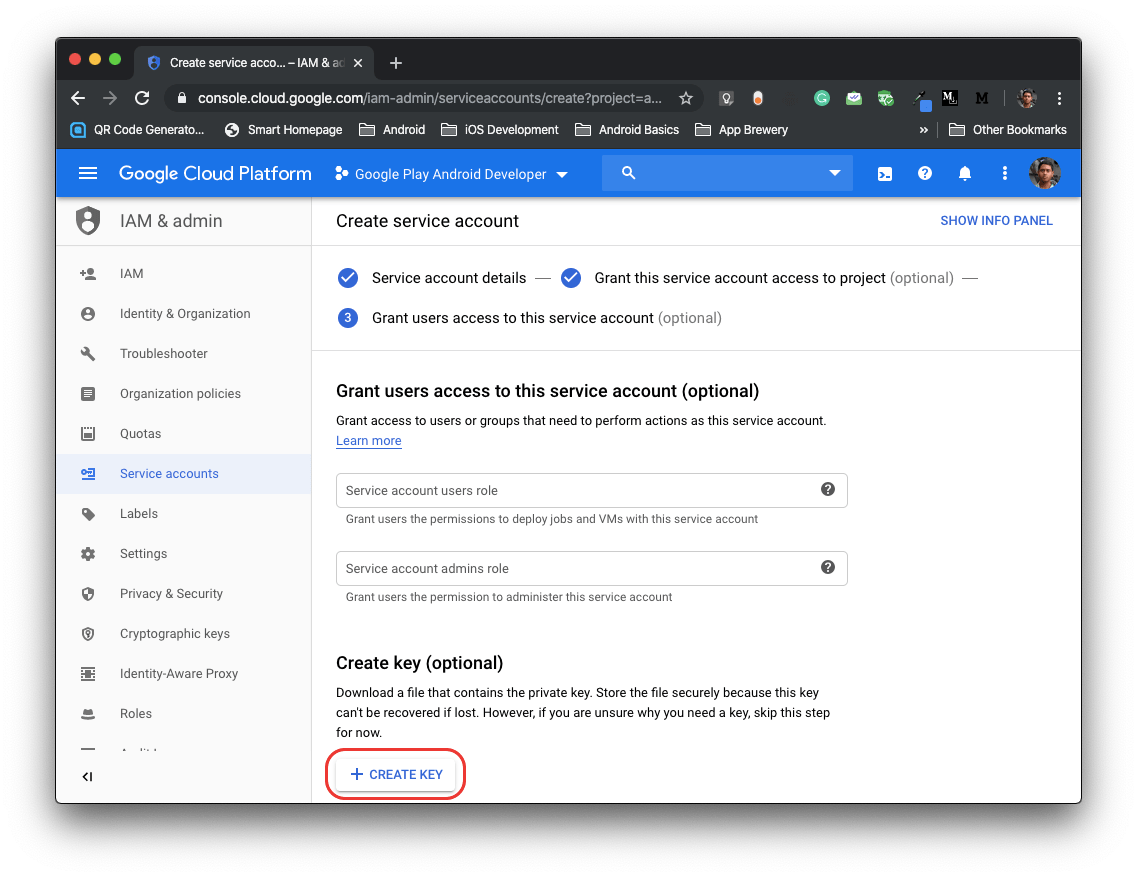
In the third step, click on CREATE KEY button.
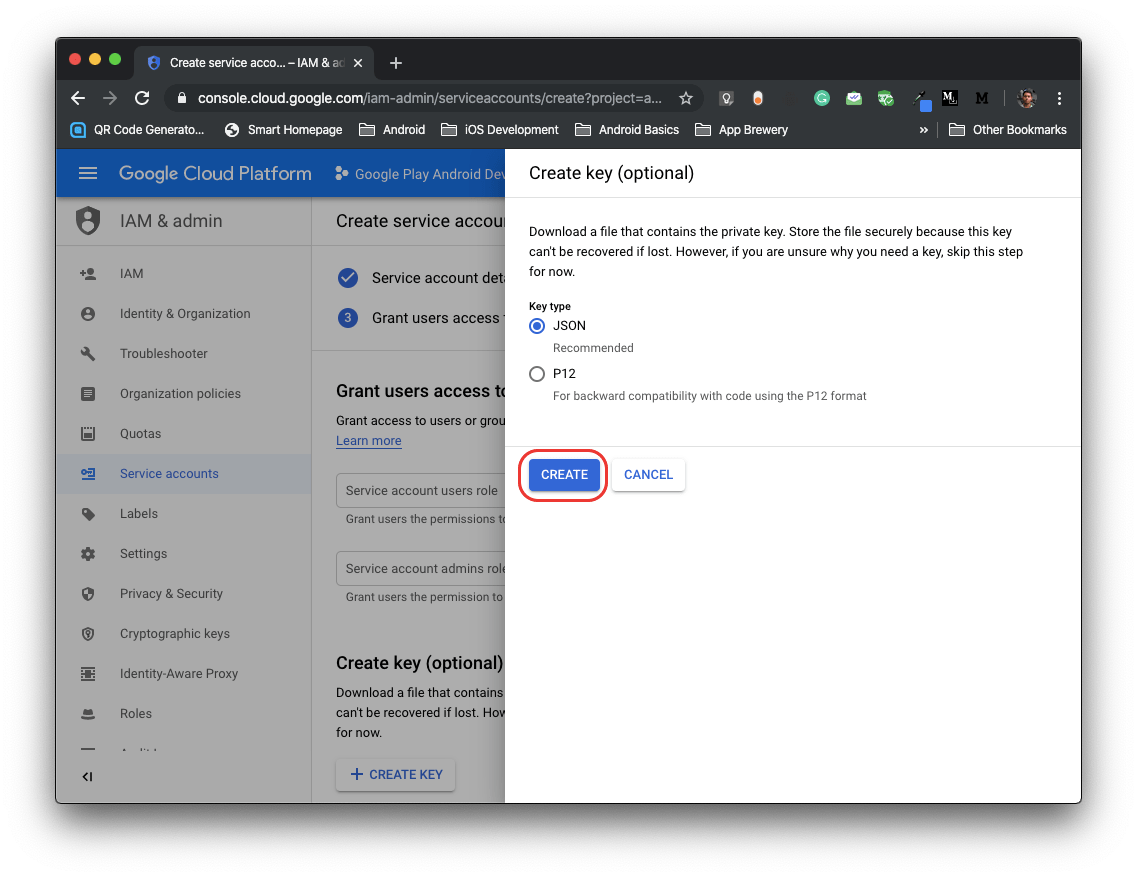
Select JSON and click on CREATE. This will download a private key for this service account. Keep it in a safe place and you will also need this for configuring auto publishing from Codemagic.
Click on DONE.
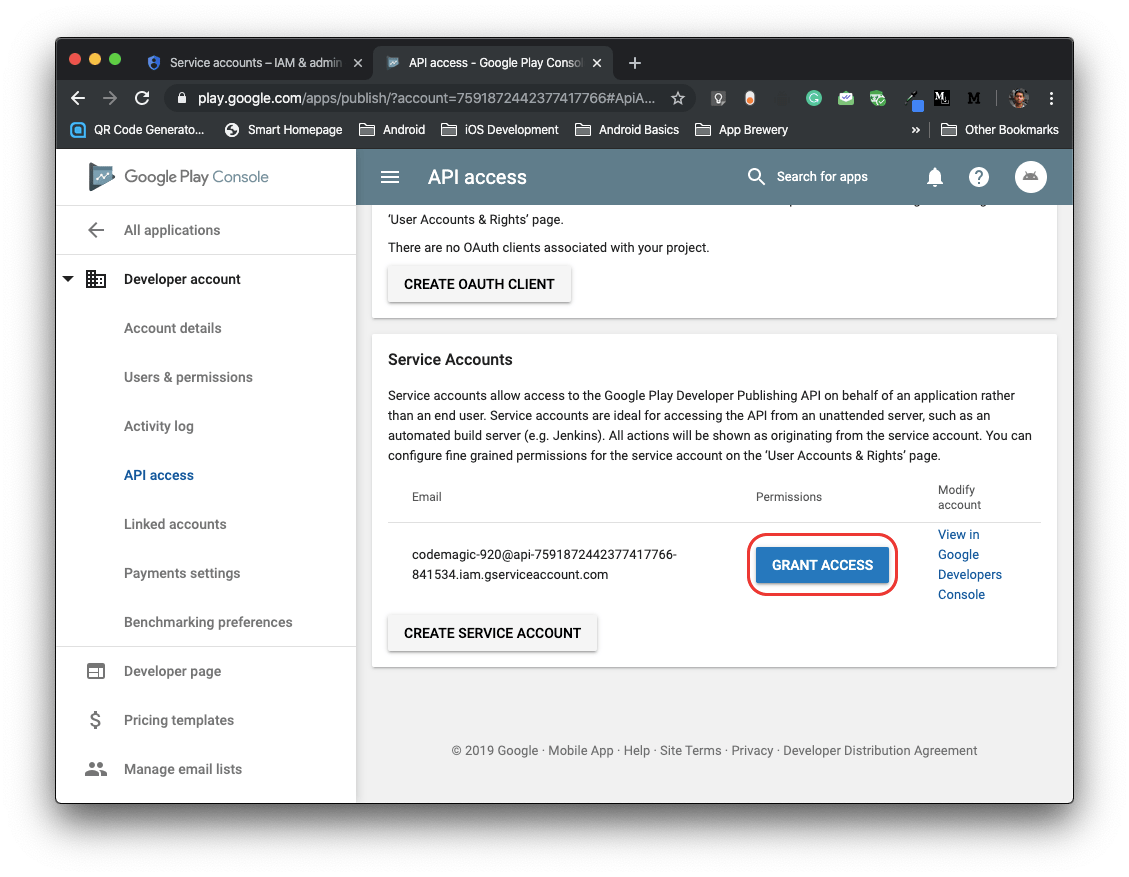
Now, go back to the Google Play Console inside Service Accounts. You will see that a new service account is listed with the name that you created. Click on GRANT ACCESS.
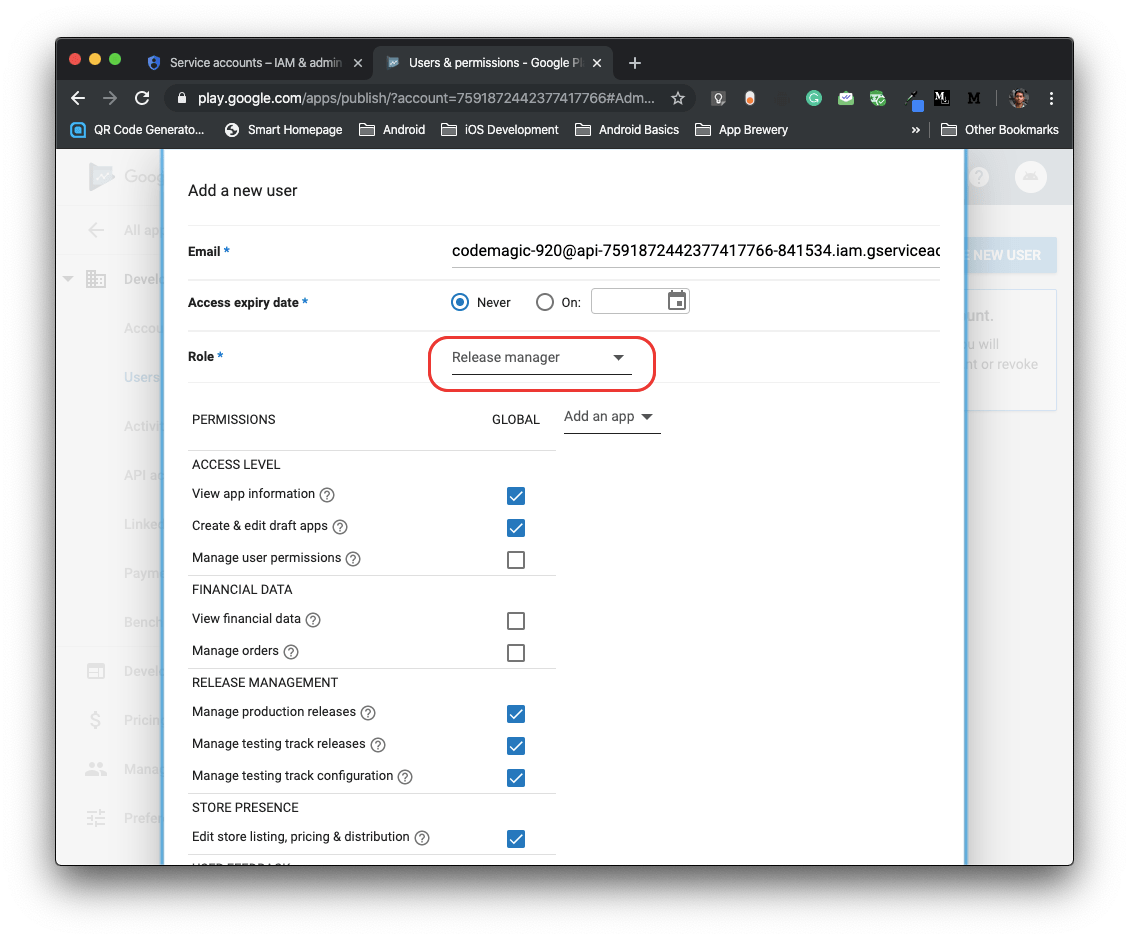
Select Release manager as the Role from the dropdown menu.
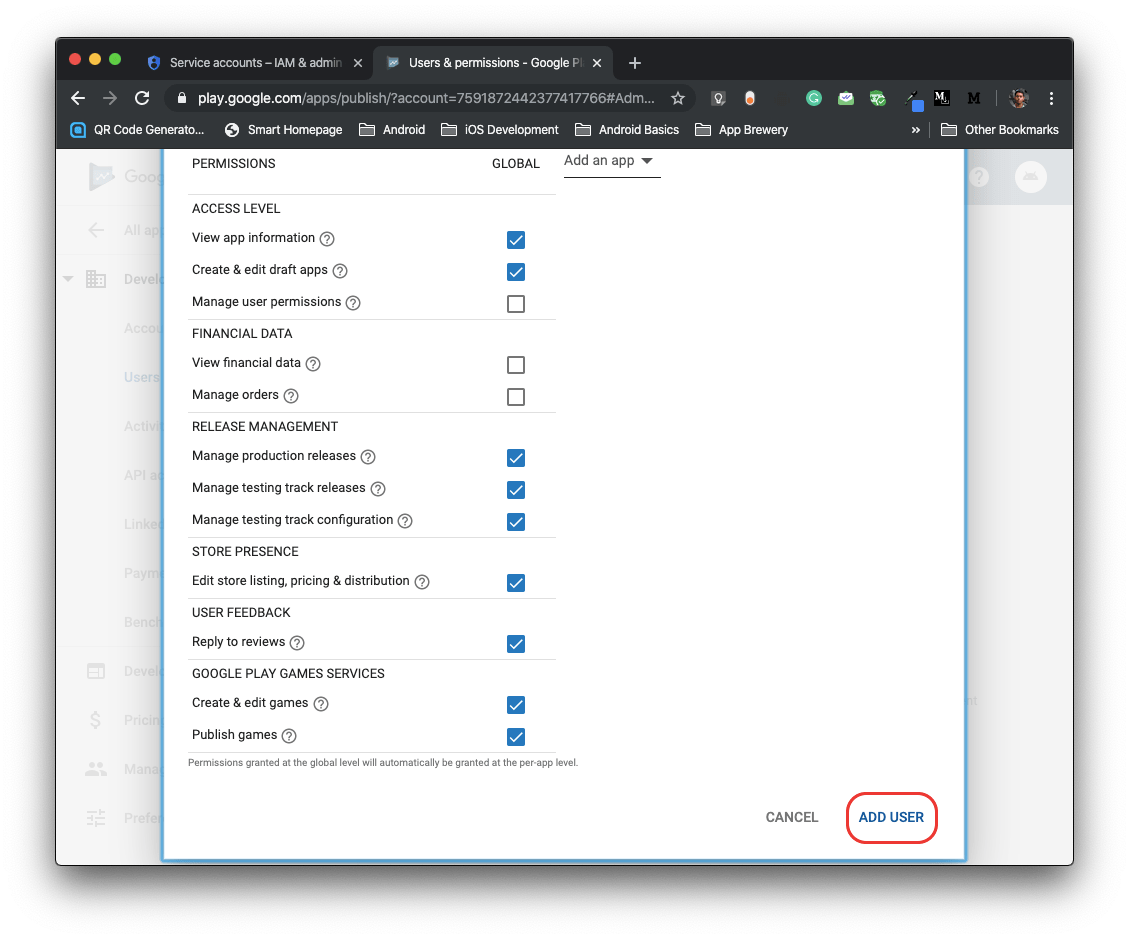
Then click on ADD USER.
So, you have finally added a service account to your Google Play Developer Account.
Configuring auto publishing on Codemagic
Now, we have to setup Google Play publishing on Codemagic.
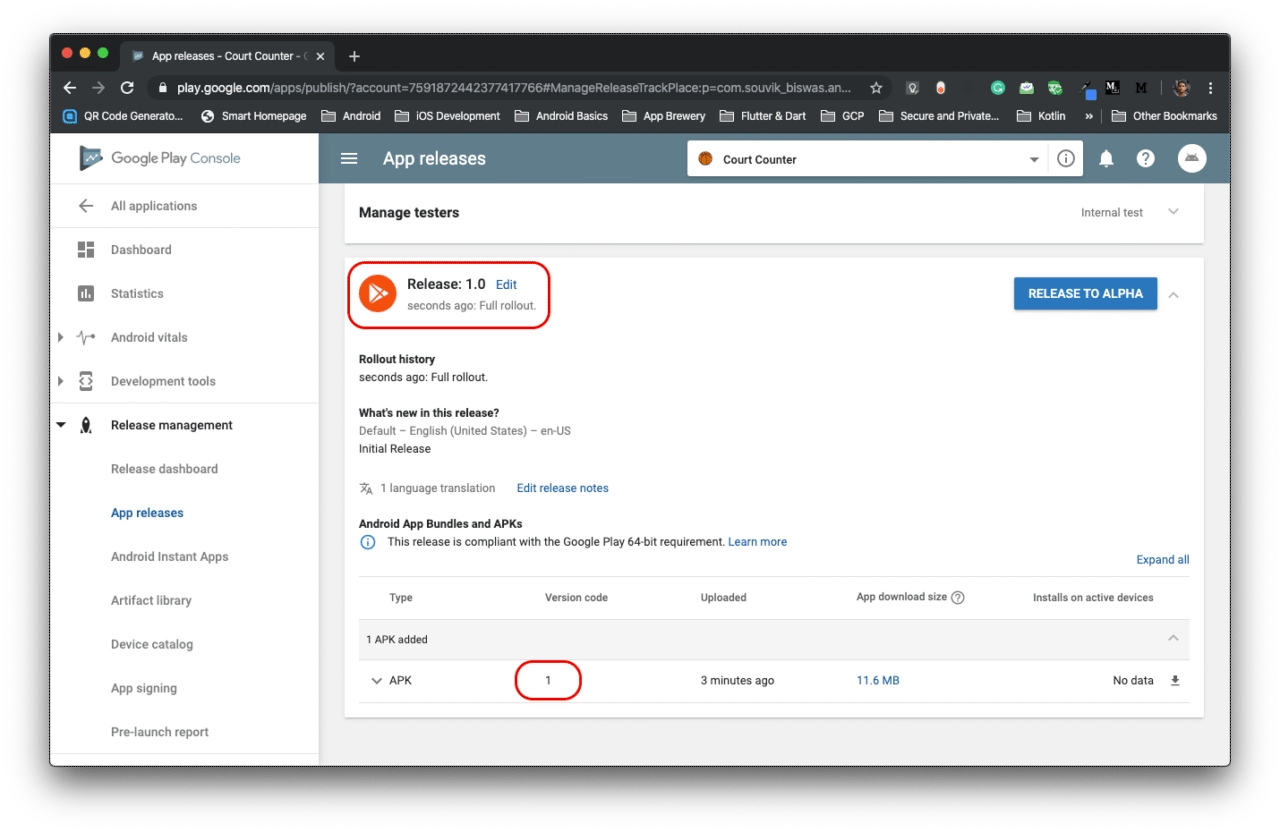
I have already made an initial release of the Court Counter app, as I had also written before that you have to just make the initial release manually and after that you can auto publish from the next version onwards.
First of all, go to the
codemagic.yamlfile inside your project directory.You have to add google_play support inside publishing. Add the following code:
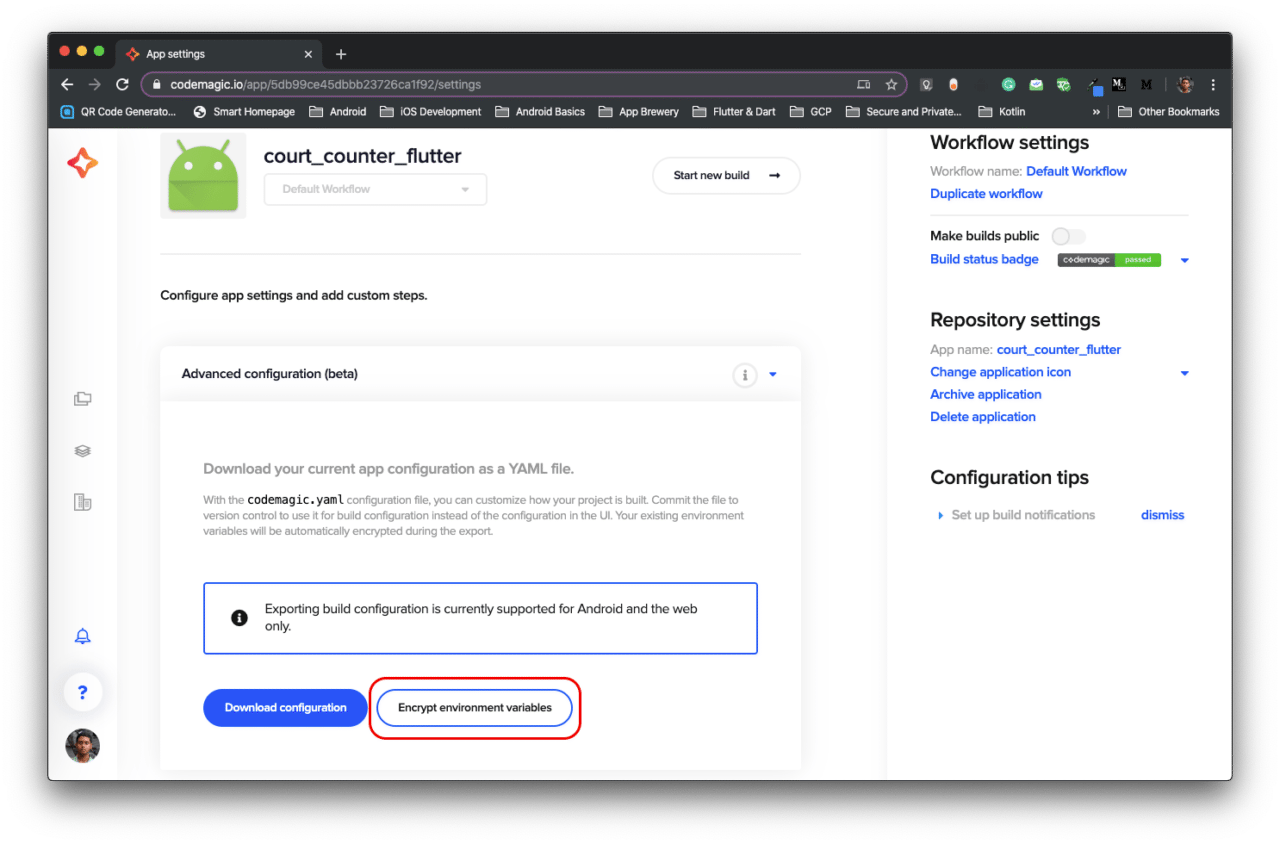
google_play:
  credentials: <Encrypted file>
  track: <Name of the track>
Go to the project Settings from the Codemagic UI.
Then go to the Advanced configuration (beta) tab and click on Encrypt environment variables.
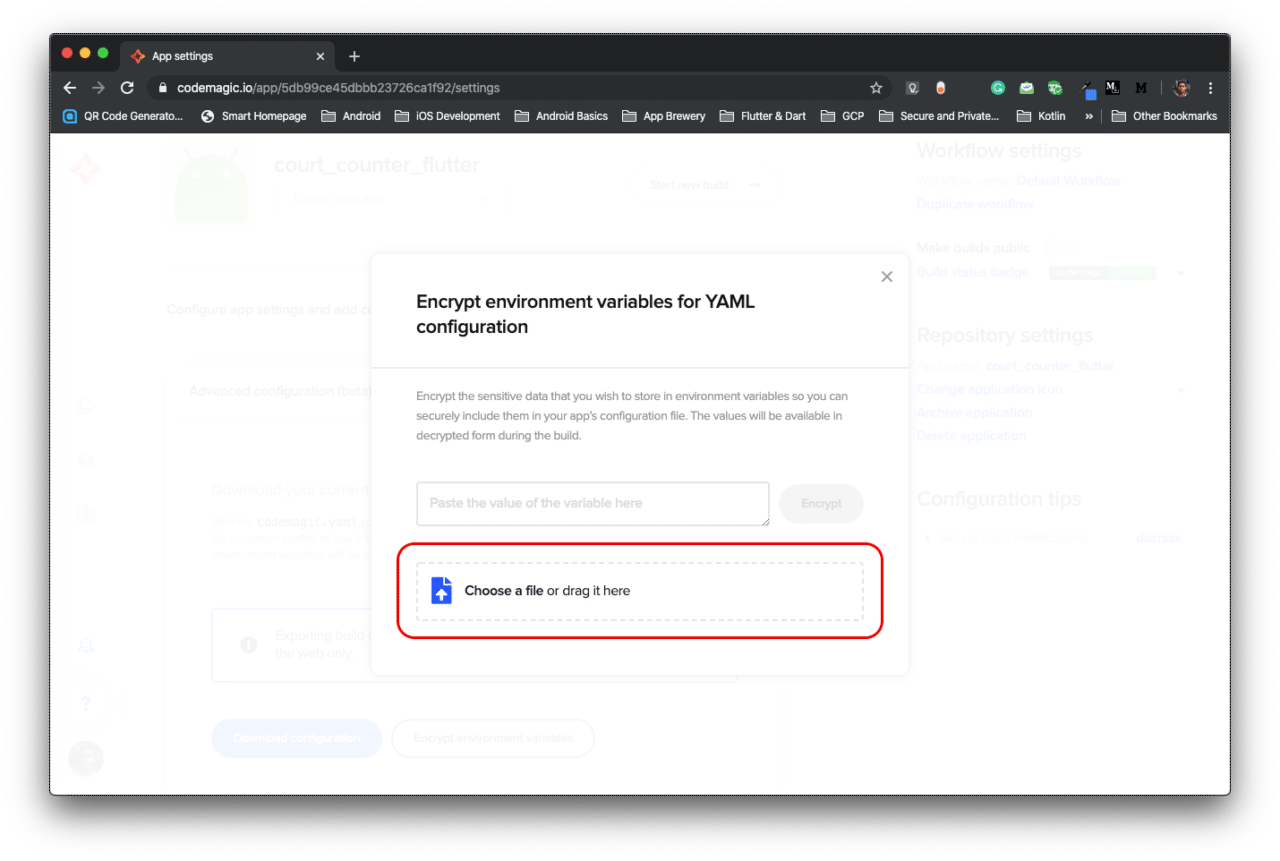
Here, just drag and drop the JSON credentials file and it will generate the encrypted version of the file.
Copy this encrypted content and paste it inside the credentials in the
codemagic.yamlfile. Also choose the track where you want to publish in Google Play store.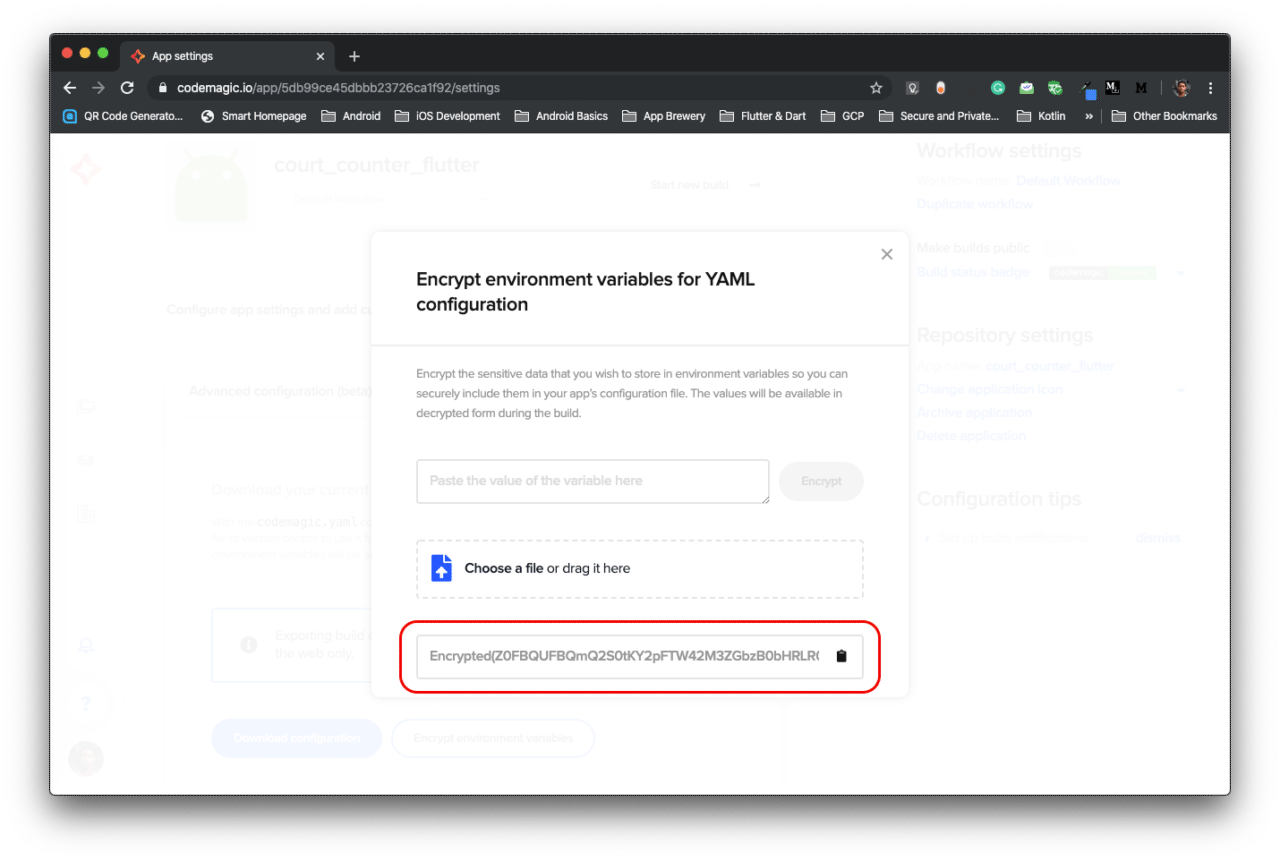
The completed
codemagic.yamlfile will look like this: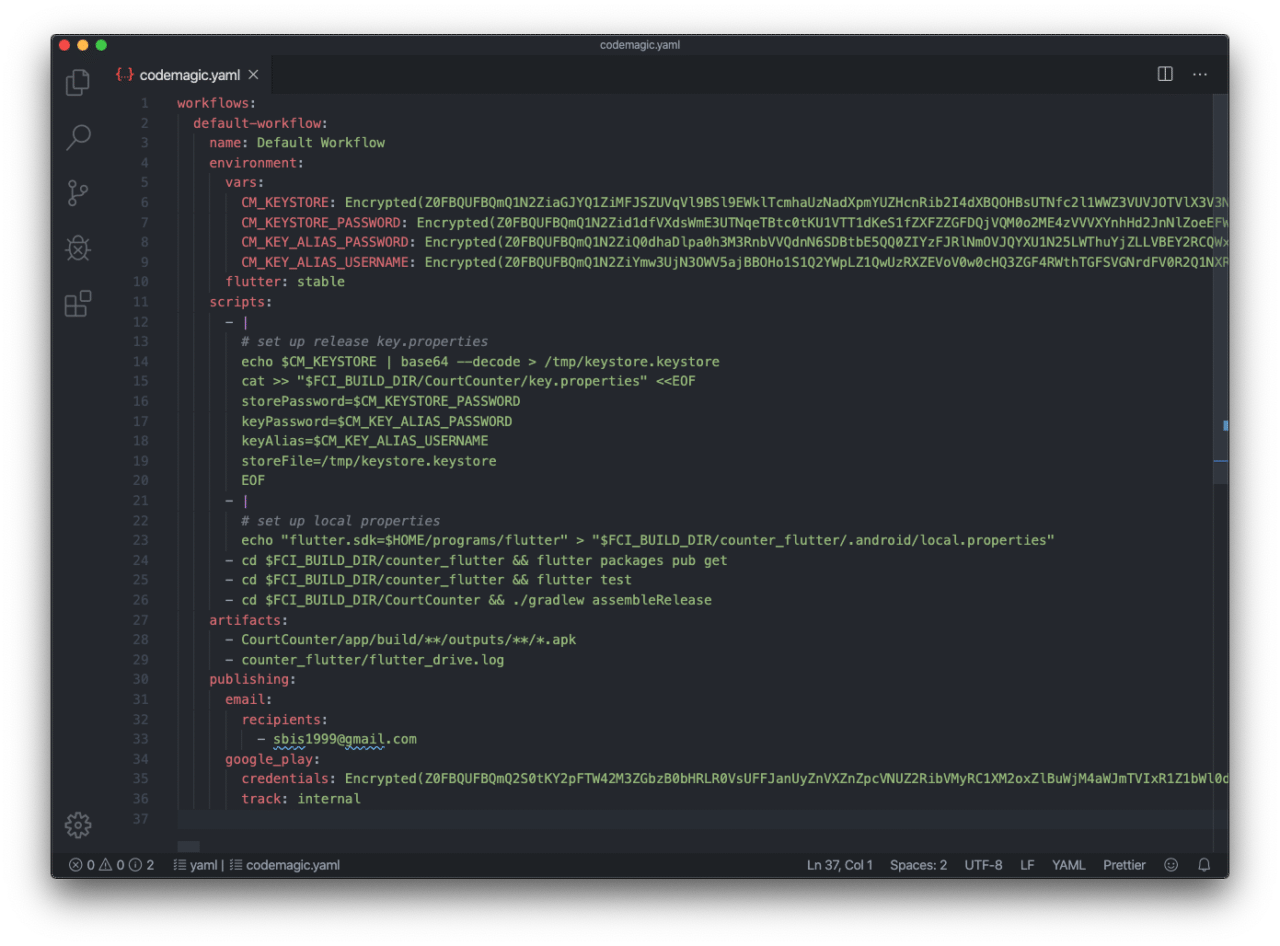
Don’t forget to increase the version code and change the version name inside app level
build.gradlebefore starting the build. Otherwise it will produce an error in publishing to Google Play store.Commit the updated
codemagic.yamlfile to the version control.Then, run your build from the Codemagic UI.
After the build is successfully completed, go to your App releases in Google Play store to check if the new version is published.
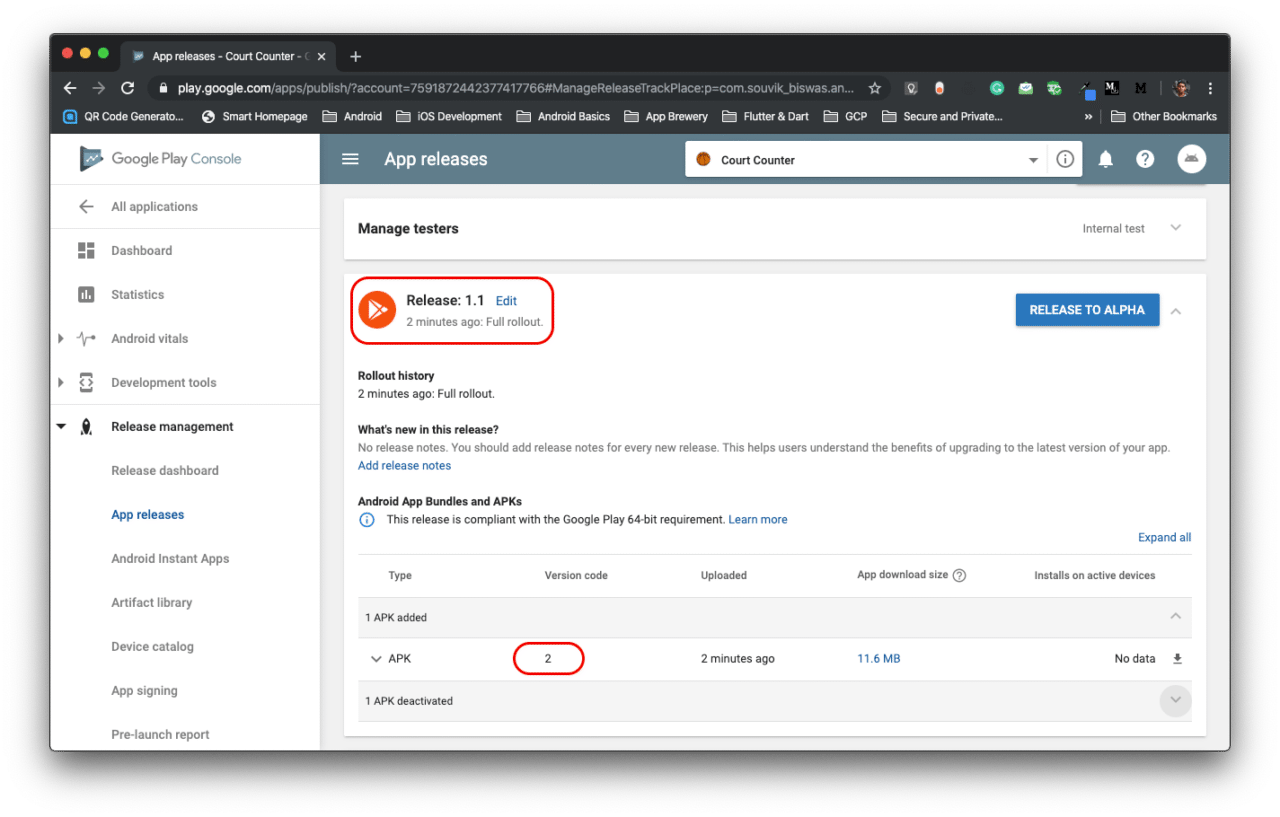
With this you have finally completed the automatic distribution setup of native Android project with Flutter modules.
Conclusion
The codemagic.yaml makes it possible for us to auto distribute native Android app with Flutter modules. Though the setup is a bit lengthy, but you have to just do it once, from the next time onwards just add new features to your app and increment the version code & version name. And it will be auto published to Google Play store after a successful build on Codemagic.
Souvik Biswas is a passionate Mobile App Developer (Android and Flutter). He has worked on a number of mobile apps throughout his journey. Loves open source contribution on GitHub. He is currently pursuing a B.Tech degree in Computer Science and Engineering from Indian Institute of Information Technology Kalyani. He also writes Flutter articles on Medium - Flutter Community.


