


Written by Souvik Biswas and updated in August 2021
In this article, I will be showing how to distribute Native iOS project containing Flutter modules using Codemagic CI/CD.
The two main steps for distribution are:
- Code signing
- Publishing to App Store Connect
This is a follow-up article to “How to add Flutter modules to native iOS project and test it on Codemagic”.
If you’re new to the concept of code signing, first read the article on how to code sign and publish iOS apps.
Code signing
In order to publish your app to Apple App Store, you need to have a code-signed .ipa file. Before starting with the actual code signing process, you will need to have the following things:
- Certificate Signing Request (CSR)
- iOS Distribution Certificate
- App ID
- Provisioning Profile
Generating the Certificate Signing Request (CSR)
You will need a Mac to generate the CSR. The generated CSR will be stored on the local machine and contains some information related to the developer identity, which is later used by Apple for confirming the identity while generating the certificate.
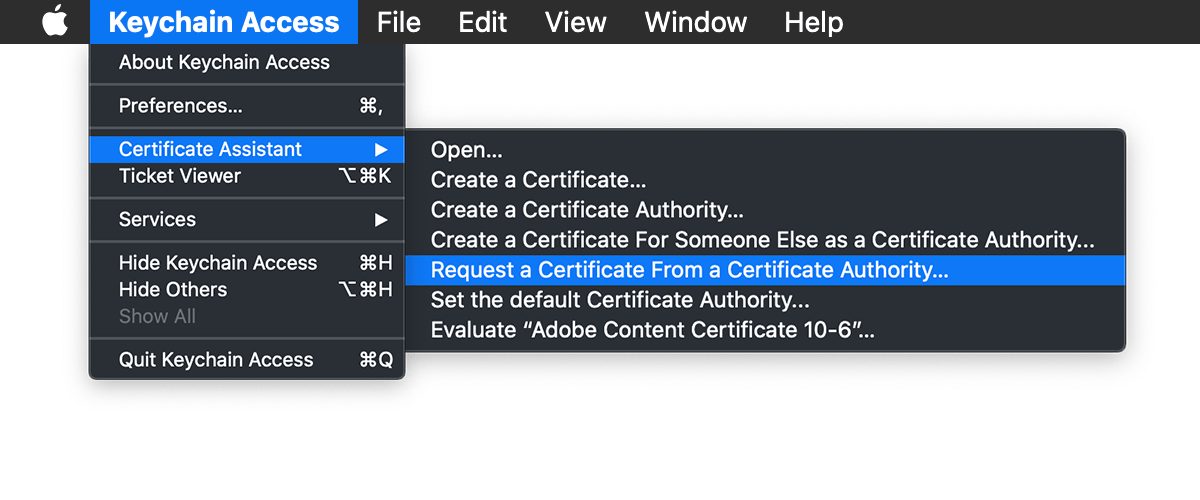
Open Keychain Access using Spotlight Search on Mac.
From the top menu bar go to Keychain Access > Certificate Assistant > Request a Certificate From a Certificate Authority.
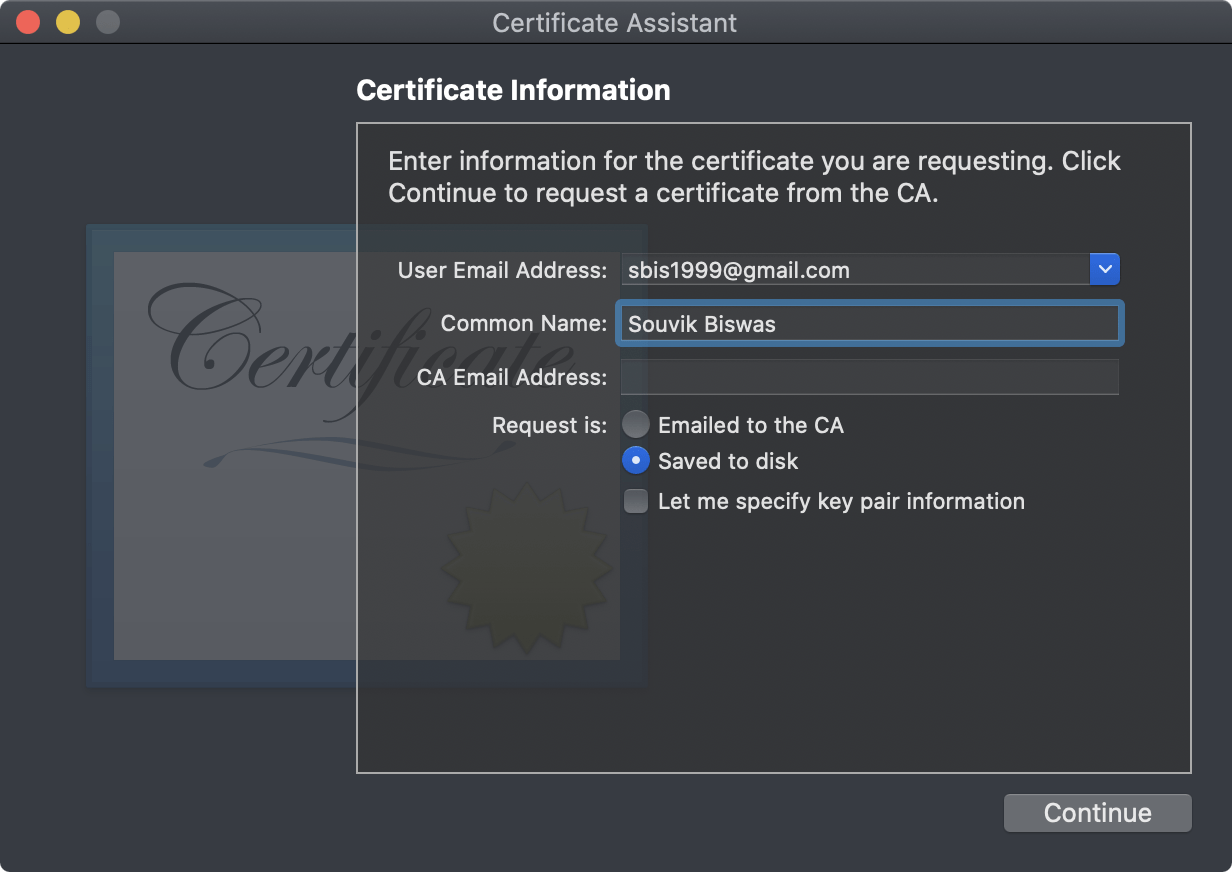
- Fill out the Certificate Information form. Leave the CA Email Address field empty. Select the option Saved to disk. Then, click on Continue.
- Now, you can click on Show in Finder to go to the folder where the CSR file has been created.
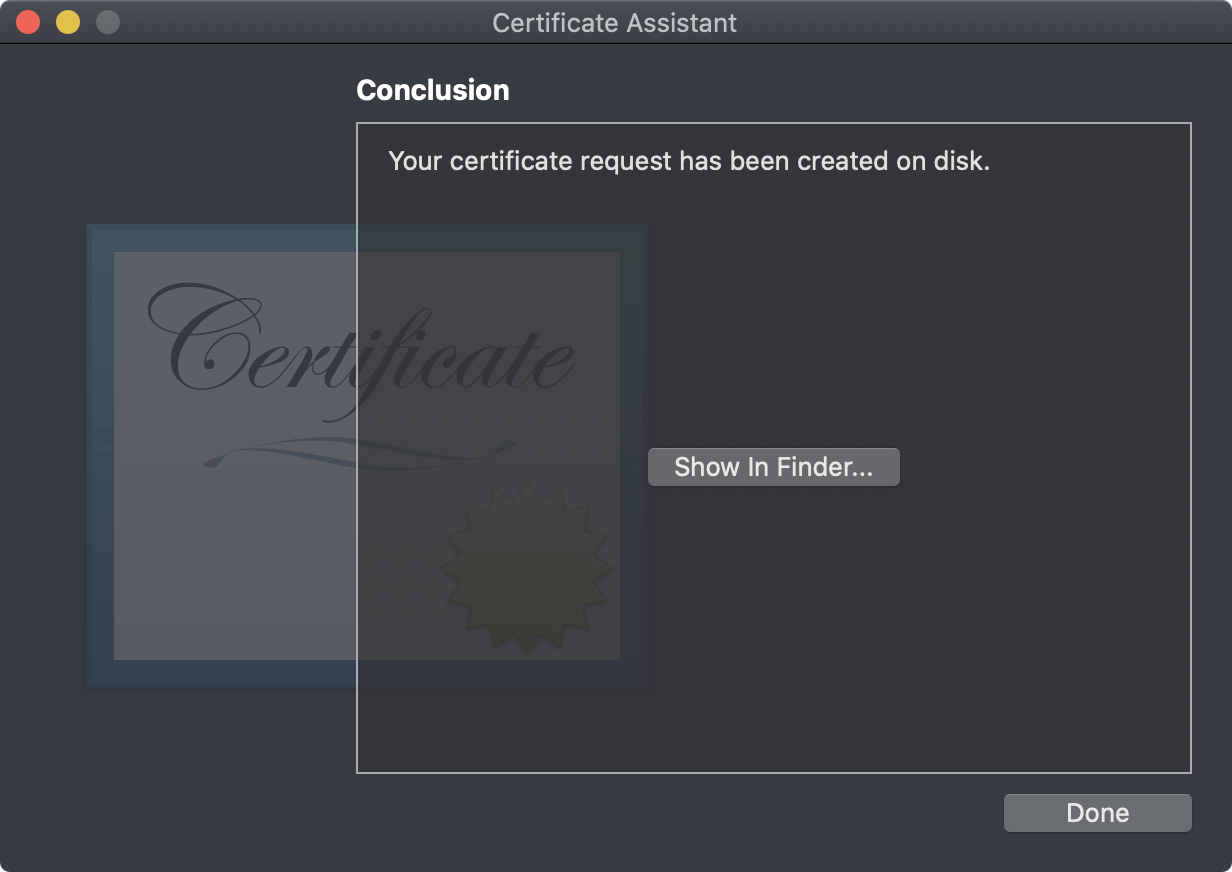
- Click on Done.
iOS Distribution Certificate
You will need an Apple Developer Membership in order to generate a certificate from the Apple Developer Portal. Various types of certificates can be generated from the portal, but to publish our app to Apple App Store we will be needing an iOS Distribution Certificate.
Follow the steps below to generate the distribution certificate:
Go to the Apple Developer Portal and sign in using your Apple ID and password.
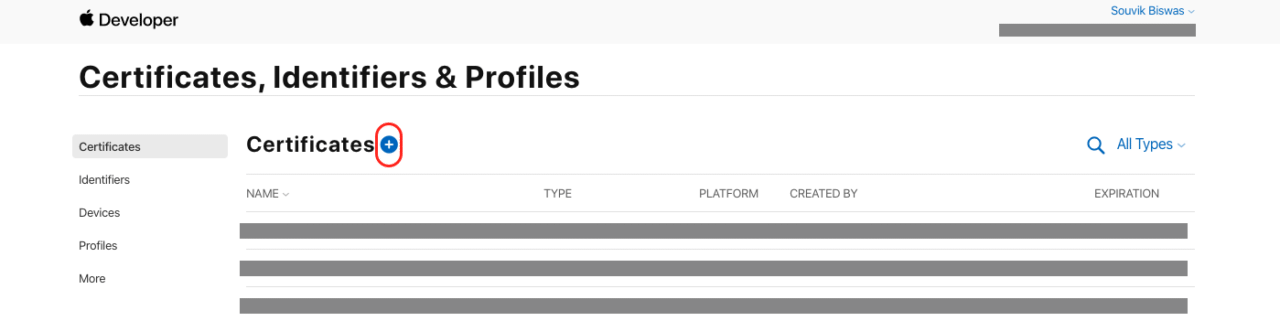
Select the Certificates, IDs & Profiles option from the left menu on the Dashboard.

Under the Certificates option, click on the “+” button.
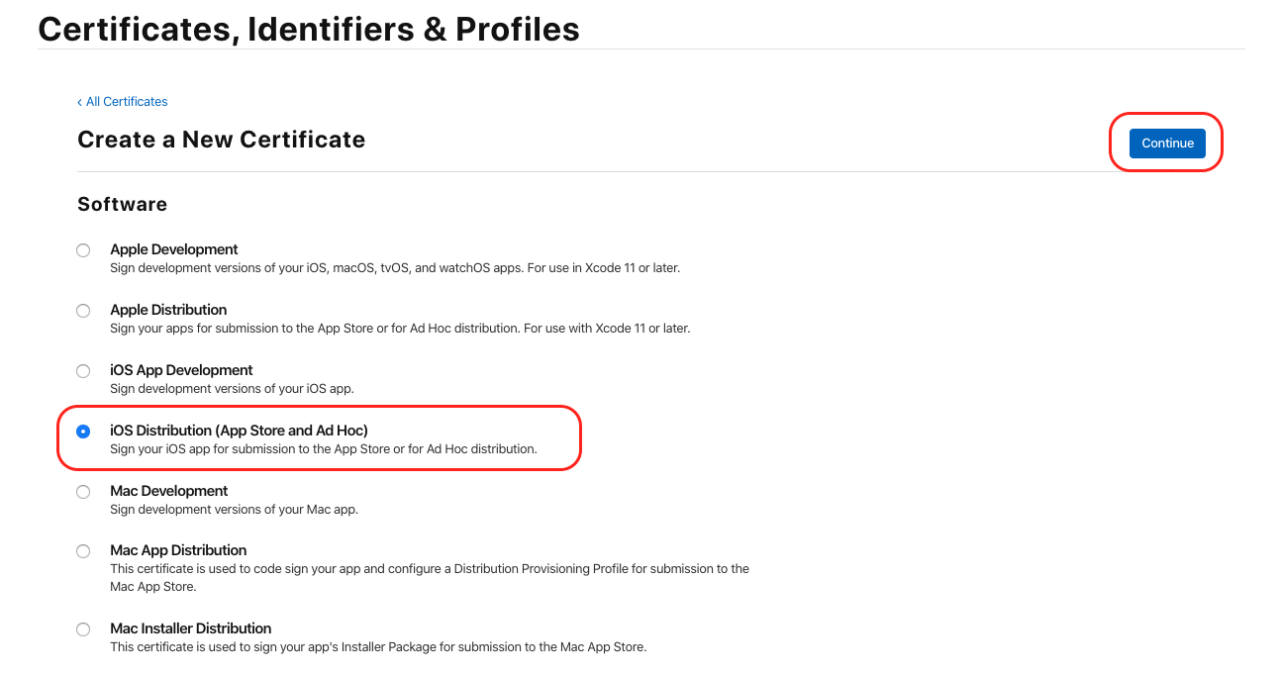
Select the iOS Distribution option and click on Continue.
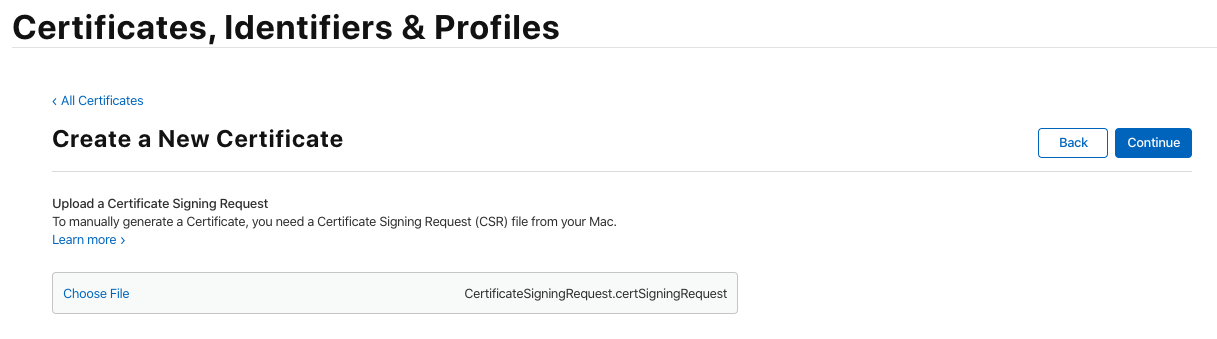
Click on Choose File to upload the CSR file that we had generated previously. Click Continue.
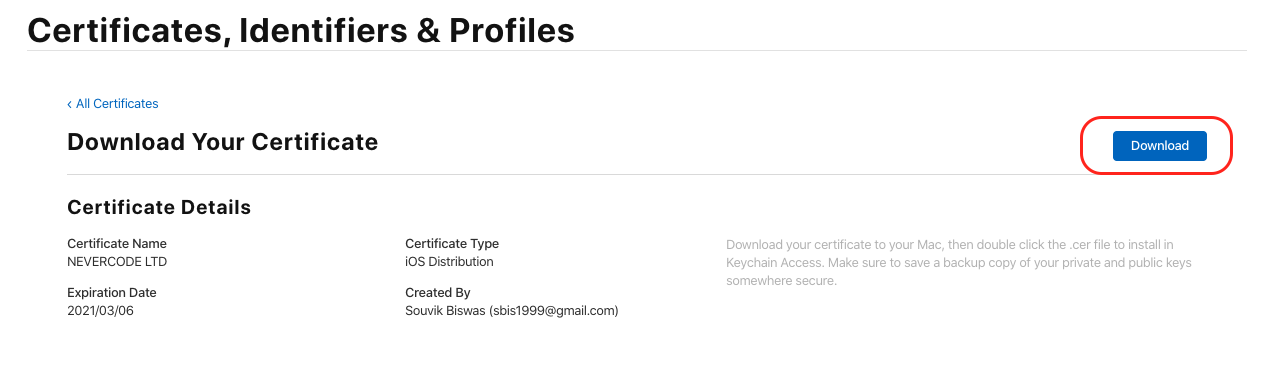
Now, you can Download the generated iOS Distribution Certificate to your local machine.
Double-click on the downloaded certificate to add it to your local device’s Keychain.
You can export any certificate from your Keychain by right-clicking and selecting Export.
You will have to supply a Certificate Password for securing the certificate.
App ID
You must register an App ID to make the app uniquely identifiable on the App Store after publication. This App ID will also be required for generating the Provisioning Profile in the next step.
The steps for registering an App ID are:
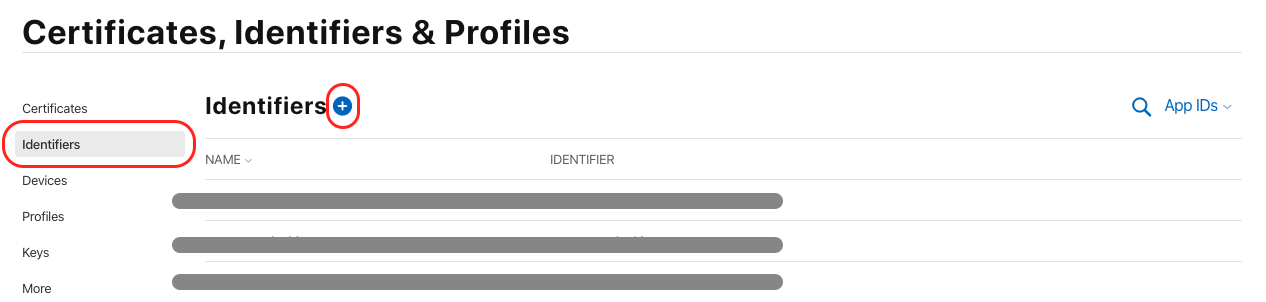
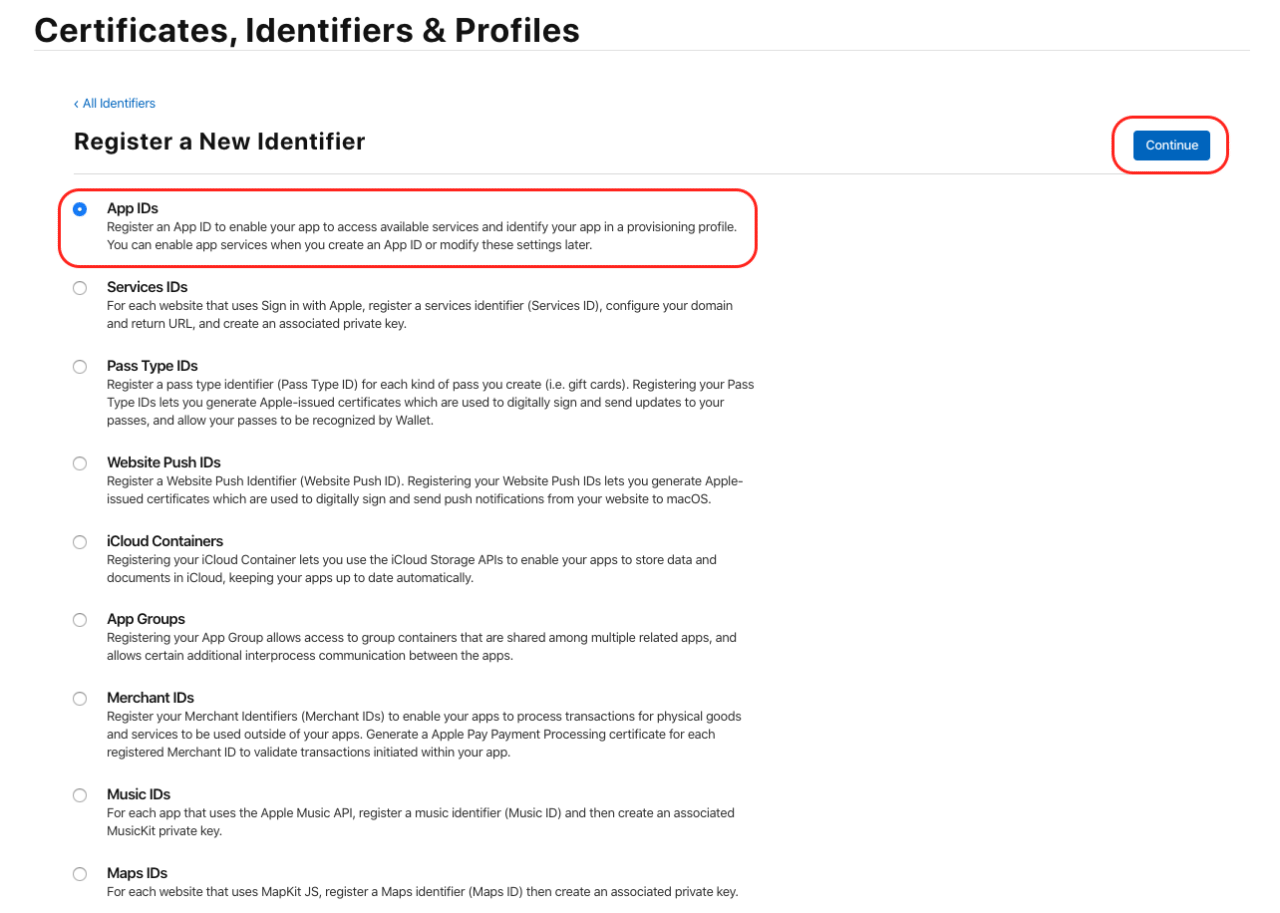
Go to the Identifiers option in the left menu and click on the “+” button.
Select the App IDs option under Register a New Identifier and click on Continue.
Enter the Description and Bundle ID of the app. Click on Continue.
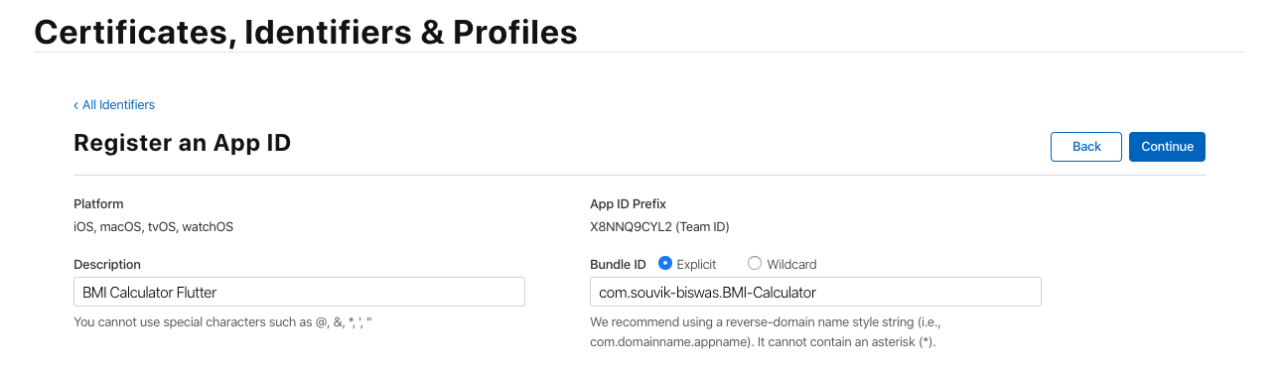
You will get the Bundle ID of your project under the Xcode General tab.
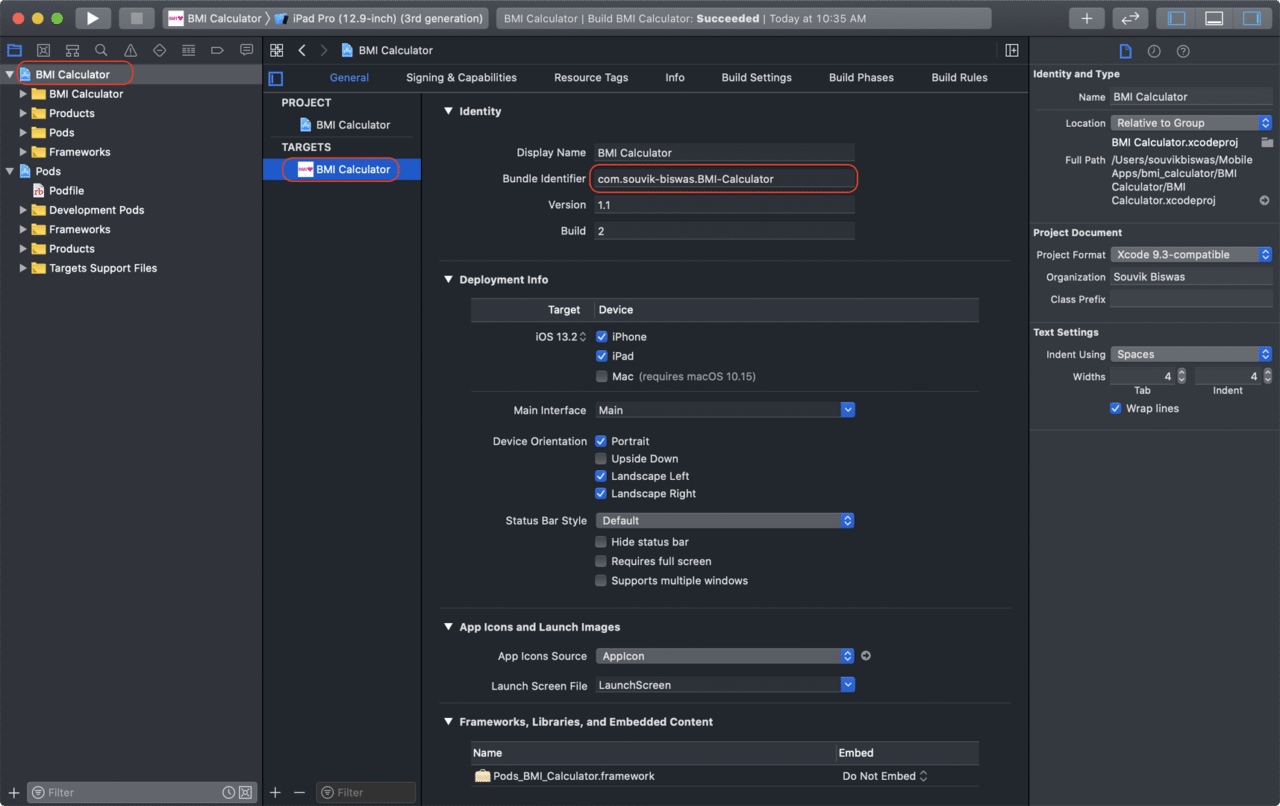
This Bundle ID needs to be unique. So, if the already defined Bundle ID of your project is not accepted in the portal, make sure you update the Bundle ID of the Xcode project with the accepted ID from the portal.
Click on Register.
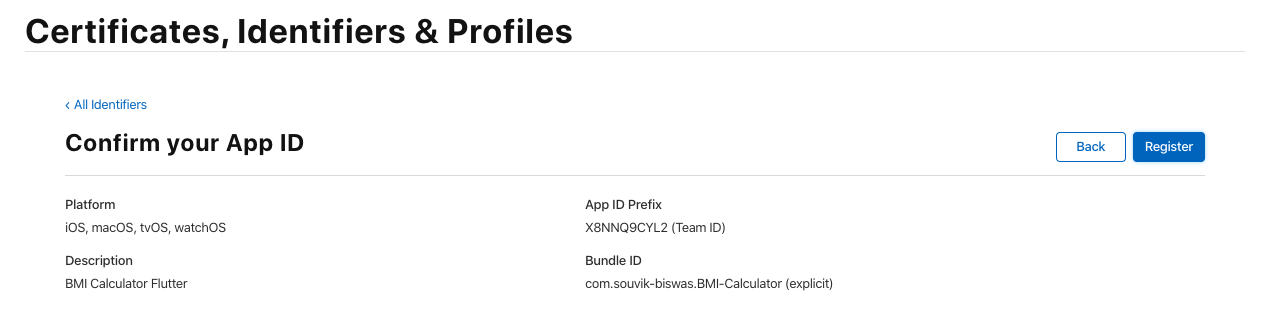
With this, you have successfully registered the Bundle ID of your iOS app.
Provisioning Profile
A Distribution Provisioning Profile is needed in order to publish an app to Apple App Store. To generate a distribution provisioning profile you will require the following:
- App ID
- Distribution Certificate
We already have a registered App ID and an iOS Distribution Certificate at hand, so we can move on to generating the provisioning profile.
Follow the steps below:
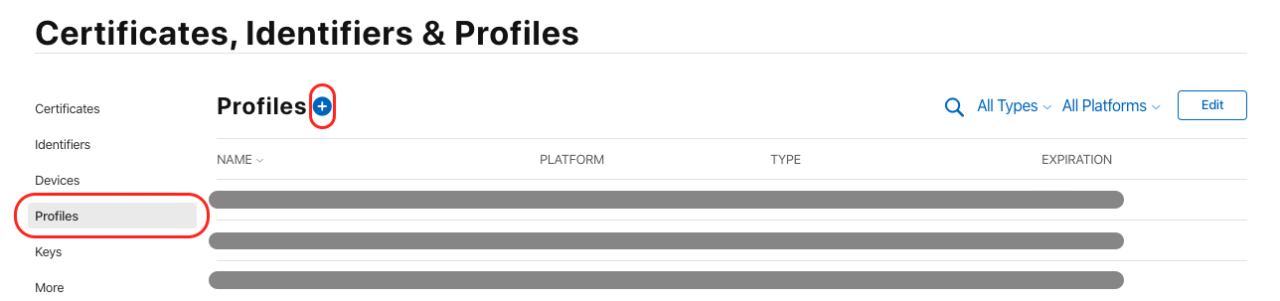
Go to the Profiles option in the left menu and click on the “+” button.
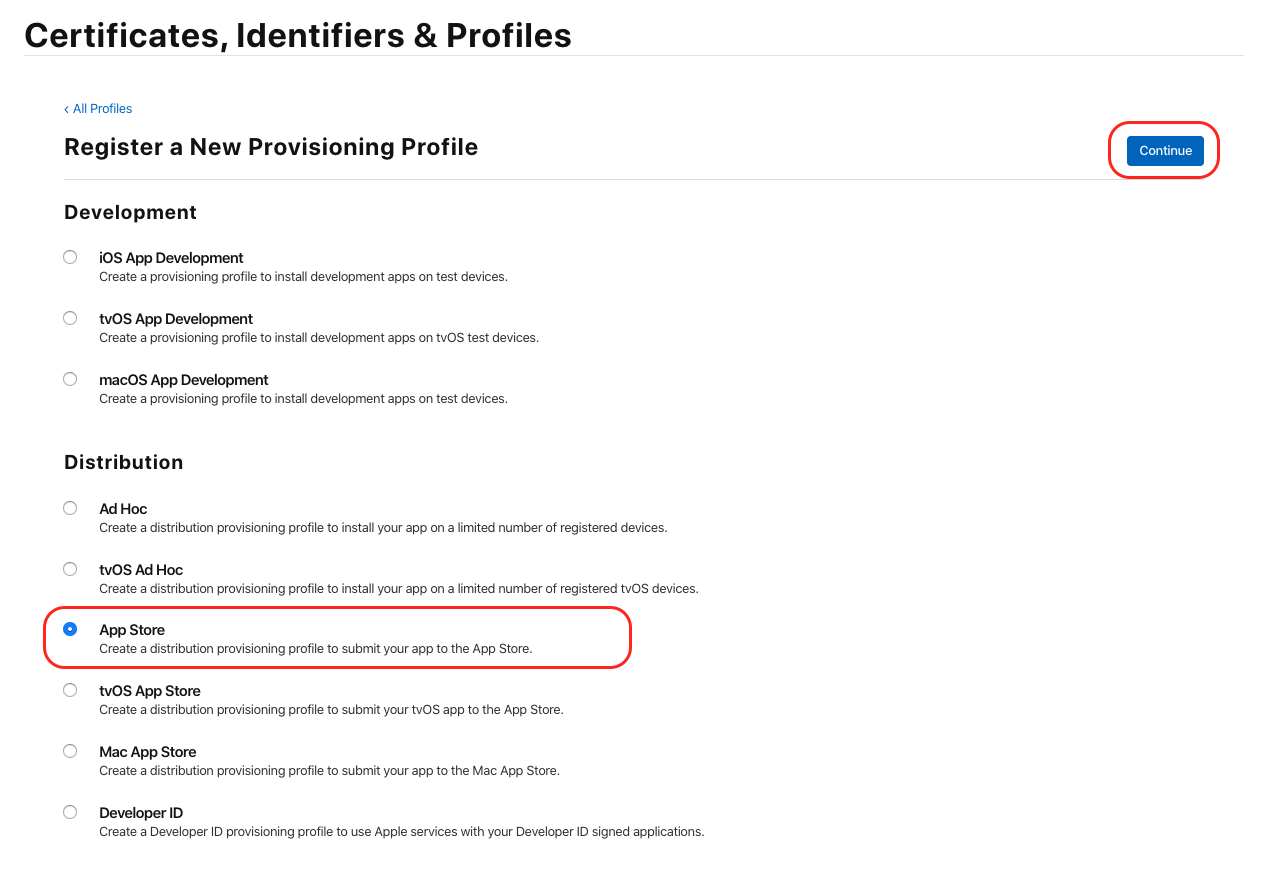
Select the App Store option from the list, and click on Continue.
This will help to generate a distribution provisioning profile for publishing the app to Apple App Store.
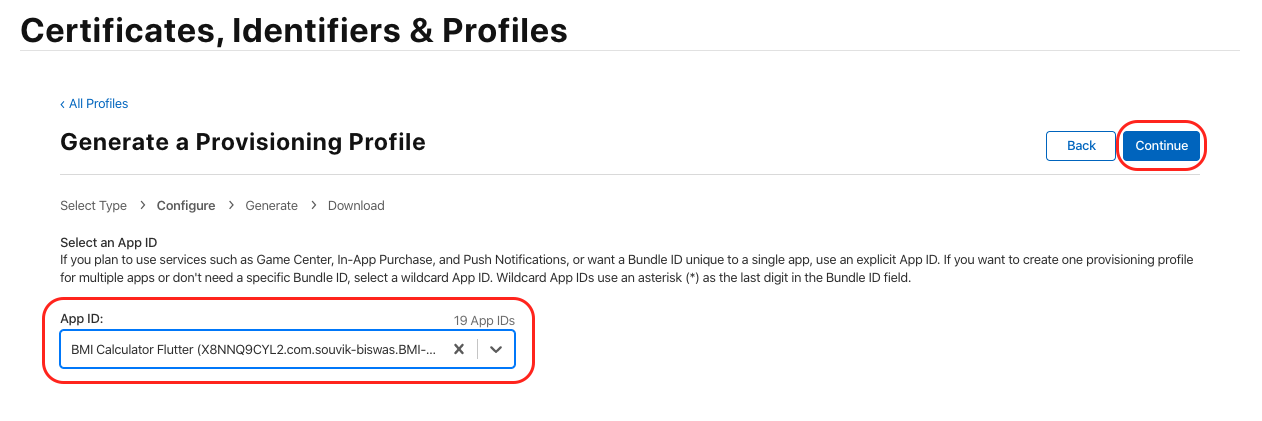
Select the App ID that we had registered previously from the drop-down list and click on Continue.
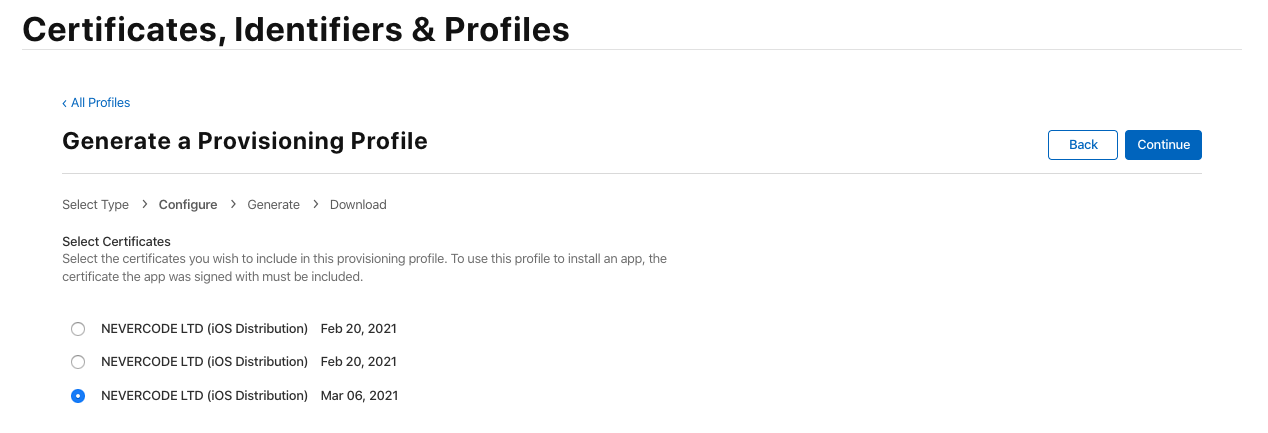
Select a Distribution Certificate with which the app was signed and click on Continue.
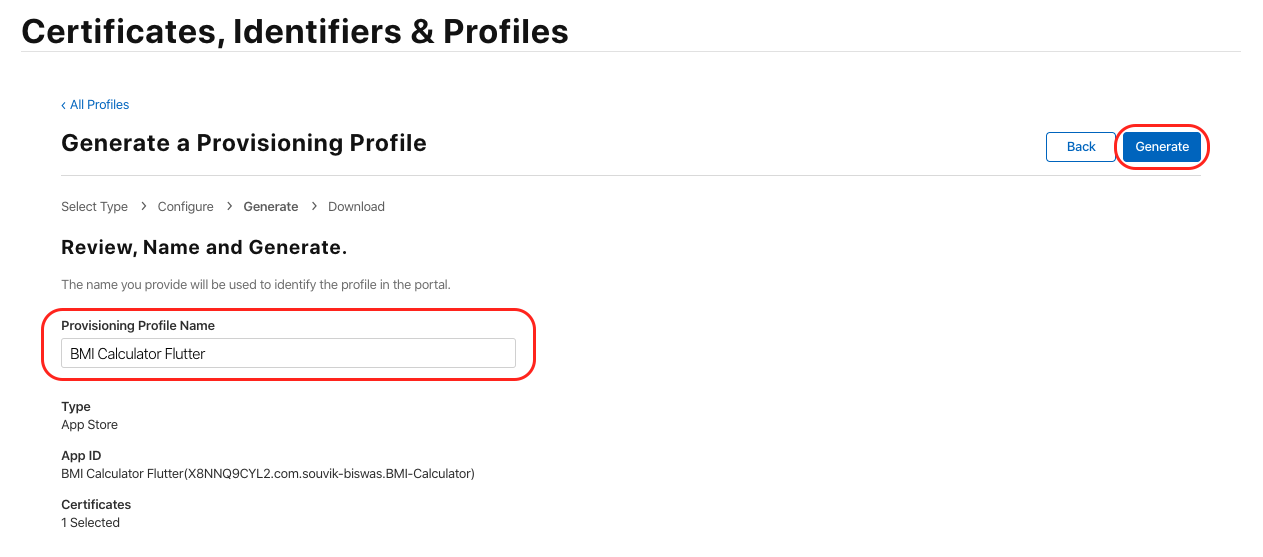
Enter a friendly Provisioning Profile Name for identifying the profile in the Apple Developer Portal. Click on Generate.
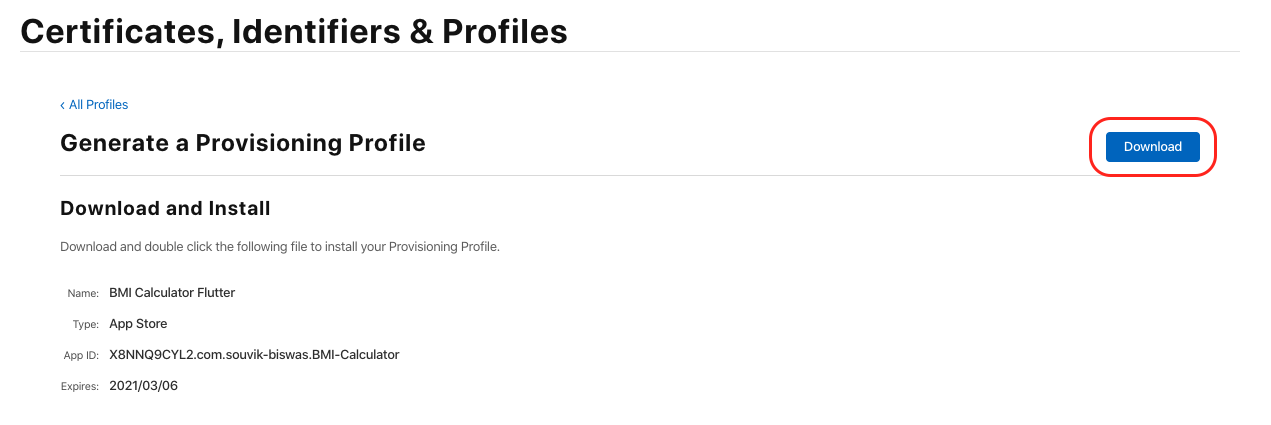
You can Download the distribution provisioning profile to your local machine.
Managing Xcode code signing
Now that you have completed all the code signing steps on the Apple Developer Portal, you’ll need to configure Xcode to use the proper Provisioning Profile for the app. This is very simple:
Open the project using Xcode.
Select the root project directory and go to the Signing and Capabilities tab.
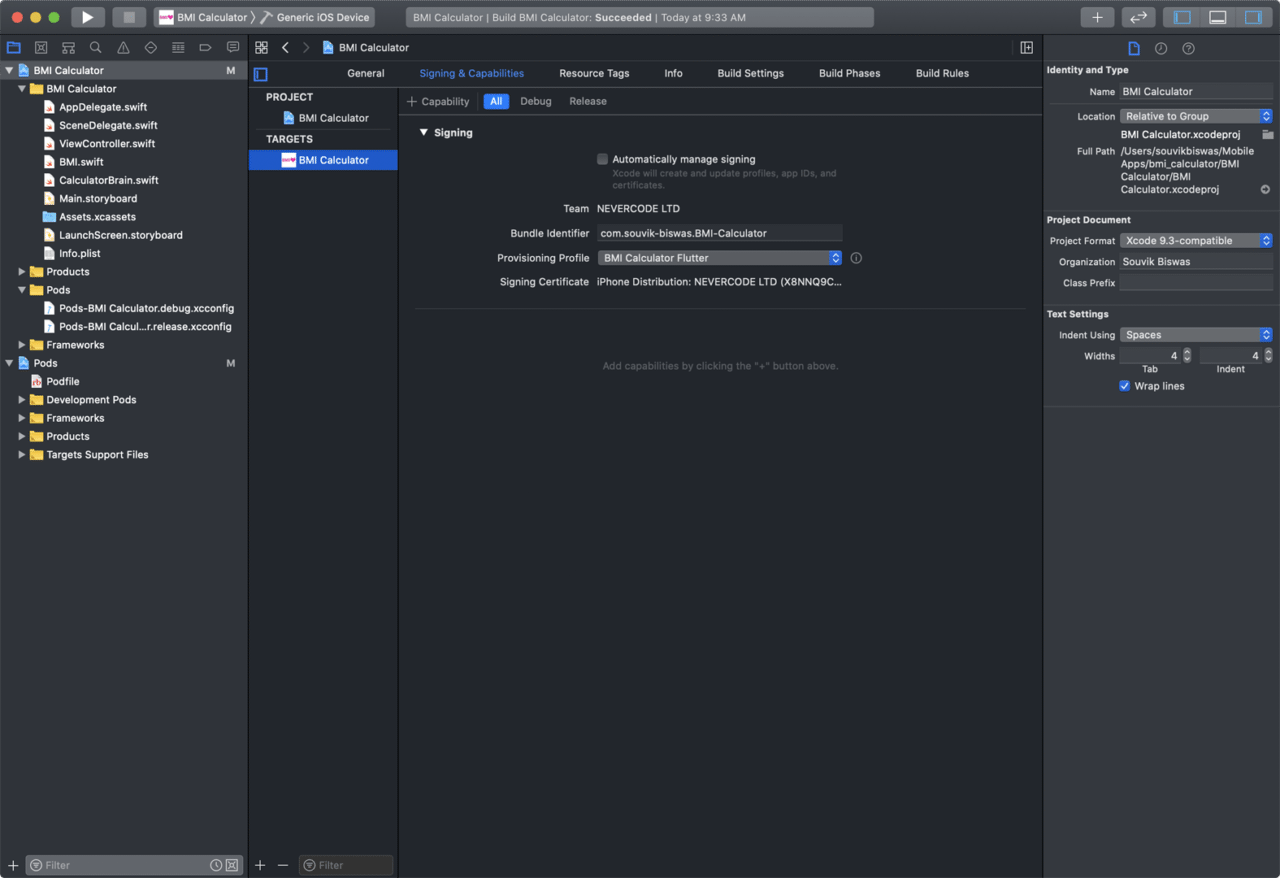
Here, you can either check Automatically manage signing or do the signing manually.
If you check the Automatically manage signing checkbox, then you will just need to select the Team from the dropdown list.
If you prefer to do the code signing manually, then you will need to upload the Provisioning Profile from the local machine.
Creating the app profile
To upload the iOS app to App Store Connect, follow the steps below:
Log in to App Store Connect.
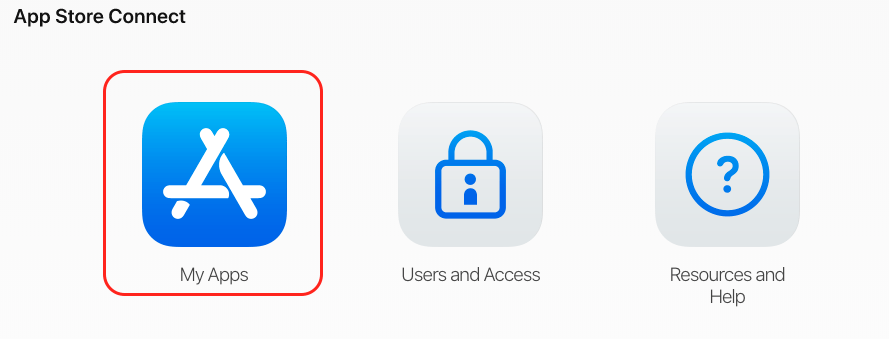
Go to My Apps.
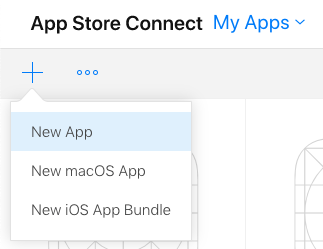
Click on the “+” button and select New App.
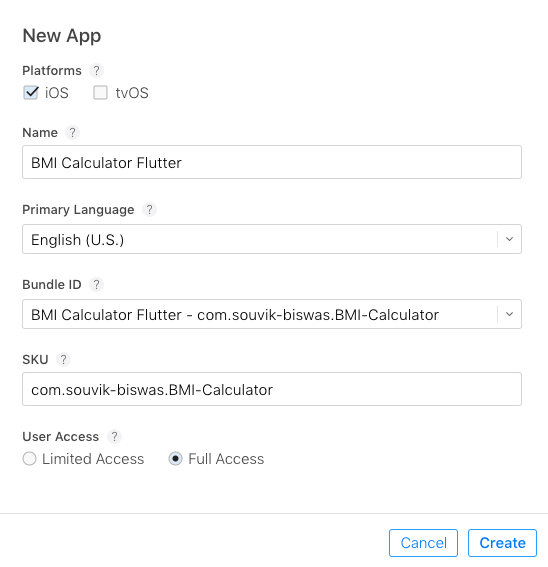
Fill out the details of the form and click on Create.
This will create a profile for your app where you can upload the .ipa of the app and add all the information required for publishing the app, like name, description, privacy policy, screenshots, etc. which are required for publishing the app.
Uploading the app using Xcode
Using Xcode, you can directly upload the .ipa file of the app to App Store Connect once the code signing step is complete and the app profile is created on the App Store Connect portal.
In Xcode, select Generic iOS Device from the target devices list.
From the top menu, go to Product > Archive.
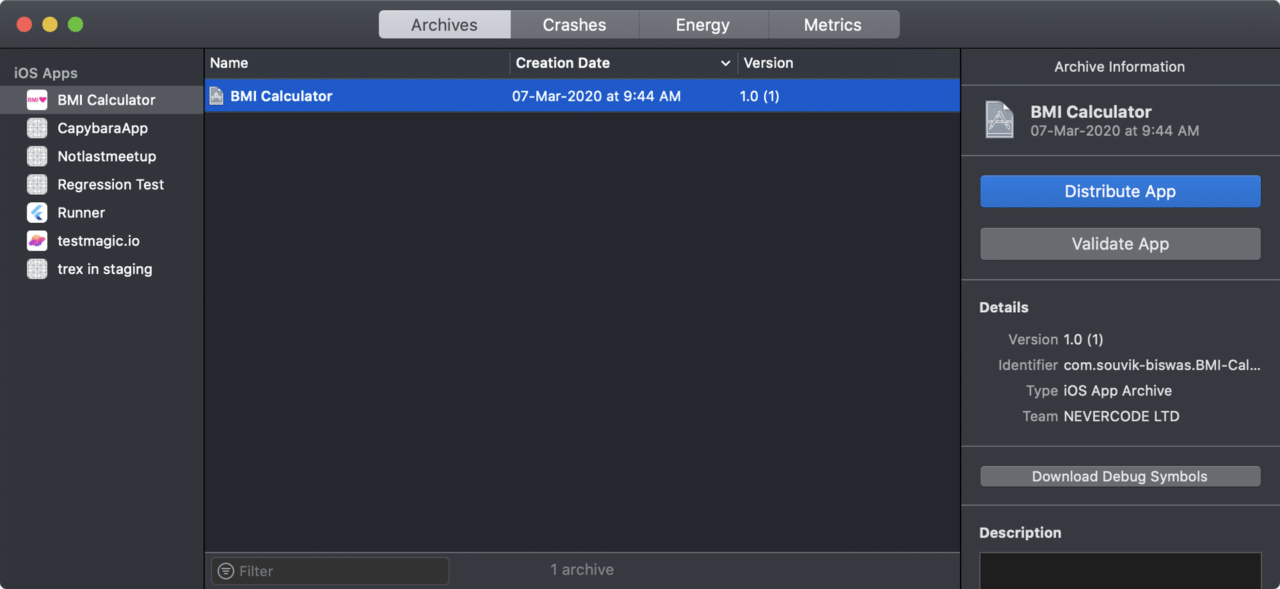
This will open a dialog box, displaying all the archives that you’ve created in the past.
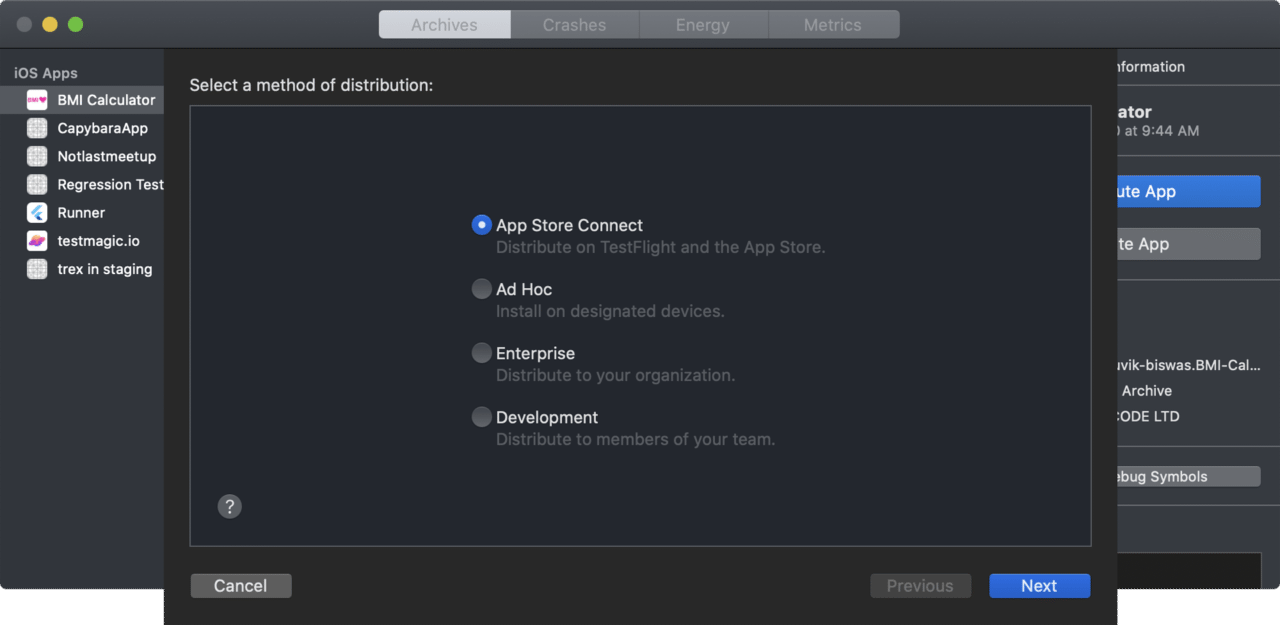
Select the recent build which you want to upload to App Store Connect and click on Distribute App.
Select App Store Connect and click on Next.
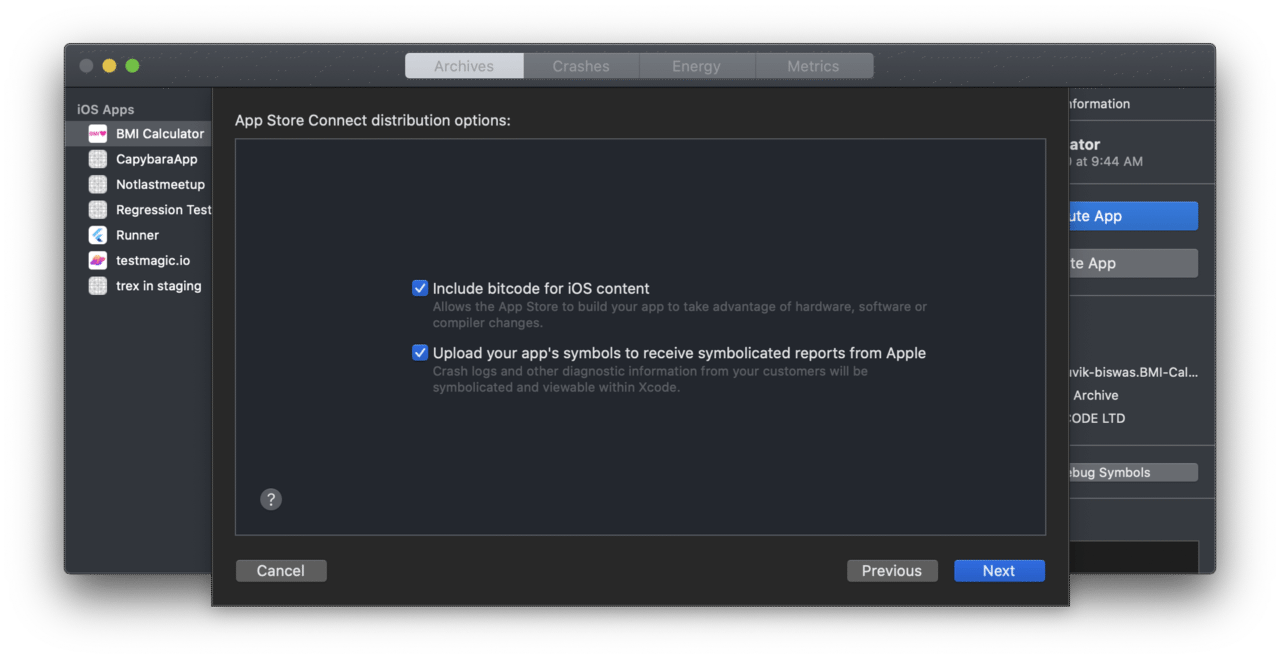
By default, both checkboxes will be checked. You do not need to change anything here – just click on Next.
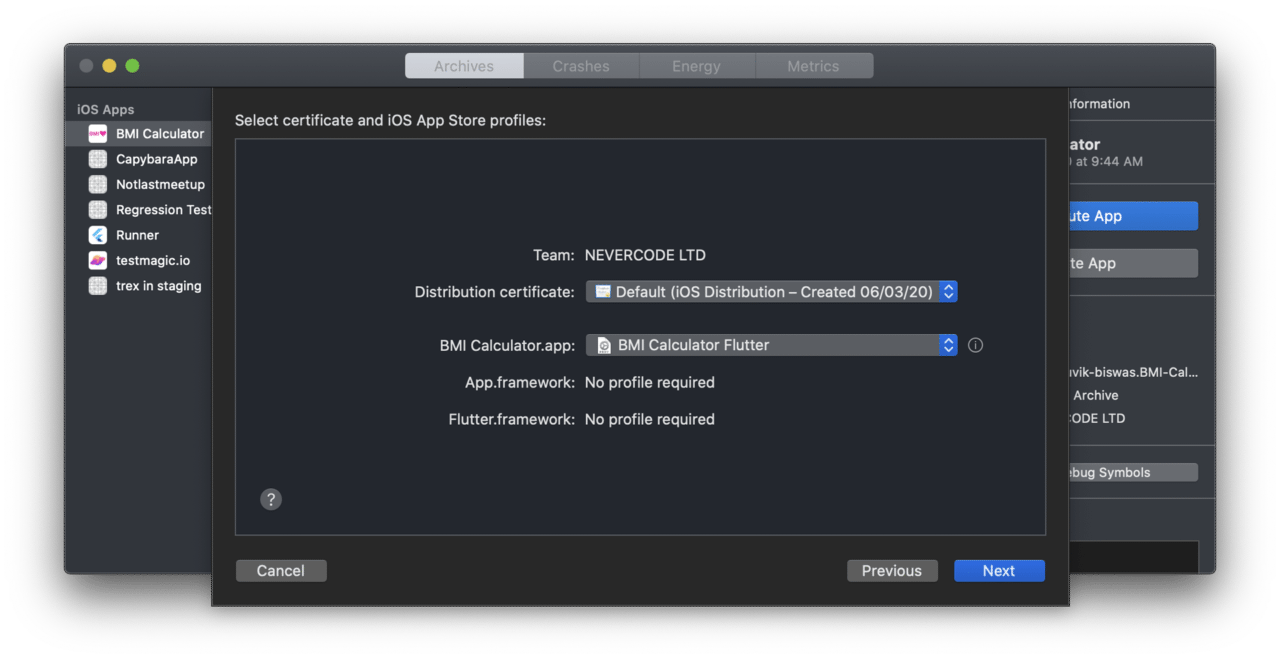
Select the Distribution Certificate and the App name from the drop-down list. Click on Next.
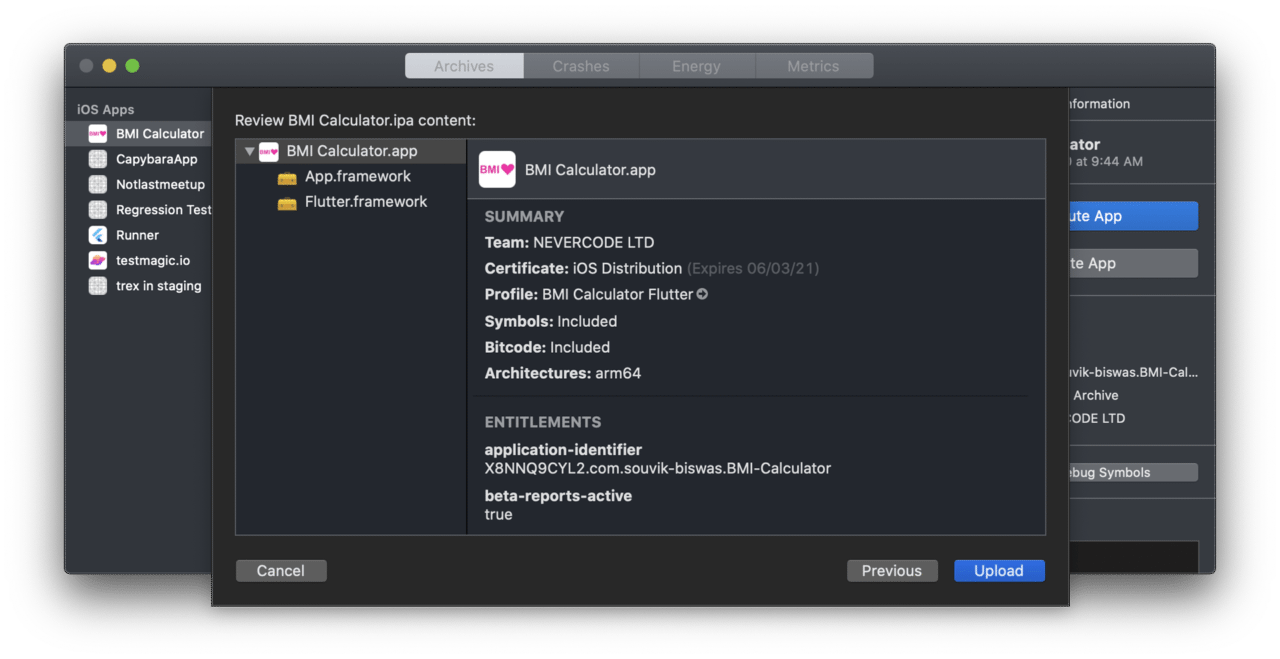
Verify the information and click on Upload.
Once the upload process is complete, click on Done.
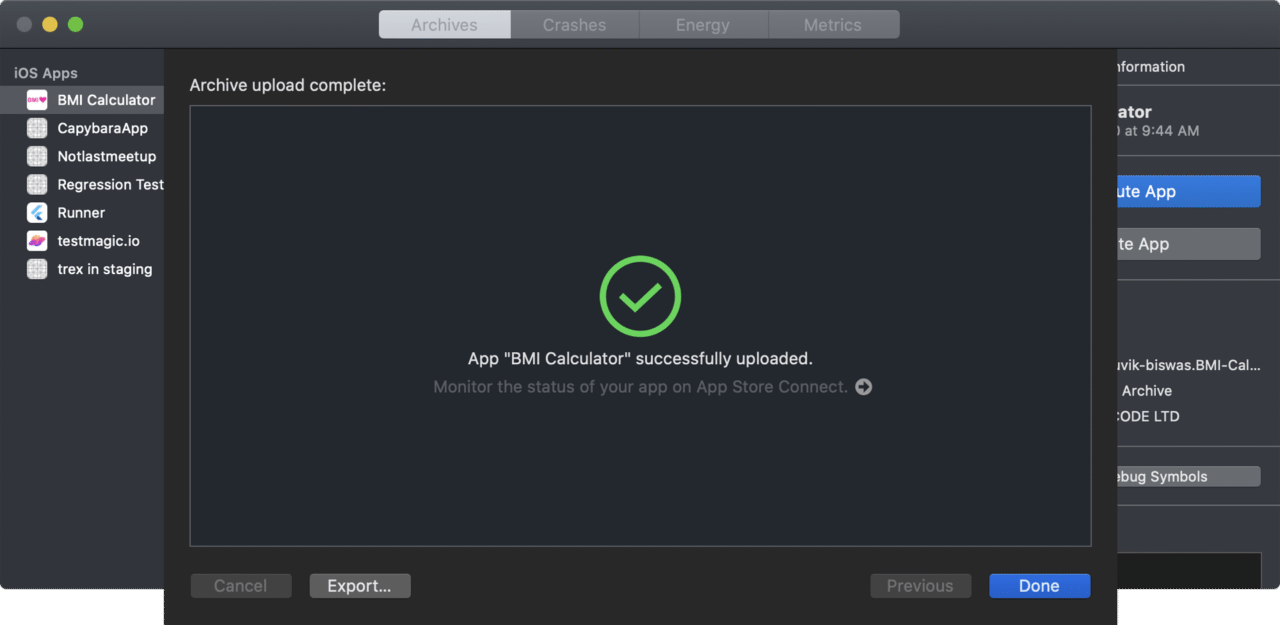
This will upload the build version of the app to App Store Connect. Now, you can go to the portal and fill in the required information for publishing the app to Apple App Store.
Publishing the app
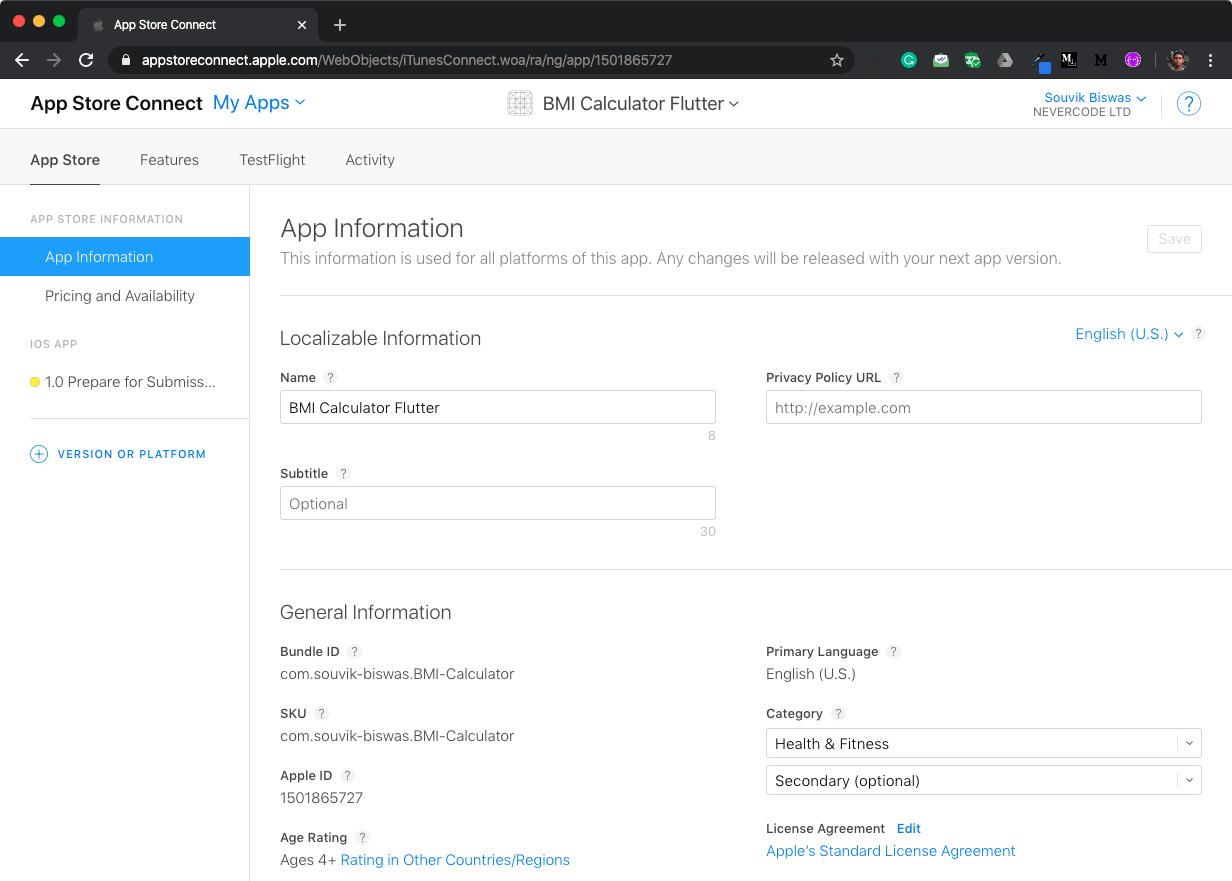
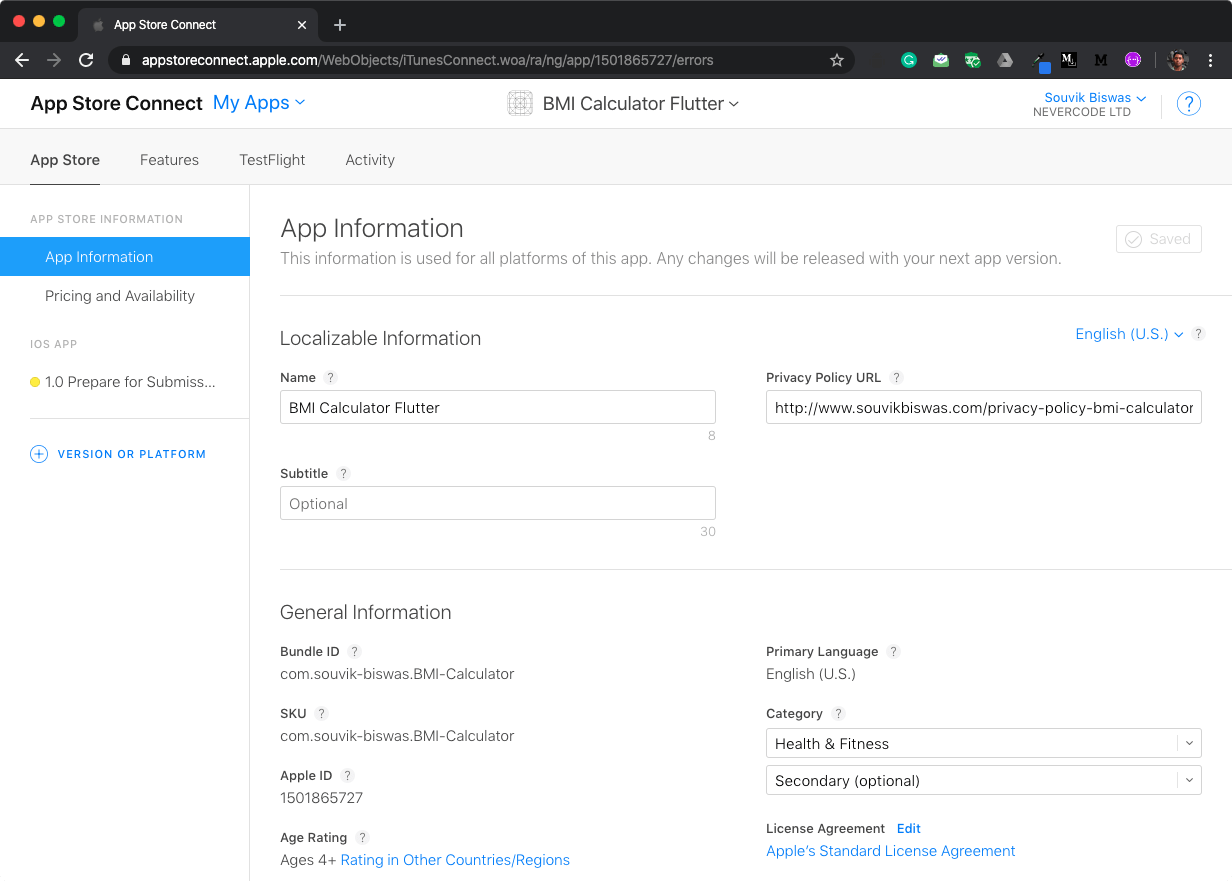
Go to your app on App Store Connect.
Under App Information, enter the Privacy Policy URL and select an Age Rating and Category.
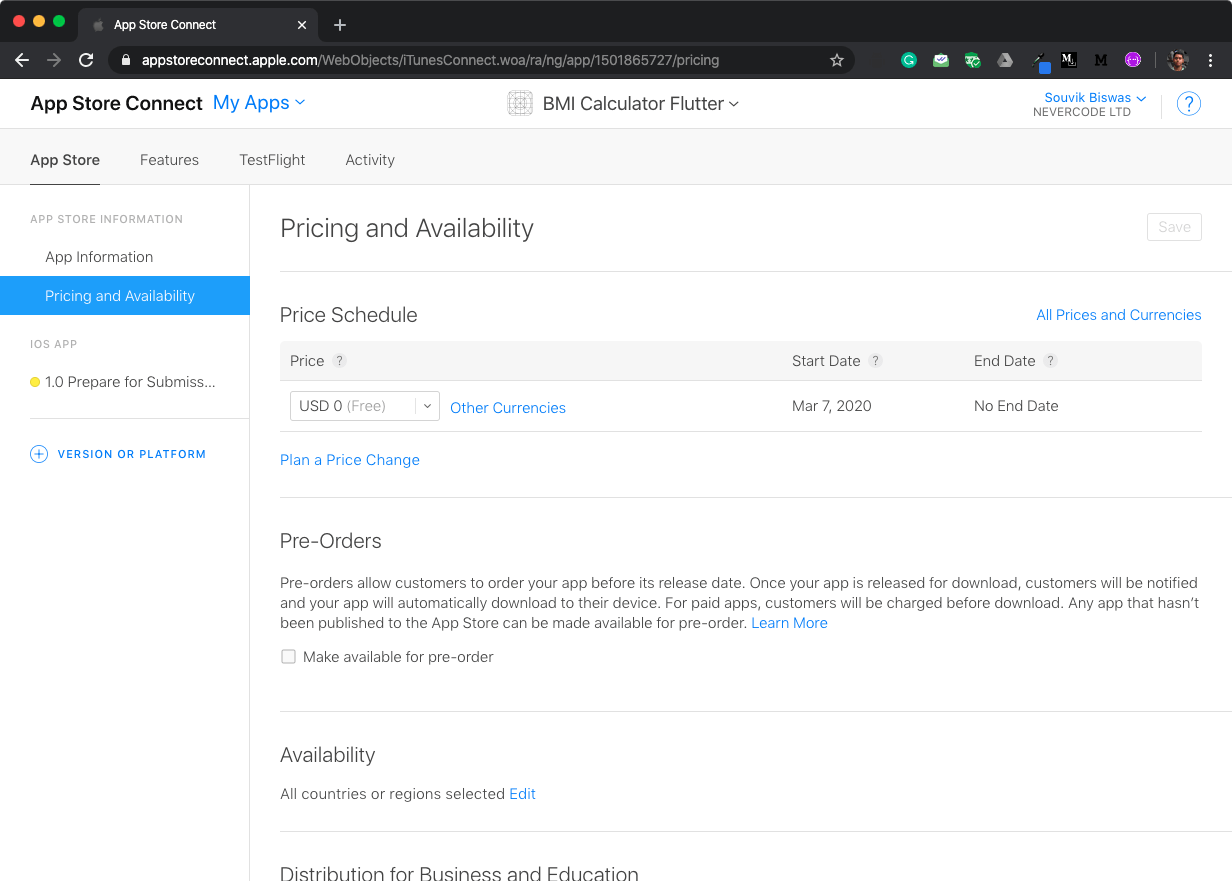
Under Pricing and Availability, select the price of the app and click on Save.
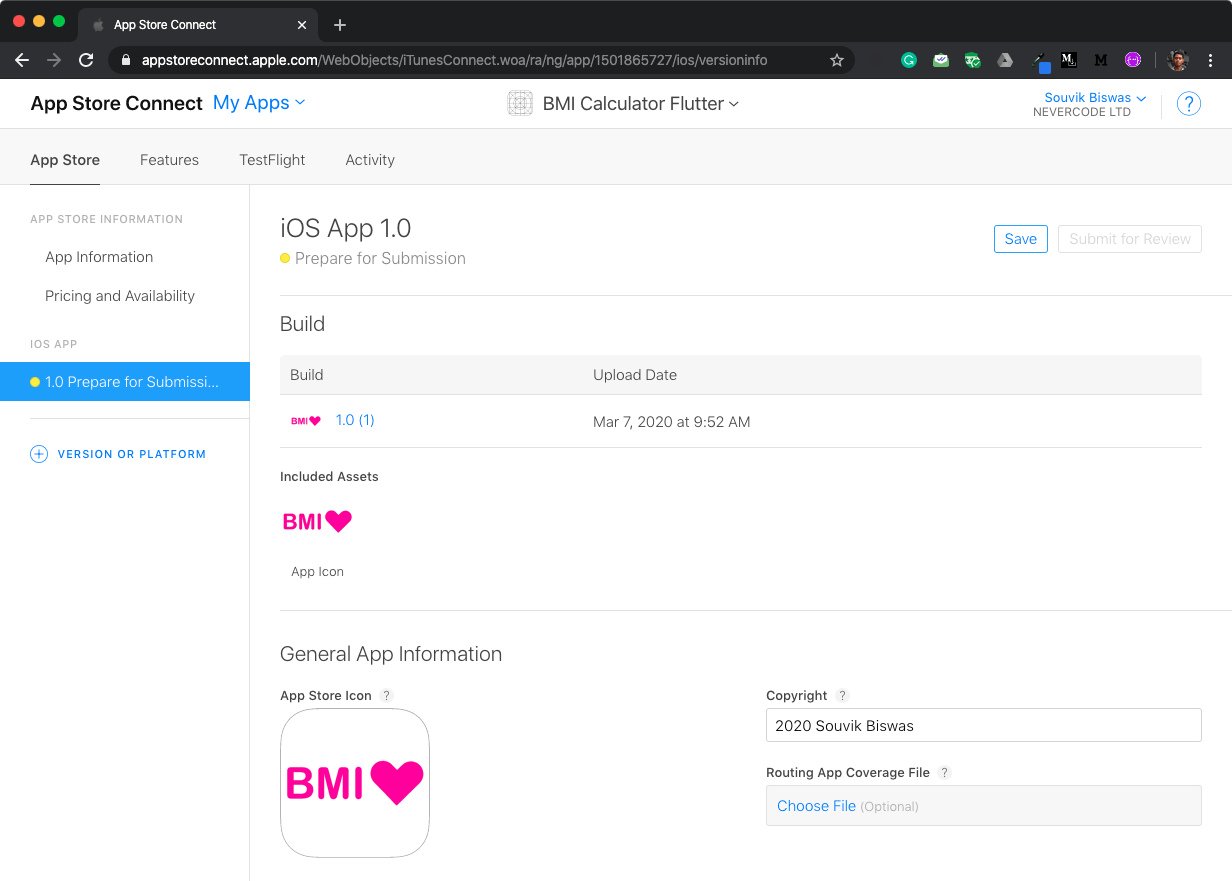
Go to the option Prepare for Submission, upload screenshots of the app for various screen sizes, and fill out all the other required information.
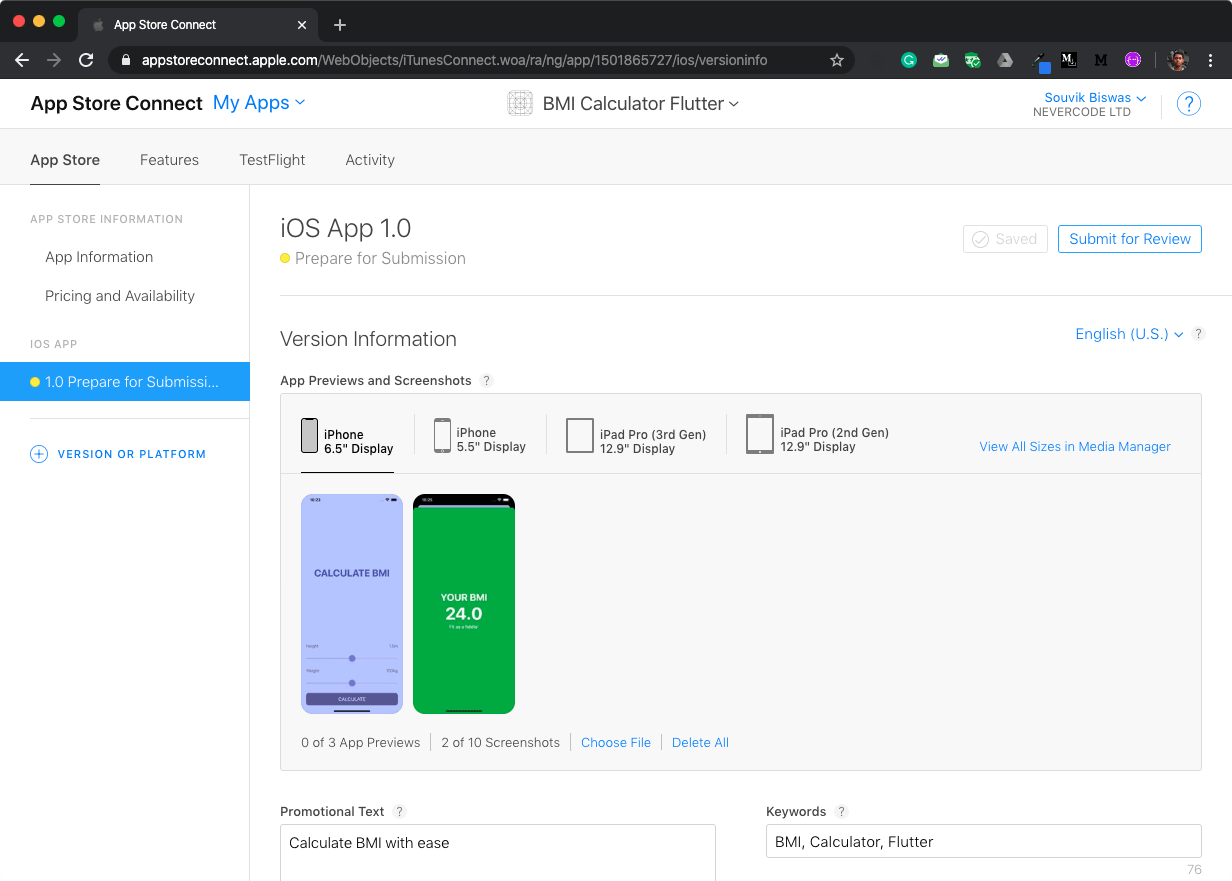
Select the Build version of the app that you want to publish and enter the Copyright information.
Click on Submit for Review.
Choose the appropriate options in the final form and click on Submit.
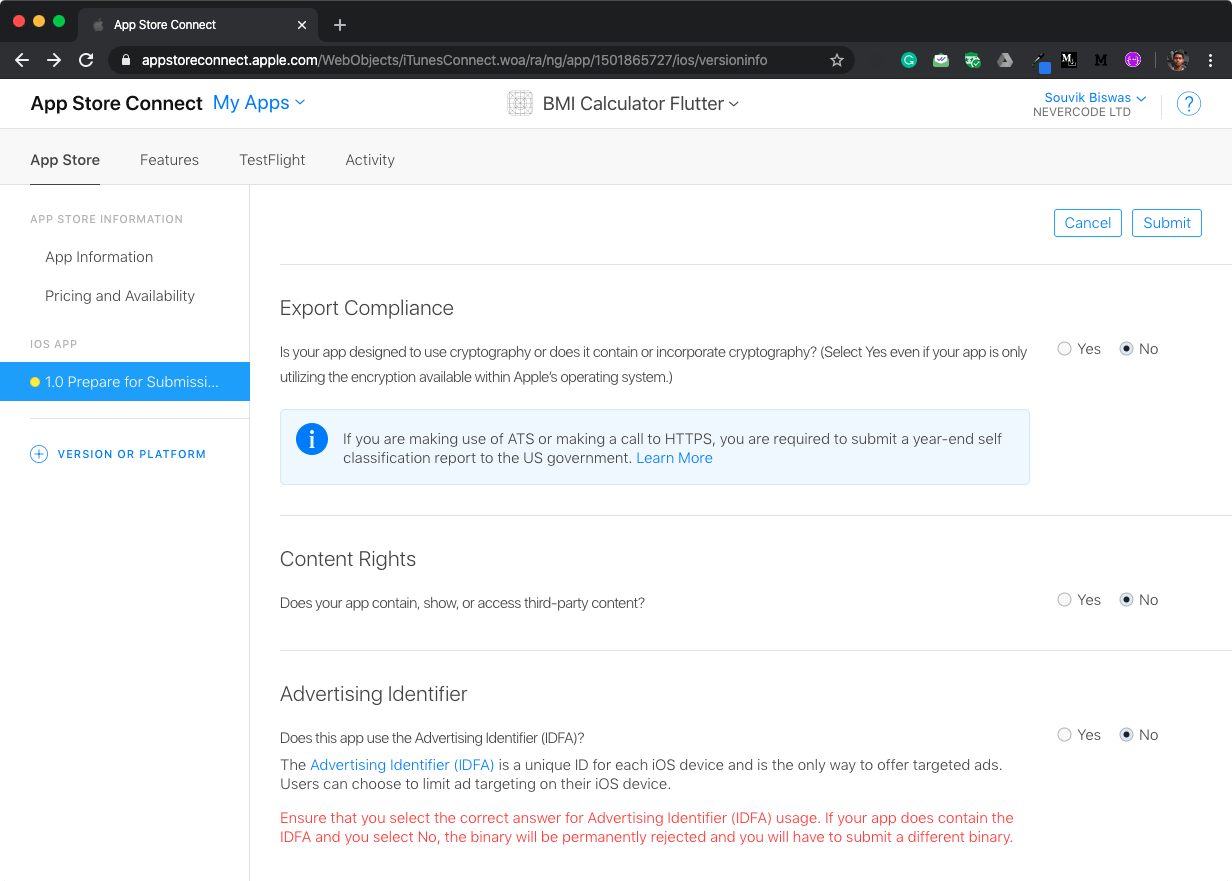
Finally, you have successfully sent your app for publishing; it will now go through a review process before it is uploaded to Apple App Store.
Distributing using Codemagic
Since I have already covered the code signing process using codemagic.yaml in the previous article, so I will not be going over the process again.
However, we need to change the certificate because we require a Distribution Certificate for publishing to the App Store (the certificate that we had used before was just a Development Certificate).
Additionally if you are using manual code signing, you’ll need to change the Provisioning Profile to the one that is generated from the Apple Developer Portal using the distribution certificate.
Updating the certificate and the profile
If you are using automatic code singing using App Store Connect, you just have to updated the fetch signing file script to the following:
- name: Fetch signing files
  script: app-store-connect fetch-signing-files $BUNDLE_ID --type IOS_APP_STORE --create
Just replace the
typetoIOS_APP_STOREinstead ofIOS_APP_DEVELOPMENTfor using the distribution certificate.
If you are using manual code signing, update the values of the following environment variables defined in your codemagic.yaml file to those of the distribution certificate:
- CM_CERTIFICATE
- CM_CERTIFICATE_PASSWORD
- CM_PROVISIONING_PROFILE
Adding App Store Connect publishing script
In order to upload the .ipa file to App Store Connect from Codemagic, we have to add the following to the publishing script.
publishing:
   email:
      recipients:
        - <email>
   # Add the following to the script:
   app_store_connect:
      apple_id: $APPLE_ID_EMAIL
      password: $APP_SPECIFIC_PASSWORD
Replace with their appropriate values, you can know more about App Store Connect publishing from here.
The provided key should have App Manager permission for publishing the app to App Store Connect.
Now, you are ready to run the script on Codemagic CI/CD.
The complete YAML file is available here.
Running the script
Go to your project from the Applications dashboard on Codemagic UI.
Click Start new build.
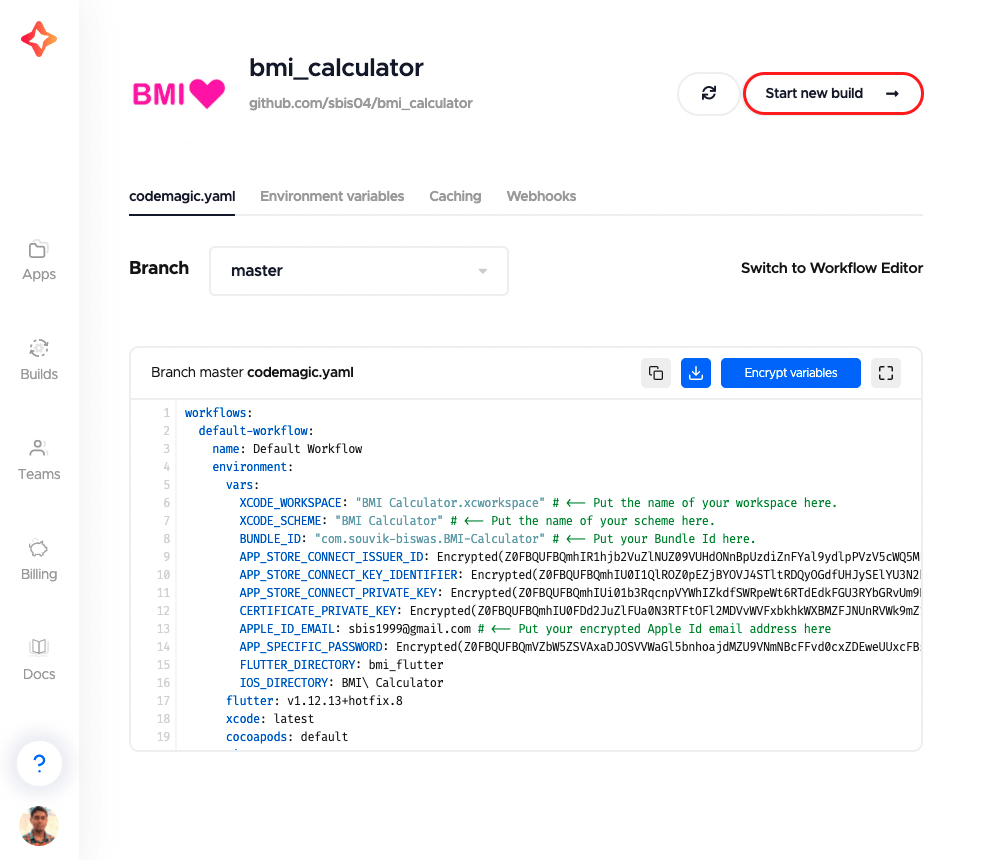
Select the correct workflow and click Start new build to start the building process.

This will test, build, and upload the .ipa to App Store Connect.
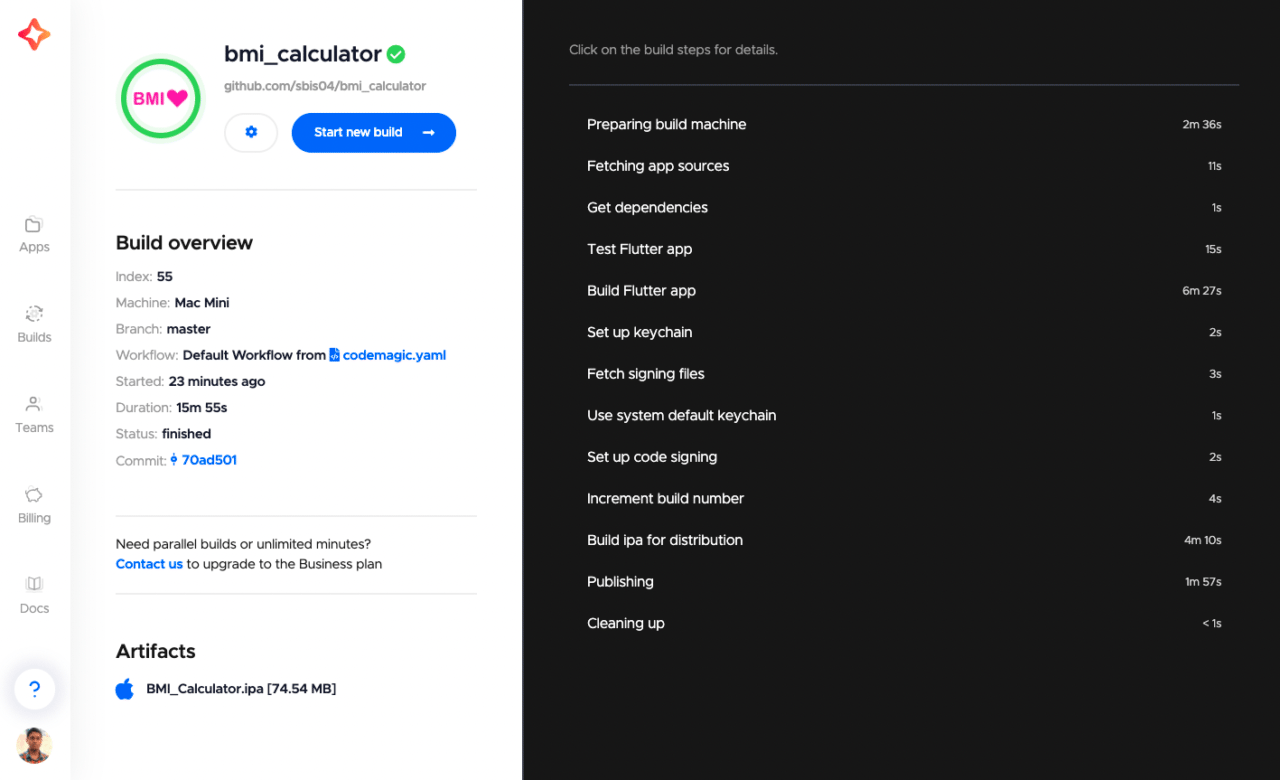
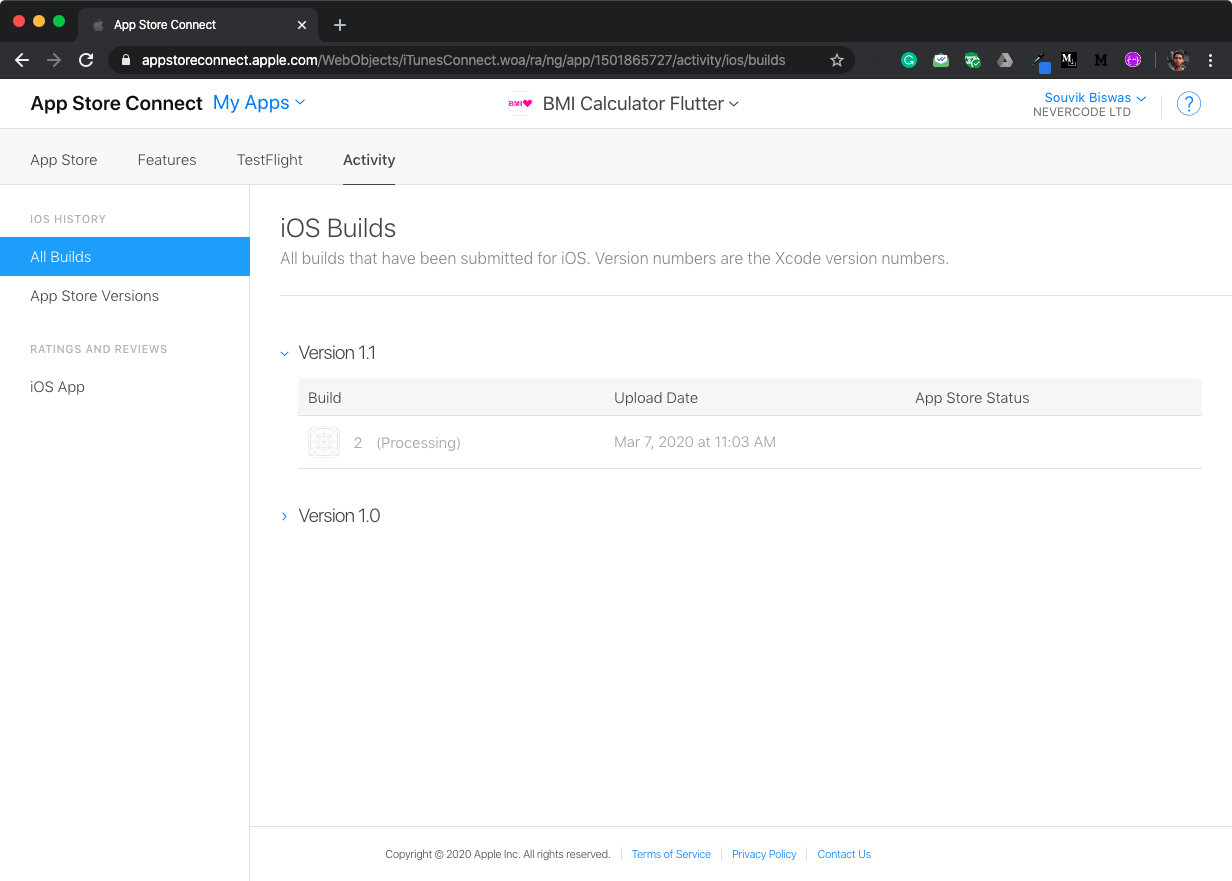
You can now go to your app on the App Store Connect portal. Go to the Activity tab > All builds. Here you will find the new version of the app. It will take some time to finish processing and then you are good to go.
Conclusion
Distributing your iOS app using codemagic.yaml helps you to skip a lot of manual steps so that you can get your app to production as fast as possible. Though the initial setup process is a bit time consuming, you only need to do it once and from then on the YAML file will be auto-detected by Codemagic CI/CD each time you run a build. It is also very convenient to manage the YAML file, as every time you make any changes to the file, you just have to push to the VCS.
Useful links and references
- The official documentation of Codemagic YAML is available here.
- Documentation for iOS code signing is here.
- Documentation for publishing to App Store Connect is here.
- The GitHub repo of this project is available here.
Souvik Biswas is a passionate Mobile App Developer (Android and Flutter). He has worked on a number of mobile apps throughout his journey. Loves open source contribution on GitHub. He is currently pursuing a B.Tech degree in Computer Science and Engineering from Indian Institute of Information Technology Kalyani. He also writes Flutter articles on Medium - Flutter Community.
More articles by Souvik:


