


 in Flutter with Codemagic CI/CD")
Written by Matt Rešetár This post was first published at Reso Coder. Blog for high quality Flutter & Dart app development tutorials to get you prepared for the real app development - from robust and clean architecture to deployment.
You are tweaking an app which is already in production. You are implementing code that allows a user to delete his data. All of a sudden, you realize that you made a huge mistake! By providing a wrong ID, you accidentally deleted data of an actual user!
Horror stories like this one can truly become a reality if you don’t have separate production and development environments. Thankfully, it’s very easy to set all of this up with Codemagic which is a CI/CD service dedicated specifically for Flutter apps.
Our multi-environment project
Environments can be used for just about anything - from supplying a different Firebase config file, so that you won’t accidentally delete production data from Firestore, to changing the UI and even logic based on the current app environment.
To keep this tutorial in a reasonable time-span, we won’t deal with Firebase but we will instead create environments for a counter app! Yay 🎉 But seriously, have you never wanted to change the increment amount from 1 to 5 by reading a configuration JSON file? No? Well, now you’ll see what you missed!
There are 2 ways in which to configure multiple environments - either by providing a config file (this is the case with Firebase) or by passing around an Environment enum or a constant String (this is usually used with dependency injection). We’re going to tackle both of these approaches.
Environments are very close to flavors but they cannot change native configuration such as the bundle ID or app icon. Once you know how to configure environments, flavors are easy to set up. I’d recommend you to check out flutter.dev docs or a post by Dominik Roszkowski if you’d like to learn more.
Also, how can we use the proper environment when we build the app? Additionally, config files can contain sensitive information which we don’t want to check into source control… How can we handle that? The answer is Codemagic and multiple branches in a git repo. However, before we can set up that kind of stuff, we have to first create a Flutter project.
The Flutter project
As you already know, we will build yet another variant of the counter app. The UI code will remain fairly unchanged. To follow along, create a new Flutter project and paste the following code into lib/app_widget.dart. Changes to the default counter app are highlighted.
app_widget.dart
import 'package:flutter/material.dart';
import 'package:provider/provider.dart';
import './config_reader.dart';
class MyApp extends StatelessWidget {
@override
Widget build(BuildContext context) {
return MaterialApp(
title: 'Flutter CI with Codemagic',
theme: ThemeData(
primarySwatch: Provider.of<Color>(context),
),
home: MyHomePage(title: 'Flutter CI with Codemagic'),
);
}
}
class MyHomePage extends StatefulWidget {
MyHomePage({Key key, this.title}) : super(key: key);
final String title;
@override
_MyHomePageState createState() => _MyHomePageState();
}
class _MyHomePageState extends State<MyHomePage> {
int _counter = 0;
void _incrementCounter() {
setState(() {
_counter += ConfigReader.getIncrementAmount();
});
}
@override
Widget build(BuildContext context) {
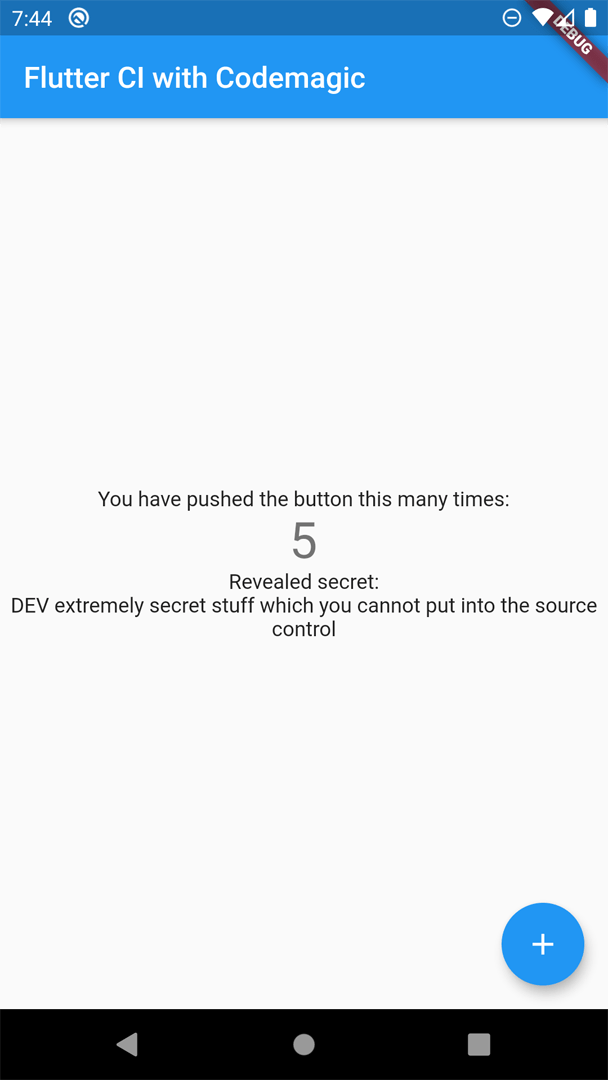
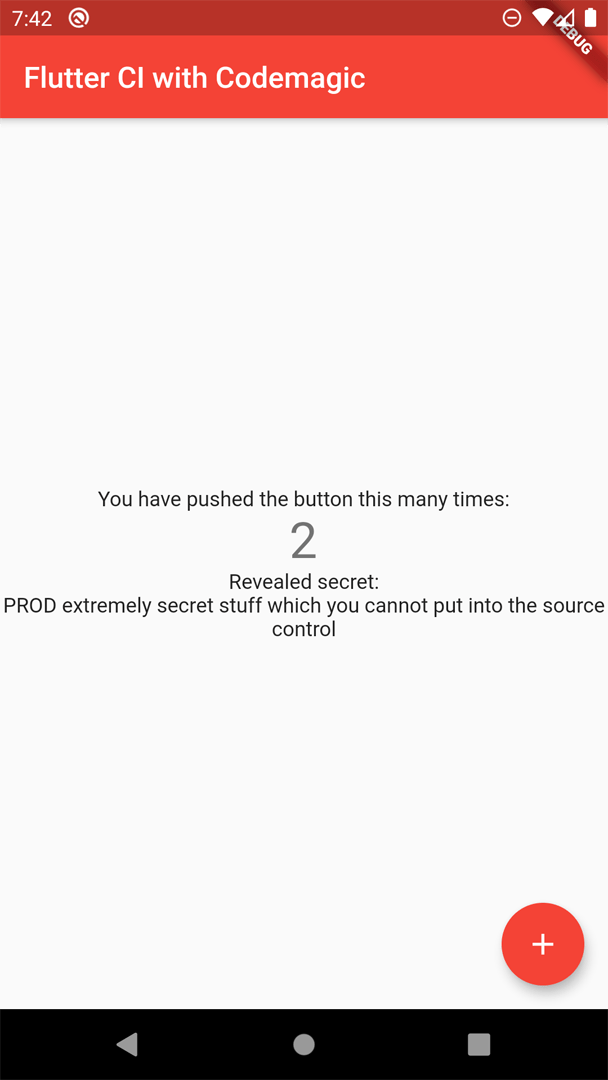
return Scaffold(
appBar: AppBar(
title: Text(widget.title),
),
body: Center(
child: Column(
mainAxisAlignment: MainAxisAlignment.center,
children: <Widget>[
Text(
'You have pushed the button this many times:',
),
Text(
'$_counter',
style: Theme.of(context).textTheme.display1,
),
Text(
'Revealed secret:\n${ConfigReader.getSecretKey()}',
textAlign: TextAlign.center,
),
],
),
),
floatingActionButton: FloatingActionButton(
onPressed: _incrementCounter,
tooltip: 'Increment',
child: Icon(Icons.add),
),
);
}
}
Pretty standard stuff, if you ask me. The difference from the default counter app lies in getting the increment value and also a “secret key” from a config JSON file using a ConfigReader. The primary theme color is gotten using Provider - changing the color is accomplished using environment const String. You’ll see how it’s all done in just a bit 😉
Configuration JSON
Files present in the project are perfect for providing non-dynamic configuration. This can range from an increment amount for a counter app to various secret keys or even a Firebase config.
The problem is that we don’t want to check secret keys into source control. After all, all kinds of people can have access to the repository even when it’s private (contractors, etc.) and you don’t want them to see the keys! That’s why it’s good to add the config file into the project only at build time with Codemagic.
Still, we want to be able to develop the app locally so we have to keep a copy of at least the development environment config on our machine. Let’s put it into a folder located in the root of the project called config.
config/app_config.json
{
  "incrementAmount": 5,
  "secretKey": "DEV extremely secret stuff which you cannot put into the source control"
}
To prevent this file from being committed to git, we’ll utilize .gitignore.
.gitignore
Secrets
/config
Lastly we need to make sure that the app_config.json file is accessible from within our Flutter app. That means we have to add the config folder to assets. While we’re inside pubspec.yaml, let’s also add a dependency on the provider package.
pubspec.yaml
dependencies:
  flutter:
    sdk: flutter
  provider: ^4.0.4

...

flutter:
  ...
  assets:
    - config/
You are probably used to having “static” asset files. Although the app_config.json file will be put into the project by Codemagic, having it as an asset will still work. That’s because we’ll add the config file before building the app and the
buildcommand automatically runsflutter pub get.
Now that we know the structure of the config file and also that it’s available as an asset, we can implement the ConfigReader class. Note that the initialize() method has to be called from main(). We’ll do that later.
config_reader.dart
import 'dart:convert';
import 'package:flutter/services.dart';

abstract class ConfigReader {
  static Map<String, dynamic> _config;

  static Future<void> initialize() async {
    final configString = await rootBundle.loadString('config/app_config.json');
    _config = json.decode(configString) as Map<String, dynamic>;
  }

  static int getIncrementAmount() {
    return _config['incrementAmount'] as int;
  }

  static String getSecretKey() {
    return _config['secretKey'] as String;
  }
}
Environment constants
Having a config file is only one way to differentiate between environments. The other way is having multiple entry points (a.k.a. targets) for an app and then passing down either a "prod" or "dev" environment string depending on whether the initially called main() method was located inside main_dev.dart or main_prod.dart file.
As opposed to config files, multiple app entry points and their associated environment constant strings cannot hold any secret keys. They are suited for dependency injection purposes and also for changing the look of the app.
Let’s first create the constant strings which will be passed around the app. It’s also possible to create an enum instead. We want to have two environments - dev and prod.
environment.dart
abstract class Environment {
  static const dev = 'dev';
  static const prod = 'prod';
}
Now onto the entry points! If you’re not aware of it, the flutter run and flutter build commands take in an option called --target or -t for short. This allows our app to have main_dev.dart and main_prod.dart files. These usually don’t contain much code in themselves. Instead, they delegate all of the work to a common main method.
main_dev.dart
Future<void> main() async {
  await mainCommon(Environment.dev);
}
main_prod.dart
Future<void> main() async {
  await mainCommon(Environment.prod);
}
The common method, which is usually located inside main_common.dart, is where we initialize the ConfigReader and do any setup based on the passed in environment. In this case, we only provide a different primary color.
main_common.dart
Future<void> mainCommon(String env) async {
  // Always call this if the main method is asynchronous
  WidgetsFlutterBinding.ensureInitialized();
  // Load the JSON config into memory
  await ConfigReader.initialize();

  Color primaryColor;
  switch (env) {
    case Environment.dev:
      primaryColor = Colors.blue;
      break;
    case Environment.prod:
      primaryColor = Colors.red;
      break;
  }

  runApp(
    Provider.value(
      value: primaryColor,
      child: MyApp(),
    ),
  );
}
VS Code launch.json
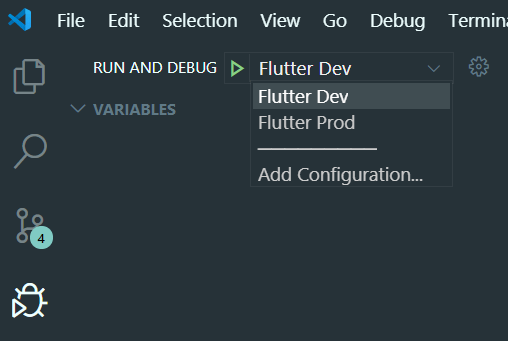
You can absolutely run the app from the command line and pass in the --target manually. I hope though that you aren’t one of those who likes to program in VIM and any modern IDE gives that person a seizure. To be able to run our custom targets from VS Code, add this launch.json into a .vscode folder located in the root of the project.
IntelliJ or Android Studio users can consult the official guide on setting up run & debug configurations by JetBrains.
launch.json
{
  "version": "0.2.0",
  "configurations": [
    {
      "name": "Flutter Dev",
      "type": "dart",
      "request": "launch",
      "program": "lib/main_dev.dart"
    },
    {
      "name": "Flutter Prod",
      "type": "dart",
      "request": "launch",
      "program": "lib/main_prod.dart"
    }
  ]
}
Going to the Debug tab will present you with two launch options 😎
A short test to prove a point
A CI tool is most useful for continuously running tests and making you think twice before you merge a PR with a failing test suite. To make ourselves happy at the sight of green checkmarks next to our tests, let’s add a completely fabricated example_test.dart.
test/example_test.dart
import 'package:flutter_test/flutter_test.dart';

void main() {
  test(
    "1 + 1 == 2",
    () async {
      expect(1 + 1 == 2, true);
    },
  );
}
The app is now fully runnable locally. The config JSON file can be read and you can launch either the prod or dev main() method. All of the tests are passing, so the next step is to automate under which environment the app runs.
Git repository with branches
The real magic of app environments lies in automatically choosing the correct one based on if the commit is located in the dev branch or master branch. As you can imagine, the production environment should be used to create apps ready for publishing from the master branch.
Let’s first set up the git repository. Codemagic fully supports GitHub, Bitbucket, GitLab and even custom remote repositories. We’re going to go with GitHub in this tutorial and I assume you already have some basic experience with setting up a repository there. Once you’ve set up either a public or a private repo, let’s do all of the usual git setup together with adding the remote.
👨💻 terminal
git init
git add .
git commit -m "Initial commit"
git remote add origin https://github.com/pathToYourGitHubRepo.git
git push -u origin master
The master branch will hold production-ready code which can be published to the app stores running under the production environment. Let’s also create a dev branch that will be an exact copy of master for now. Builds from the dev branch will be distributed to testers and they will run under the development environment.
👨💻 terminal
git checkout -b dev
git push -u origin dev
Setting up Codemagic
A good CI/CD tool is the glue that connects git branches to environments (and possibly flavors). Getting access to all that’s happening in your repository through Codemagic is simple - just sign in with your GitHub account.
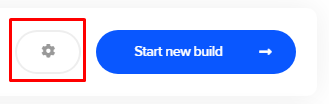
Organization accounts may require a bit more setup. Follow this guide to add Codemagic as an authorized OAuth app for your organization. Codemagic works with workflows. First, we’re going to create a Dev Workflow which will, of course, build the app under the development environment. Find your repository in the list of apps and hit the gear icon.
Dev Workflow
Build trigger
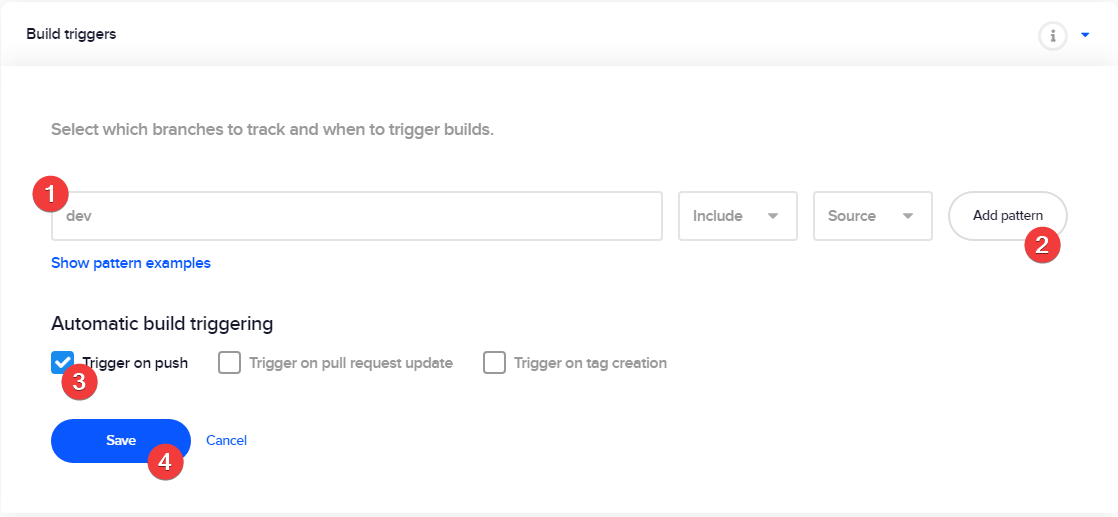
We want to trigger development environment builds whenever there’s a new commit in the dev branch. That’s what build triggers are for.
Environment variable
Next, we need to get the app_config.json file into Codemagic so that we can dynamically add the correct one to the project upon build. The issue is, you cannot upload a file to Codemagic 😢 That’s not a problem though! Any string of text (JSON included) can be converted to a base64 string and then added to the CI/CD solution as an environment variable.
Let’s open up a terminal at the root of our Flutter project. If you’re running GitBash, you can encode files to base64 in the following way:
👨💻 terminal
# GitBash
base64 config/app_config.json
GitBash will display the encoded string directly in the terminal. MacOS and Linux users have to follow a bit different procedure as you have to write out the base64 string to a file.
👨💻 terminal
# MacOS
openssl base64 -in config/app_config.json -out outfile.txt
# Linux
base64 --encode config/app_config.json outfile.txt
Either way, if you’ve been following along and your config file has the same incrementAmount and secretKey, the base64 string will be as follows:
ew0KICAiaW5jcmVtZW50QW1vdW50IjogNSwNCiAgInNlY3JldEtleSI6ICJERVYgZXh0cmVtZWx5
IHNlY3JldCBzdHVmZiB3aGljaCB5b3UgY2Fubm90IHB1dCBpbnRvIHRoZSBzb3VyY2UgY29udHJv
bCINCn0NCg==
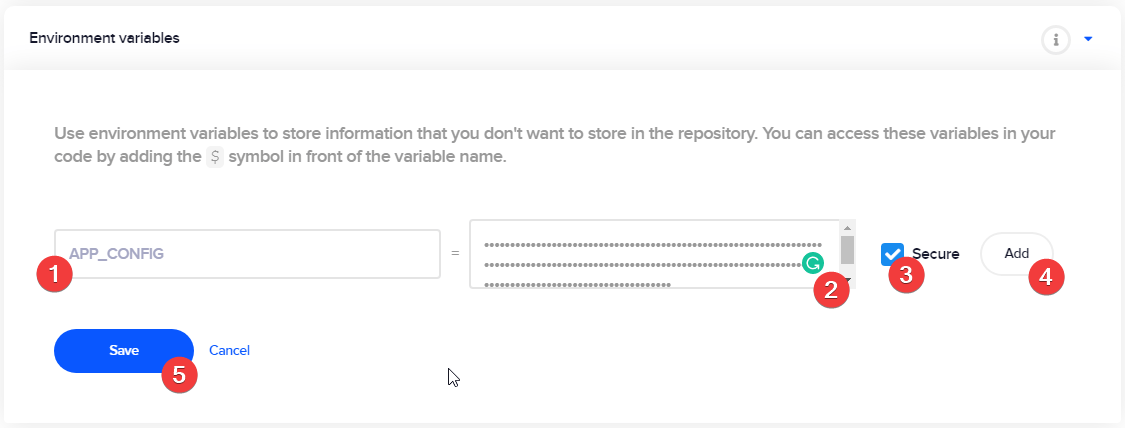
Copy this string and add it as an APP_CONFIG environment variable. Make sure to check “Secure” to make it encrypted.
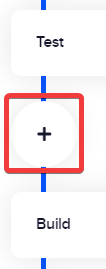
With this variable accessible when the Codemagic’s machine starts testing and building, we can now finally do what we wanted to accomplish from the beginning - create a new file called app_config.dart under the config directory all within the CI/CD workflow. Let’s create a pre-build script by hitting the “+” button in between “Test” and “Build”.
We’ll want to create the config directory if it doesn’t yet exist and then take the APP_CONFIG encrypted base64 string and output it into the app_config.json file.
✨ Codemagic pre-build script
# Create directory if it doesn't exist
mkdir -p $CM_BUILD_DIR/config
# Write out the environment variable as a json file
echo $APP_CONFIG | base64 --decode > $CM_BUILD_DIR/config/app_config.json
Accessing an environment variable is done by prefixing it with a dollar sign. There are a bunch of predefined variables. For example, CM_BUILD_DIR contains the path to our project on the build machine.
Test and build
There are two last steps needed to finalize this Dev Workflow. First, let’s enable analyzer and flutter_test under the Test tab in Codemagic and hit Save.

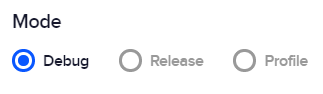
In the Build tab, set up the platforms for which you want to build, set the mode to debug and, most importantly, provide the proper target file as a build argument.


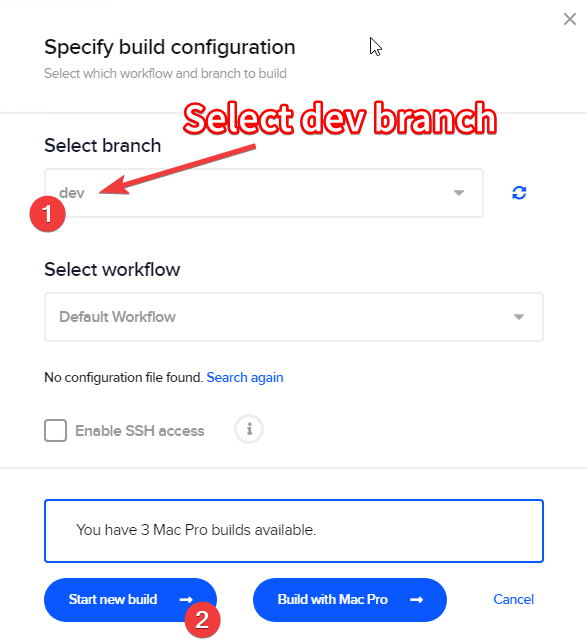
This setup is enough for the Dev Workflow (which is currently called just Default Workflow) and we can finally start our first build manually.
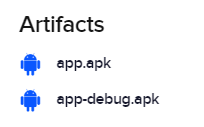
If everything goes properly (and it should!), this build will be successful and it will give us an APK file which will run under the development environment. You can download the APK files from the finished build tab.
In addition to downloading APK files like this, you can also use Testmagic or even integrate your workflow with Firebase App Distribution. Doing so will enable testers to easily access development builds of the app.
Prod Workflow
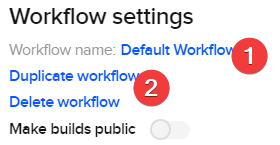
First up, don’t despair! We won’t have to create the Prod Workflow from scratch because we can duplicate the Dev Workflow and then just slightly modify it.
Rename the “Default” to “Dev” Workflow and hit Duplicate.
Update the Build trigger to listen to pushes on the master branch. Steps are the same as in this paragraph above.
Next, we’re going to update the APP_CONFIG environment variable to hold a production incrementAmount and secretKey. Follow the steps from this paragraph. The only thing which differs is the content of the app_config.json.
config/app_config.json
{
  "incrementAmount": 1,
  "secretKey": "PROD extremely secret stuff which you cannot put into the source control"
}
Lastly, we’re going to modify the Build tab to target the main_prod.dart file. Follow these steps if you need a refresher.
Leave the build mode at Debug. Unless you set up code signing, you won’t be able to install Release APKs. Follow the official docs to sign your apps.
Push commits and reap the benefits
While it’s entirely possible to start builds manually, we’ve set up build triggers to automate the process. Try pushing a new commit to the master branch to trigger the Prod Workflow. You’ll immediately notice the different environments once you install the APKs.
Setting up environments with Codemagic is a breeze. Since Codemagic is a CI/CD tool is dedicated to Flutter, they’re always on top of their game and although this article is sponsored, I can truly recommend them. Their support is top notch and their service is priced very competitively so you won’t need to max out your credit card to use it 😉
Matt is an app developer with a knack for teaching others. Working as a senior software developer at HandCash, freelancer and most importantly developer educator, he doesn’t have a lot of free time 😅 Yet he still manages to squeeze in tough workouts 💪 and guitar 🎸. You can follow him @resocoder. Don’t forget to check his Reso Coder blog and subscribe to Flutter tutorials and news newsletter.


