


Written by Souvik Biswas
Local Authentication is an important verification step for several apps. This verification is fully done on device, so there is no way of leaking any sensitive information to any third-party servers.
This can also serve as an additional layer of security over the traditional sign-in methods (like using Email / Password or Google Sign In) to restrict access to some very sensitive information that should not get displayed to any other person except the user of the device. Some of the use-cases for local authentication may be for viewing the transaction history of the user or the authentication of any payment done through the app.
Apple App Store and Google Play Store already use Touch ID / Face ID and Fingerprint Authentication respectively to verify the transaction when a user purchases any app.
You can also use this Biometrics Security in your Flutter apps.
NOTE: This article uses the latest Flutter 2.0 stable release, with null safety enabled, for creating the sample app.
Getting Started
There is a nice plugin available for integrating Local Authentication in your Flutter app, known as local_auth. This uses the Platform APIs to get access to the device hardware, so there is no chance of leaking any private information from the device.
Let’s start by creating a new Flutter project, but first, let us know what’s your main difficulty when building apps?
Create project
Create a Flutter project by using the following command:
flutter create flutterfire_samples
Then open the project using your favorite code editor. For opening with VS Code you can use:
code flutterfire_samples
Flutter 2.0 has support for null safety in stable channel, but in order to use it inside the app you have to run a command for migrating the project to null safety.
Before running the migration command, check if all your current project dependencies support null safety by using:
dart pub outdated --mode=null-safety
Then, run the following command to migrate:
dart migrate
You can follow the migration guide here.
Import packages
Now, import the plugin by adding the following line to your project’s pubspec.yaml file:
dependencies:
  local_auth: ^1.1.0
You can get the latest version of the plugin available here.
Working on the UI
For this tutorial, I will be using one of my previously built projects known as flutterfire_samples.
Currently that project contains two layouts:
- SignInScreen
- UserInfoScreen
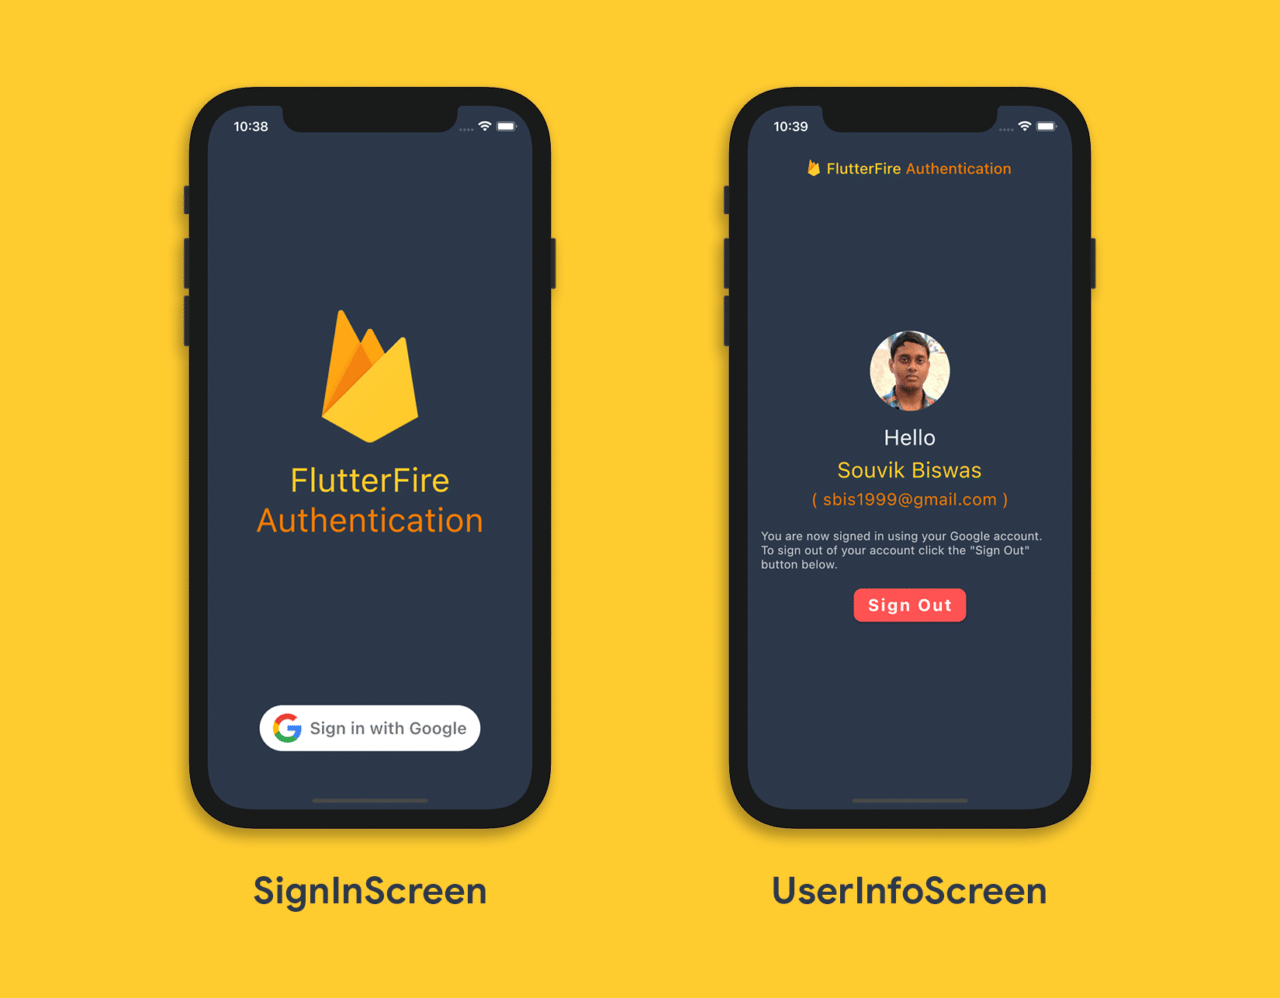
This is a simple project for implementing Firebase authentication & Google Sign In to your Flutter app.
Check out this article, if you want to get started with Firebase Auth and Google Sign In using Flutter.
We will be adding a SecretVaultScreen to this app, which will require biometric authentication to access.
The final app will have three layouts:
- SignInScreen
- UserInfoScreen
- SecretVaultScreen
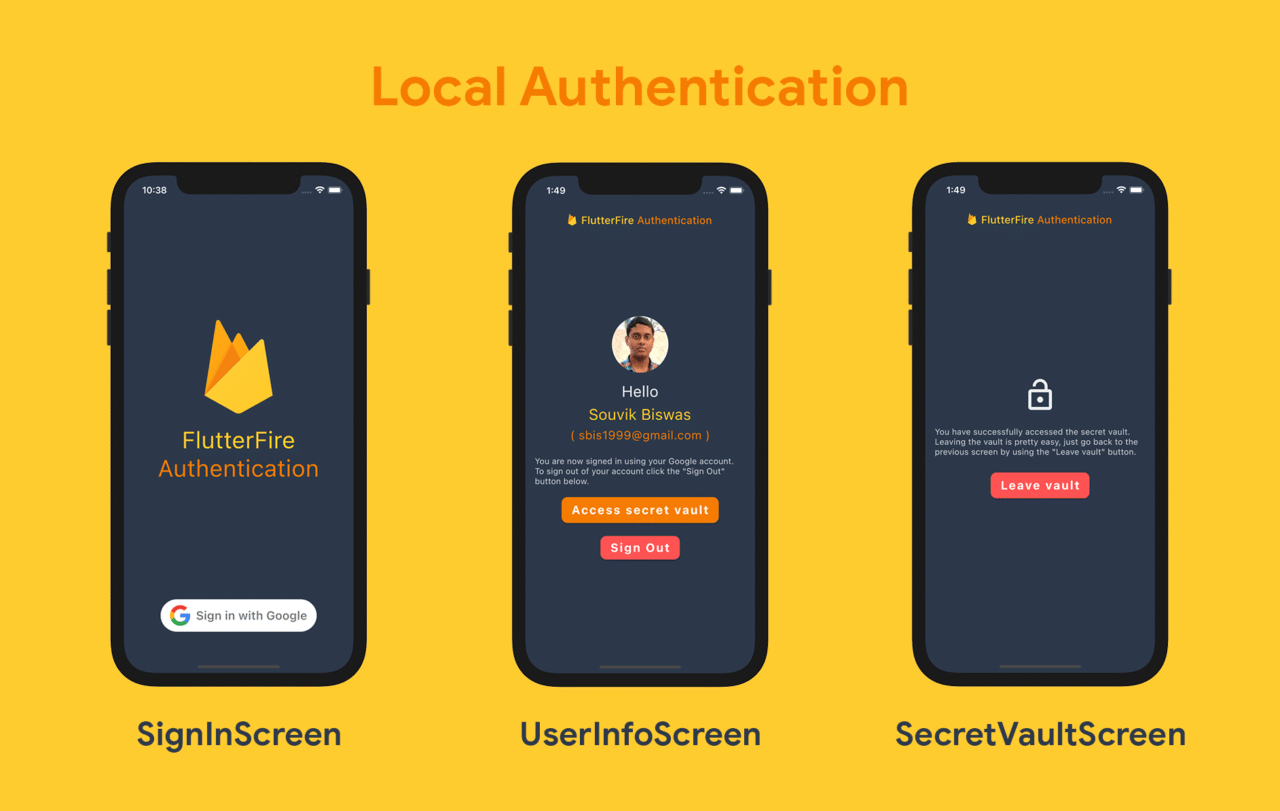
Let’s get started by adding a button labeled Access secret vault to the UserInfoScreen that will route to the SecretVaultScreen.
The code for Access secret vault button (without biometric authentication):
ElevatedButton(
  style: ButtonStyle(
    backgroundColor: MaterialStateProperty.all(
      CustomColors.firebaseOrange,
    ),
    shape: MaterialStateProperty.all(
      RoundedRectangleBorder(
        borderRadius: BorderRadius.circular(10),
      ),
    ),
  ),
  onPressed: () {
    Navigator.of(context).push(
      MaterialPageRoute(
        builder: (context) => SecretVaultScreen(),
      ),
    );
  },
  child: Padding(
    padding: EdgeInsets.only(top: 10.0, bottom: 10.0),
    child: Text(
      'Access secret vault',
      style: TextStyle(
        fontSize: 20,
        fontWeight: FontWeight.bold,
        color: Colors.white,
        letterSpacing: 2,
      ),
    ),
  ),
),
The SecretVaultScreen will contain an icon, a text, and a button (for going back to the previous screen).
The code for the SecretVaultScreen:
class SecretVaultScreen extends StatelessWidget {
  @override
  Widget build(BuildContext context) {
    return Scaffold(
      backgroundColor: CustomColors.firebaseNavy,
      appBar: AppBar(
        elevation: 0,
        leading: Container(),
        backgroundColor: CustomColors.firebaseNavy,
        title: AppBarTitle(),
      ),
      body: SafeArea(
        child: Padding(
          padding: const EdgeInsets.only(
            left: 16.0,
            right: 16.0,
            bottom: 20.0,
          ),
          child: Column(
            mainAxisAlignment: MainAxisAlignment.center,
            children: [
              Row(),
              Icon(
                Icons.lock_open,
                size: 60,
                color: CustomColors.firebaseGrey,
              ),
              SizedBox(height: 24.0),
              Text(
                'You have successfully accessed the secret vault. Leaving the vault is pretty easy, just go back to the previous screen by using the "Leave vault" button.',
                style: TextStyle(
                  color: CustomColors.firebaseGrey.withOpacity(0.8),
                  fontSize: 14,
                  letterSpacing: 0.2,
                ),
              ),
              SizedBox(height: 24.0),
              ElevatedButton(
                style: ButtonStyle(
                  backgroundColor: MaterialStateProperty.all(Colors.redAccent),
                  shape: MaterialStateProperty.all(
                    RoundedRectangleBorder(
                      borderRadius: BorderRadius.circular(10),
                    ),
                  ),
                ),
                onPressed: () => Navigator.of(context).pop(),
                child: Padding(
                  padding: EdgeInsets.only(top: 10.0, bottom: 10.0),
                  child: Text(
                    'Leave vault',
                    style: TextStyle(
                      fontSize: 20,
                      fontWeight: FontWeight.bold,
                      color: Colors.white,
                      letterSpacing: 2,
                    ),
                  ),
                ),
              ),
            ],
          ),
        ),
      ),
    );
  }
}
Local authentication overview
Before moving on to the actual implementation of the biometric authentication in our app, let’s take a look into the main things provided by the local_auth plugin.
First of all, import the local_auth package:
import 'package:local_auth/local_auth.dart';
Then you have create an instance of the plugin like this:
final LocalAuthentication localAuthentication = LocalAuthentication();
Some of the things that you can do with this plugin are:
- Check if biometric authentication is supported by the device
- Get a list of available biometric types
- Authenticate user using biometrics or pin/passcode.
Check for biometric authentication
You can check if the device supports biometric authentication or if it can use the device credentials (pin/passcode lock):
bool isBiometricSupported = await localAuthentication.isDeviceSupported();
Now, if you want to verify whether biometric authentication is accessible from the app, you can check it using this:
bool canCheckBiometrics = await localAuthentication.canCheckBiometrics;
Retrieve list of biometric types
You can retrieve a list of biometric types that are supported by the device, using this:
List<BiometricType> biometricTypes =
          await localAuthentication.getAvailableBiometrics();
The list may contain one or more from the following types:
- BiometricType.face
- BiometricType.fingerprint
- BiometricType.iris
Authenticate using biometrics or pin
You can perform the local authentication (that is using biometrics or pin/passcode) by using the following:
isAuthenticated = await localAuthentication.authenticate(
  localizedReason: 'Please complete the biometrics to proceed.',
);
If you want to restrict the user to biometric authentication (prevent authenticating using pin/passcode), you can set the biometricOnly parameter value to true:
isAuthenticated = await localAuthentication.authenticate(
  localizedReason: 'Please complete the biometrics to proceed.',
  biometricOnly: true,
);
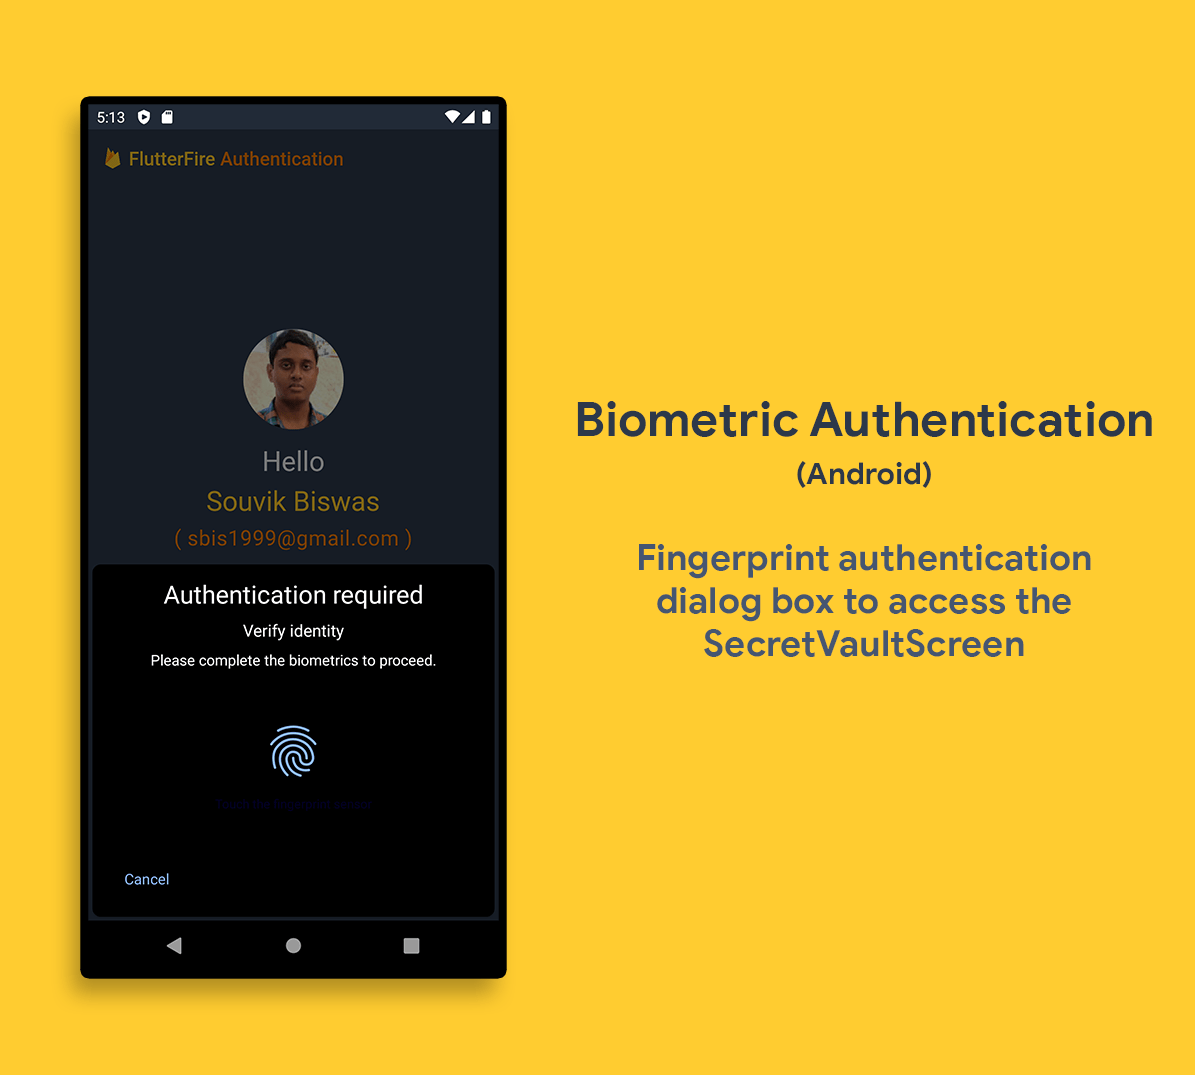
In our implementation, we will need to check if biometric authentication is supported by the device, then let the user to only use biometrics to authenticate, and move on to the next screen.
Implement local authentication
We need to authenticate the user in the UserInfoScreen before proceeding to the SecretVaultScreen.
Define a new method in the Authentication class, present in the authentication.dart file, called authenticateWithBiometrics() where the entire logic of biometric authentication will be written.
class Authentication {
  static Future<bool> authenticateWithBiometrics() async {
    final LocalAuthentication localAuthentication = LocalAuthentication();
    bool isBiometricSupported = await localAuthentication.isDeviceSupported();
    bool canCheckBiometrics = await localAuthentication.canCheckBiometrics;

    bool isAuthenticated = false;

    if (isBiometricSupported && canCheckBiometrics) {
      isAuthenticated = await localAuthentication.authenticate(
        localizedReason: 'Please complete the biometrics to proceed.',
        biometricOnly: true,
      );
    }

    return isAuthenticated;
  }
}
The authenticateWithBiometrics() method will return a boolean indicating whether the biometric authentication is successful.
There are some optional parameters of this localAuthentication.authenticate() method that we can define:
- localizedReason: The message to show the user while authentication.
- useErrorDialogs: While set to true, it will check if fingerprint reader exists on the phone but there’s no fingerprint registered, the plugin will attempt to take the user to settings to add one.
- stickyAuth: In normal circumstances the authentication process stops when the app goes to background. If stickyAuth is set to true, authentication resumes when the app is resumed.
Now, you can update the onPressed() method of the Access secret vault button to use the biometric authentication:
ElevatedButton(
  // ...
  onPressed: () async {
    bool isAuthenticated =
        await Authentication.authenticateWithBiometrics();

    if (isAuthenticated) {
      Navigator.of(context).push(
        MaterialPageRoute(
          builder: (context) => SecretVaultScreen(),
        ),
      );
    } else {
      ScaffoldMessenger.of(context).showSnackBar(
        Authentication.customSnackBar(
          content: 'Error authenticating using Biometrics.',
        ),
      );
    }
  },
  // ...
),
If the authentication is successful then the user will navigated to the SecretVaultScreen, otherwise a SnackBar would be shown with an error message.
Setup for using biometrics
For Android:
Add this permission to the AndroidManifest.xml file present in the directory android -> app -> src -> main:
<uses-permission android:name="android.permission.USE_FINGERPRINT"/>
Update the MainActivity.kt file to use FlutterFragmentActivity instead of FlutterActivity:
import io.flutter.embedding.android.FlutterFragmentActivity
import io.flutter.embedding.engine.FlutterEngine
import io.flutter.plugins.GeneratedPluginRegistrant

class MainActivity: FlutterFragmentActivity() {
    override fun configureFlutterEngine(flutterEngine: FlutterEngine) {
        GeneratedPluginRegistrant.registerWith(flutterEngine)
    }
}
For iOS:
For using FaceID on iOS, add the following line to the Info.plist file, this defines the message to be displayed when a user is prompted to authenticate:
<key>NSFaceIDUsageDescription</key>
<string>Biometric authentication for accessing secrets</string>
Testing the app on Simulator
For testing the app on iOS Simulator, you will need to enable FaceID or TouchID from the Simulator Hardware Settings.
- Run the app on Simulator
- Click on the Hardware in the top bar
- Go to Face ID or Touch ID, click on Enrolled
- Now, proceed with the biometric authentication
- When it prompts for the authentication, again go to Hardware -> Face ID or Touch ID.
- Here, you can choose between two options Matching Face or Non-matching Face (for Face ID) and Matching Touch or Non-matching Touch (for Touch ID), to simulate the authentication.

Conclusion
Local Authentication has a number of use-cases in apps and I hope this article will make it easier for you to integrate biometric authentication to your Flutter apps.
The GitHub repo of this app is available here.
How did you like that tutorial? Was is helpful? Let us know HERE.
Souvik Biswas is a passionate Mobile App Developer (Android and Flutter). He has worked on a number of mobile apps throughout his journey. Loves open source contribution on GitHub. He is currently pursuing a B.Tech degree in Computer Science and Engineering from Indian Institute of Information Technology Kalyani. He also writes Flutter articles on Medium - Flutter Community.
More articles by Souvik:


