


In this tutorial, you’ll learn how to implement local notifications using the
flutter_local_notificationspackage. This article is written Ivy Walobwa
Improving your app’s user engagement is key to its success. One way to prevent churn and increase interactions in your Flutter app is by using notifications. Push notifications are pop-up messages that are displayed outside the app’s UI. These messages can appear when the app is closed or in the background. Push notifications are used to get users’ attention and communicate information to them.
We’ll cover how to set up and display instant or scheduled notifications on iOS and Android. You’ll also learn how to group messages on both platforms.
This tutorial assumes that you have a working knowledge of Dart and Flutter.
Example app
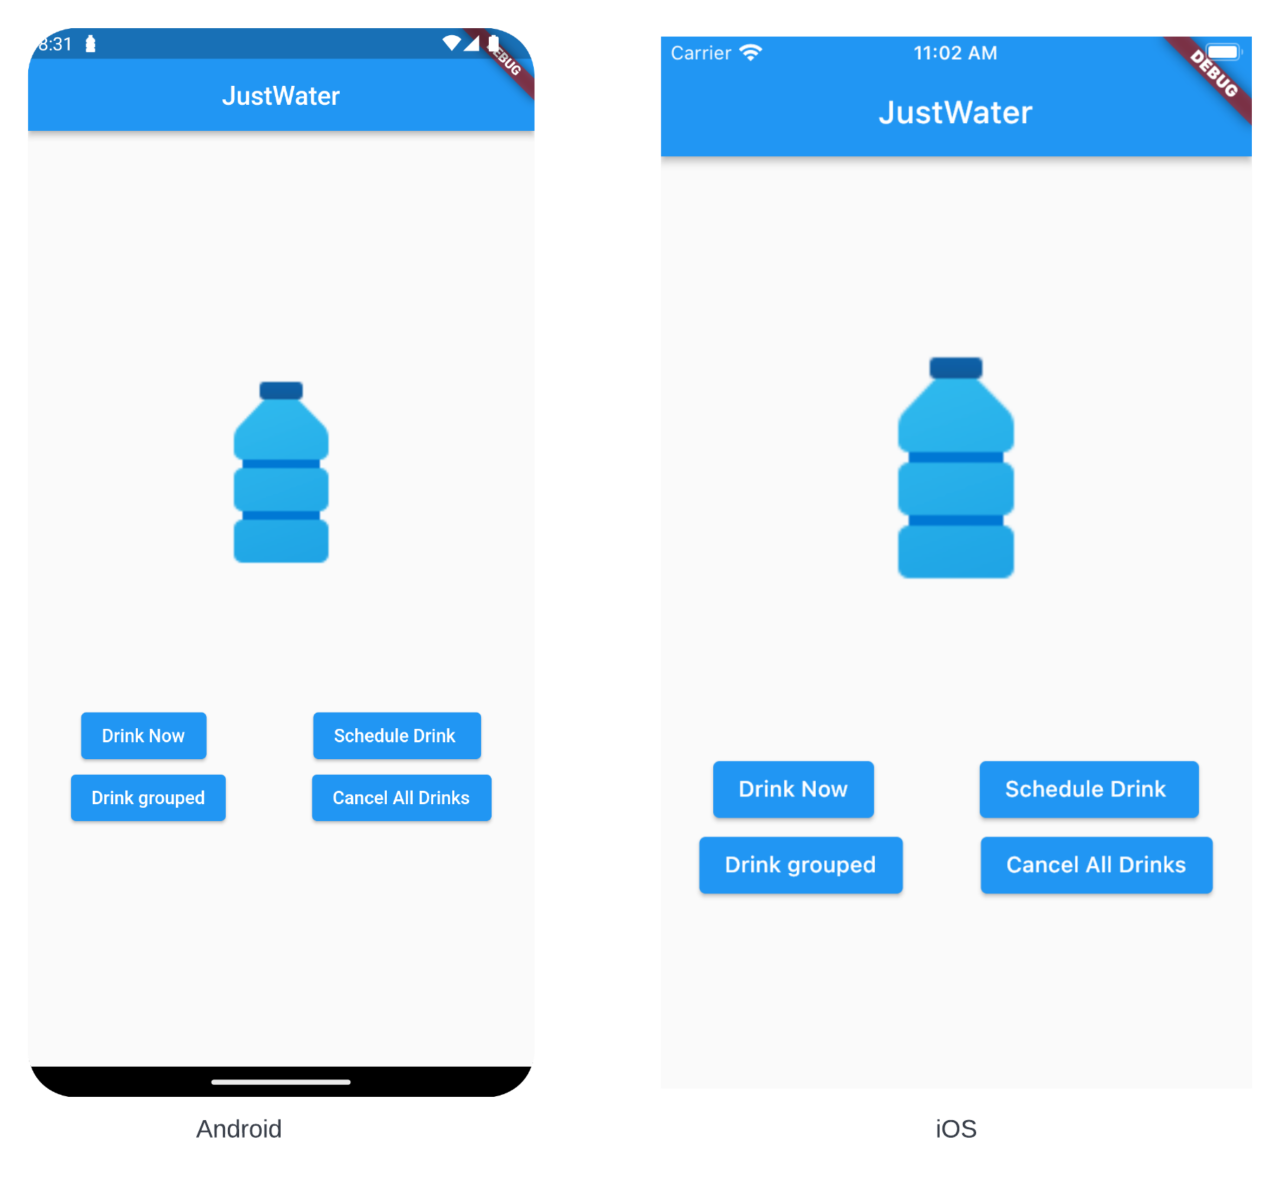
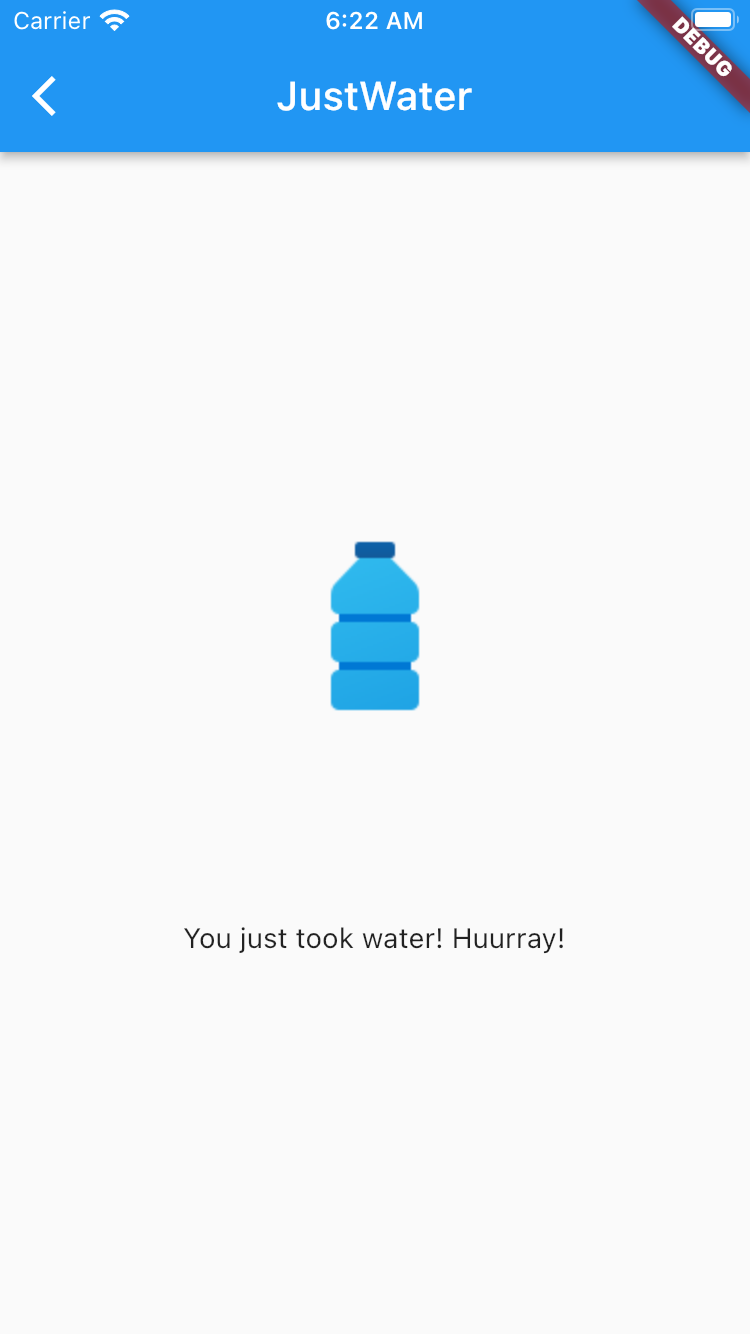
You’ll work on the JustWater application shown below, which sends notifications to a user that remind them to drink water. The messages can be sent instantly or scheduled for a specific time. Similar notifications are grouped. Clicking on a single notification navigates to a second screen, as demonstrated in the video below.
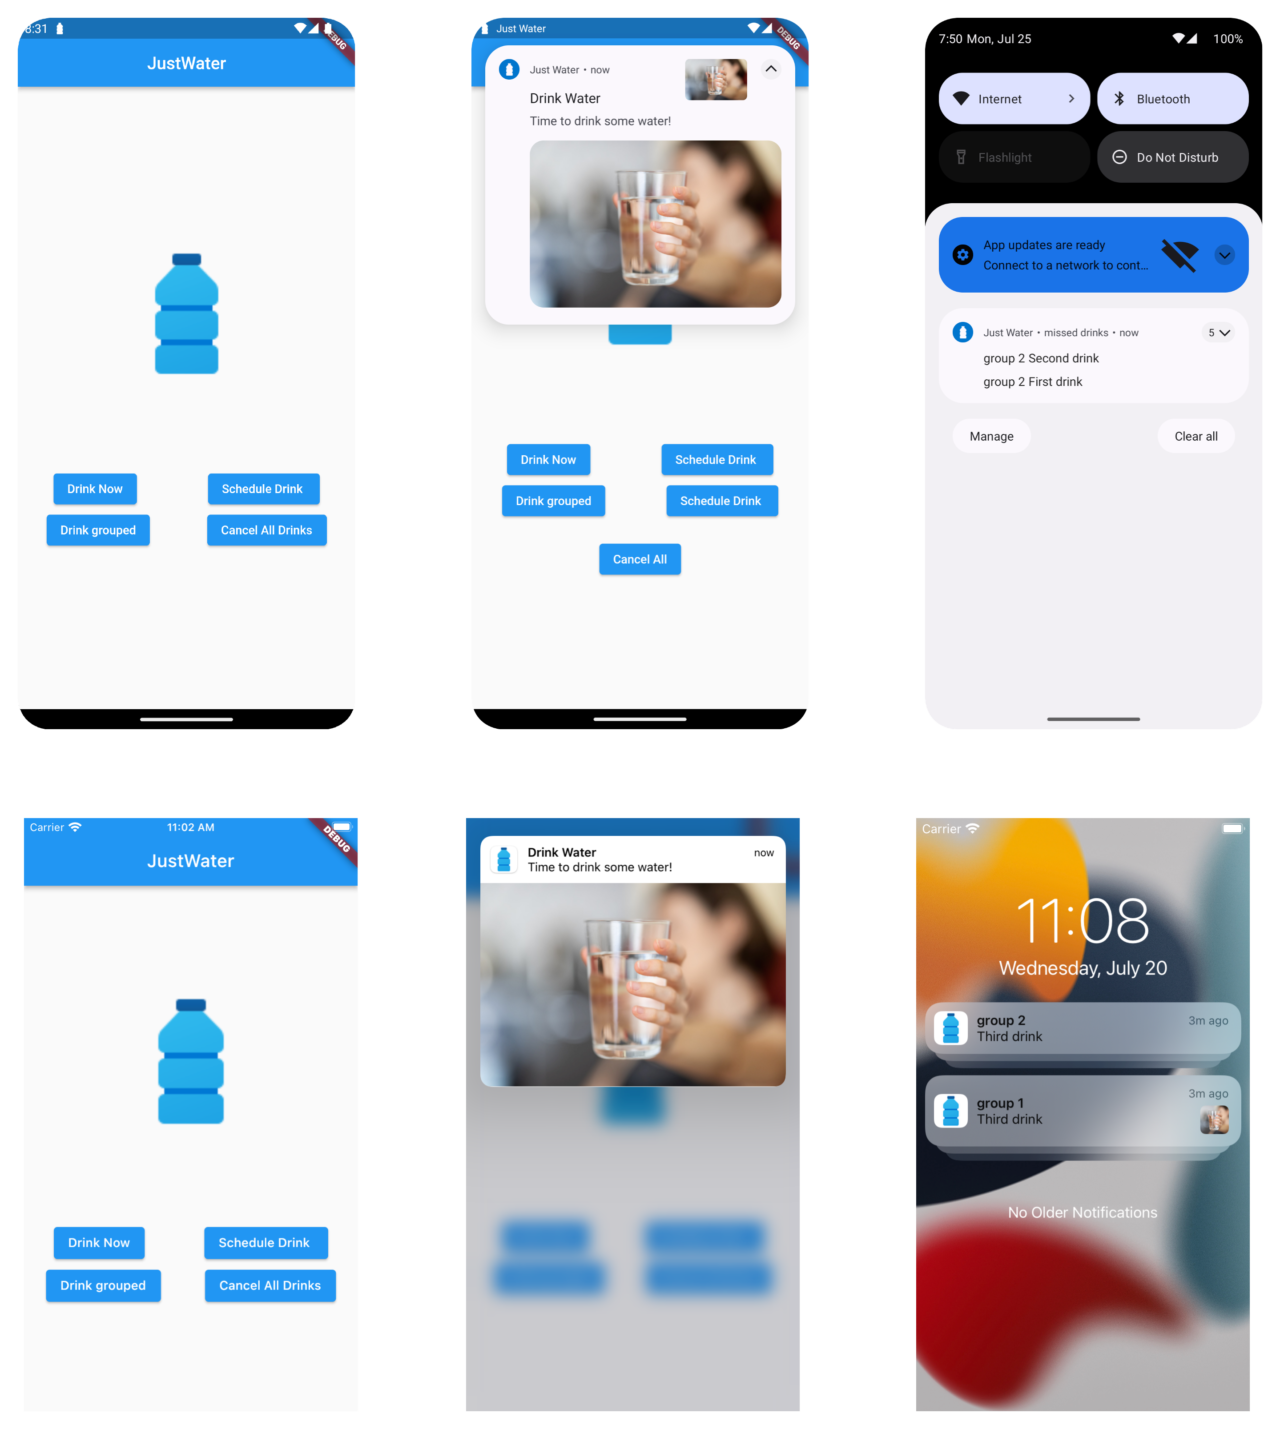
Video that demonstrates Flutter local notifications:
Flutter local notifications setup
flutter_local_notifications is a cross-platform plugin for displaying local notifications. The plugin has several features you can implement to customize notifications on the supported platforms. To get started, you’ll need to install and set up the package for Android and iOS.
You can find the initial UI for the application on this DartPad. Copy the code into your main.dart file, and update your assets folder to include an image that you will display on the UI. Update line 49 in your code to refer to the added image, as shown below:
Image.asset("assets/images/justwater.png", scale: 0.6)
Running your application should display the initial state of your app.
Add dependencies
In your pubspec.yaml file, add the dependency as shown below:
flutter_local_notifications: ^9.7.0
timezone: ^0.8.0
rxdart: ^0.27.5
path_provider: ^2.0.11
http: ^0.13.4
flutter_native_timezone: ^2.0.0
The following packages are installed:
flutter_local_notifications— display local notificationstimezoneandflutter_native_timezone— get the local timezonerxdart— create and listen to event streamspath_provider— work with the device file systemhttp— make HTTP requests
Platform setup and initialization
First, you’ll set up notifications on iOS by adding the code snippet below in your /ios/Runner/AppDelegate.swift file.
if #available(iOS 10.0, *) {
  UNUserNotificationCenter.current().delegate = self as? UNUserNotificationCenterDelegate
}
Then create a notification_service.dart file and add the code snippet below.
import 'dart:io';
import 'dart:ui';

import 'package:flutter_local_notifications/flutter_local_notifications.dart';
import 'package:flutter_native_timezone/flutter_native_timezone.dart';
import 'package:flutter_push_notifications/utils/download_util.dart';
import 'package:rxdart/subjects.dart';
import 'package:timezone/data/latest_all.dart' as tz;
import 'package:timezone/timezone.dart' as tz;

class NotificationService {
  NotificationService();

  final _localNotifications = FlutterLocalNotificationsPlugin();
  final BehaviorSubject<String> behaviorSubject = BehaviorSubject();

  Future<void> initializePlatformNotifications() async {
    const AndroidInitializationSettings initializationSettingsAndroid =
      AndroidInitializationSettings('ic_stat_justwater');

    final IOSInitializationSettings initializationSettingsIOS =
        IOSInitializationSettings(
            requestSoundPermission: true,
            requestBadgePermission: true,
            requestAlertPermission: true,
            onDidReceiveLocalNotification: onDidReceiveLocalNotification);

    final InitializationSettings initializationSettings =
        InitializationSettings(
      android: initializationSettingsAndroid,
      iOS: initializationSettingsIOS,
    );

    await _localNotifications.initialize(initializationSettings,
        onSelectNotification: selectNotification);
  }

  void onDidReceiveLocalNotification(
      int id, String? title, String? body, String? payload) {
    print('id $id');
  }

  void selectNotification(String? payload) {
    if (payload != null && payload.isNotEmpty) {
      behaviorSubject.add(payload);
    }
  }
}
The file creates a new instance of the plugin class and then initializes it with the settings to use for Android and iOS. AndroidInitializationSettings expects the asset’s name to be displayed as the app icon. You should add this in your android/app/src/main/res/drawable folder.
The selectNotification method adds the payload to the data stream event, which its listeners will receive. With that, you are now ready to display your first notification.
Displaying notifications
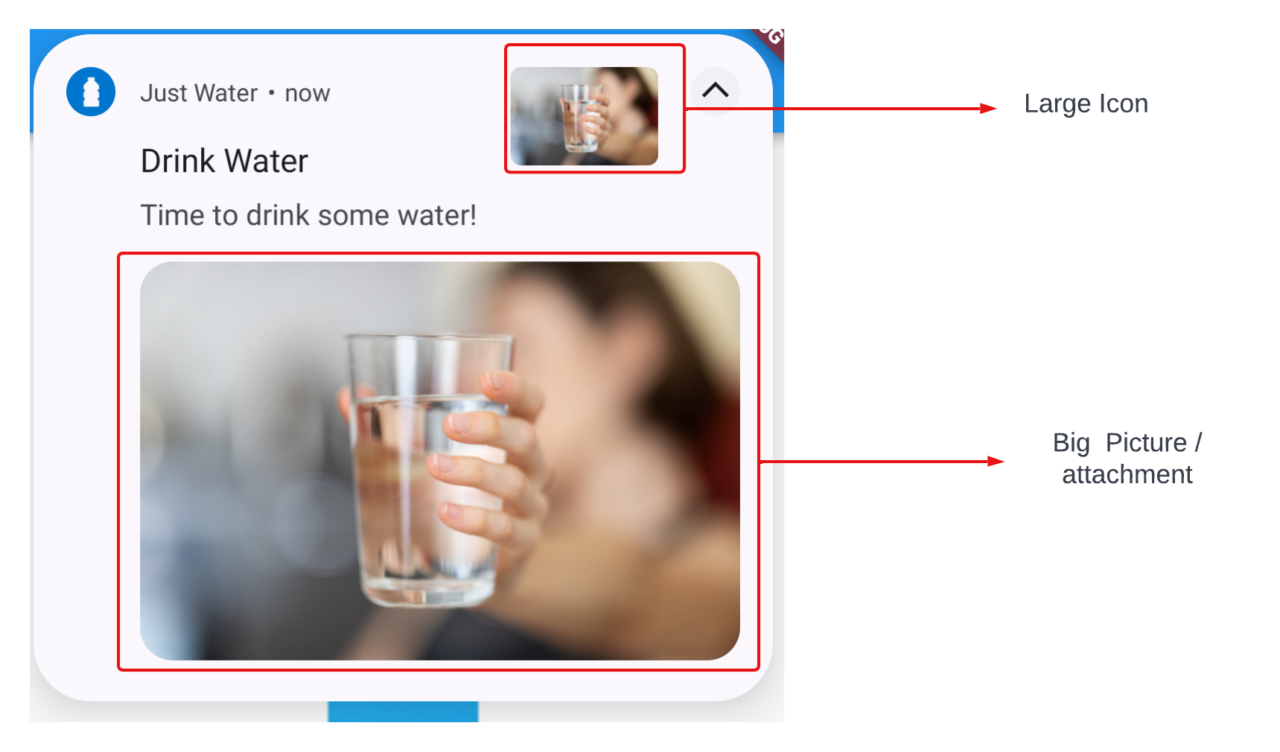
To display a notification, you’ll first need to describe the details of your notification for each platform. You can set the icons, attachments, notification priority, and more.
Future<NotificationDetails> _notificationDetails() async {
  final bigPicture = await DownloadUtil.downloadAndSaveFile(
      "https://images.unsplash.com/photo-1624948465027-6f9b51067557?ixlib=rb-1.2.1&ixid=MnwxMjA3fDB8MHxwaG90by1wYWdlfHx8fGVufDB8fHx8&auto=format&fit=crop&w=1470&q=80",
      "drinkwater");

  AndroidNotificationDetails androidPlatformChannelSpecifics =
      AndroidNotificationDetails(
    'channel id',
    'channel name',
    groupKey: 'com.example.flutter_push_notifications',
    channelDescription: 'channel description',
    importance: Importance.max,
    priority: Priority.max,
    playSound: true,
    ticker: 'ticker',
    largeIcon: const DrawableResourceAndroidBitmap('justwater'),
    styleInformation: BigPictureStyleInformation(
      FilePathAndroidBitmap(bigPicture),
      hideExpandedLargeIcon: false,
    ),
    color: const Color(0xff2196f3),
  );

  IOSNotificationDetails iosNotificationDetails = IOSNotificationDetails(
      threadIdentifier: "thread1",
      attachments: <IOSNotificationAttachment>[
        IOSNotificationAttachment(bigPicture)
      ]);

  final details = await _localNotifications.getNotificationAppLaunchDetails();
  if (details != null && details.didNotificationLaunchApp) {
    behaviorSubject.add(details.payload!);
  }
  NotificationDetails platformChannelSpecifics = NotificationDetails(
      android: androidPlatformChannelSpecifics, iOS: iosNotificationDetails);

  return platformChannelSpecifics;
}
The code snippet above downloads and saves the big picture locally on the device. You can find the downloadAndSaveFile function on this gist. In this case, you set the Android largeIcon from a drawable resource, android/app/src/main/res/drawable/justwater.png. The color of the Android notification details sets the color of the app icon.
Suppose a user clicks on a notification when the app is no longer in the background; the notification payload is added to the data event on app launch and initialized with the details set for both platforms.
You need to call the showLocalNotification method with the notification details to show a notification. The code snippet below displays a notification with a title, body, payload, and platform-specific configurations.
Future<void> showLocalNotification({
  required int id,
  required String title,
  required String body,
  required String payload,
}) async {
  final platformChannelSpecifics = await _notificationDetails();
  await _localNotifications.show(
    id,
    title,
    body,
    platformChannelSpecifics,
    payload: payload,
  );
}
To invoke showLocalNotification from the UI, create an instance of your notification service and initialize the platform-specific settings. You then need to listen to the data event and configure an action once data is received. In this case, you’ll navigate to a second screen, passing the payload received, as shown below:
late final NotificationService notificationService;
@override
void initState() {
  notificationService = NotificationService();
  listenToNotificationStream();
  notificationService.initializePlatformNotifications();
  super.initState();
}

void listenToNotificationStream() =>
    notificationService.behaviorSubject.listen((payload) {
      Navigator.push(
          context,
          MaterialPageRoute(
              builder: (context) => MySecondScreen(payload: payload)));
});
The code snippet above is added to your main.dart file in the _MyHomePageState widget.
Finally, you call the showLocalNotification method on button press to display the notification. The notification ID, title, body, and payload are passed as arguments.
ElevatedButton(
  onPressed: () async {
    await notificationService.showLocalNotification(
        id: 0,
        title: "Drink Water",
        body: "Time to drink some water!",
        payload: "You just took water! Huurray!");
  },
  child: const Text("Drink Now"),
),
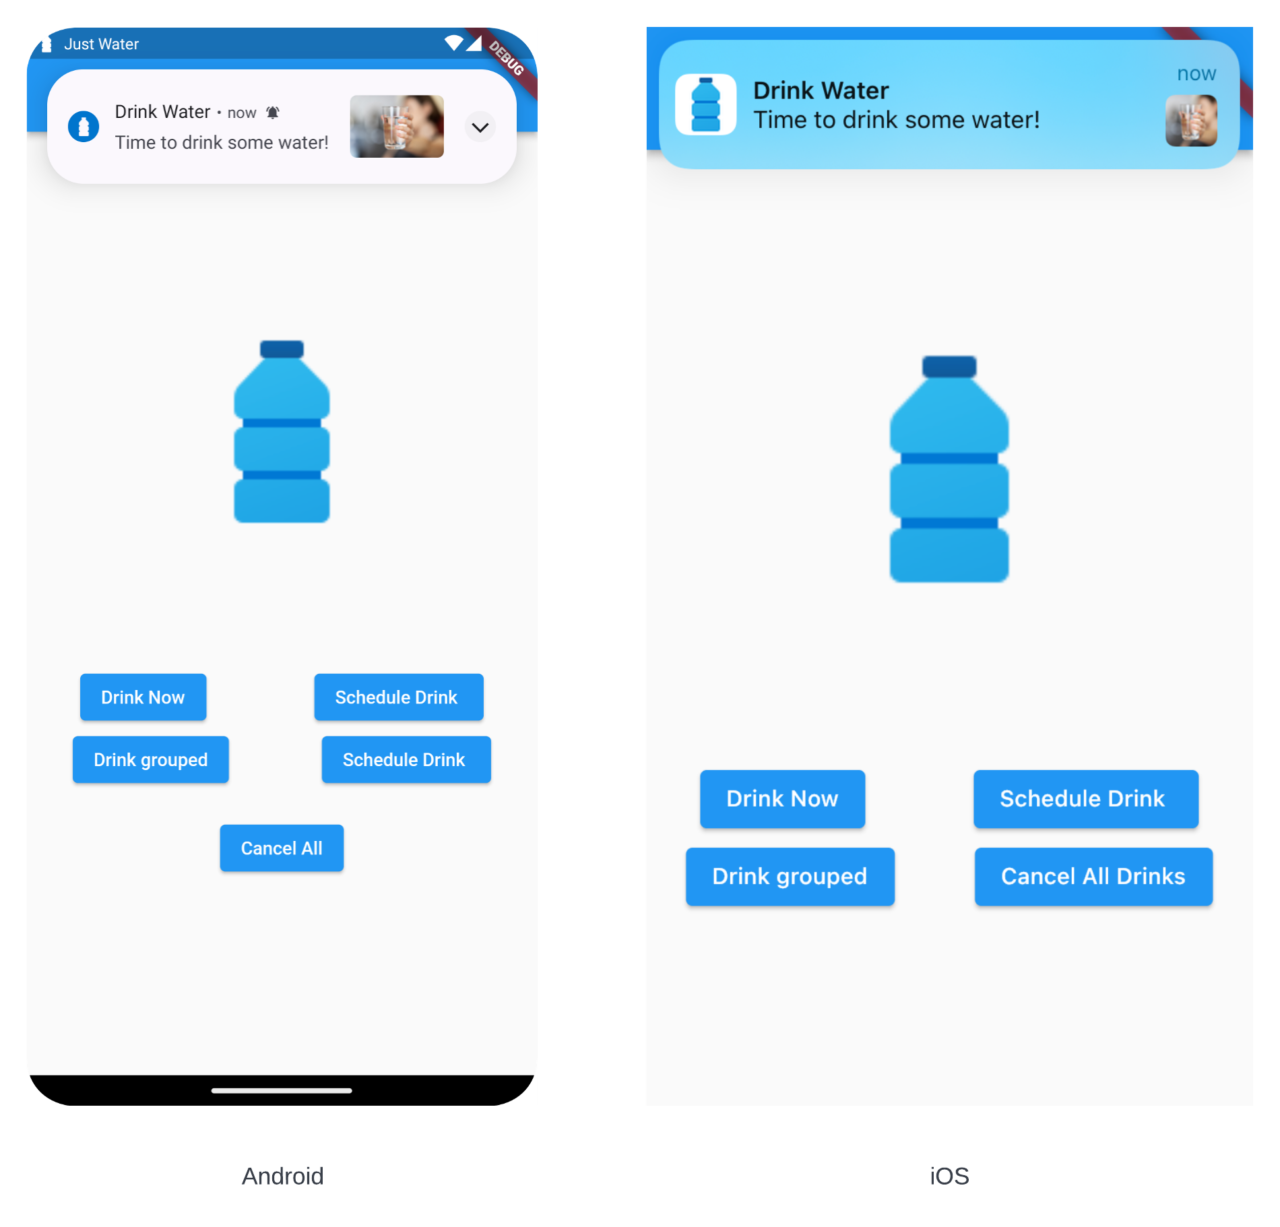
Clicking on the notification navigates to the second screen displaying the payload attached.
Display scheduled notifications
You can schedule notifications to be displayed after a specific duration. Scheduling notifications will require you to set a date and time relative to a particular timezone.
In the initializePlatformNotifications method, add the code snippet below to initialize timezones and get and set the local timezone.
tz.initializeTimeZones();
  tz.setLocalLocation(
    tz.getLocation(
      await FlutterNativeTimezone.getLocalTimezone(),
    ),
  );

...
Then make use of the zonedSchedule function to show the notification at the specified time relative to the specific timezone.
Future<void> showScheduledLocalNotification({
  required int id,
  required String title,
  required String body,
  required String payload,
  required int seconds,
}) async {
  final platformChannelSpecifics = await _notificationDetails();
  await _localNotifications.zonedSchedule(
    id,
    title,
    body,
    tz.TZDateTime.now(tz.local).add(Duration(seconds: seconds)),
    platformChannelSpecifics,
    payload: payload,
    uiLocalNotificationDateInterpretation:
        UILocalNotificationDateInterpretation.absoluteTime,
    androidAllowWhileIdle: true,
  );
}
You can display periodic notifications using the periodicallyShow method. These are displayed periodically after a specified time.
Future<void> showPeriodicLocalNotification({
  required int id,
  required String title,
  required String body,
  required String payload,
}) async {
  final platformChannelSpecifics = await _notificationDetails();
  await _localNotifications.periodicallyShow(
    id,
    title,
    body,
    RepeatInterval.everyMinute,
    platformChannelSpecifics,
    payload: payload,
    androidAllowWhileIdle: true,
  );
}
The code snippet below schedules notifications to be sent every two seconds.
ElevatedButton(
    onPressed: () async {
      await notificationService.showScheduledLocalNotification(
          id: 1,
          title: "Drink Water",
          body: "Time to drink some water!",
          payload: "You just took water! Huurray!",
          seconds: 2);
    },
    child: const Text("Schedule Drink"))
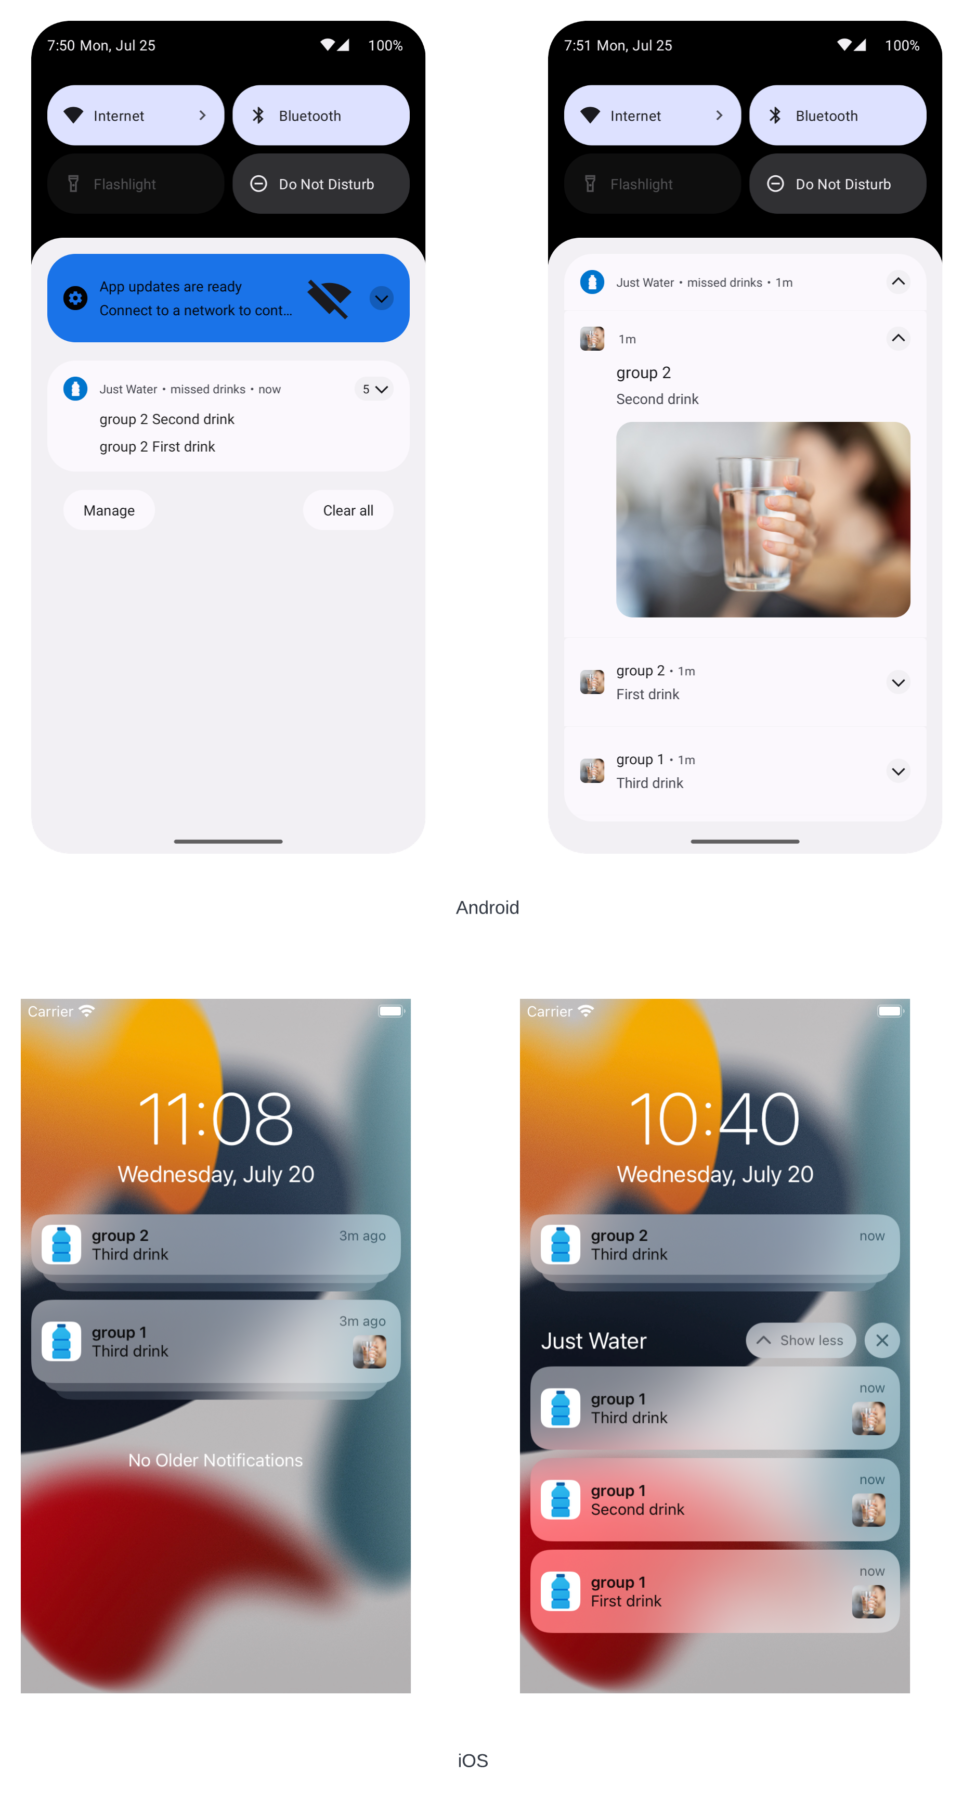
Display grouped notifications
If four or more similar notifications are displayed, you can group them based on a group key on Android or a thread identifier on iOS.
To display grouped notifications on Android, you’ll create another notification detail with the inbox-style notification. The notification detail will describe the group summary for your notifications supporting older versions. You also need to set the setAsGroupSummary property to true. You can learn more about grouping Android notifications from the official Android documentation.
To display grouped notifications on iOS, you need to give our notification a thread identifier.
Future<NotificationDetails> _groupedNotificationDetails() async {
  const List<String> lines = <String>[
    'group 1 First drink',
    'group 1   Second drink',
    'group 1   Third drink',
    'group 2 First drink',
    'group 2   Second drink'
  ];
  const InboxStyleInformation inboxStyleInformation = InboxStyleInformation(
      lines,
      contentTitle: '5 messages',
      summaryText: 'missed drinks');
  AndroidNotificationDetails androidPlatformChannelSpecifics =
      const AndroidNotificationDetails(
    'channel id',
    'channel name',
    groupKey: 'com.example.flutter_push_notifications',
    channelDescription: 'channel description',
    setAsGroupSummary: true,
    importance: Importance.max,
    priority: Priority.max,
    playSound: true,
    ticker: 'ticker',
    styleInformation: inboxStyleInformation,
    color: Color(0xff2196f3),
  );

  const IOSNotificationDetails iosNotificationDetails =
      IOSNotificationDetails(threadIdentifier: "thread2");

  final details = await _localNotifications.getNotificationAppLaunchDetails();
  if (details != null && details.didNotificationLaunchApp) {
    behaviorSubject.add(details.payload!);
  }

  NotificationDetails platformChannelSpecifics = NotificationDetails(
      android: androidPlatformChannelSpecifics, iOS: iosNotificationDetails);

  return platformChannelSpecifics;
}
You then call the show method to display the notifications. Each notification will have a unique ID. On Android, the notification meant to be the group summary will have a custom title and body, which displays an outline for the grouping.
Future<void> showGroupedNotifications({
  required String title,
}) async {
  final platformChannelSpecifics = await _notificationDetails();
  final groupedPlatformChannelSpecifics = await _groupedNotificationDetails();
  await _localNotifications.show(
    0,
    "group 1",
    "First drink",
    platformChannelSpecifics,
  );
  await _localNotifications.show(
    1,
    "group 1",
    "Second drink",
    platformChannelSpecifics,
  );
  await _localNotifications.show(
    3,
    "group 1",
    "Third drink",
    platformChannelSpecifics,
  );
  await _localNotifications.show(
    4,
    "group 2",
    "First drink",
    Platform.isIOS
        ? groupedPlatformChannelSpecifics
        : platformChannelSpecifics,
  );
  await _localNotifications.show(
    5,
    "group 2",
    "Second drink",
    Platform.isIOS
        ? groupedPlatformChannelSpecifics
        : platformChannelSpecifics,
  );
  await _localNotifications.show(
    6,
    Platform.isIOS ? "group 2" : "Attention",
    Platform.isIOS ? "Third drink" : "5 missed drinks",
    groupedPlatformChannelSpecifics,
  );
}
Hooking the showGroupedNotifications method to your UI will display the notifications added.
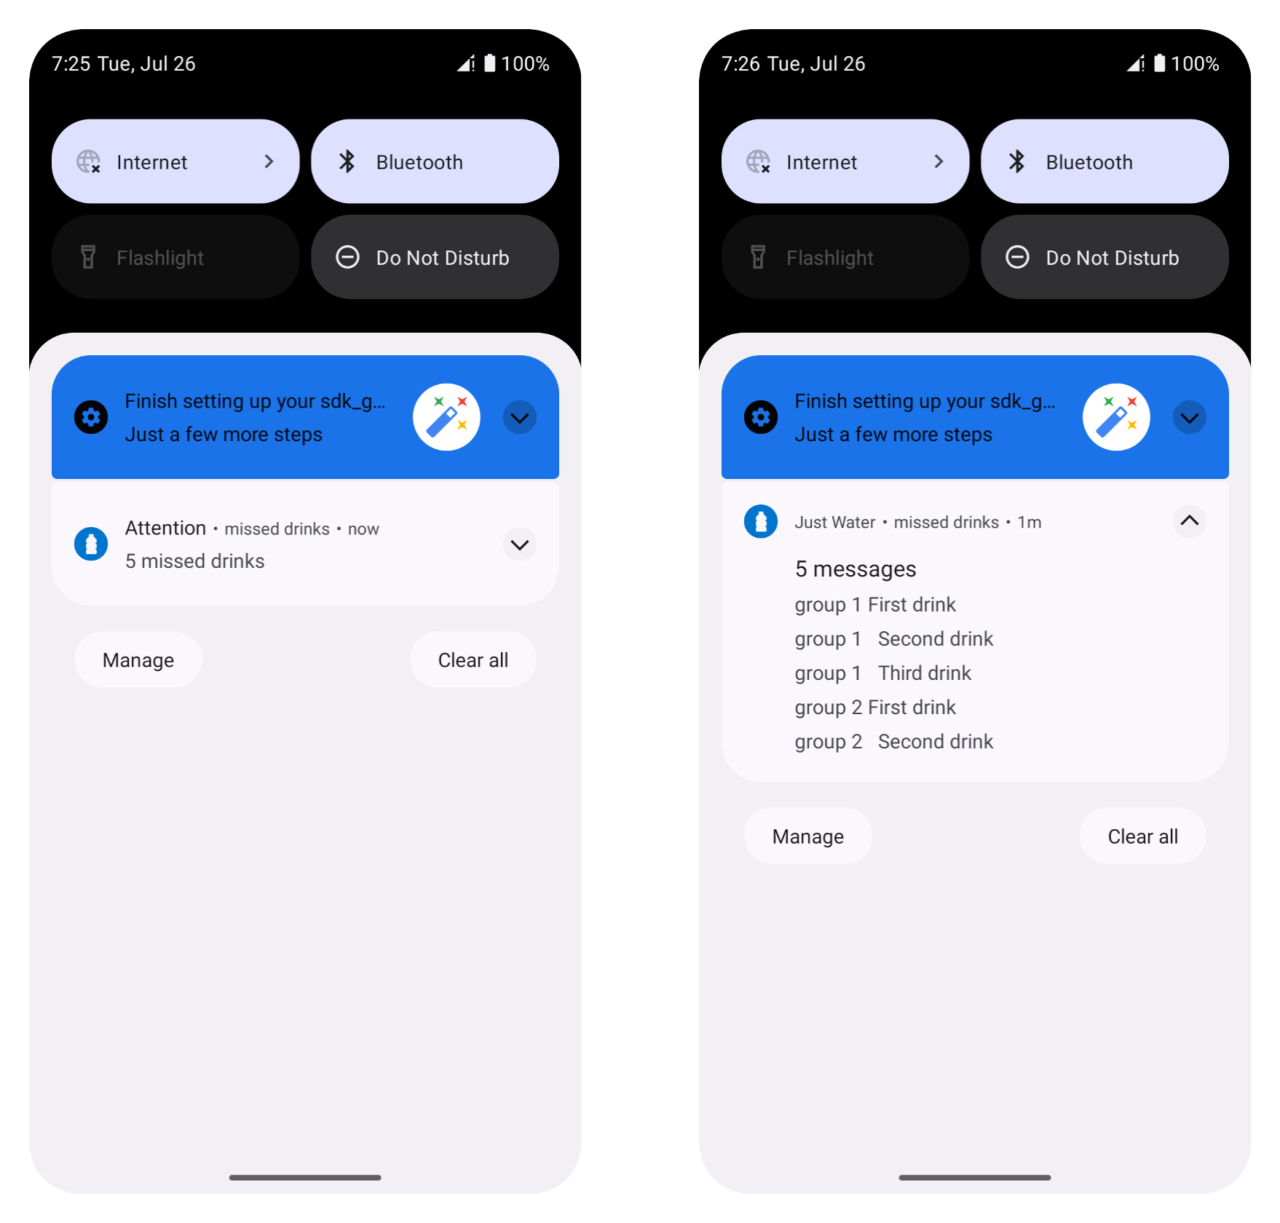
For older Android versions, the default inbox styling will be displayed as shown below:
Cancel notifications
To cancel a single notification, make use of the cancel method, passing the ID of the notification. You can use the cancelAll method to cancel all notifications.
void cancelSingleNotifications() => _localNotifications.cancel(0);
void cancelAllNotifications() => _localNotifications.cancelAll();
Build and share your app artifacts with Codemagic
Codemagic is a CI/CD tool for mobile app projects. It works by automatically handling all the builds, tests, and releases for you.
To build and share your app artifacts with Codemagic, you first need to have your Flutter app hosted on your favorite Git provider. Prepare your app for release by following the guide on the official Flutter documentation.
You need a Codemagic account to use the CI/CD tool. You can sign up for Codemagic with your favorite Git provider.
After signing up, you can get set up by following the steps below:
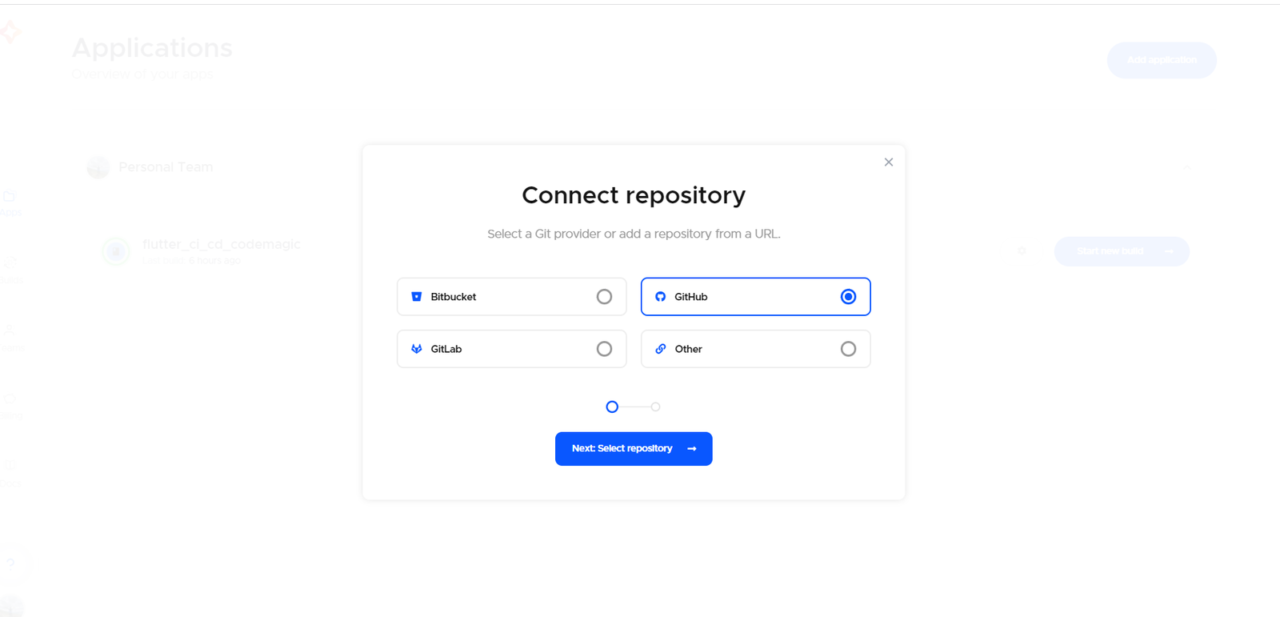
Create an application and connect a repository from your Git provider.
Select your project repository and type. In this case, the project type is Flutter App (via WorkFlow Editor).
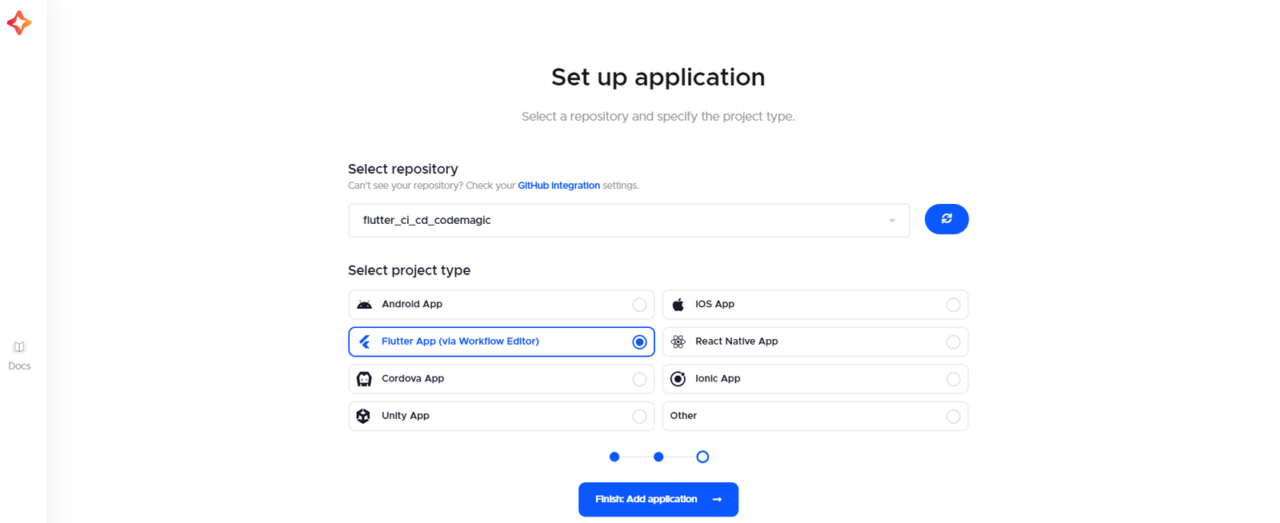
Your app is ready, and you can now add some settings to determine how your app is built.
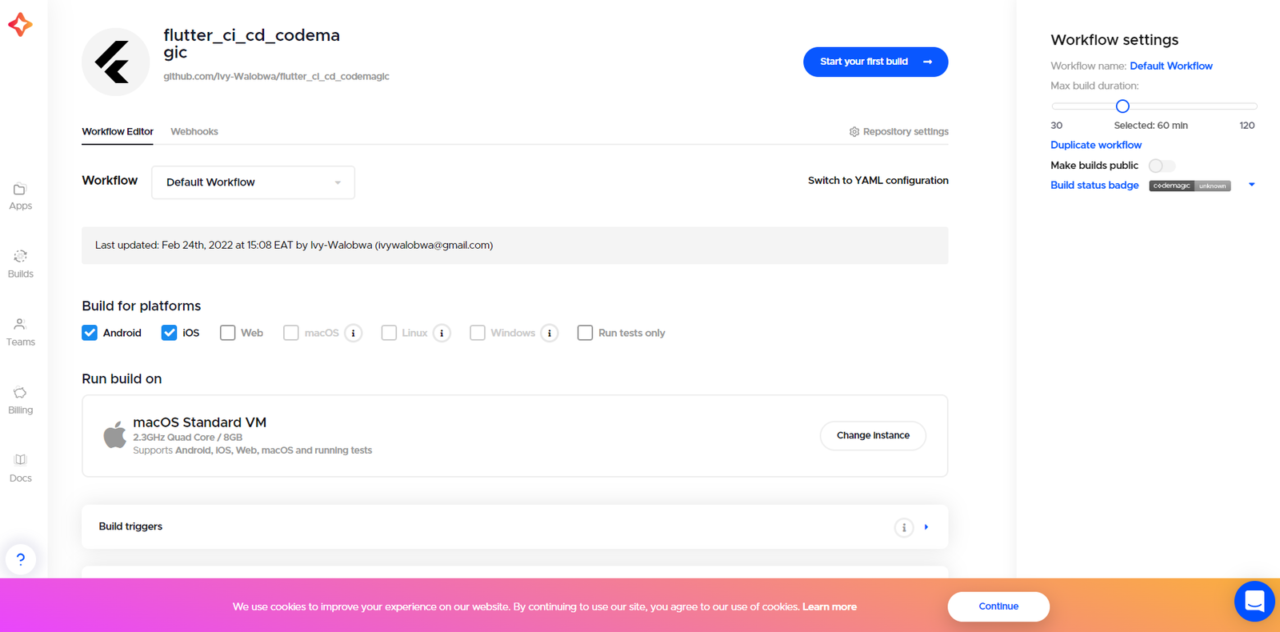
To build your app, you need to customize the build settings to suit it:
Click on “Finish build setup” for first-time applications. For an existing app, click on the settings icon.
Select “Android” as your build platform on the Workflow Editor page.
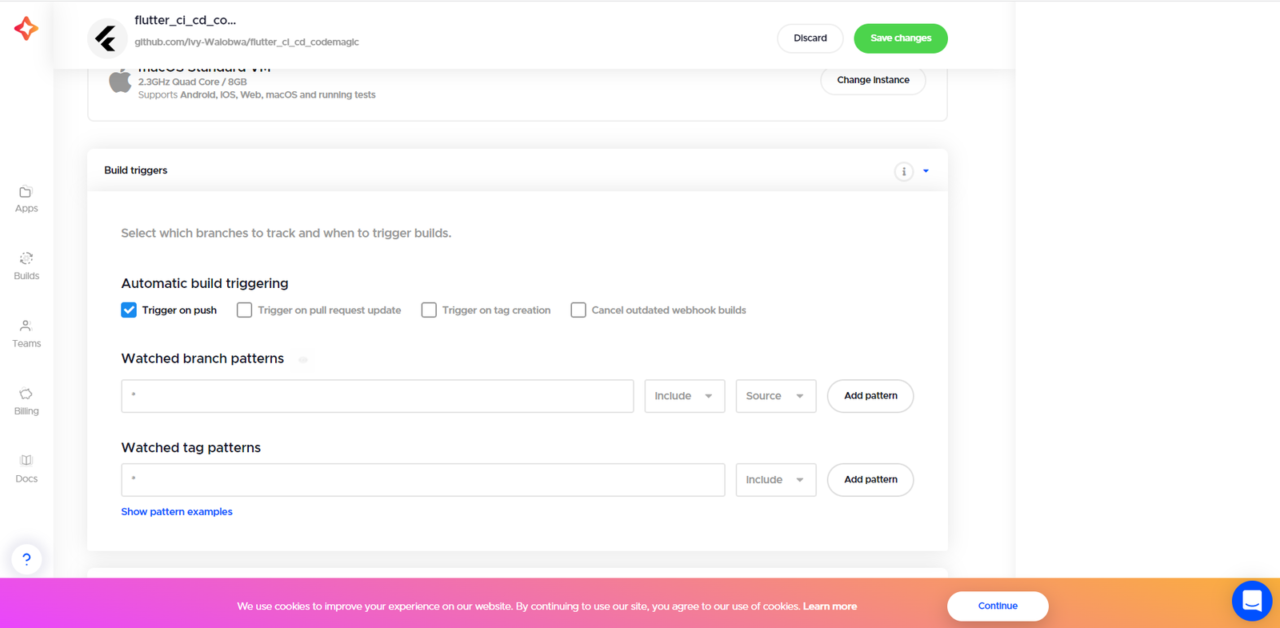
Expand the “Build triggers” section and select your preferred build trigger. You can also configure the watched branches and tags. These triggers will start an app build whenever they occur.
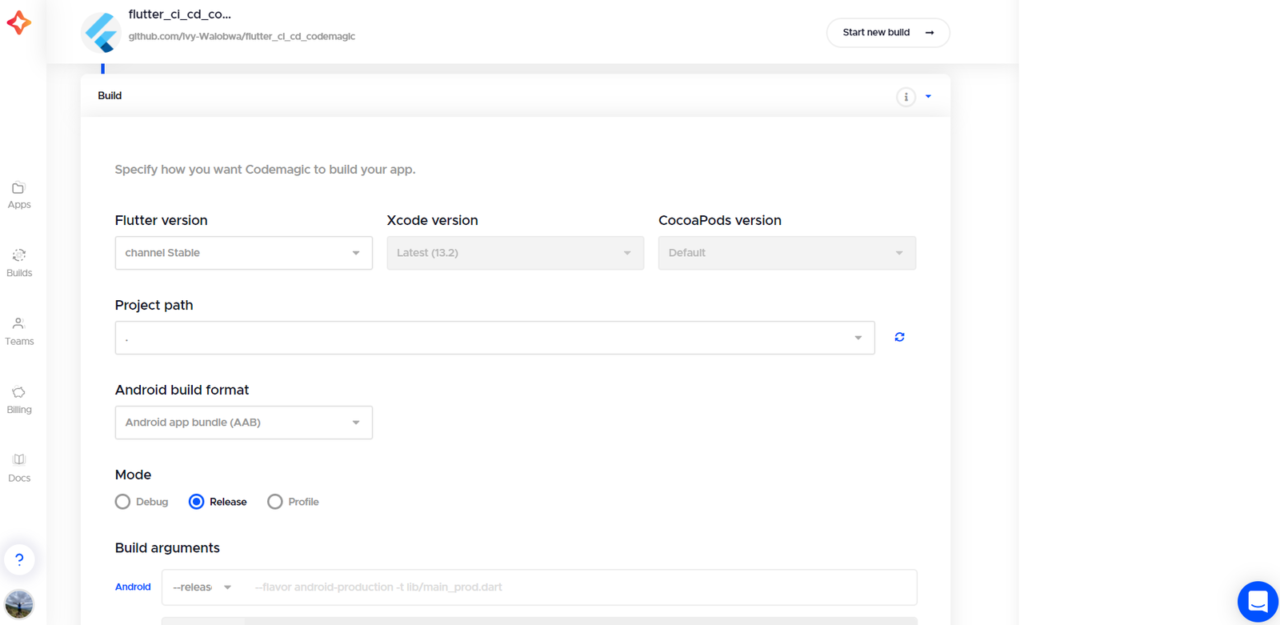
Expand the “Build” section and select your app’s build format and mode.
- Save the changes and start a new build. Codemagic will add a green checkmark beside your app name if your app builds successfully. Downloadable Android artifacts are also added.
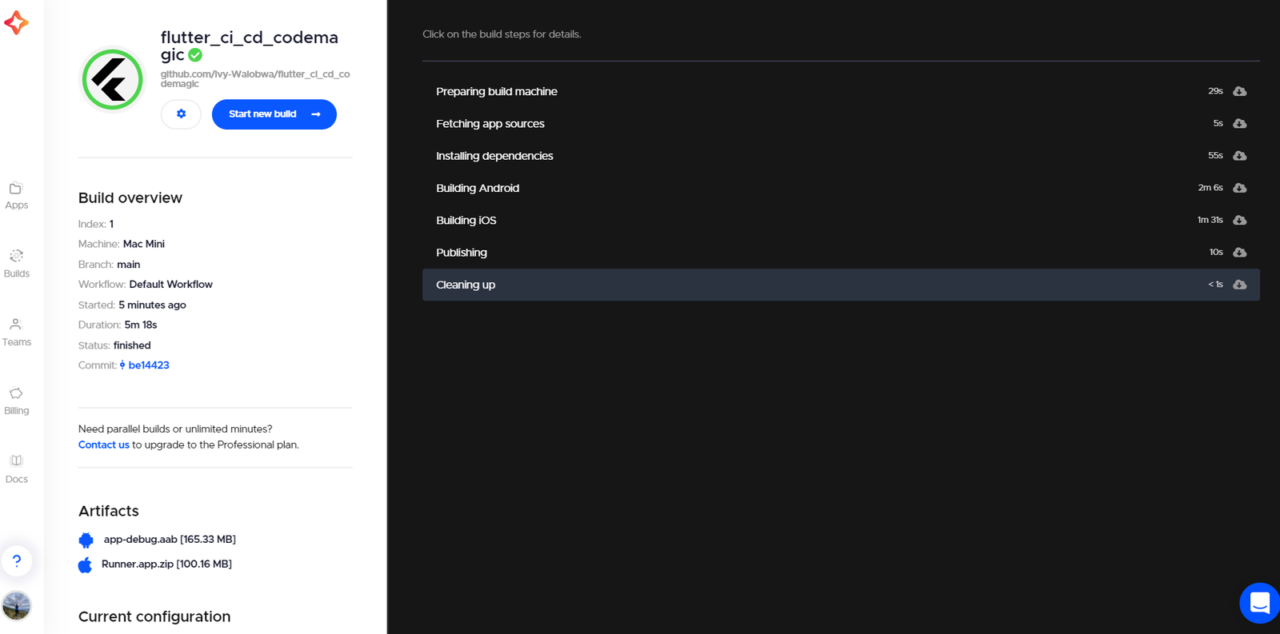
Congrats! You just made your first build with Codemagic and can now download and share your app artifacts.
Conclusion
This tutorial taught you to set up local notifications for Android and iOS. You learned to display local notifications and add notification details for both platforms. We also covered how to display scheduled and periodic notifications and grouping notifications. Finally, you learned to build and share your app artifacts with Codemagic.
You can find the application used in this article on GitHub. We hope you enjoyed this tutorial!
This article is written by Ivy Walobwa, a Flutter Developer and Technical Author. She’s passionate about communities and always willing to help facilitate students’ learning in the tech space. If she’s not building communities or creating content, she’s probably hiking on a random trail. Check out her profile.


