


Written by Souvik Biswas
In this article, I will be showing how to add Flutter to your new or existing Native Android project and how to test it on Codemagic CI/CD using codemagic.yaml file.
The YAML feature is currently in beta and has the following limitations:
Exporting configuration from UI is supported for Flutter-based Android, iOS and web apps.
The exported configuration is not identical to the settings in UI and lacks the configuration for some features, such as Stop build if tests fail and publishing to Codemagic Static Pages.
I will be starting from the scratch to give you some tips and tricks in the way. So, let us first create a simple Native Android app for this tutorial.
Editor’s Note: We also recommend you to read iOS Code Signing and Publishing with codemagic.yaml file.
App Overview
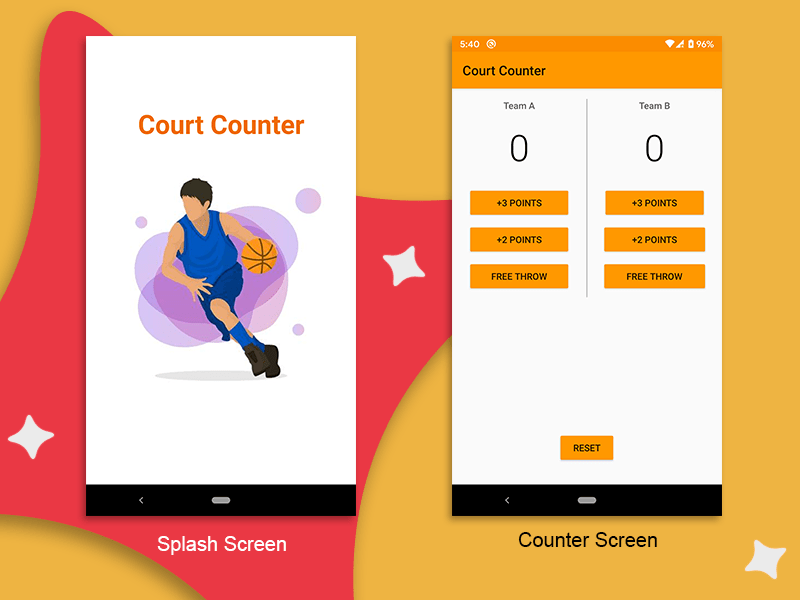
We will be creating a simple app called Court Counter, which will be a score keeper for a basketball match between two teams.
It will contain two screens:
- Splash screen (using Flutter Module)
- Counter screen (using Native Android)
Creating a native Android app
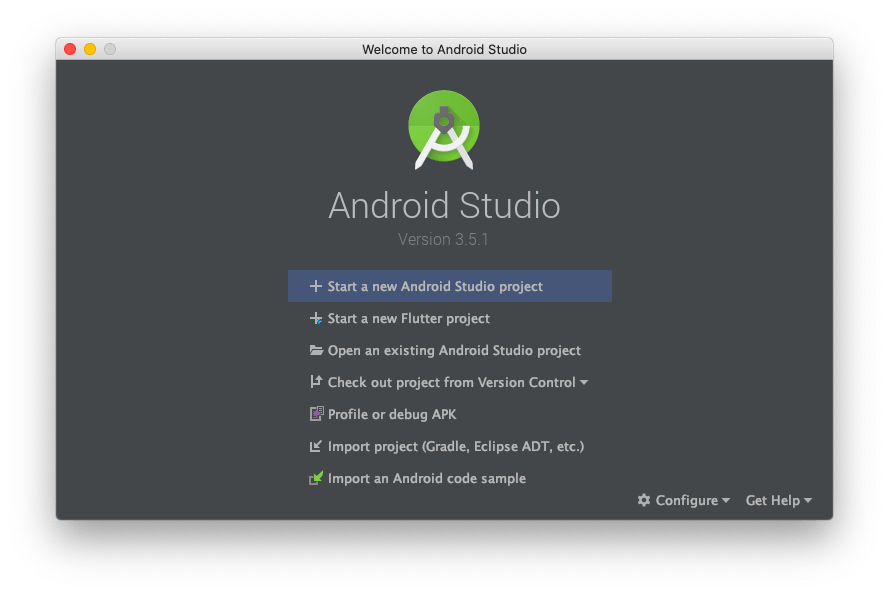
Start Android Studio on your system.
Click on Start a new Android Studio project.
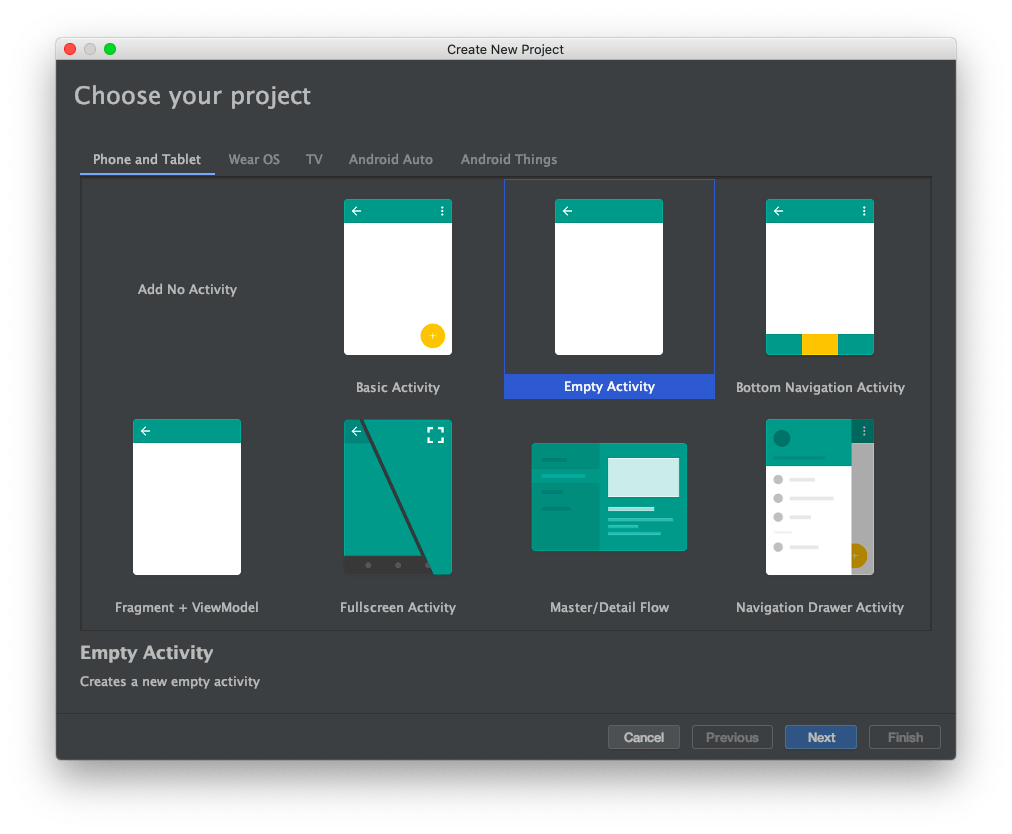
Choose Empty Activity and click on Next.
Now enter the details for the project.
- Name: CourtCounter
- Package name: com.example.courtcounter (auto-filled)
- Save location: ~/Desktop/CourtCounterFlutter/CourtCounter
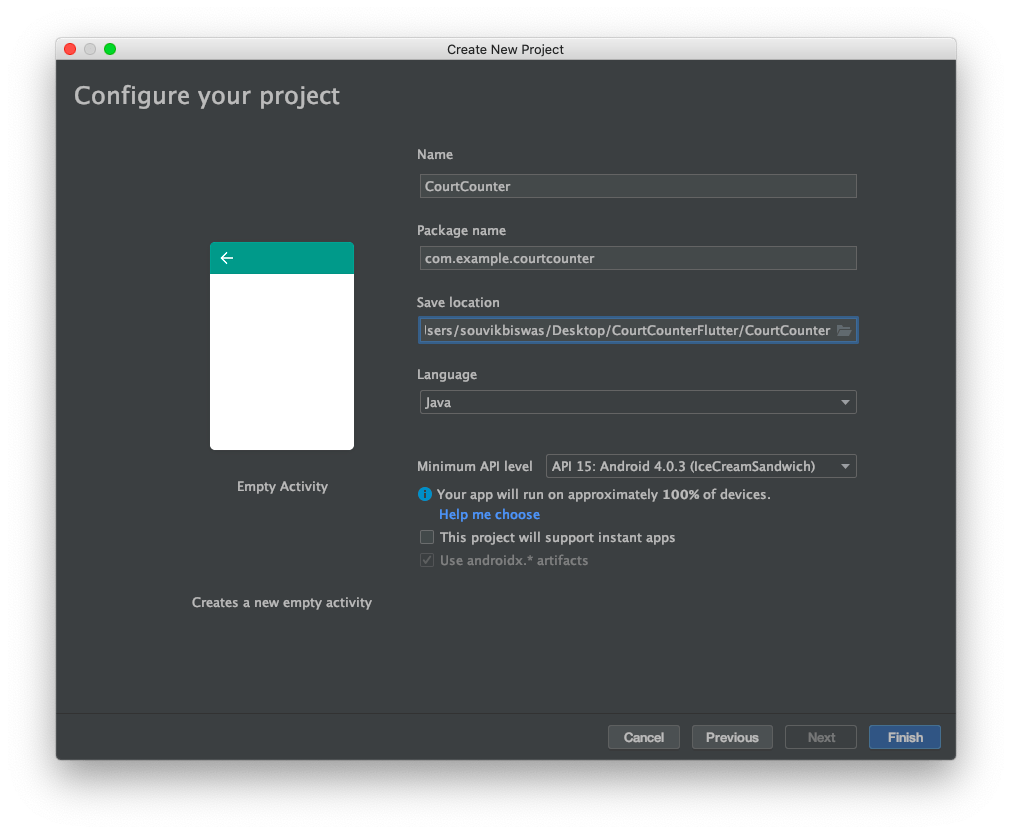
I have added an extra folder to store the native Android project because this will make it easier to add the Flutter module later.
- Click on Finish and wait for the initial Gradle sync to complete.
So, the empty native Android project is ready.
Creating Flutter module
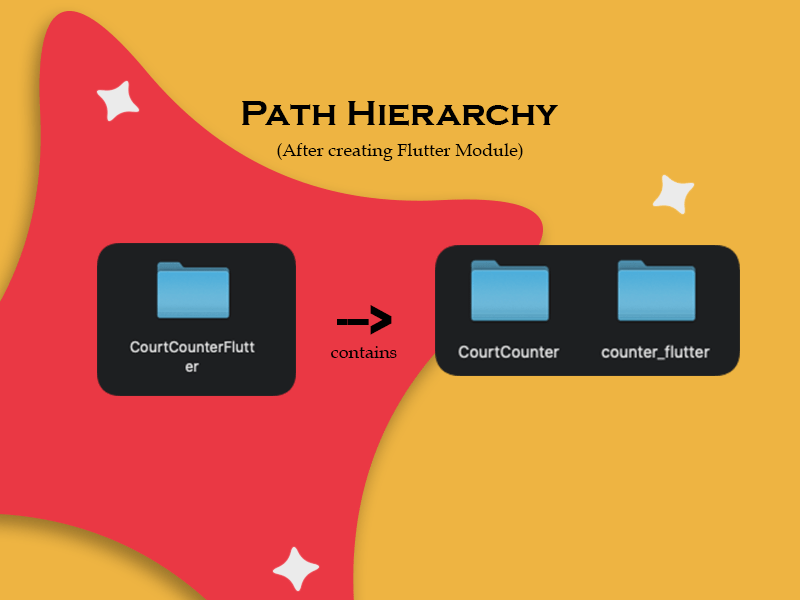
The Flutter module should be added as a sibling to the native Android project. Assuming that you have your Android project at path/to/project/nativeApp, where nativeApp is the name of your Android project folder, then you have to create the Flutter module from path/to/project folder.
The steps for creating the Flutter module are as follows:
- Go to the Terminal inside your Android Studio IDE.
- You will be inside your Android project folder, but we have to add the Flutter module as a sibling to the native app. So, you have to go to the previous folder and use the following command to create a new Flutter module.
$ cd ..

$ flutter create -t module name_of_module
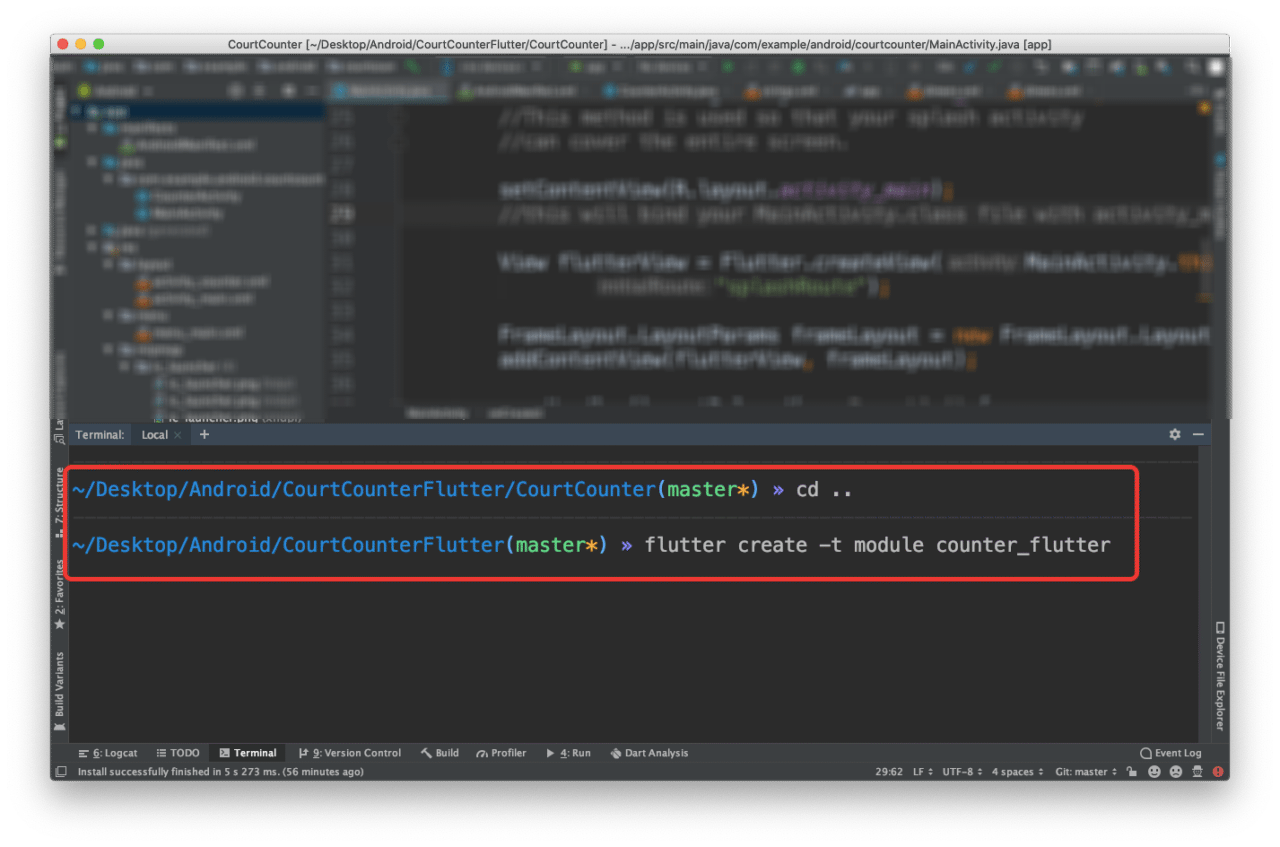
After running this command you will have a flutter module generated in the desired folder.
Adding Flutter module to native Android
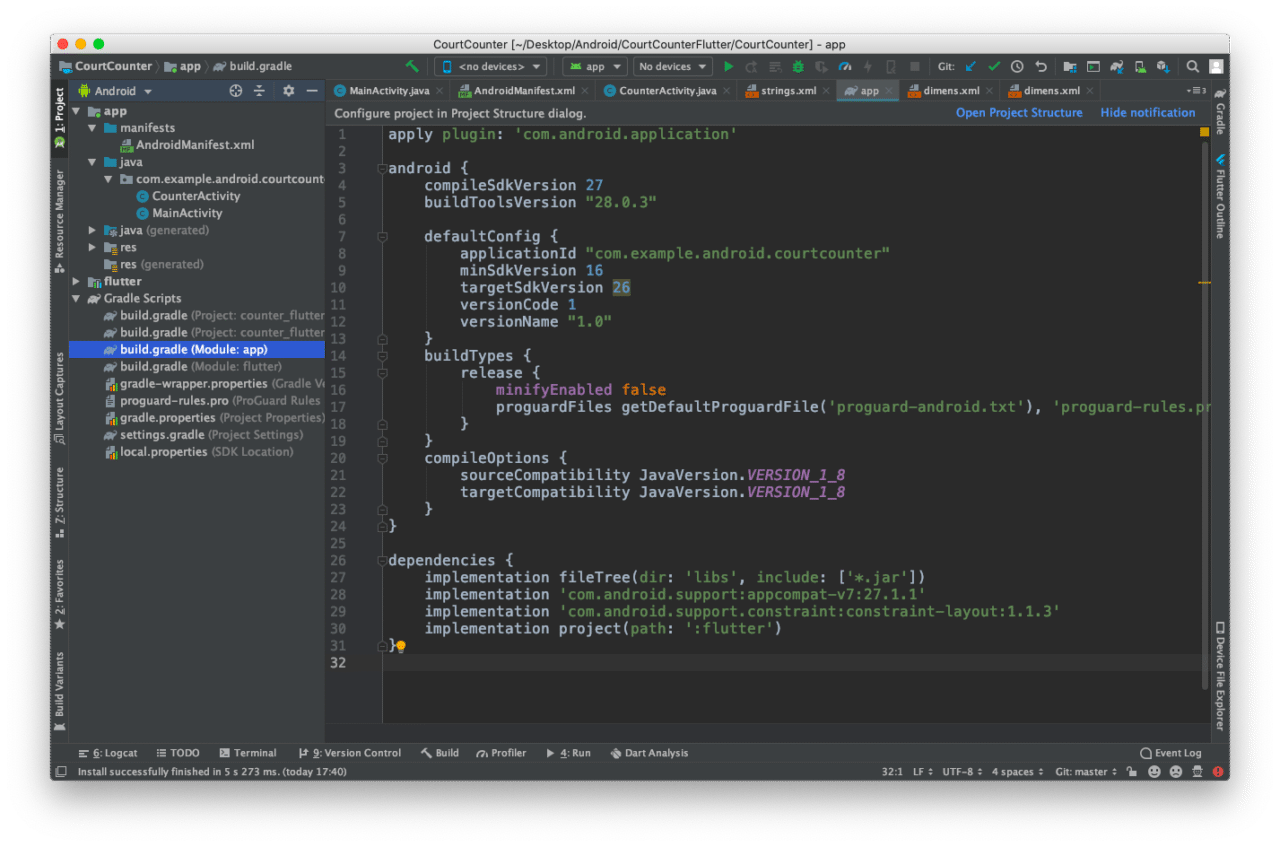
First of all, you have to add two compile options sourceCompatibility & targetCompatibility to the app level build.gradle of the native Android app.
Add the following commands:
// In build.gradle(app)

android {

  //...
  compileOptions {
    sourceCompatibility 1.8
    targetCompatibility 1.8
  }
}
There are two ways for making the host app depend on the Flutter module:
- Depend on the Android Archive (AAR): This packages your Flutter library as a generic local Maven repository comprised of AARs and POMs artifacts. This allows your team to build the host app without needing to install the Flutter SDK.
- Depend on the module’s source code: This enables a one-step build for both your Android project and Flutter project. This is convenient when working on both parts simultaneously, but your team must install the Flutter SDK to build the host app.
In this tutorial, I will be using the second method to demonstrate the procedure of adding Flutter to native Android app.
Follow these steps to add Flutter to the native Android app:
- Include Flutter module as a sub-project to the host app’s
settings.gradlefile by adding the following commands:
include ':app'

setBinding(new Binding([gradle:this]))

evaluate(new File(
    settingsDir.parentFile,
    'name_of_module/.android/include_flutter.groovy'
))
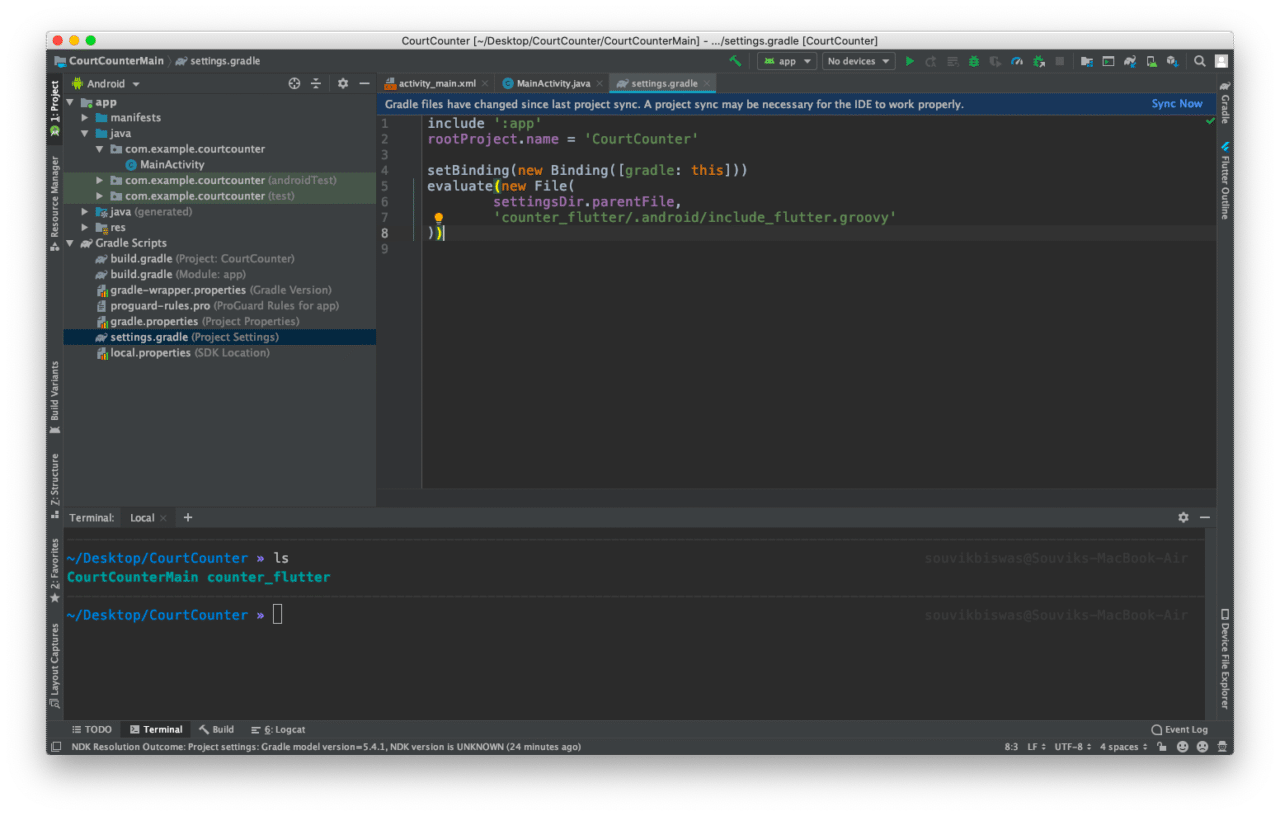
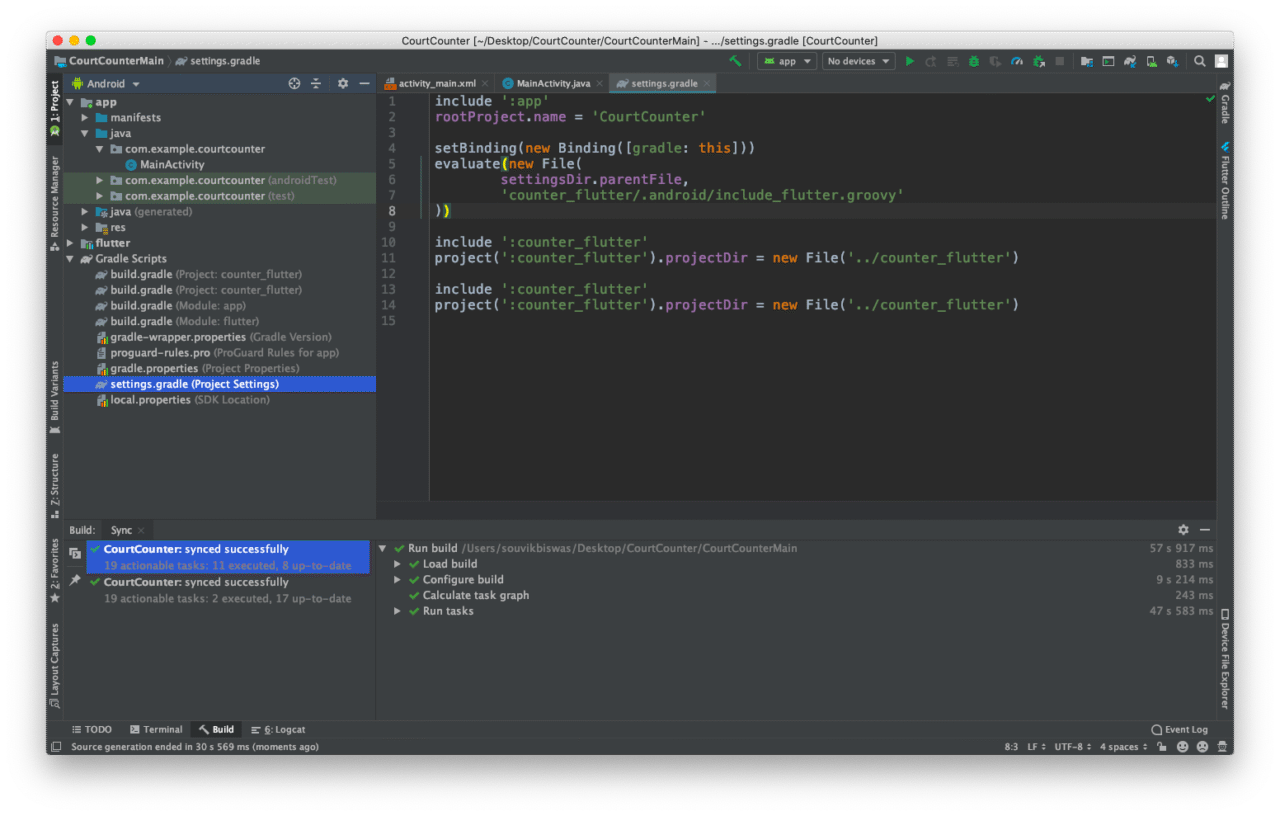
- Then sync the Gradle by clicking on
Sync Nowbutton. This will add some additional code and files to the host app for making it flutter dependent.
- Add a dependency to the app level
build.gradleof the host app.
// In build.gradle(app)

dependencies {

  //...
  implementation project(':flutter')
}
With this, we have successfully added Flutter to the native Android app.
Building the Android app
Now, let’s start building the UI for the app. I will be using Java for the native part (although you can also do it with Kotlin which is default now).
In the MainActivity.java file, I will first start with the Splash Screen for the Court Counter app which will be using the Flutter module.
Flutter can be added to the native Android app in three ways:
- Using FlutterActivity (io.flutter.embedding.android.FlutterActivity)
- Using FlutterFragment (io.flutter.embedding.android.FlutterFragment)
- Using FlutterView (io.flutter.embedding.android.FlutterView)
Flutter does not currently provide convenient APIs for utilizing Flutter at the View level, so the use of a
FlutterViewshould be avoided, if possible.More about it here.
Here, I have used a FlutterActivity to display the Flutter screen within the host app.
startActivity(
        FlutterActivity
                .withNewEngine()
                .initialRoute("splashRoute")
                .build(this)
);
The use of the withNewEngine() factory method configures a FlutterActivity that internally create its own FlutterEngine instance.
The initialRoute() factory method defines a custom route to display the Flutter UI which we have to define in the Flutter app code.
Finally the build() method builds the FlutterActivity within the host app. It takes the current Activity as an argument.
For more info refer to this official guide here.
The whole Java code for the splash screen is given below.
// Inside MainActivity.java

public class MainActivity extends AppCompatActivity {

    // After completion of 4000 ms, the next activity will get started.
    private static final int SPLASH_SCREEN_TIME_OUT = 4000;

    @Override
    protected void onCreate(Bundle savedInstanceState) {
        super.onCreate(savedInstanceState);

        // This method is used so that your splash activity
        // can cover the entire screen.
        getWindow().setFlags(WindowManager.LayoutParams.FLAG_FULLSCREEN,
                WindowManager.LayoutParams.FLAG_FULLSCREEN);

        // Defining the FlutterActivity to display
        // the Flutter UI within this host app.
        startActivity(
                FlutterActivity
                        .withNewEngine()
                        .initialRoute("splashRoute")
                        .build(this)
        );

        new Handler().postDelayed(() -> {

            // This intent will be used to switch to the CounterActivity
            Intent i = new Intent(MainActivity.this,
                    CounterActivity.class);

            // Invoke the CounterActivity
            startActivity(i);

            // The current activity will get finished
            finish();

        }, SPLASH_SCREEN_TIME_OUT);
    }
}
Flutter UI takes a little amount of time to load up inside the Android Activity. So, for this brief moment add any image to display on the screen.
Add the image inside main –> res –> drawable folder in SVG or PNG format.
Add the following style to main –> res –> values –> styles.xml file.
<!-- styles.xml -->

<style name="LaunchTheme" parent="@android:style/Theme.Black.NoTitleBar">
    <item name="android:windowBackground">@drawable/demo</item>
</style>
Here, demo is the name of the PNG image, “demo.png” which is present inside the drawable folder.
Add the following inside the AndroidManifest.xml file of the host app in order to load up the Flutter UI.
<!-- AndroidManifest.xml -->
<!-- Inside <application> tag -->

<activity
  android:name="io.flutter.embedding.android.FlutterActivity"
  android:theme="@style/LaunchTheme"
  android:configChanges="orientation|keyboardHidden|keyboard|screenSize|locale|layoutDirection|fontScale|screenLayout|density|uiMode"
  android:hardwareAccelerated="true"
  android:windowSoftInputMode="adjustResize"/>
The Splash Screen will display for 4000ms and then it will navigate to the CounterActivity class.
The CounterActivity.java is fully native Java code without any Flutter module and it mostly contains the logic for the score keeper.
/**
 * This activity keeps track of the basketball score for 2 teams.
 */
public class CounterActivity extends AppCompatActivity {

    // Tracks the score for Team A
    int scoreTeamA = 0;

    // Tracks the score for Team B
    int scoreTeamB = 0;

    @Override
    protected void onCreate(Bundle savedInstanceState) {
        super.onCreate(savedInstanceState);
        setContentView(R.layout.activity_counter);
    }

    /**
     * Increase the score for Team A by 1 point.
     */
    public void addOneForTeamA(View v) {
        scoreTeamA = scoreTeamA + 1;
        displayForTeamA(scoreTeamA);
    }

    /**
     * Increase the score for Team A by 2 points.
     */
    public void addTwoForTeamA(View v) {
        scoreTeamA = scoreTeamA + 2;
        displayForTeamA(scoreTeamA);
    }

    /**
     * Increase the score for Team A by 3 points.
     */
    public void addThreeForTeamA(View v) {
        scoreTeamA = scoreTeamA + 3;
        displayForTeamA(scoreTeamA);
    }

    /**
     * Increase the score for Team B by 1 point.
     */
    public void addOneForTeamB(View v) {
        scoreTeamB = scoreTeamB + 1;
        displayForTeamB(scoreTeamB);
    }

    /**
     * Increase the score for Team B by 2 points.
     */
    public void addTwoForTeamB(View v) {
        scoreTeamB = scoreTeamB + 2;
        displayForTeamB(scoreTeamB);
    }

    /**
     * Increase the score for Team B by 3 points.
     */
    public void addThreeForTeamB(View v) {
        scoreTeamB = scoreTeamB + 3;
        displayForTeamB(scoreTeamB);
    }

    /**
     * Resets the score for both teams back to 0.
     */
    public void resetScore(View v) {
        scoreTeamA = 0;
        scoreTeamB = 0;
        displayForTeamA(scoreTeamA);
        displayForTeamB(scoreTeamB);
    }

    /**
     * Displays the given score for Team A.
     */
    public void displayForTeamA(int score) {
        TextView scoreView = findViewById(R.id.team_a_score);
        scoreView.setText(String.valueOf(score));
    }

    /**
     * Displays the given score for Team B.
     */
    public void displayForTeamB(int score) {
        TextView scoreView = findViewById(R.id.team_b_score);
        scoreView.setText(String.valueOf(score));
    }
}
The code for the activity_counter.xml is given below:
<RelativeLayout xmlns:android="http://schemas.android.com/apk/res/android"
    xmlns:tools="http://schemas.android.com/tools"
    android:layout_width="match_parent"
    android:layout_height="match_parent"
    tools:context=".MainActivity">

    <LinearLayout
        android:layout_width="match_parent"
        android:layout_height="wrap_content"
        android:orientation="horizontal">

        <LinearLayout
            android:layout_width="0dp"
            android:layout_height="wrap_content"
            android:layout_weight="1"
            android:orientation="vertical">

            <TextView
                android:layout_width="match_parent"
                android:layout_height="wrap_content"
                android:fontFamily="sans-serif-medium"
                android:gravity="center"
                android:padding="16dp"
                android:text="Team A"
                android:textColor="#616161"
                android:textSize="14sp" />

            <TextView
                android:id="@+id/team_a_score"
                android:layout_width="match_parent"
                android:layout_height="wrap_content"
                android:fontFamily="sans-serif-light"
                android:gravity="center"
                android:paddingBottom="24dp"
                android:text="0"
                android:textColor="#000000"
                android:textSize="56sp" />

            <Button
                android:layout_width="match_parent"
                android:layout_height="wrap_content"
                android:layout_marginBottom="8dp"
                android:layout_marginLeft="24dp"
                android:layout_marginRight="24dp"
                android:onClick="addThreeForTeamA"
                android:text="+3 Points" />

            <Button
                android:layout_width="match_parent"
                android:layout_height="wrap_content"
                android:layout_marginBottom="8dp"
                android:layout_marginLeft="24dp"
                android:layout_marginRight="24dp"
                android:onClick="addTwoForTeamA"
                android:text="+2 Points" />

            <Button
                android:layout_width="match_parent"
                android:layout_height="wrap_content"
                android:layout_marginBottom="8dp"
                android:layout_marginLeft="24dp"
                android:layout_marginRight="24dp"
                android:onClick="addOneForTeamA"
                android:text="Free throw" />
        </LinearLayout>

        <View
            android:layout_width="1dp"
            android:layout_height="match_parent"
            android:layout_marginTop="16dp"
            android:background="@android:color/darker_gray" />

        <LinearLayout
            android:layout_width="0dp"
            android:layout_height="match_parent"
            android:layout_weight="1"
            android:orientation="vertical">

            <TextView
                android:layout_width="match_parent"
                android:layout_height="wrap_content"
                android:fontFamily="sans-serif-medium"
                android:gravity="center"
                android:padding="16dp"
                android:text="Team B"
                android:textColor="#616161"
                android:textSize="14sp" />

            <TextView
                android:id="@+id/team_b_score"
                android:layout_width="match_parent"
                android:layout_height="wrap_content"
                android:fontFamily="sans-serif-light"
                android:gravity="center"
                android:paddingBottom="24dp"
                android:text="0"
                android:textColor="#000000"
                android:textSize="56sp" />

            <Button
                android:layout_width="match_parent"
                android:layout_height="wrap_content"
                android:layout_marginBottom="8dp"
                android:layout_marginLeft="24dp"
                android:layout_marginRight="24dp"
                android:onClick="addThreeForTeamB"
                android:text="+3 Points" />

            <Button
                android:layout_width="match_parent"
                android:layout_height="wrap_content"
                android:layout_marginBottom="8dp"
                android:layout_marginLeft="22dp"
                android:layout_marginRight="22dp"
                android:onClick="addTwoForTeamB"
                android:text="+2 Points" />

            <Button
                android:layout_width="match_parent"
                android:layout_height="wrap_content"
                android:layout_marginBottom="8dp"
                android:layout_marginLeft="22dp"
                android:layout_marginRight="22dp"
                android:onClick="addOneForTeamB"
                android:text="Free throw" />
        </LinearLayout>
    </LinearLayout>

    <Button
        android:layout_width="wrap_content"
        android:layout_height="wrap_content"
        android:layout_alignParentBottom="true"
        android:layout_centerHorizontal="true"
        android:layout_marginBottom="32dp"
        android:onClick="resetScore"
        android:text="Reset" />

</RelativeLayout>
This completes the native Android app. Now, we have to add the splash screen UI in Dart using the Flutter module.
Defining the Splash Screen UI using Flutter module
- Open the Flutter module folder in another window from Android Studio.
- Go to the
main.dartfile inside thelibfolder. - Now, here you will find the Flutter demo counter app code already defined.
- Delete the whole code and start from scratch.
- First of all, import the
dart:uilibrary andmaterial.dartpackage.
import 'dart:ui';

import 'package:flutter/material.dart';
Here, we have to define the route which is used in the Android app to specify what to show in the FlutterActivity.
The name that I had given to the route was splashRoute. I am using a switch case to show the UI defined in
MyFlutterActivity(), otherwise show a default UI with a Text widget.
void main() => runApp(chooseWidget(window.defaultRouteName));

Widget chooseWidget(String route) {
  switch (route) {
    // name of the route defined in the host app
    case 'splashRoute':
      return MyFlutterActivity();

    default:
      return Center(
        child: Text('Unknown'),
      );
  }
}
- Now, we have to define the
MyFlutterActivity(). This will be a StatelessWidget which consists of another class namedSplashScreen()which has the whole UI defined.
class MyFlutterActivity extends StatelessWidget {
  @override
  Widget build(BuildContext context) {
    return MaterialApp(
      debugShowCheckedModeBanner: false,
      home: SplashScreen(),
    );
  }
}

class SplashScreen extends StatelessWidget {
  @override
  Widget build(BuildContext context) {
    return Scaffold(
      backgroundColor: Colors.white,
      body: Container(
        child: Column(
          mainAxisAlignment: MainAxisAlignment.center,
          children: <Widget>[
            Text(
              'Court Counter',
              style: TextStyle(
                color: Colors.orange[800],
                fontSize: 40,
                fontWeight: FontWeight.bold,
              ),
            ),
            Image.asset('assets/images/basketball.jpg'),
          ],
        ),
      ),
    );
  }
}
- Also, don’t forget to import the
basketball.jpgimage usingpubspec.yamlfile.
So, your Flutter module is now ready to use with the native Android app.
Running the Android app with Flutter module
Before running the Android app on your emulator or physical device, verify some of the basic things so that you do not run into any error at the starting of the app.
TIPS:
Make sure that the minSdkVersion is same for both
build.gradlefile of the Native app and Flutter app.If you are using androidx in your Native Android app then you have to configure it for the Flutter module also.
Otherwise, if you do not require androidx support in your host app, comment out all the code in
gradle.propertiesfile.Also, use
AppCompatActivityof theandroid.support.v7.app.AppCompatActivity, instead of the androidx version of it.
To run the Android app on your device:
- Go to the Native Android app project folder in Android Studio.
- Make sure that the configuration is set to app in the top bar.

- Run the app using the green Play button.
This should run the Android app on your device and use the Flutter module as a dependency in it.
Using Hot Reload & Hot Restart
Though you are adding Flutter as a dependency to the native Android app, but you can still use one of the best features of Flutter, i.e. Hot reload & Hot restart.
To use Hot reload & Hot restart use follow these steps:
- Go to your Flutter project from the Android Studio.
- Run a command from the Terminal in the IDE, while you are inside the flutter project directory.
flutter attach - Then, go to the Android project from the Android Studio.
- Run the app using the green Play button.
- Now, if you see the terminal, then you will notice that the connection is successful and you can now use Hot reload & Hot restart for the Flutter module running inside a native Android app.
Building on Codemagic (using YAML)
With the introduction of the codemagic.yaml, it is now much easier to build and test Flutter module on the Codemagic CI/CD platform.
I will show you how to use the Codemagic YAML file for defining the correct pipeline for the Android app using Flutter module.
- First of all, commit the code to git.
Make sure that you include both the Android project folder as well as the Flutter module folder in git, in order to do so initialize git from the main folder containing both the parts.
- Push it to a GitHub repo.
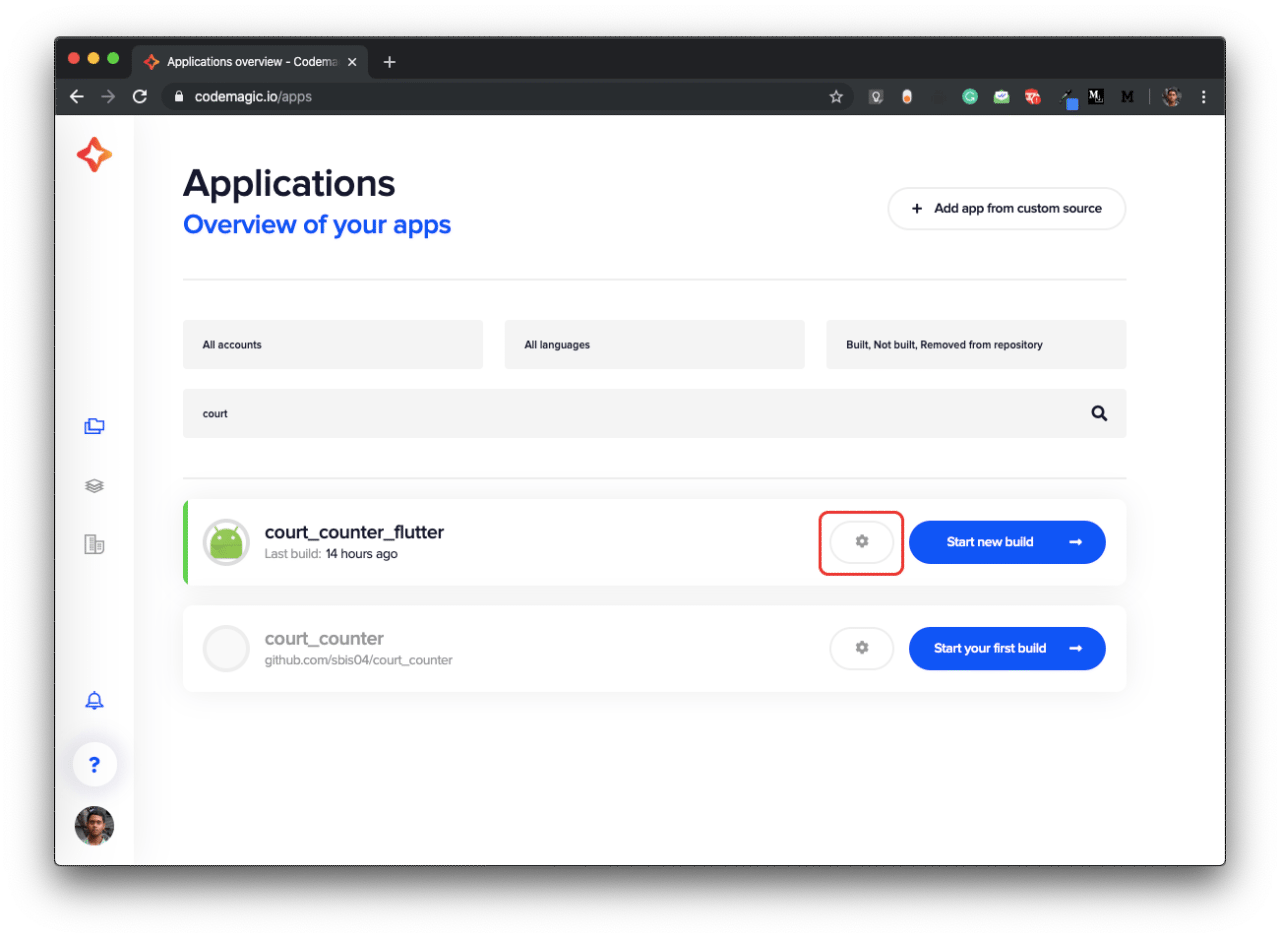
- Now, go to the Codemagic UI.
- Login with your GitHub account.
- In the Applications dashboard, search for your project and go to it’s Settings.
- Then expand the Advanced configurations (beta) tab.
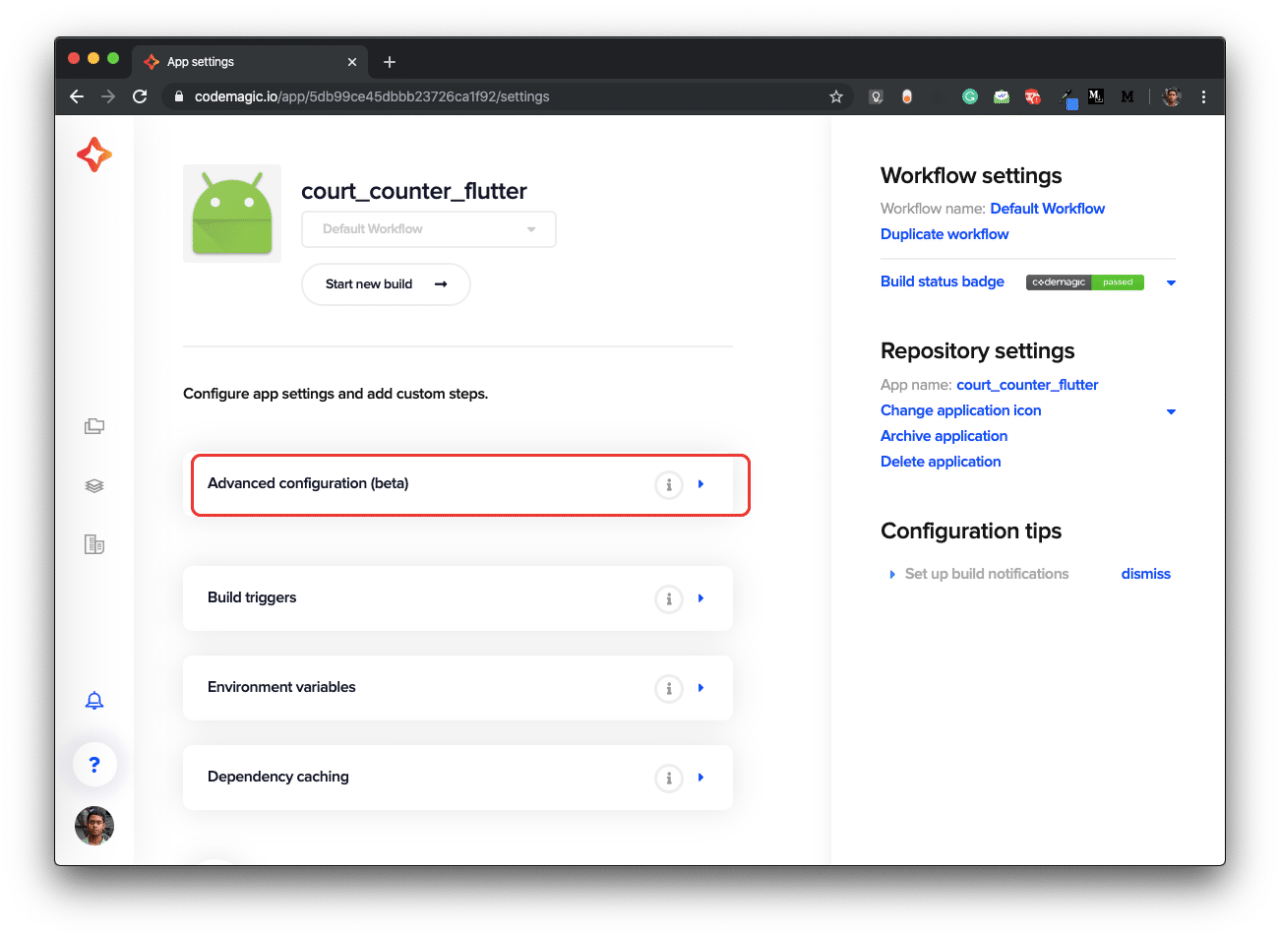
- From here you can download the initial
codemagic.yamlfile with some default configurations.
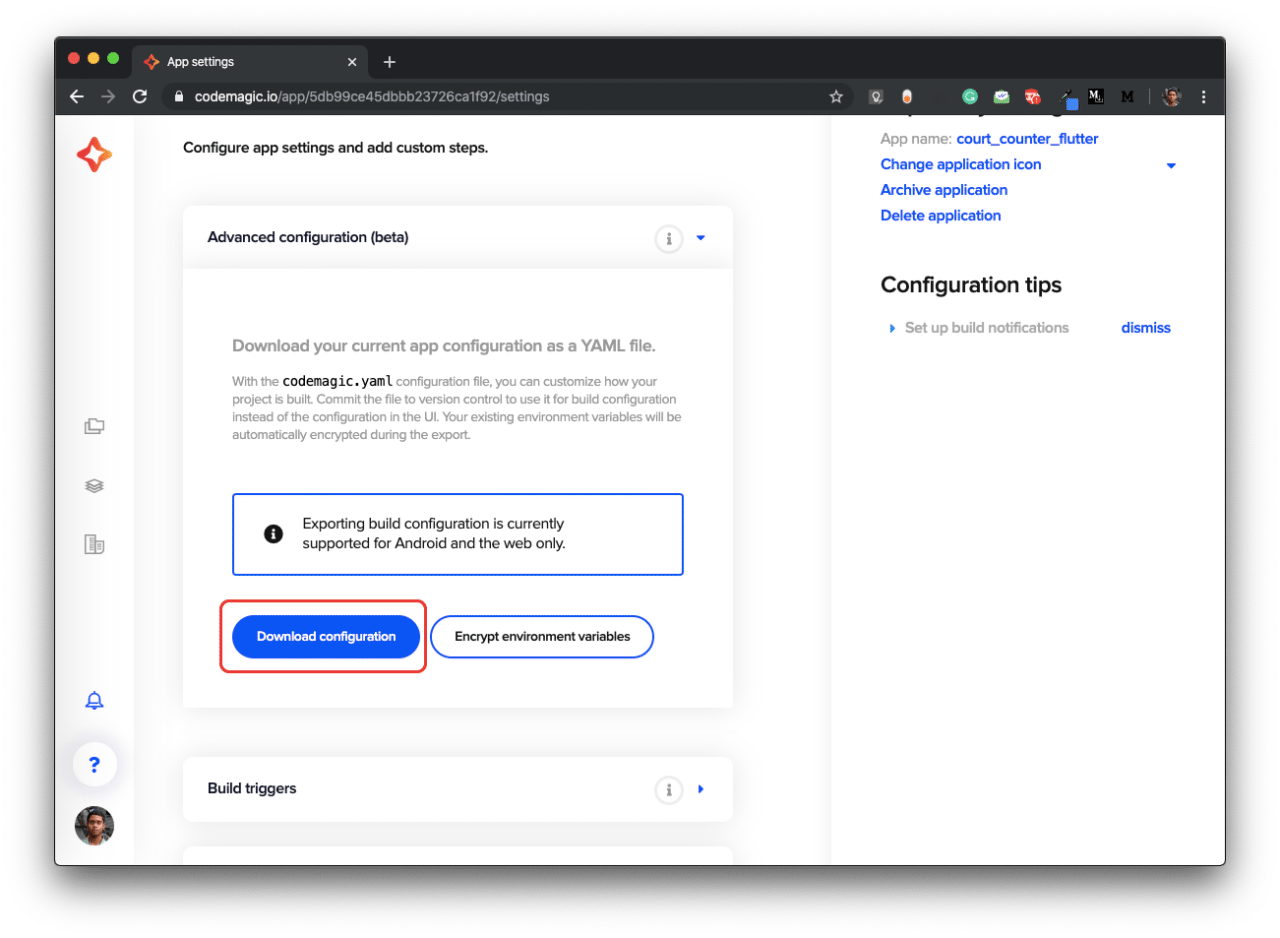
After downloading the file, open it in a code editor.
You will see a default pipeline for any Flutter app is written in the file.
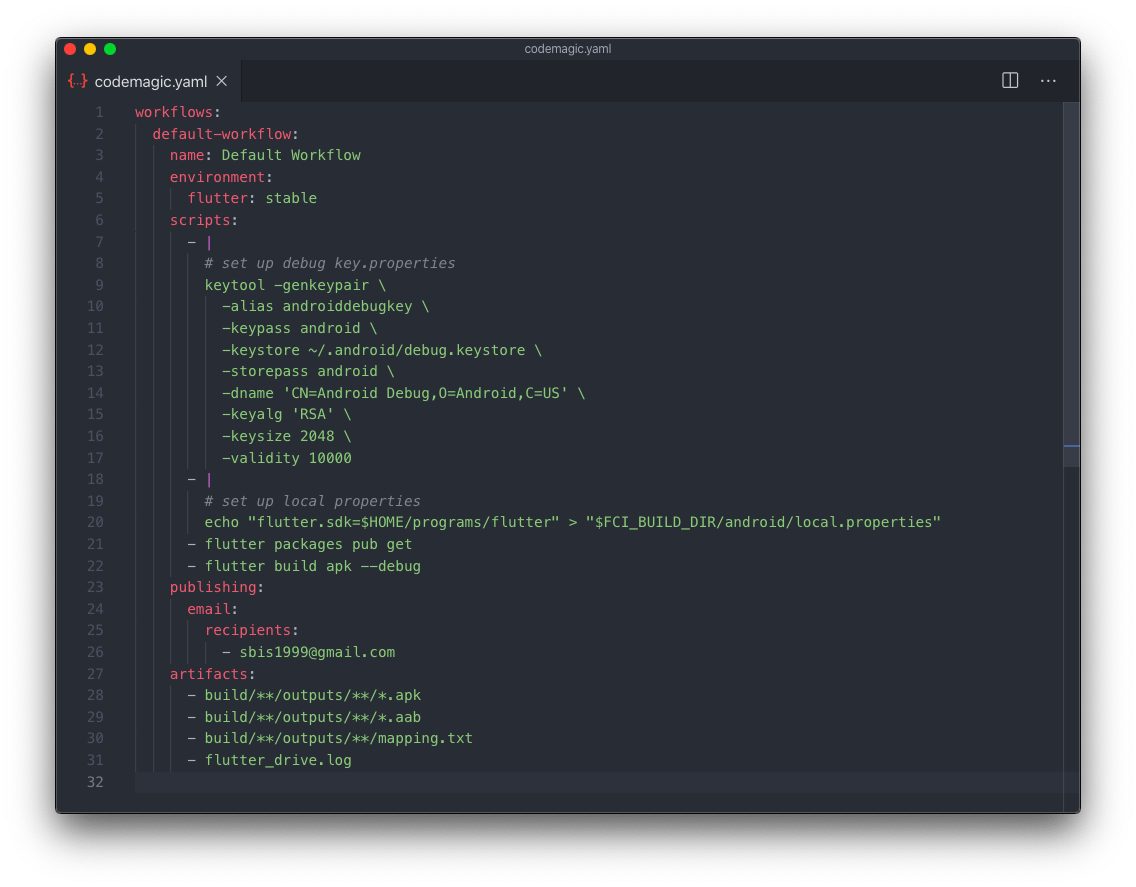
But this pipeline will not work properly in our case, because we are using a Flutter as a dependency to the host Android app. So, running the standalone Flutter app will give us errors. We need to make some modifications to the configuration.
- Under set up local properties comment, we need to provide the correct Flutter SDK path and add build commands for generating the apk.
- Delete the commands below this comment and replace with this one:
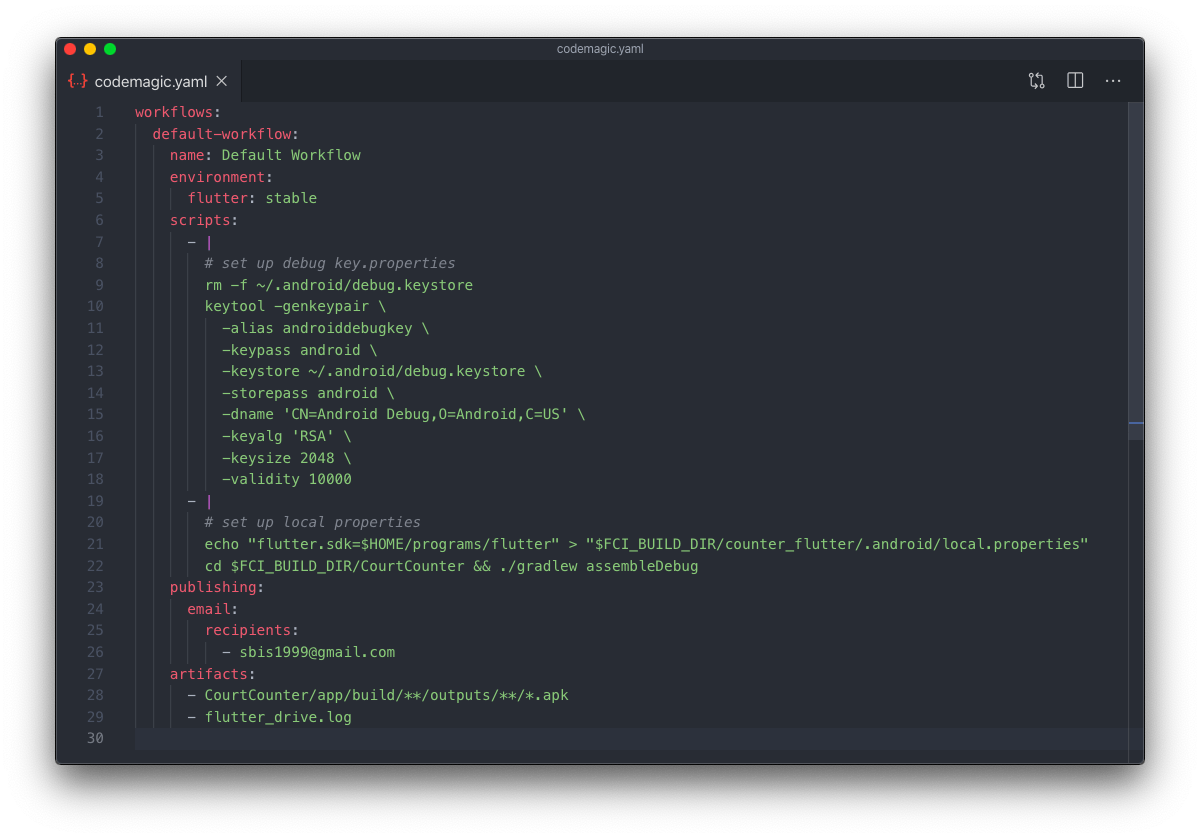
# set up local properties echo "flutter.sdk=$HOME/programs/flutter" > "$CM_BUILD_DIR/name_of_module/.android/local.properties" cd $CM_BUILD_DIR/nameOfAndroidFolder && ./gradlew assembleDebug- This will generate the debug apk of the app.
- To retrieve this debug apk, we need the define the correct path under the
artifacts. - Under artifacts define this path to retrieve the debug apk:
artifacts: - nameOfAndroidFolder/app/build/**/outputs/**/*.apk- Replace the nameOfAndroidFolder with the correct Android project folder name.
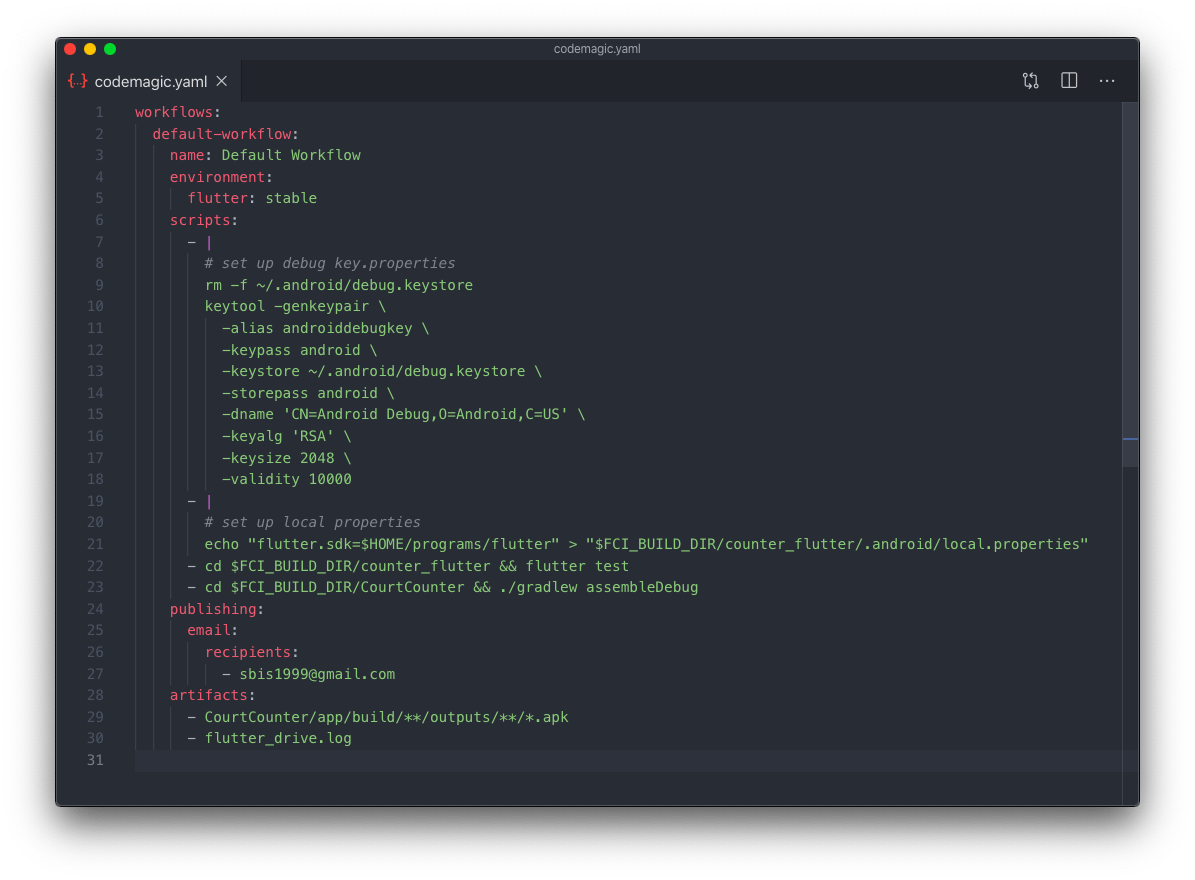
The modified
codemagic.yamlfile will look like this:
- Place this
codemagic.yamlfile in your root project folder along with the Android and Flutter project folders.
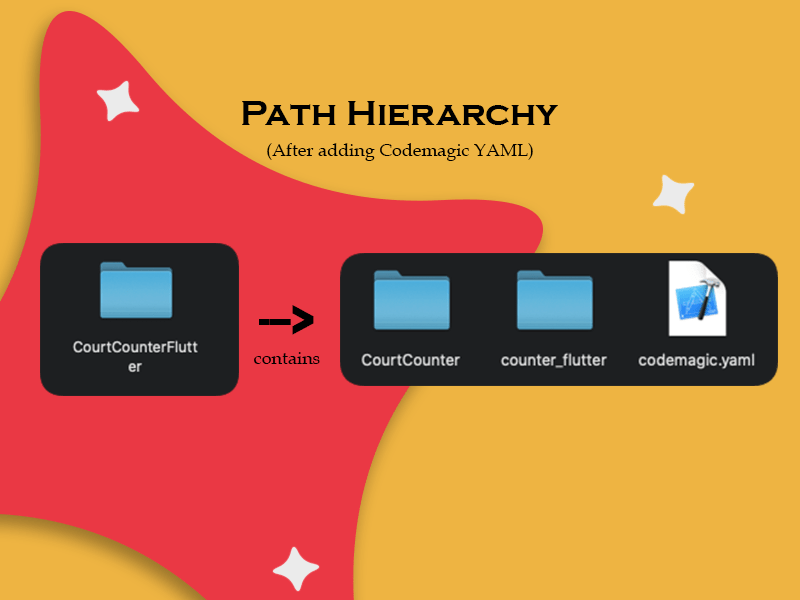
Commit and push it to GitHub.
To use this YAML file in Codemagic UI while building, you have to go to the Settings of the application and click on Start new build.

- Then click on Select workflow from codemagic.yaml, so the YAML file commands will be used now for building the app.
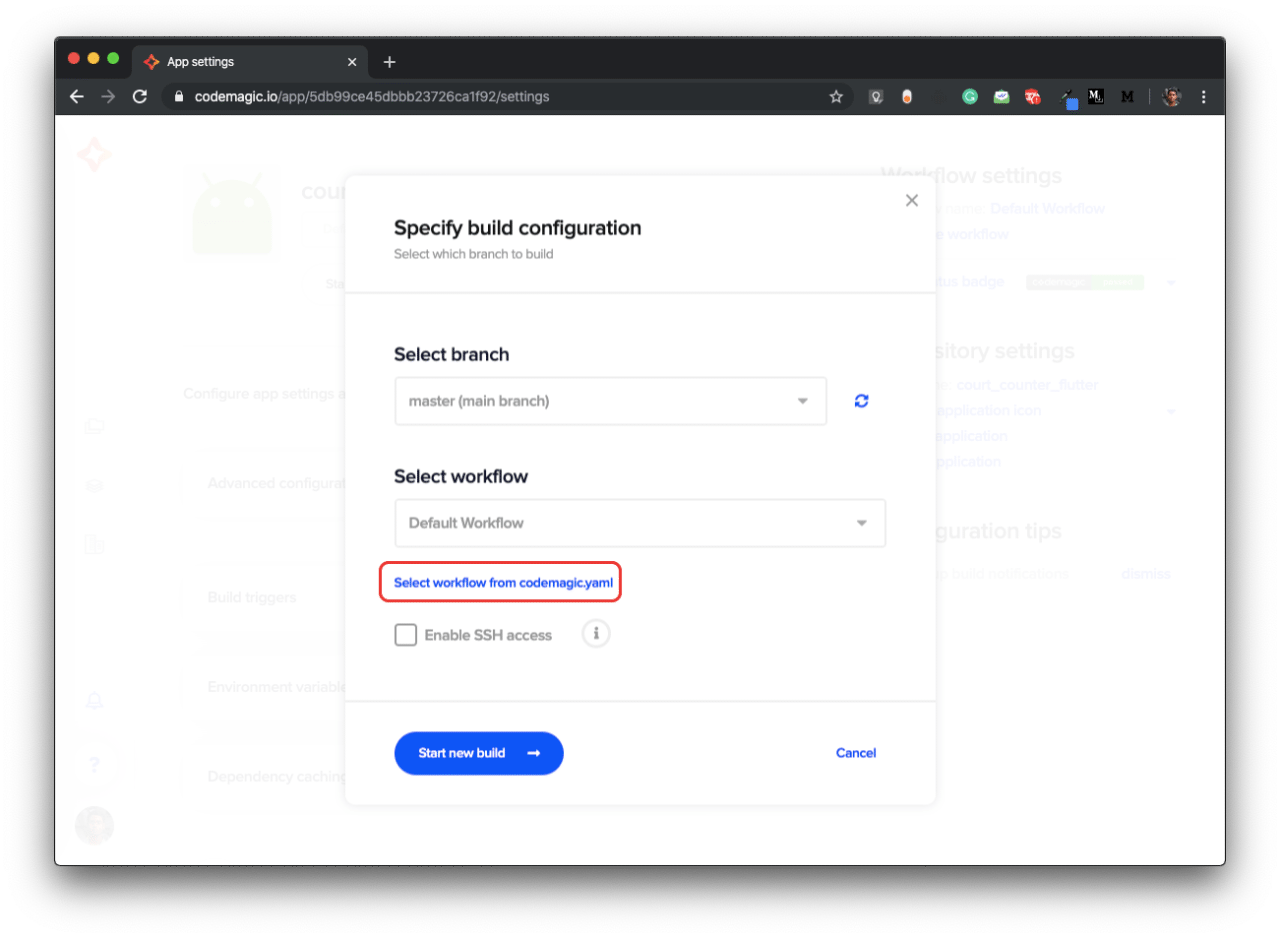
- Click on Start new build to proceed with the build using the YAML file.
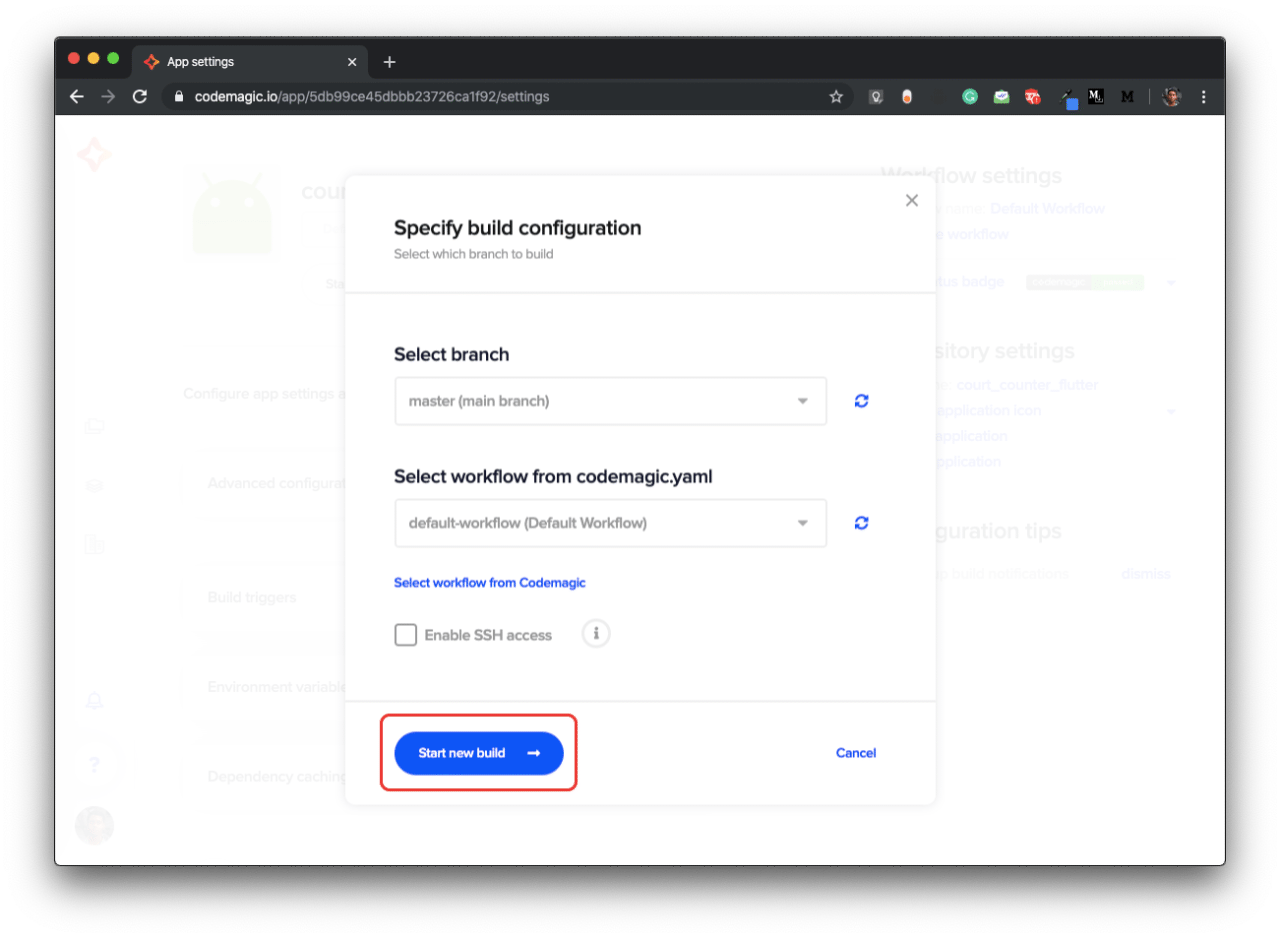
- This will start the build and after the completion of the build you will get a app-debug.apk as the output.
Testing on Codemagic (using YAML)
Let’s add a very simple widget test for the Flutter module which will just test if the Image and the Text widget is present on the screen.
The code for the test is given below:
// widget_test.dart

void main() {
  Widget makeTestableWidget({Widget child}) {
    return MaterialApp(
      home: child,
    );
  }

  testWidgets('Splash screen test', (WidgetTester tester) async {
    SplashScreen splashScreen = SplashScreen();

    await tester.pumpWidget(makeTestableWidget(child: splashScreen));


    expect(find.text('Court Counter'), findsOneWidget);
    expect(find.byType(Image),findsOneWidget);


    print('Found app title text.');
    print('Found splash screen image.');
  });
}
To test it on Codemagic CI/CD, we have to add one more line to the codemagic.yaml file.
We have to run the test from the Flutter project folder. So, for doing this using the YAML, add the following line to the file.
cd $CM_BUILD_DIR/name_of_module && flutter test
The complete codemagic.yaml file will look like this.
Conclusion
The codemagic.yaml file makes it a lot simpler to build and test Flutter module on Codemagic CI/CD. You have to write the YAML configuration file once and then you can use it for all your CI/CD builds for this project. It also gets auto-detected from your GitHub, so you just have to push the modified codemagic.yaml file to GitHub if you want to apply any build configuration changes.
The official documentation for Codemagic YAML is available here.
You can find the GitHub repo for this project in this link.
Souvik Biswas is a passionate Mobile App Developer (Android and Flutter). He has worked on a number of mobile apps throughout his journey. Loves open source contribution on GitHub. He is currently pursuing a B.Tech degree in Computer Science and Engineering from Indian Institute of Information Technology Kalyani. He also writes Flutter articles on Medium - Flutter Community.


