


Flutter 103 by Scott Stoll
Welcome back! This is the third article in a series I’ve decided to call: “Flutter 10X, Flutter for Humans” (that’s pronounced “one-oh-x”). Today, we’ll take a look at Flutter 103: Navigating Multiple Screens.
Quick disclaimer: You’re not going to find a lot here that isn’t in the docs, but the big difference is you’ll be able to understand this easier. Don’t get me wrong, Flutter’s documentation has always been fantastic compared to any others! I also think they’ve listened carefully to many things non-Engineers have said over the past two years about docs, and are working very hard to make them as understandable as possible. However, even their great docs are still written by Engineers, for Engineers… but they are working on it.
I, on the other hand, am not an Engineer. I write for humans, and a lot of those aren’t coming to us with iOS or Android backgrounds. Therefore, I word things a bit differently than you might be used to.
So, back to Navigation…
Everything is a Widget; Even if it’s a Page, Screen, Route or Piece of Cheesecake
Screens, Pages, Activities, ViewControllers. Different words, different code to make them, the same result. In Flutter, we get this same result using Navigators and Routes.
When you talk to Flutter people, they still say “page” for the screen you see but technically I suppose we should be calling it a route. The term just never caught on. This is why you see a folder called pages in many Flutter projects, even though it technically should be called “routes”.
So Routes are the Screens/Pages/Activities/ViewControllers, and Navigators are how you get there.
The Straight Shot, Just Get Me There
If you really don’t care about looking pretty and just want to “turn the page”, there are a few ways to do this. Each has its advantages. The MaterialPageRoute is probably the most commonly used method on both iOS and Android.
I know, “Material” PageRoute is commonly used on iOS… ironic, isn’t it? Here’s a basic example, I’ve underlined the parts we care about:
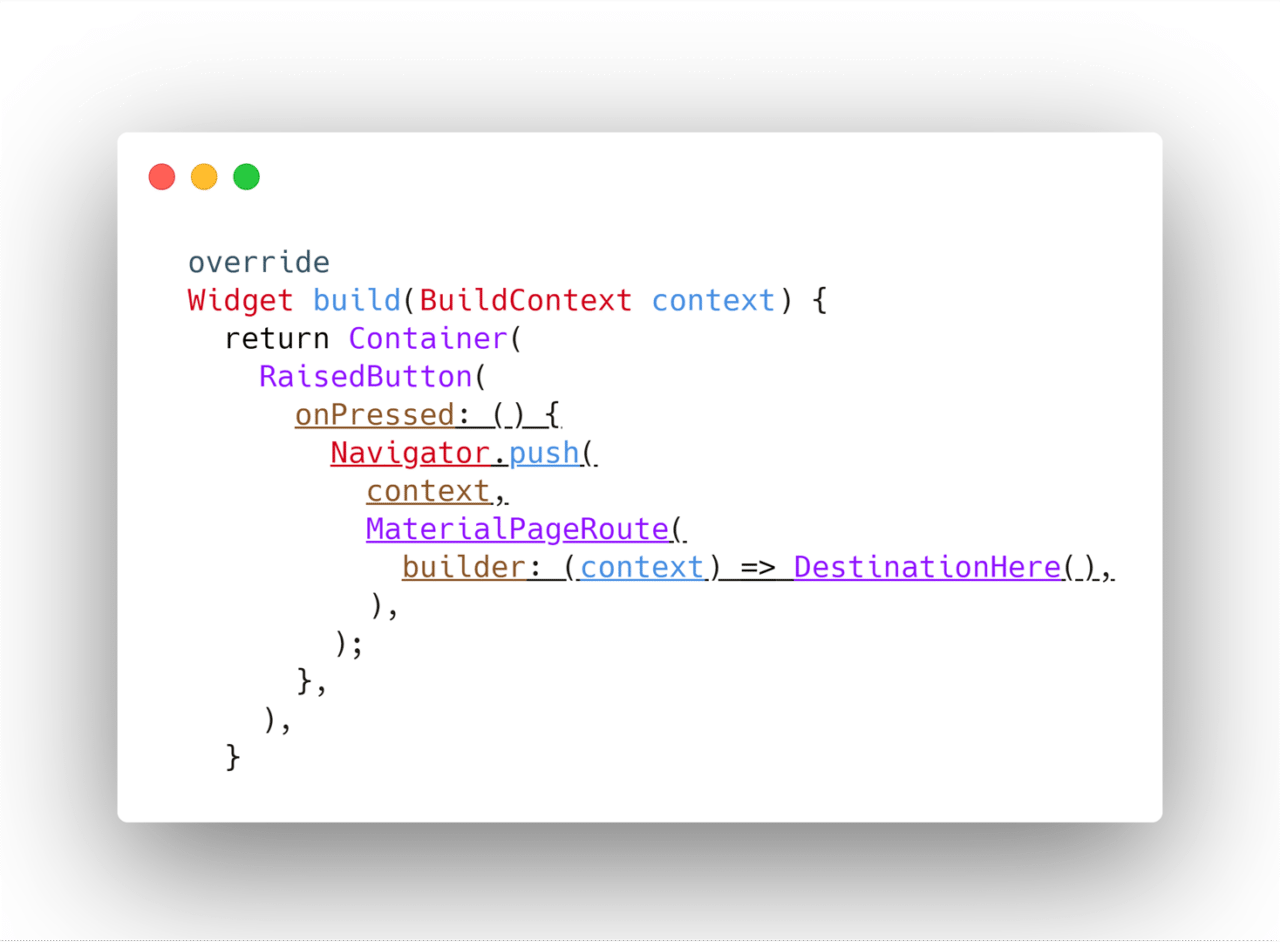
Our on Pressed parameter takes an anonymous function, in this case without any parameters of its own (this is why the ( ) is empty). You could also see this written as a lambda (“fat arrow” syntax):
onPressed: () => Navigator.push(context, MaterialPageRoute( ...
Changing pages isn’t exactly a matter of replacing the old one with a new one. It’s more like making a pile of them (it’s called a stack), and every time you change a page you’re pushing a new page onto the stack or pulling one-off and revealing the page under it. This is why the Navigator in the above example is being told to push.
You have to give the Navigator a Context. If you don’t understand Context, a very simplified explanation is, “the situation and status of everything going on in that Widget, and all the ones above it, at the exact moment the function is triggered”. Notice that it doesn’t include the Widgets below that because, at the time this Context is created, those Widgets don’t yet exist. So, there’s no way to know what they are.
So, Context is basically the state of existence at any particular moment. As such, it’s best left to philosophers to figure out, right after they finish contemplating the nature of existence itself.
Now that we know we’re trying to add something to the stack (push) and under what conditions were trying to do it (context), we have to figure out which approach we want to use. That’s where MaterialPageRoute comes in. When you use it, the new page will slide in from the bottom and fade in on Android, and slide and fade in from the right on iOS, unless the user’s language reads right-to-left, in which case the new page will come from the left.
Tip: By default, the old page is kept in memory but you can free up resources if you set maintainState to false.
Now that we know how we’re going to do this, we need to know where we’re going. The builder is the one doing the work and we’re now giving it the context, so it knows the circumstances it has to build under. All that’s left is to tell the builder what to build. Basically, we’re passing the builder an anonymous function that returns our destination Widget’s constructor… hence the ( ) on the end.
Be nice to your Route and give it a name… like “Bob”
Sometimes when you have a lot of pages it can become a little cumbersome to try to remember all the different constructor names you’ll need to navigate to. So Flutter has a way to give each one a name, which can be a lot more human-readable.
What you do is give each Route a name in your MaterialApp Widget that you can use in a Navigator later. How do you give it a name? With a map, of course! Since the name of the route is a String, that makes it perfect for the key. Your target Widget’s constructor is the value
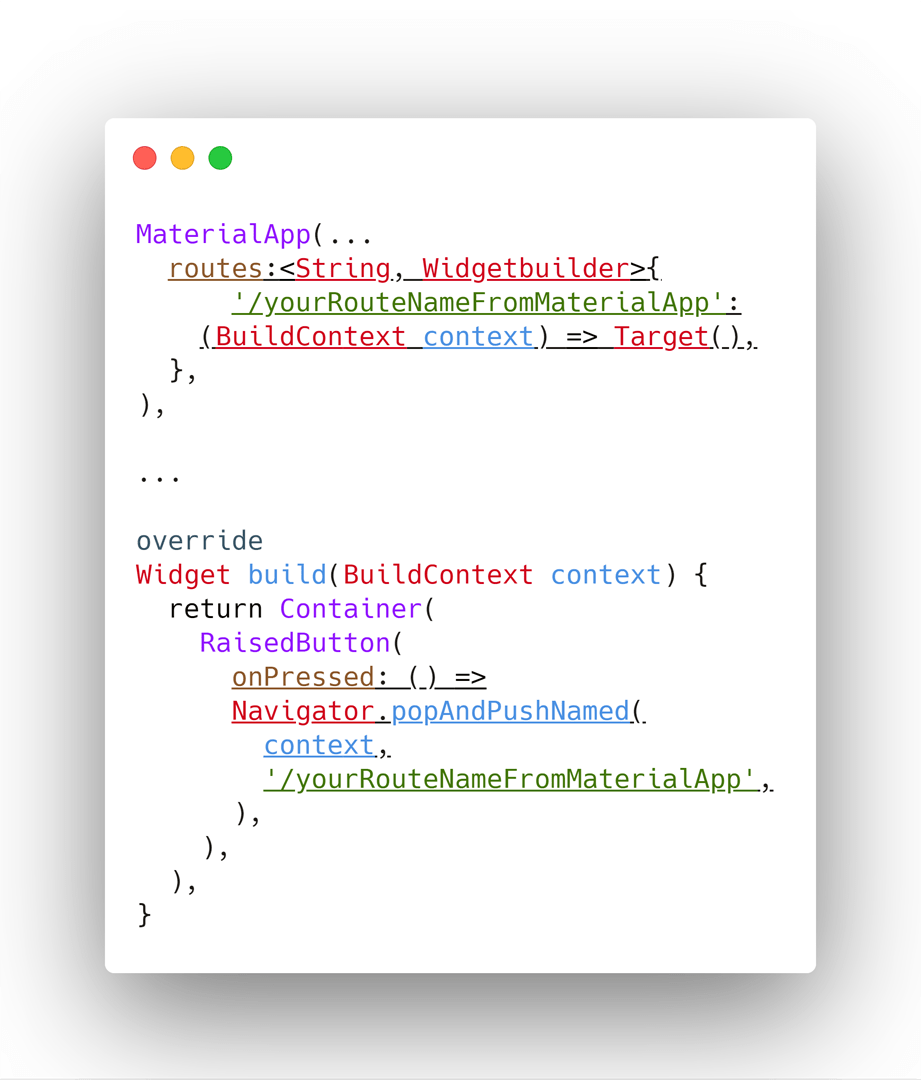
I trust we don’t need to walk through this one, too. You might not need them very often, but if you have twenty pages or more thenNamed Routes could really simplify your life.
There are a bunch of cool things you can do with Routes, including pushing more than one at a time. Let’s say you pushed three things at once. By doing that, you set things up so that when your user hits the back button they go to #2, not back to where they came from.
Speaking of the Back Button…
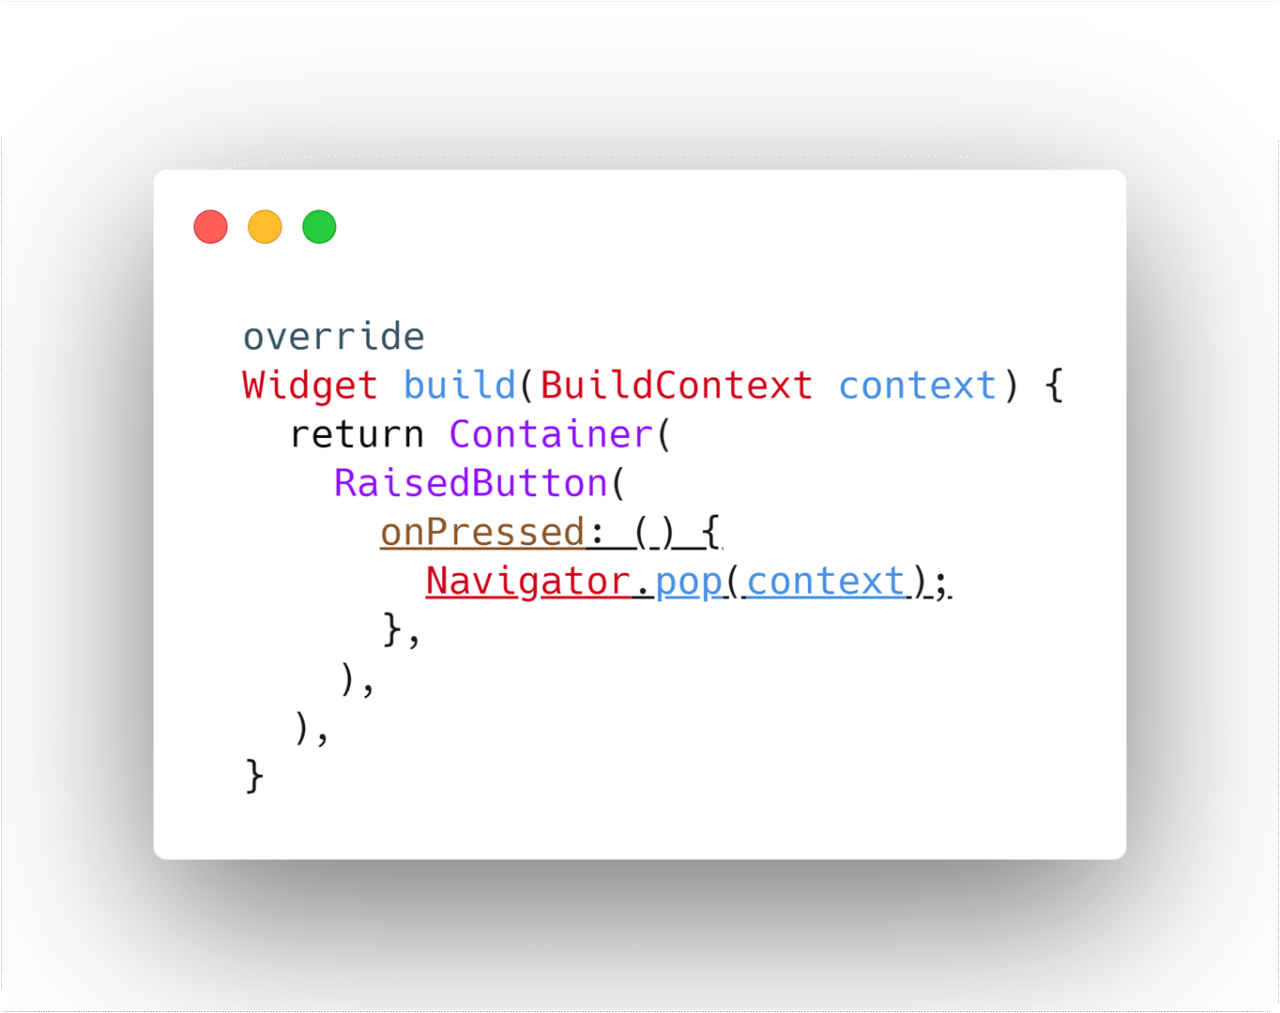
Let’s face it. Life doesn’t get much easier than Navigator.pop(context). By now you can see that we’re using a Navigator, popping something off the stack instead of pushing, and we’re using the current context… which tells the Navigator what the current status of the stack is.
And remember, we’re not going to display the things that pop off. We’re revealing the page that was under the page we popped off!
There’s a LOT more to Routes, but this is only Flutter 103, after all. If you’re hungry for more, the place to start is the docs page for the Navigator class.
Until next time, don’t overflow your stack!
You can stalk the author on Twitter at @scottstoll2017


