


Written by Souvik Biswas
Maintaining consistent performance without jaggedness is an important factor for improving user experience. Performance testing helps developers to pinpoint which component is causing the hiccup and on which page of the web app.
There are two broad types of performance testing:
- Quantitative testing looks at metrics like response time.
- Qualitative testing is concerned with scalability, stability, and interoperability.
In this article, we will take a look at the quantitative testing part of a Flutter web app and how you can run it in the CI environment of Codemagic.

Sample app
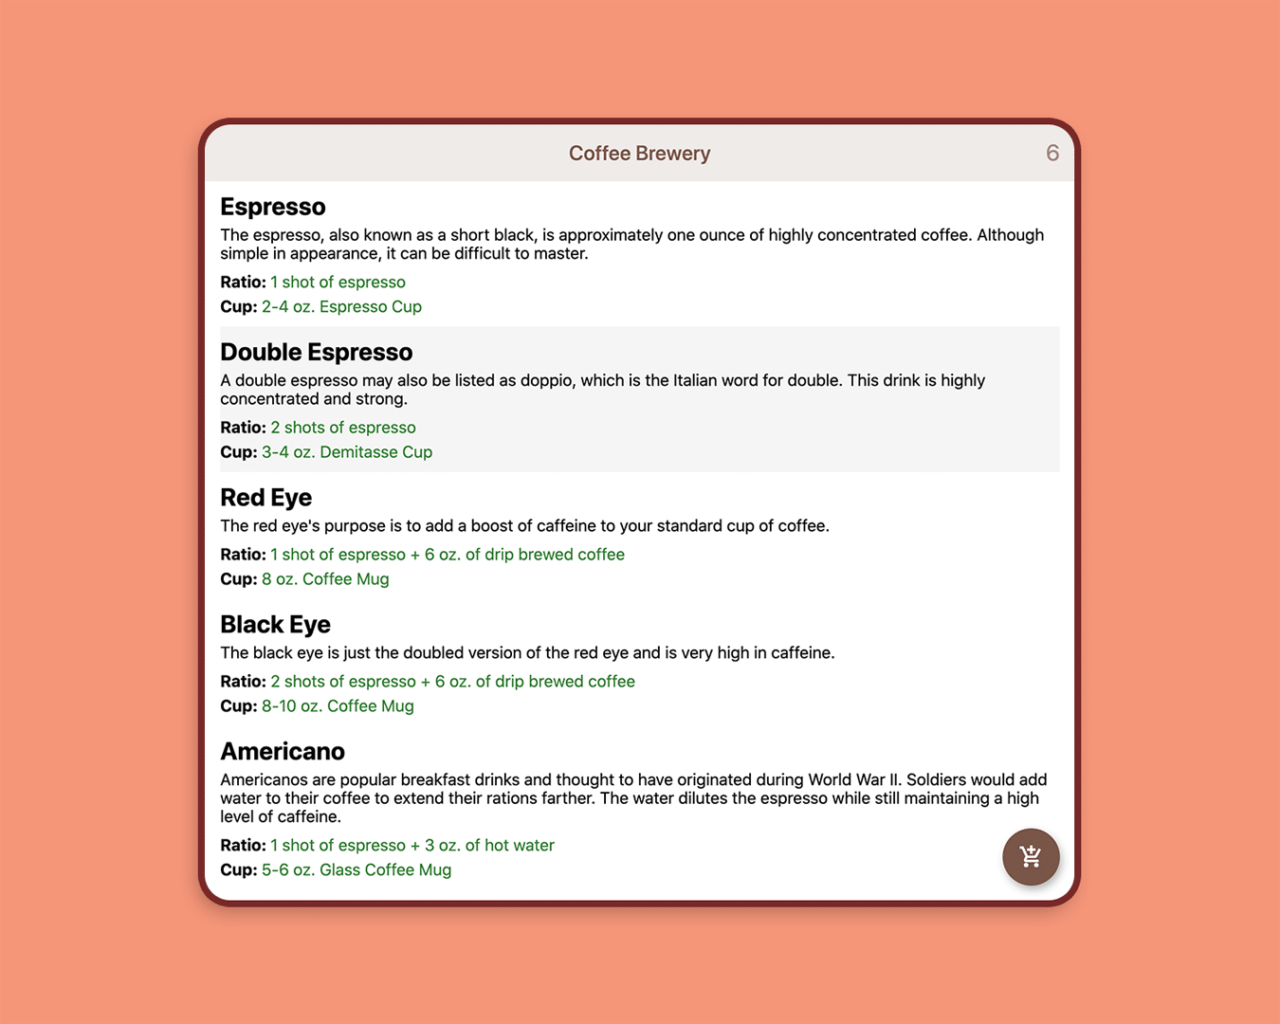
The sample Flutter web app that we will be using is called Coffee Brewery. It contains a list of coffee descriptions and a floating action button that increments the number of coffees in the cart.
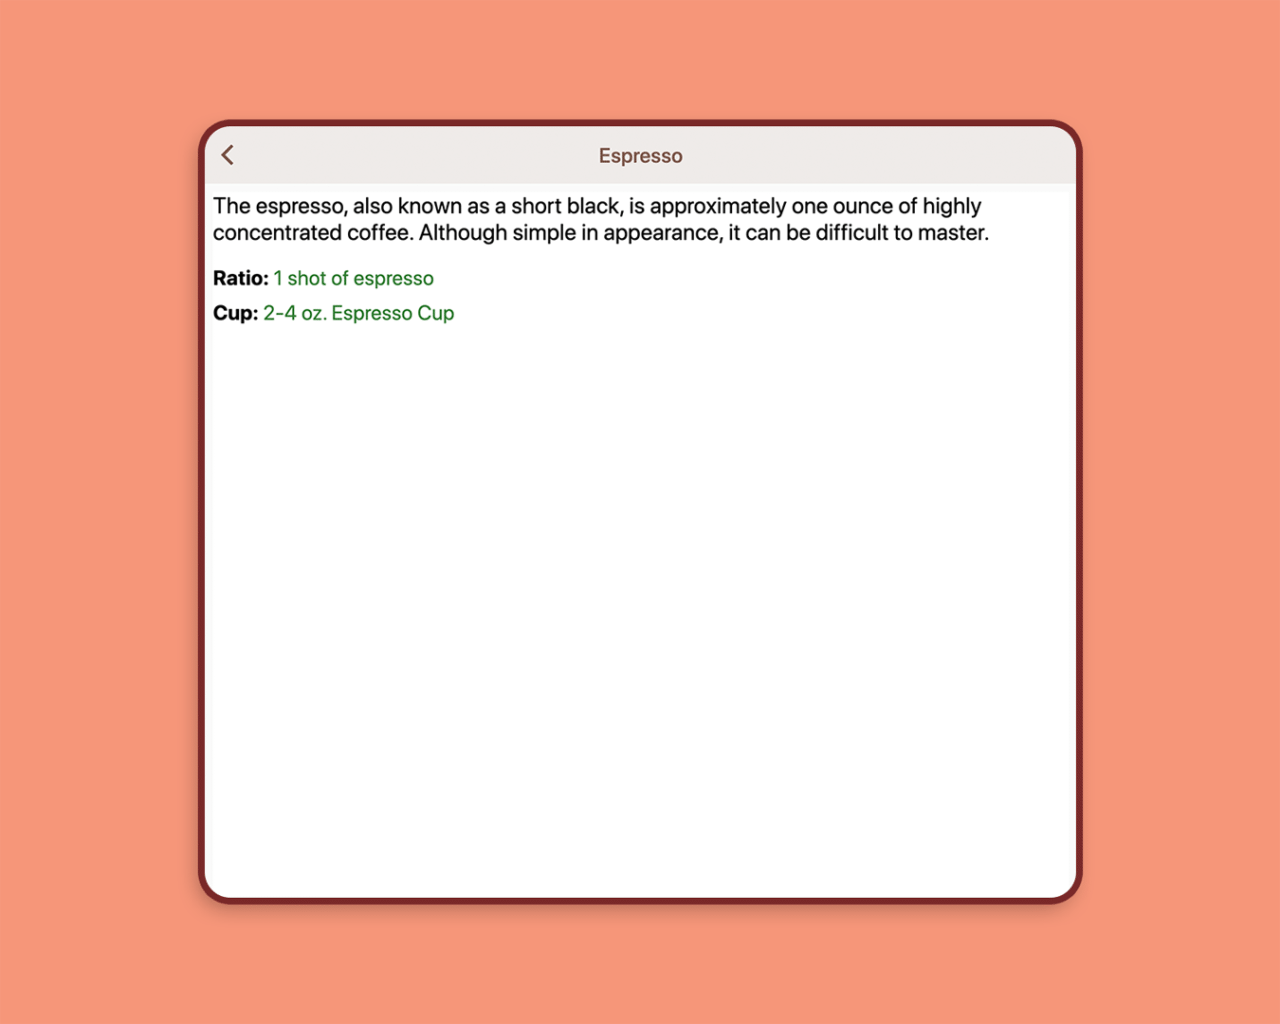
Selecting any coffee leads to another page showing that coffee’s description.
Setting up for testing
In order to run Flutter web performance benchmarks, we can use the package called web_benchmarks_framework. It helps in running performance tests on Chrome.
dependencies:
  web_benchmarks_framework:
    git:
      url: https://github.com/material-components/material-components-flutter-experimental.git
      ref: f6ebb4ed3b6489547d9ae58216df9999112be568
      path: web_benchmarks_framework
This package is adapted from macrobenchmarks and devicelab, two packages used by Flutter for web performance testing of the Flutter Gallery.
Also, it is recommended to use the most recent dev channel release of the Dart or Flutter SDK for running these benchmark tests on the web.
To switch to the dev channel of Flutter:
flutter channel dev
flutter upgrade
To switch to the dev channel of Dart (on macOS):
brew unlink dart
brew install --head dart
You can check out this guide for instructions on switching to the dev channel on Windows or Linux.
Adding tests
The things we are going to test are some simple user actions, like:
- Scrolling through the list
- Navigating between two pages
- Tapping the floating action button (FAB)
Create a new folder called benchmarks under the lib directory, and add a new file called runner.dart:
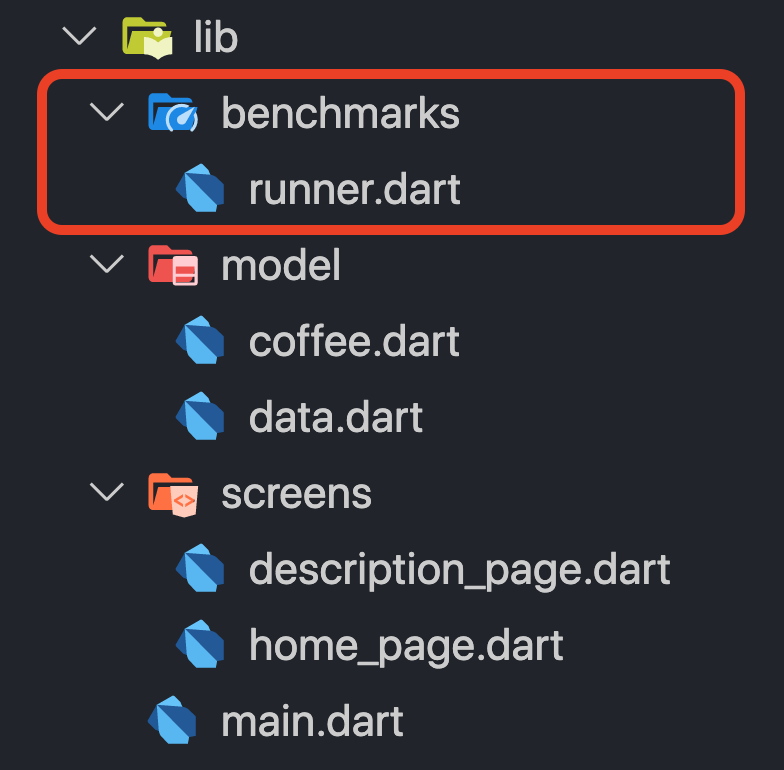
We will be defining the tests in this file. Add the following:
/// A recorder that measures frame building durations.
class AppRecorder extends WidgetRecorder {
  AppRecorder({@required this.benchmarkName}) : super(name: benchmarkName);

  final String benchmarkName;

  bool _completed = false;

  @override
  bool shouldContinue() {
    if (benchmarkName == 'scroll') {
      return profile.shouldContinue();
    } else {
      return profile.shouldContinue() || !_completed;
    }
  }

  @override
  Widget createWidget() {
    final automationFunction = {
      'scroll': automateScrolling,
      'tap': automateTapping,
      'page': automatePaging,
    }[benchmarkName];
    Future.delayed(Duration(milliseconds: 400), automationFunction);
    return MyApp();
  }

  Future<void> automateScrolling() async {
    final scrollable = Scrollable.of(find.byKey(listItemKey).evaluate().single);
    await scrollable.position.animateTo(
      2000,
      curve: Curves.linear,
      duration: Duration(seconds: 5),
    );
  }

  Future<void> automatePaging() async {
    final controller = LiveWidgetController(WidgetsBinding.instance);
    for (int i = 0; i < 10; ++i) {
      print('Testing round $i...');
      await controller.tap(find.byKey(listItemKey));
      await animationStops();
      await controller.tap(find.byKey(backKey));
      await animationStops();
    }
    _completed = true;
  }

  Future<void> automateTapping() async {
    final controller = LiveWidgetController(WidgetsBinding.instance);
    for (int i = 0; i < 20; ++i) {
      print('Testing round $i...');
      await controller.tap(find.byIcon(Icons.add_shopping_cart));
      await animationStops();
    }
    _completed = true;
  }

  Future<void> animationStops() async {
    while (WidgetsBinding.instance.hasScheduledFrame) {
      await Future<void>.delayed(Duration(milliseconds: 200));
    }
  }
}

Future<void> main() async {
  await runBenchmarks(
    {
      'scroll': () => AppRecorder(benchmarkName: 'scroll'),
      'tap': () => AppRecorder(benchmarkName: 'tap'),
      'page': () => AppRecorder(benchmarkName: 'page'),
    },
  );
}
Understanding the tests
The
AppRecorderclass extends theWidgetRecorder, which helps in recording the performance data as it drives the app.The
shouldContinuemethod causes theAppRecorderto stop recording frames after all gestures have finished.The
automateScrollingmethod simulates the action of scrolling through the list of coffee descriptions by finding one element using its key.The
automatePagingmethod simulates the action of navigating to the description page of a coffee type and then returning back to the home page.The
automateTappingmethod simulates the action of tapping the floating action button (FAB), which in turn increments the number of coffees present in the cart.animationStopsrepeatedly checks whether an animation is happening and stops when all animation has stopped.runBenchmarksis a function that allows us to select which benchmark to run and displays the results in the browser.
Running the tests
You can run the tests on Chrome by running the following command from the root project directory:
flutter run -d chrome -t lib/benchmarks/runner.dart --profile
This uses runner.dart as the entry point, instead of main.dart.
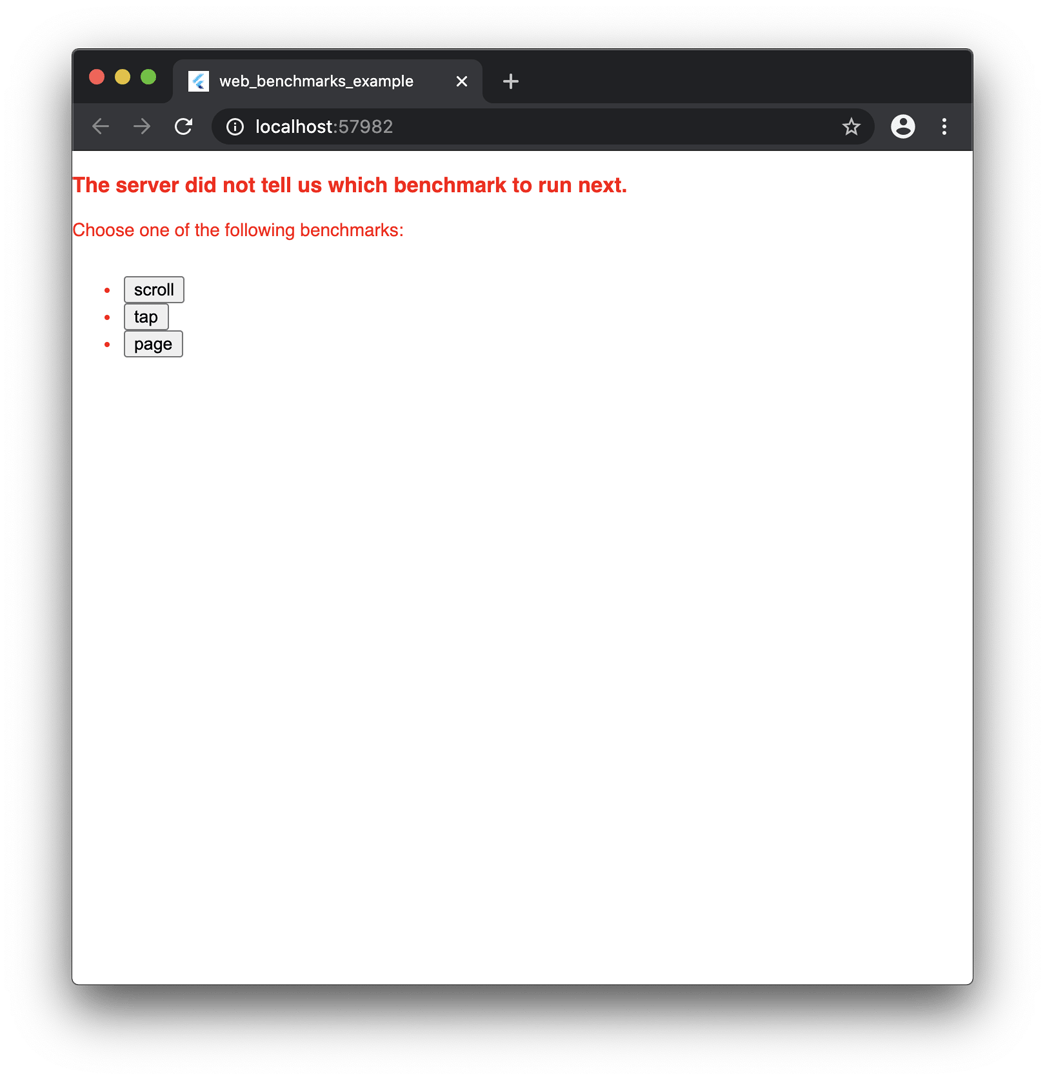
On running this command, you will see the following screen, which lets you select the test you want to run.
On selecting any test, it will run the benchmark and generate the result. The following is the animation for the “page” benchmark:
After the test completes, it will generate a result like this:
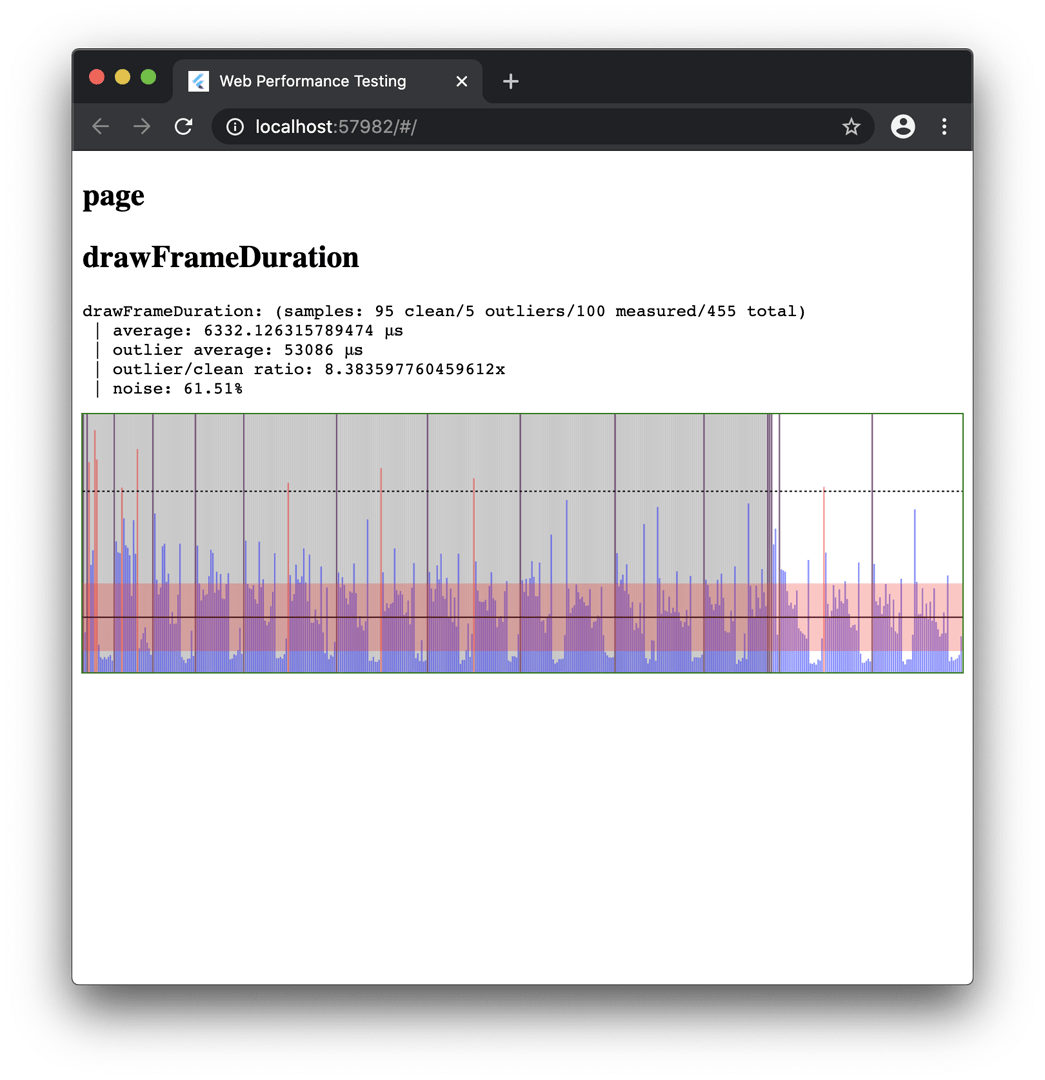
Collecting data from Chrome’s DevTools
You can generate the result of the benchmark in a JSON format. Create a file called run_benchmarks.dart in the test folder, and add the following:
import 'dart:convert' show JsonEncoder;

import 'package:web_benchmarks_framework/server.dart';

Future<void> main() async {
  final taskResult = await runWebBenchmark(
    macrobenchmarksDirectory: '.',
    entryPoint: 'lib/benchmarks/runner.dart',
    useCanvasKit: false,
  );
  print(JsonEncoder.withIndent('  ').convert(taskResult.toJson()));
}
You can run the tests by using the following command:
dart test/run_benchmarks.dart
This will print the result in the console (in JSON format), like this:
Received profile data
{
  "success": true,
  "data": {
    "scroll.html.preroll_frame.average": 50.72727272727273,
    "scroll.html.preroll_frame.outlierAverage": 635,
    "scroll.html.preroll_frame.outlierRatio": 12.517921146953405,
    "scroll.html.preroll_frame.noise": 0.1557479535529603,
    "scroll.html.apply_frame.average": 159.76530612244898,
    "scroll.html.apply_frame.outlierAverage": 1624.5,
    "scroll.html.apply_frame.outlierRatio": 10.168039854378234,
    "scroll.html.apply_frame.noise": 0.4763820247107002,
    "scroll.html.drawFrameDuration.average": 643.1318681318681,
    "scroll.html.drawFrameDuration.outlierAverage": 3167.8888888888887,
    "scroll.html.drawFrameDuration.outlierRatio": 4.925722151027576,
    "scroll.html.drawFrameDuration.noise": 0.26153072675117545,
    "scroll.html.totalUiFrame.average": 2046,
    "tap.html.preroll_frame.average": 37.72222222222222,
    "tap.html.preroll_frame.outlierAverage": 64.2,
    "tap.html.preroll_frame.outlierRatio": 1.701914580265096,
    "tap.html.preroll_frame.noise": 0.14439149898135345,
    "tap.html.apply_frame.average": 298.0777777777778,
    "tap.html.apply_frame.outlierAverage": 1047.1,
    "tap.html.apply_frame.outlierRatio": 3.512841540239311,
    "tap.html.apply_frame.noise": 0.9220792123340406,
    "tap.html.drawFrameDuration.average": 719.6145833333334,
    "tap.html.drawFrameDuration.outlierAverage": 7415.75,
    "tap.html.drawFrameDuration.outlierRatio": 10.305169144362578,
    "tap.html.drawFrameDuration.noise": 0.6977711839517265,
    "tap.html.totalUiFrame.average": 465,
    "page.html.preroll_frame.average": 45.44565217391305,
    "page.html.preroll_frame.outlierAverage": 62.625,
    "page.html.preroll_frame.outlierRatio": 1.3780196125328867,
    "page.html.preroll_frame.noise": 0.227067133294334,
    "page.html.apply_frame.average": 509.4888888888889,
    "page.html.apply_frame.outlierAverage": 1582.9,
    "page.html.apply_frame.outlierRatio": 3.1068390980067173,
    "page.html.apply_frame.noise": 0.732141578034883,
    "page.html.drawFrameDuration.average": 1389.2105263157894,
    "page.html.drawFrameDuration.outlierAverage": 5804,
    "page.html.drawFrameDuration.outlierRatio": 4.177912483424891,
    "page.html.drawFrameDuration.noise": 0.5862849206826566,
    "page.html.totalUiFrame.average": 2153
  },
  "benchmarkScoreKeys": [
    "scroll.html.drawFrameDuration.average",
    "scroll.html.drawFrameDuration.outlierRatio",
    "scroll.html.totalUiFrame.average",
    "tap.html.drawFrameDuration.average",
    "tap.html.drawFrameDuration.outlierRatio",
    "tap.html.totalUiFrame.average",
    "page.html.drawFrameDuration.average",
    "page.html.drawFrameDuration.outlierRatio",
    "page.html.totalUiFrame.average"
  ]
}
If you want to learn more about the results, take a look at this post.
Configuring for Codemagic
You can use codemagic.yaml to run the Flutter Web performance tests on Codemagic and also to collect the benchmark result in a JSON file.
First, you have to make some changes to the test/run_benchmarks.dart file to store the result in a file. Modify it as follows:
import 'dart:convert' show JsonEncoder;
import 'dart:io';

import 'package:web_benchmarks_framework/server.dart';

Future<void> main() async {
  final taskResult = await runWebBenchmark(
    macrobenchmarksDirectory: '.',
    entryPoint: 'lib/benchmarks/runner.dart',
    useCanvasKit: false,
  );

  // For storing the benchmark result to a JSON file
  final result = File('report.json').openWrite(mode: FileMode.write);
  result.write(JsonEncoder.withIndent('  ').convert(taskResult.toJson()));

  await result.close();
}
Now, you can use the following YAML template for running the tests on Codemagic:
workflows:
  flutter-web:
    name: Performance testing
    environment:
      flutter: dev
    scripts:
      - name: Switch to dart dev
        script: |
          brew unlink dart
          brew install --head dart
      - name: Enable flutter web
        script: flutter config --enable-web
      - name: Get flutter packages
        script: cd . && flutter packages pub get
      - name: Run benchmarks
        script: dart test/run_benchmarks.dart
    artifacts:
      - report.json
      - build/web/
    publishing:
      email:
        recipients:
          - user@example.com # Enter your email here
Understanding the YAML contents
Uses to the
devchannel of Flutter.Switching to the
devchannel of Dart:brew unlink dart brew install --head dartEnabling Flutter Web:
flutter config --enable-webGetting Flutter packages:
flutter packages pub getRunning the performance tests:
dart test/run_benchmarks.dartRetrieving the benchmark result:
artifacts:
  - report.json
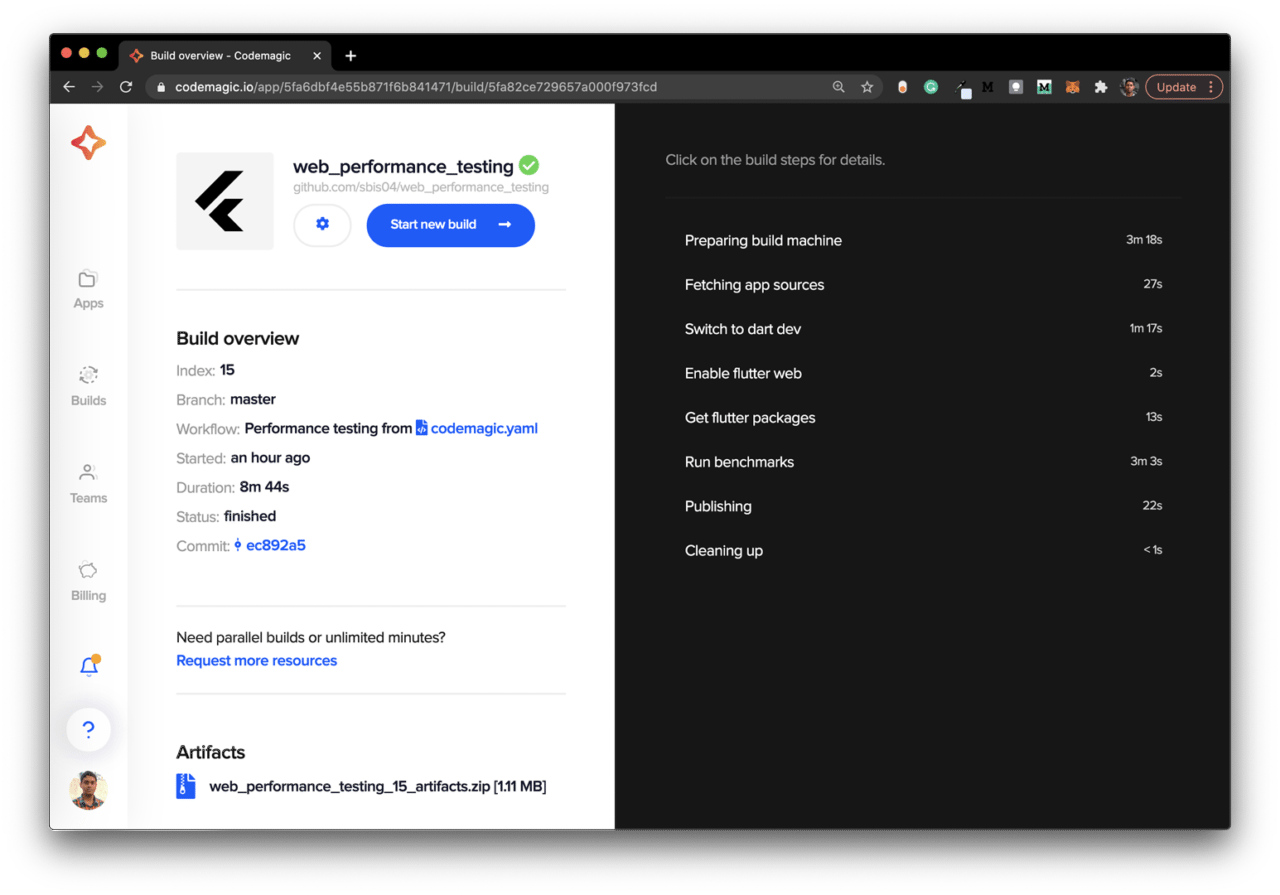
Running on Codemagic
Add the codemagic.yaml file to the root project directory, and commit it to your cloud repository (GitHub, GitLab, Bitbucket, etc.).
Follow the steps below to start the build:
Go to the Codemagic Applications dashboard.
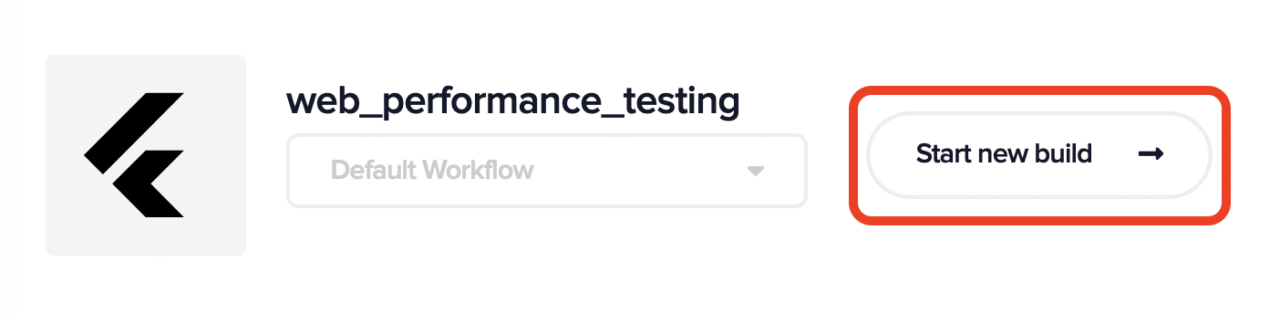
Search for your project, and go to its settings.
Click on Start new build.
Select the workflow from
codemagic.yaml, and click on Start new build.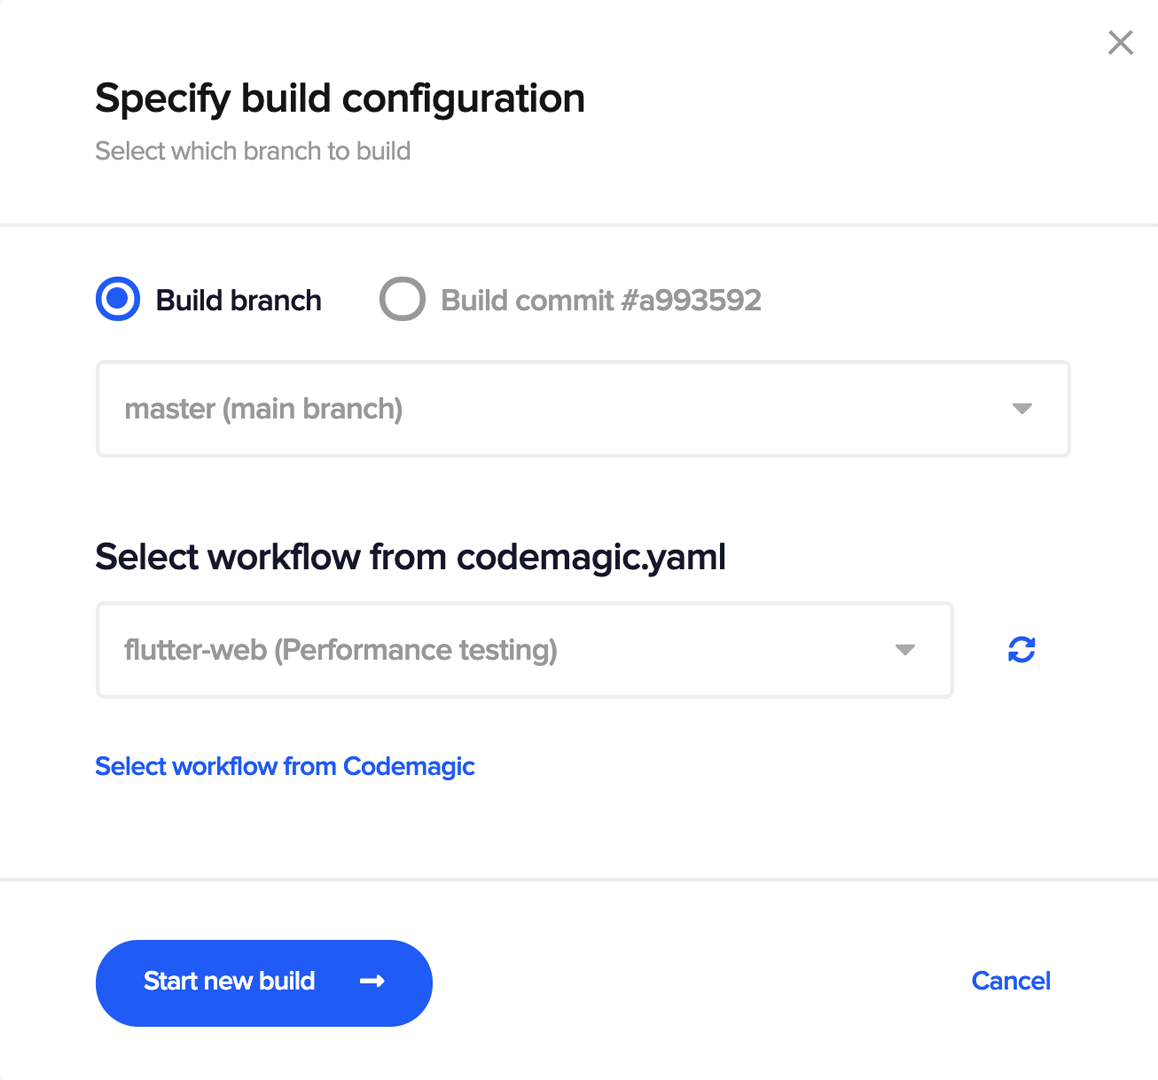
This will start a new benchmark test with the selected workflow on Codemagic.
Conclusion
Once you have the benchmark results, you can assess if anything is causing performance hiccups and iterate upon improving the performance of your Flutter web app. You can also configure codemagic.yaml to run the benchmarks as new commits are made in order to retain performance as new features are added.
References

Souvik Biswas is a passionate Mobile App Developer (Android and Flutter). He has worked on a number of mobile apps throughout his journey. Loves open source contribution on GitHub. He is currently pursuing a B.Tech degree in Computer Science and Engineering from Indian Institute of Information Technology Kalyani. He also writes Flutter articles on Medium - Flutter Community.


