


This is a getting started guide on building Flutter apps with Codemagic CI/CD.
Updated in March 2023 by Maksim Lin.
At the Flutter Live 2018 conference in London, Nevercode partnered with Google and launched a dedicated CI/CD solution for Flutter apps – a solution called Codemagic. With Codemagic, you can have your Flutter apps tested and released with zero configuration and no pain.
We’re the Flutter experts, but we are also so much more. If you want to treat your native apps to the same quality of service, you can now use the codemagic.yaml file for configuring and building your native Android and iOS apps, as well as React Native, Ionic, Cordova apps and Unity games. If you want to have more control over the scripts, Codemagic allows developers to run custom scripts and create custom workflows for their apps. Developing high-quality apps fast just got even better!
In this article, you will learn how to build, test and deliver Flutter apps on Codemagic.

Getting started
Make sure that your Flutter project is uploaded to a code hosting platform (like GitHub, Bitbucket or GitLab). To start building your apps using Codemagic CI/CD, you first need to sign up using a GitHub, Bitbucket or GitLab account, or via email. Follow the steps below to access your project on Codemagic:
- Log in to Codemagic. If you’re not a user, then sign up:
On the Applications page, click Add application:

Select a Git provider (or select Other if you want to add using the clone URL of a repository) you want to use:
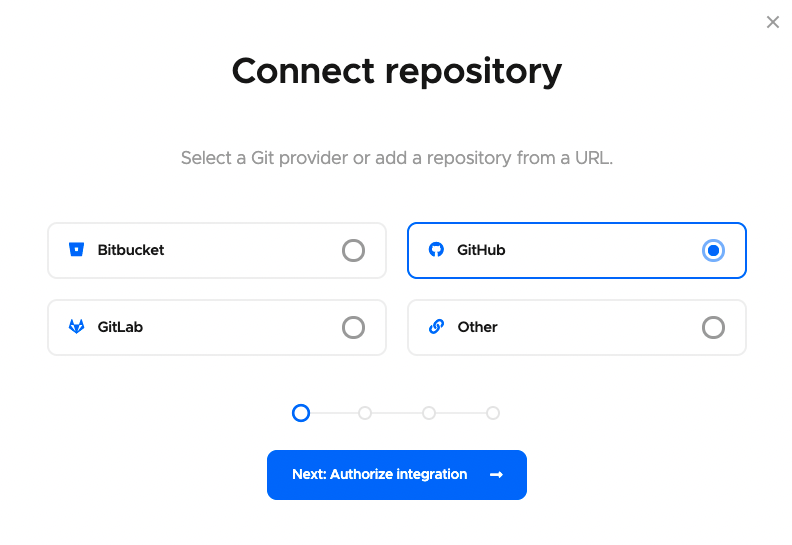
Click Next: Authorize integration to authorize Codemagic. If you have already authorized your selected Git provider, click Next: Select repository instead.
If you are using GitHub as your Git provider then there is one additional step before selecting repository, click Install GitHub App to set up the integration. Know more about configuring GitHub App integration here.
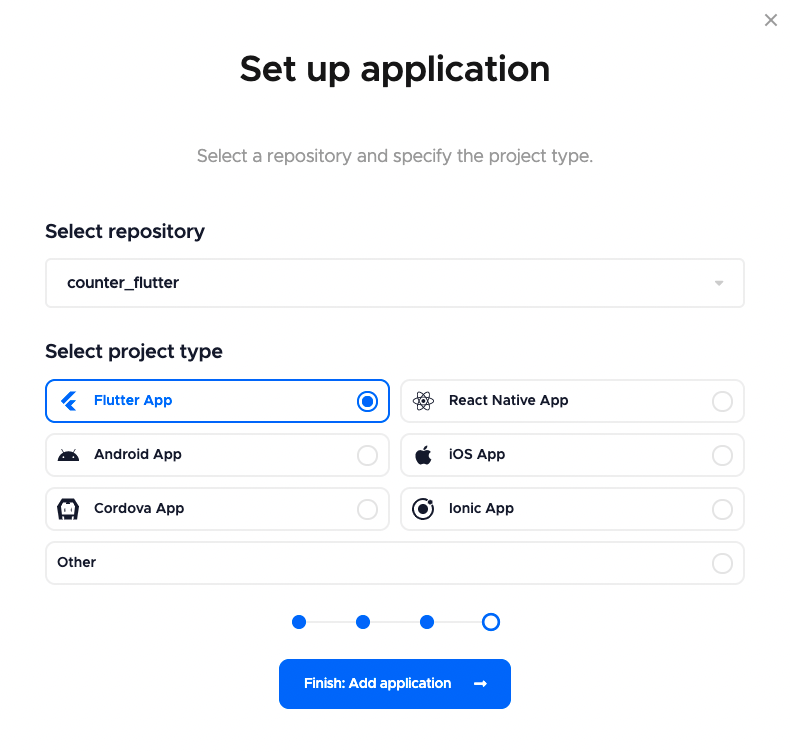
Now, select your repository (or add the clone URL if using Others) and select the project type, click Finish: Add application:
You will be taken to the project settings. The Workflow Editor tab will be selected by default.
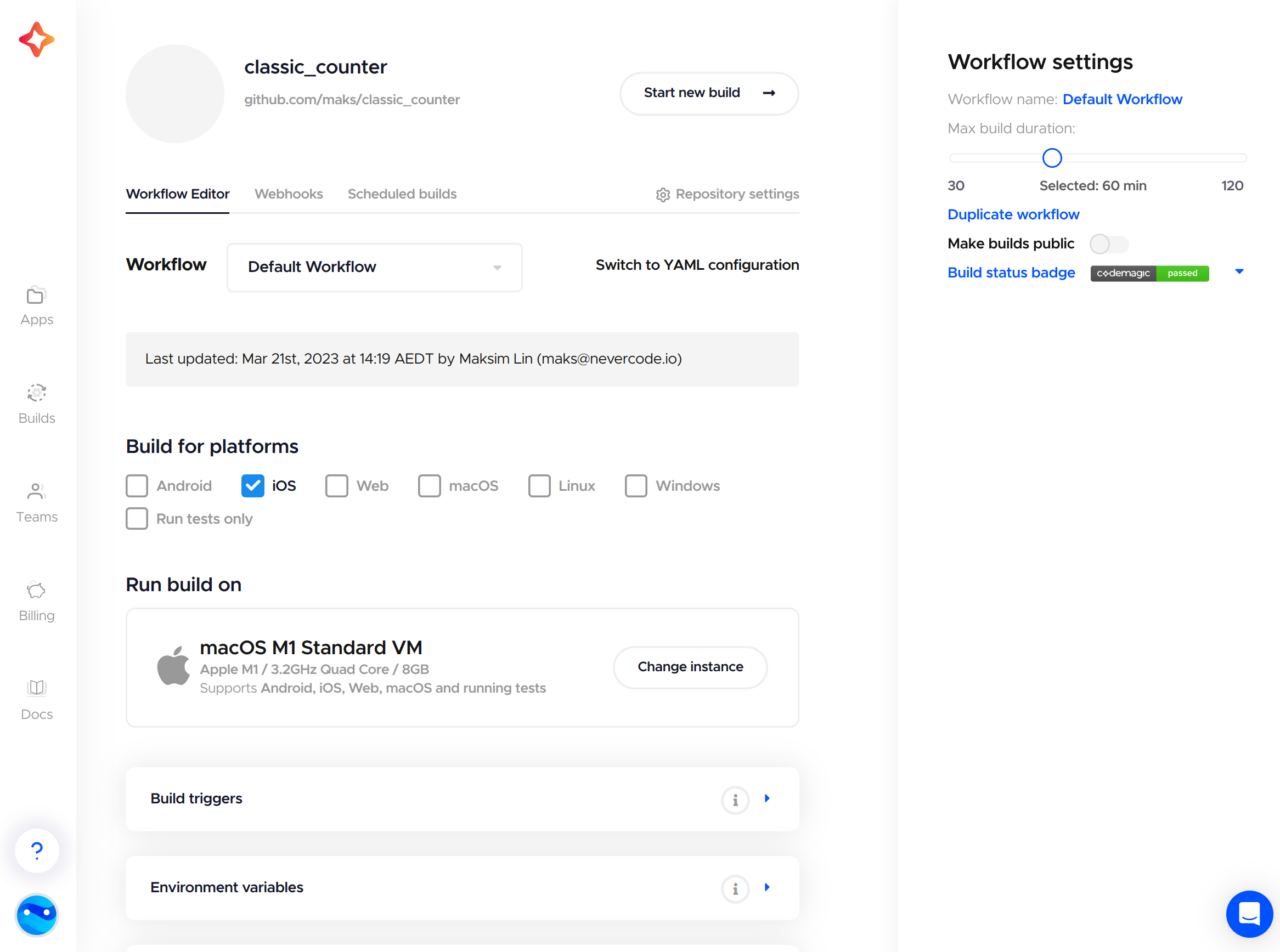
To set up the build workflow of your Flutter project, you can either use the workflow editor or the codemagic.yaml file.
Deep dive into the workflow editor
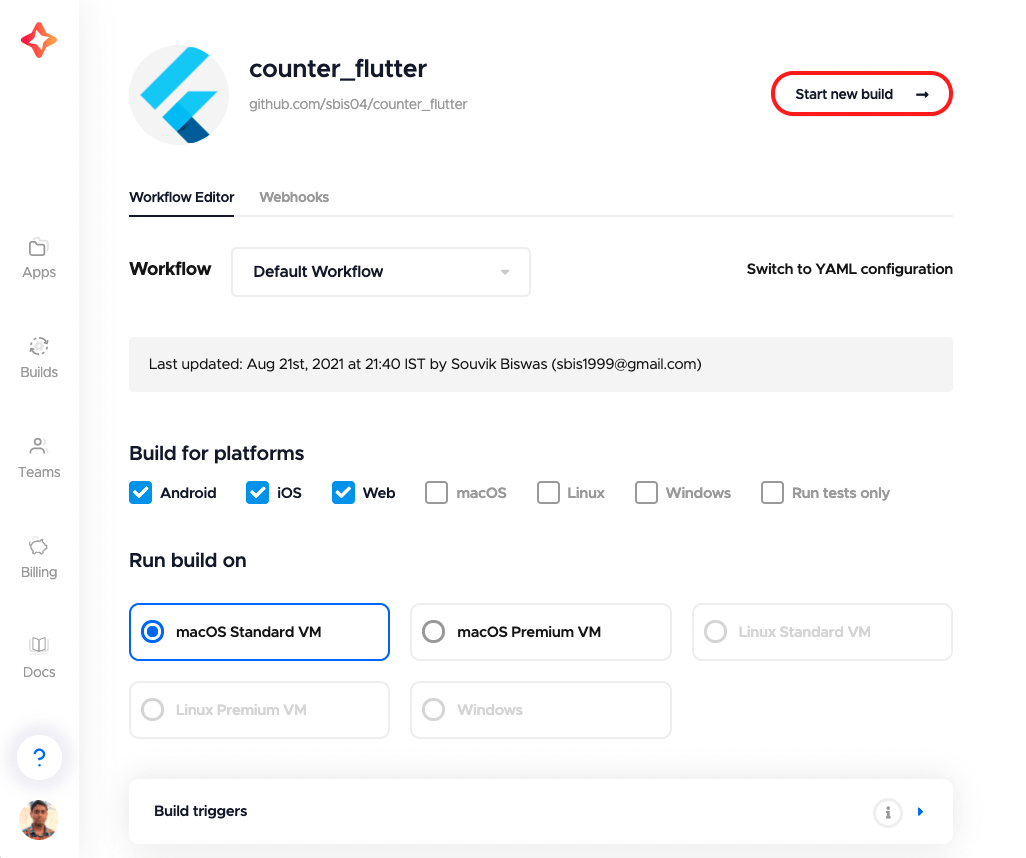
Let’s take a look at how you can use the workflow editor to configure your build workflow and generate debug builds for your Flutter app.
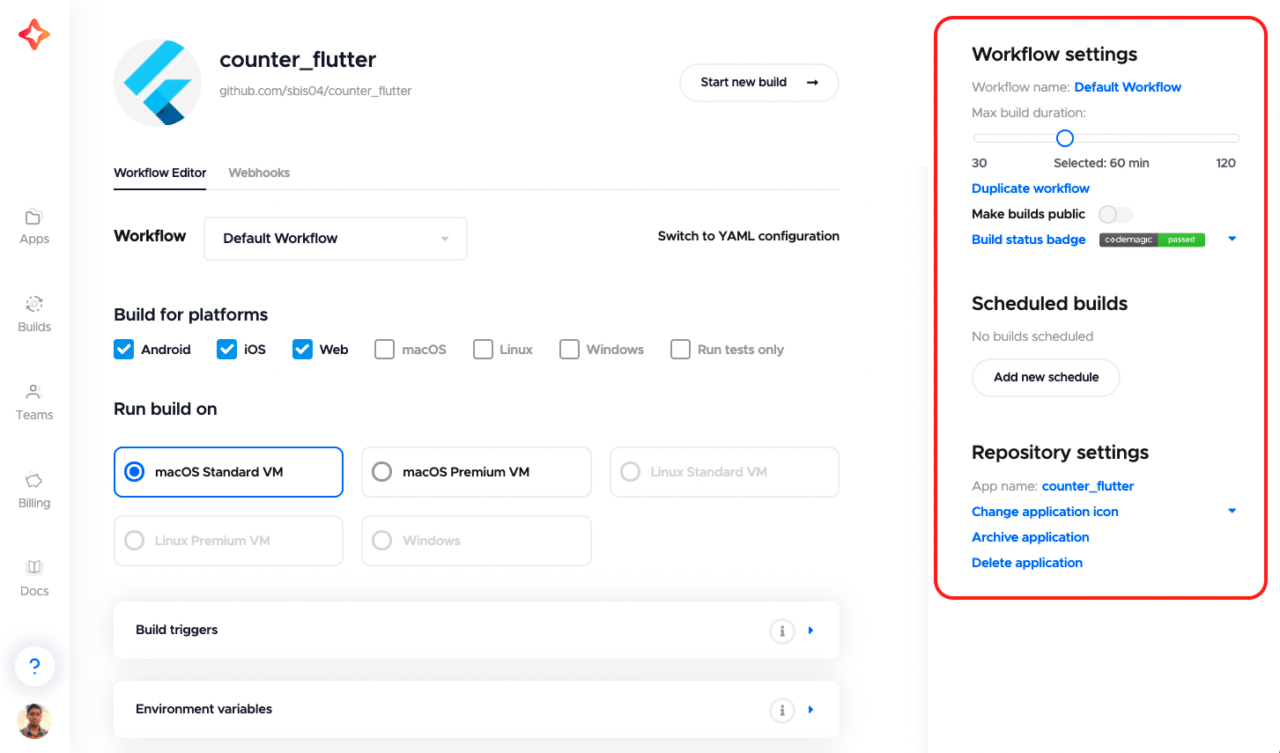
On the right side, you can find the Workflow settings panel, on which you can change the name of the workflow, set the maximum build duration, schedule builds and much more.
You can learn more about some workflow settings from the documentation.
Build triggers
In this section, you can automate the starting of your builds on Codemagic by specifying the build triggers. Here, you can configure when the build is triggered (on push, PR or tag creation) and watch for specific branch and tag patterns.
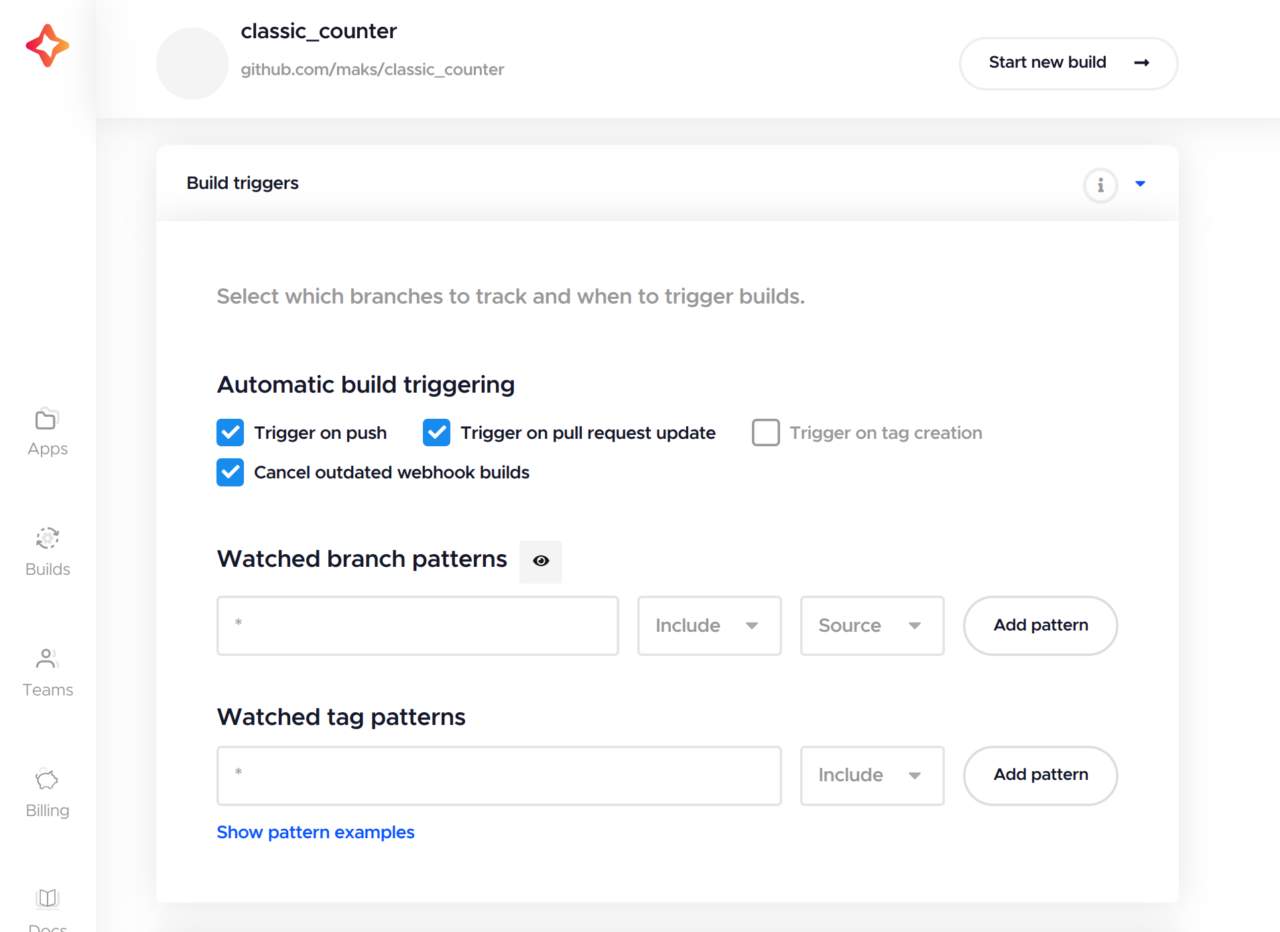
You can learn more about the build triggers here.
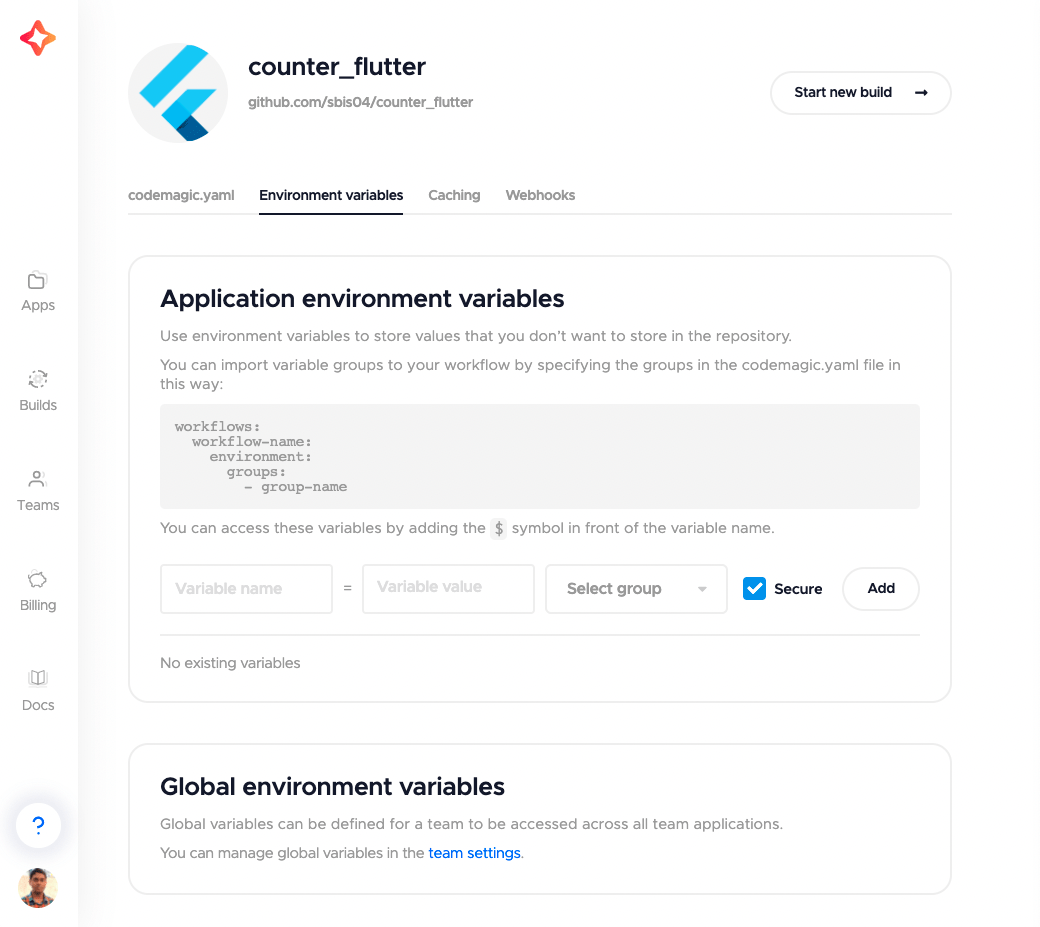
Environment variables
You can store your credentials, API keys or any kind of secret file on Codemagic by specifying them in the Environment variables section. Before storing the sensitive keys/files, make sure that you encrypt them by going to the Encrypt environment variables option under the Configuration as code section.
There are various Codemagic read-only environment variables. You can learn more about them here.
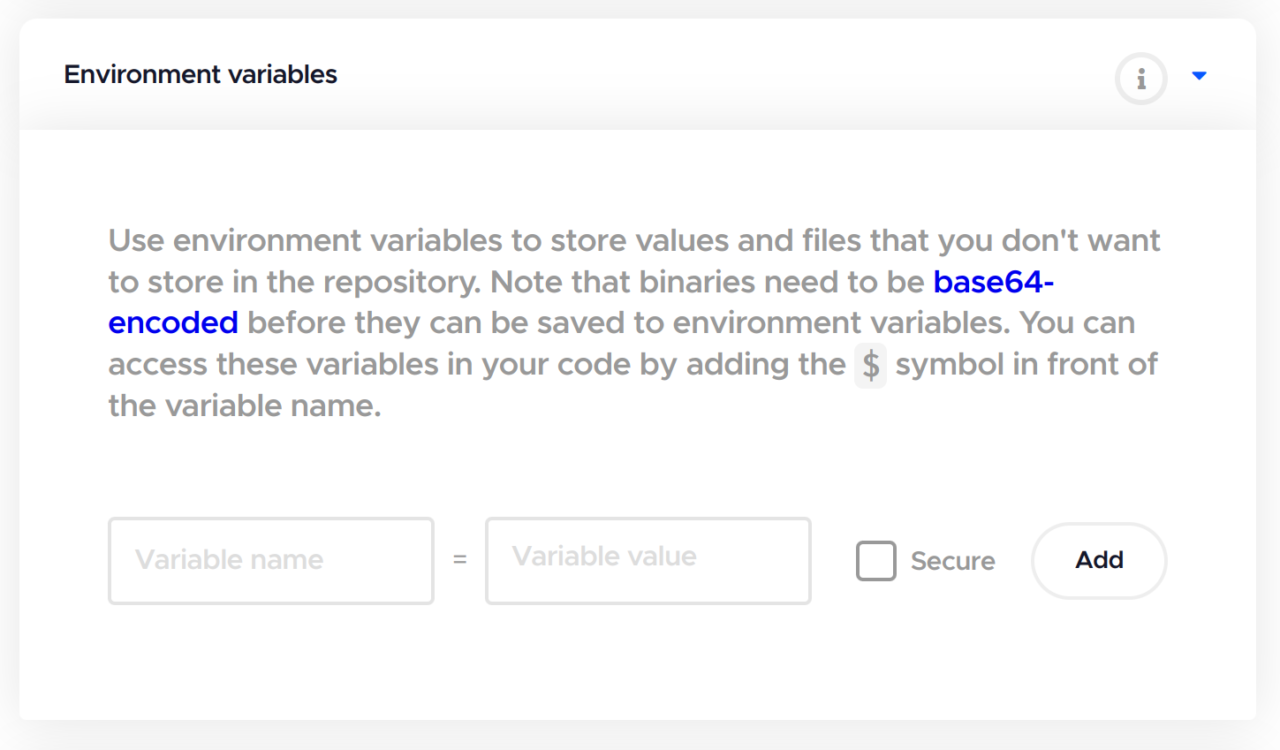
Learn more about adding environment variables here.
Dependency caching
You can speed up the builds on Codemagic by caching dependencies. To use this, you have to check Enable dependency caching. Then you have to specify the path(s) to the dependencies that you want to cache.
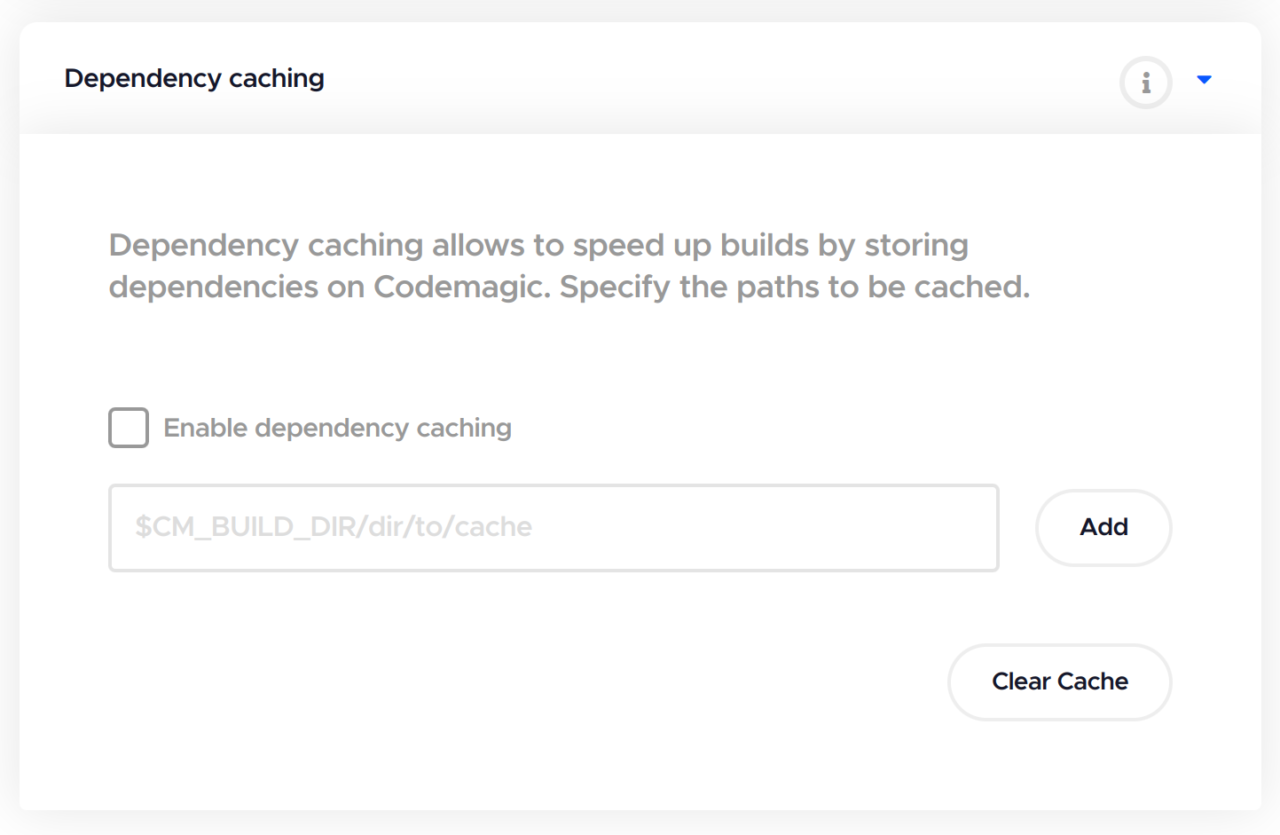
Learn more about dependency caching here.
Test
In this section, you can configure what type of tests you want to run on your Flutter project. If you are running integration tests, then you can specify the type of device you want to run the tests on. It can be an emulator, a simulator or a physical device (AWS Device Farm).
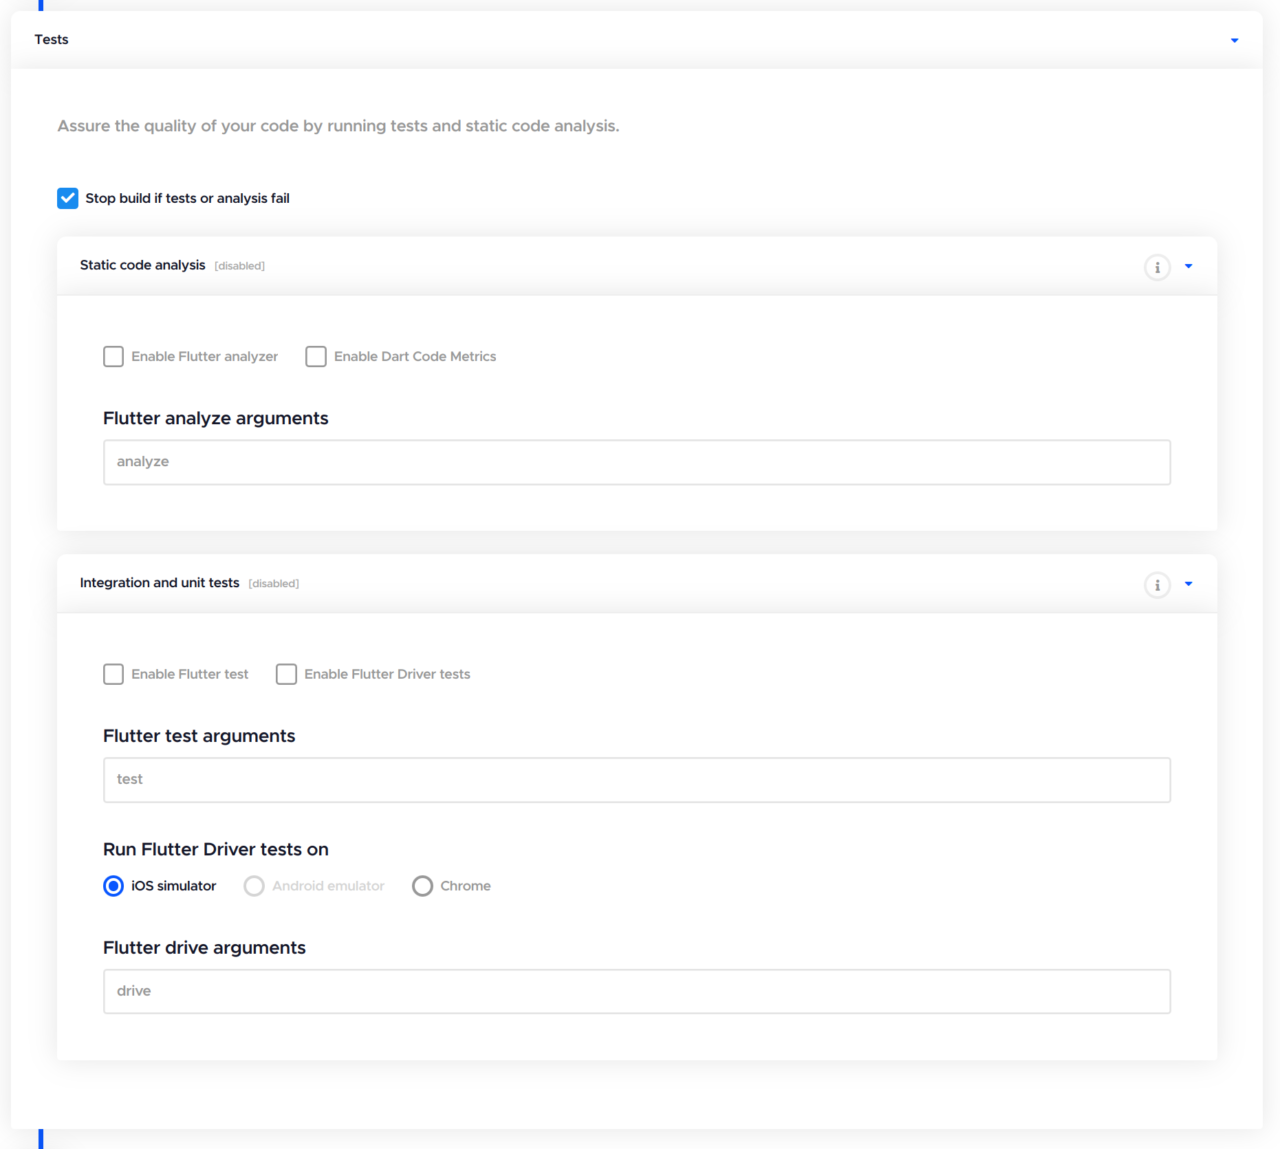
Learn more about testing Flutter apps on Codemagic here.
Build
You can configure the Flutter, Xcode and CocoaPods version. Additionally, you can define the root project path and the build mode (debug, release or profile) in this section.
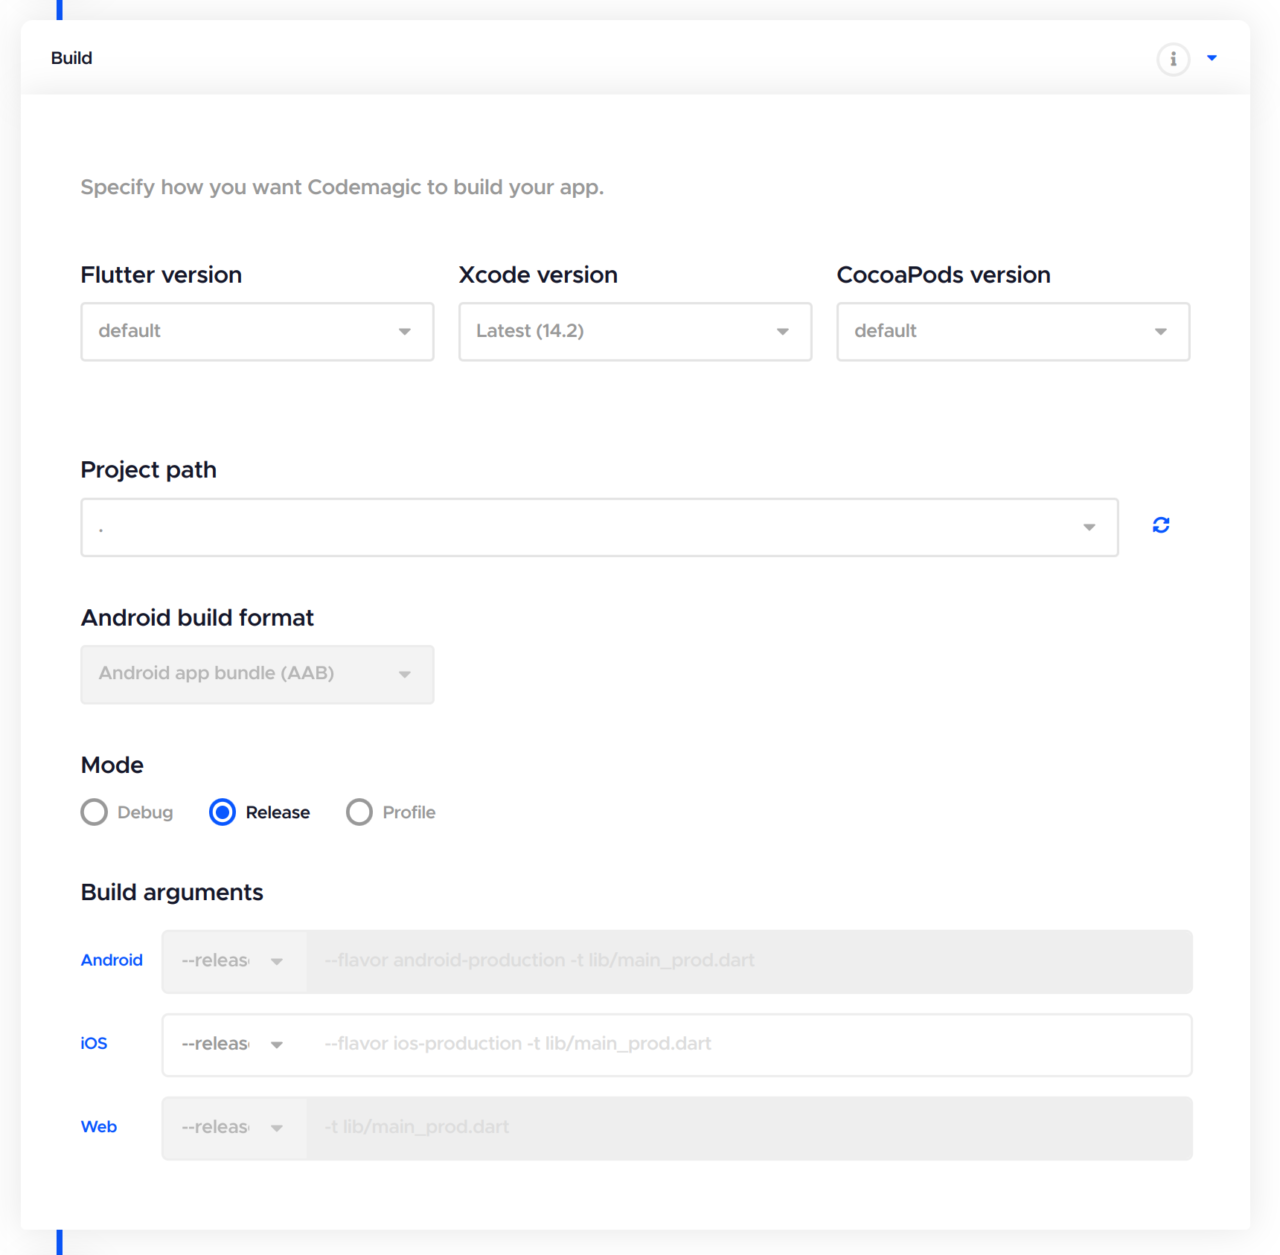
Learn more about building Flutter projects on Codemagic here.
Distribution
You can set up code signing and publishing for your Flutter app in this section. Codemagic allows you to automatically publish your app to various services, such as Google Play Store, App Store Connect & Firebase App Distribution. To publish Flutter web apps, you can use Codemagic Static Pages without any hassle.
You will have the distribution options based upon the build platforms selected.
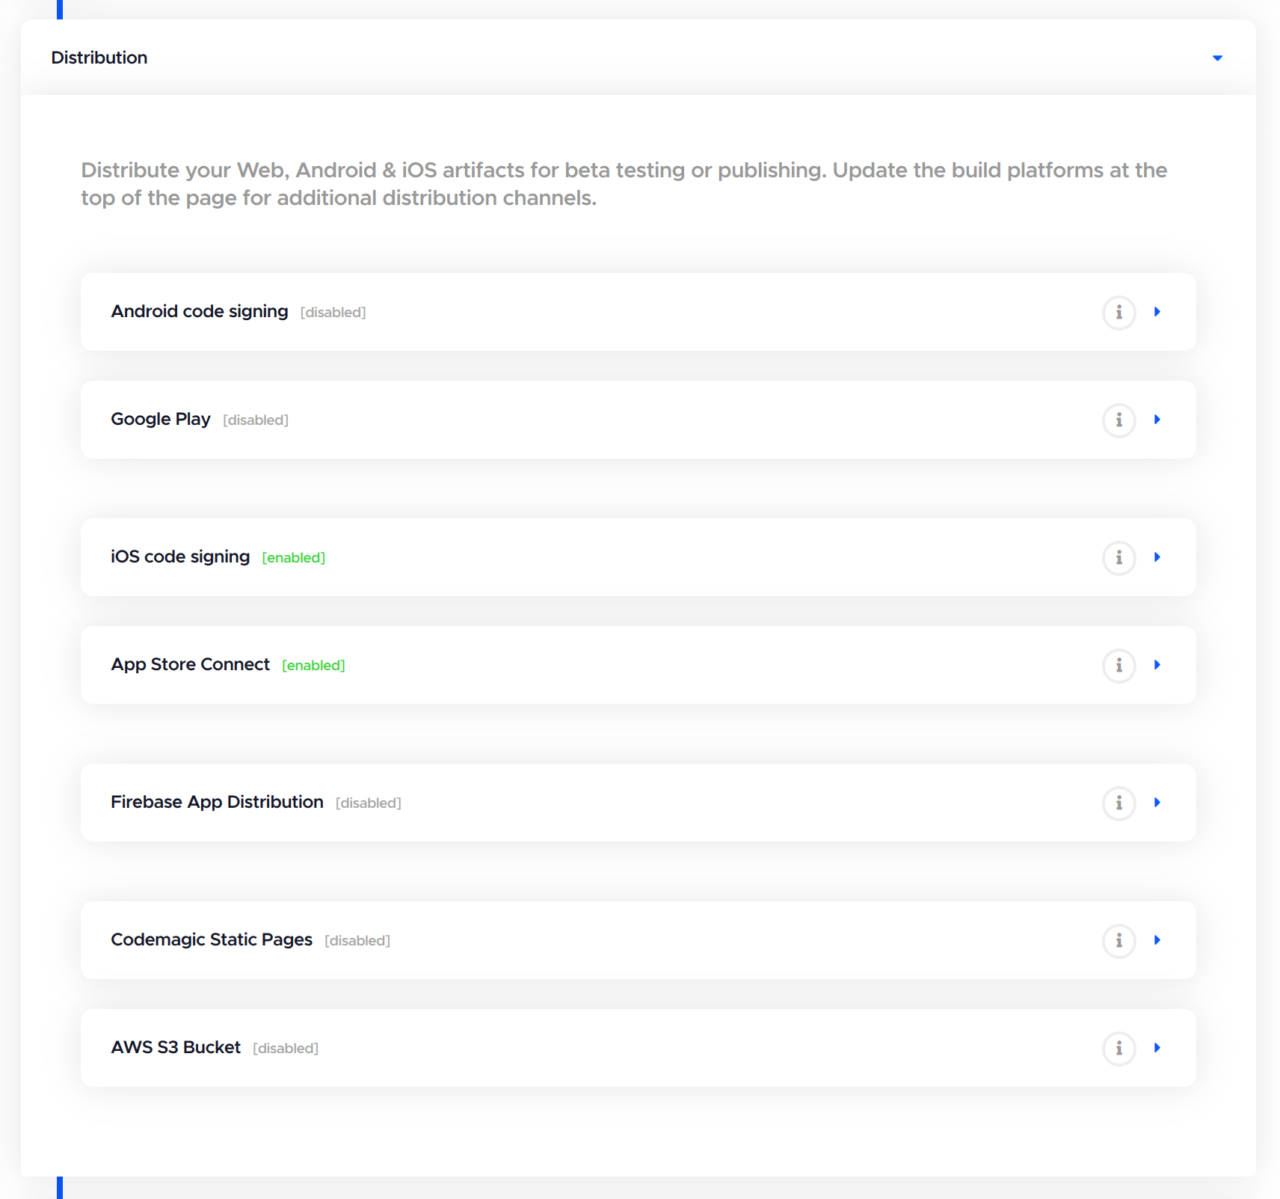
You can learn more about the different types of publishing options here.
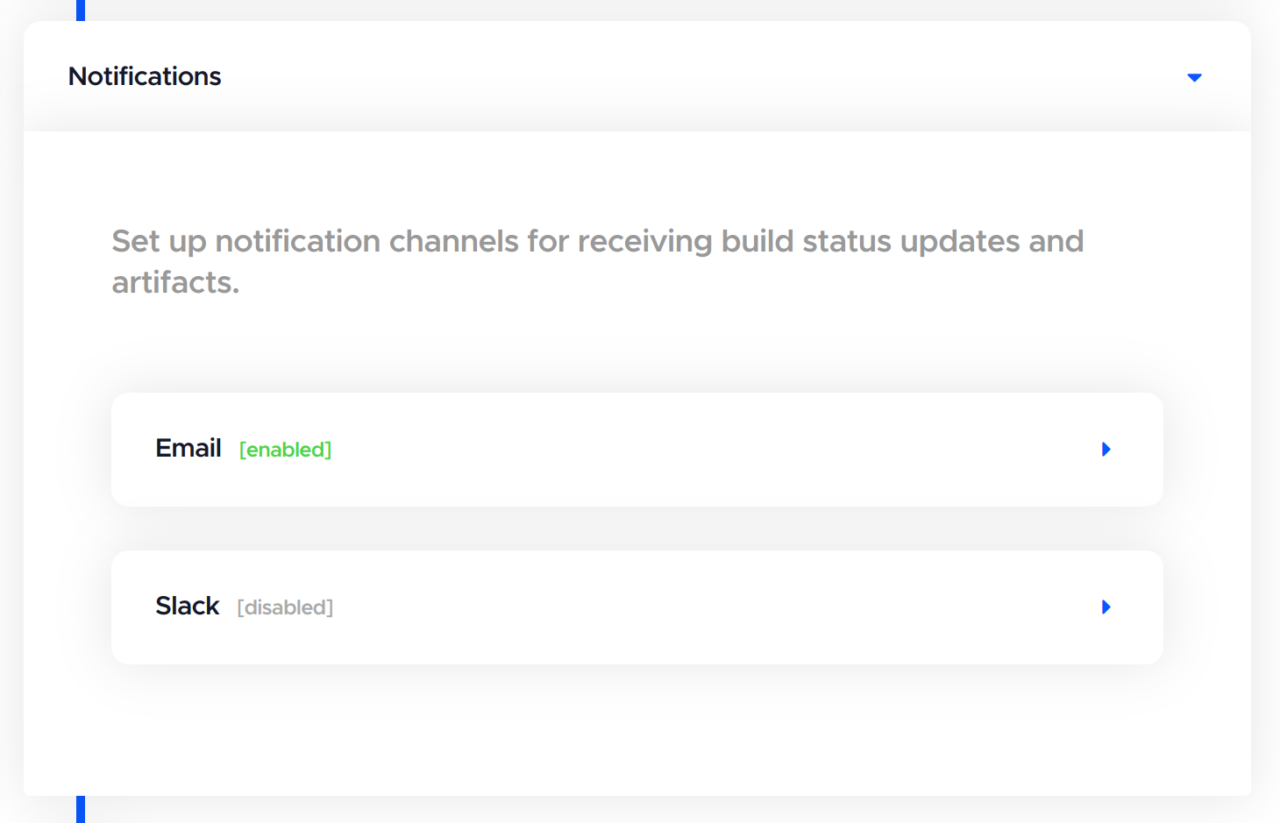
Notifications
In this section, you have the options for setting up Email and Slack notifications.
Custom scripts
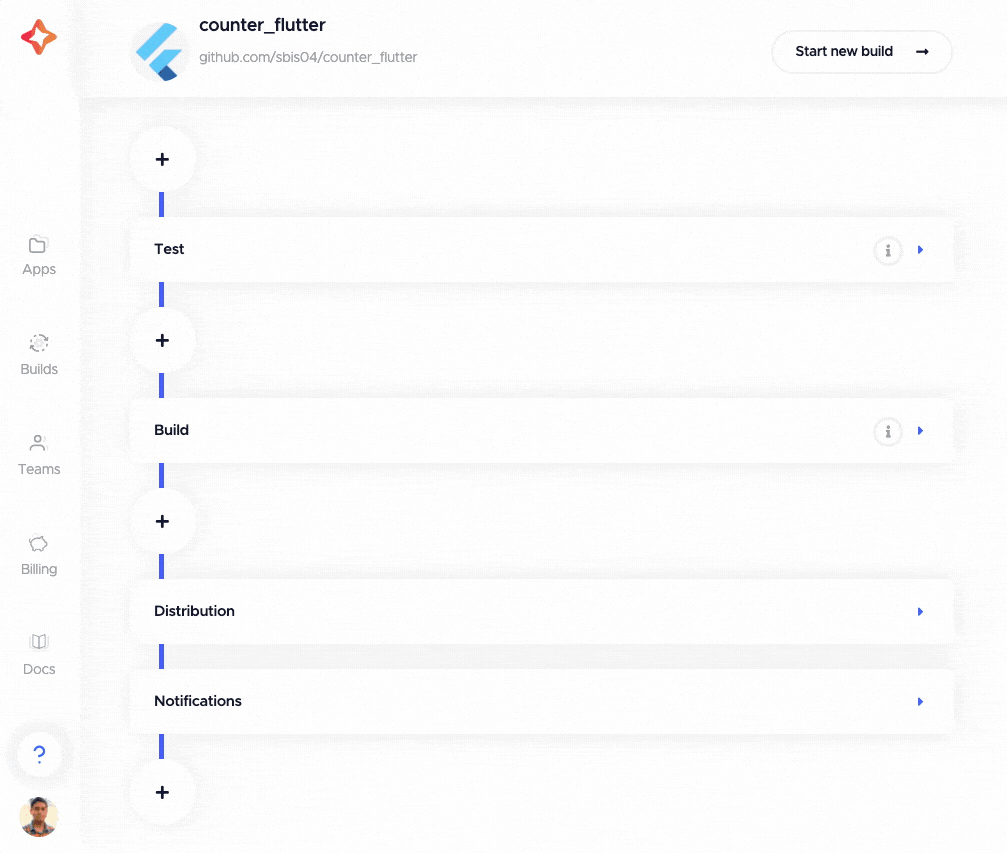
You can define custom scripts by clicking on any of the “+” buttons located before the various sections of the Flutter workflow editor. The custom scripts can be defined in post-clone, pre-test, post-test, pre-build, post-build, pre-publish and post-publish phases.
You can define custom scripts in any language. (The language can be specified with a shebang line.) For example, if you are using Firebase in your project, you need to decrypt the secret Firebase files before building the app. You can define the following in the pre-build script:
#!/usr/bin/env sh
set -e # exit on first failed command

echo $ANDROID_FIREBASE_SECRET | base64 --decode > $CM_BUILD_DIR/android/app/google-services.json
echo $IOS_FIREBASE_SECRET | base64 --decode > $CM_BUILD_DIR/ios/Runner/GoogleService-Info.plist
Learn more about custom scripts here.
Deep dive into YAML
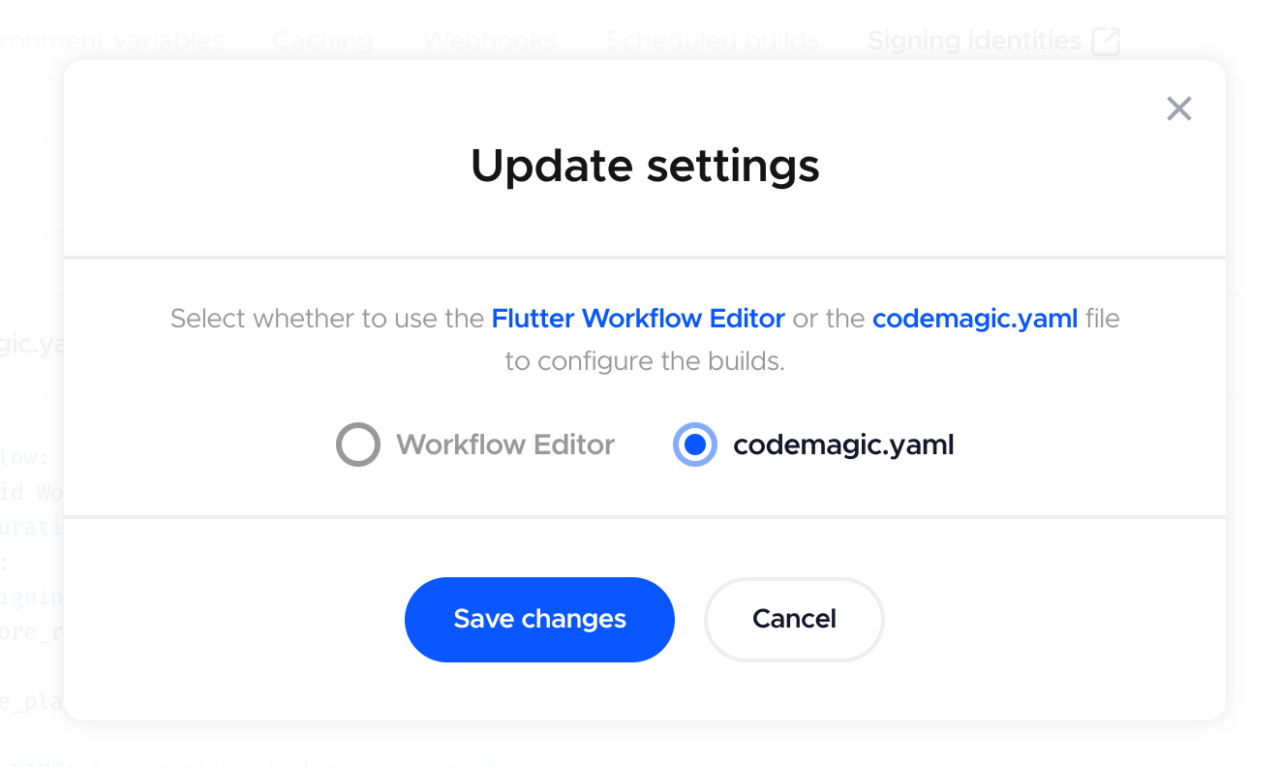
You can also configure your Flutter workflow using the codemagic.yaml file. To use YAML, click on Switch to YAML configuration. A dialog box will appear for updating your settings, and whether you want to export the current configuration as codemagic.yaml. Click Save changes.
NOTE: The downloaded configuration file may not be an exact match of the settings defined in the Workflow Editor. Adjustment may be necessary.
If you have your YAML file in your version control, it should be visible here. Otherwise, you can find links to the documentation for creating your YAML file.
We recommend going through the article to gain a better understanding, but if you already have experience using the
codemagic.yamlfile, you can get the YAML template for the Flutter project here.
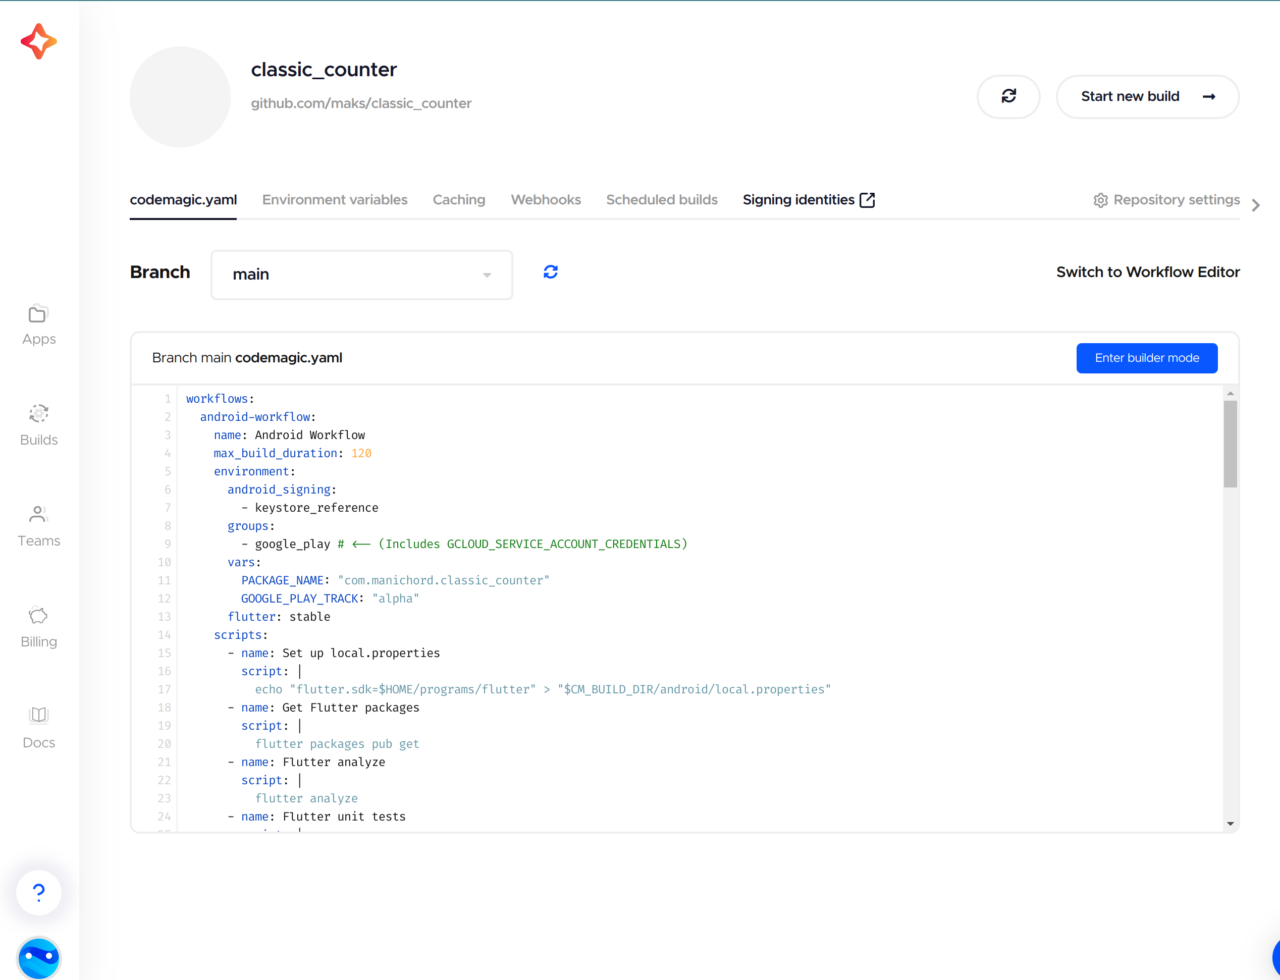
An example of a workflow for building a debug Android app is as follows:
workflows:
  android-workflow:
    name: Android Workflow
    max_build_duration: 120
    environment:
      android_signing:
        - keystore_reference
      groups:
        - google_play # <-- (Includes GCLOUD_SERVICE_ACCOUNT_CREDENTIALS)
      vars:
        PACKAGE_NAME: "io.codemagic.flutteryaml" # <-- Put your package name here
        GOOGLE_PLAY_TRACK: "alpha"
      flutter: stable
    scripts:
      - name: Set up local.properties
        script: echo "flutter.sdk=$HOME/programs/flutter" > "$CM_BUILD_DIR/android/local.properties"
      - name: Get Flutter packages
        script: flutter packages pub get
      - name: Flutter analyze
        script: flutter analyze
      - name: Flutter unit tests
        script: flutter test
        ignore_failure: true
      - name: Build AAB with Flutter
        script: |
          BUILD_NUMBER=$(($(google-play get-latest-build-number --package-name "$PACKAGE_NAME" --tracks="$GOOGLE_PLAY_TRACK") + 1))
          flutter build appbundle --release \
            --build-name=1.0.$BUILD_NUMBER \
            --build-number=$BUILD_NUMBER
    artifacts:
      - build/**/outputs/**/*.aab
      - build/**/outputs/**/mapping.txt
      - flutter_drive.log
    publishing:
      email:
        recipients:
          - user_1@example.com
          - user_2@example.com
        notify:
          success: true
          failure: false
      google_play:
        credentials: $GCLOUD_SERVICE_ACCOUNT_CREDENTIALS
        track: $GOOGLE_PLAY_TRACK
        submit_as_draft: true
An example of a workflow for building a debug iOS app is as follows:
workflows:
  ios-workflow:
    name: iOS Workflow
    max_build_duration: 120
    integrations:
      app_store_connect: codemagic
    environment:
      ios_signing:
        distribution_type: app_store
        bundle_identifier: io.codemagic.flutteryaml
      vars:
        APP_ID: 1111111111 # <-- Put your APP ID here
      flutter: stable
      xcode: latest
      cocoapods: default
    scripts:
      - name: Set up code signing settings on Xcode project
        script: xcode-project use-profiles
      - name: Get Flutter packages
        script: flutter packages pub get
      - name: Install pods
        script: find . -name "Podfile" -execdir pod install \;
      - name: Flutter analyze
        script: flutter analyze
      - name: Flutter unit tests
        script: flutter test
        ignore_failure: true
      - name: Flutter build ipa and automatic versioning
        script: |
          flutter build ipa --release \
            --build-name=1.0.0 \
            --build-number=$(($(app-store-connect get-latest-app-store-build-number "$APP_ID") + 1)) \
            --export-options-plist=/Users/builder/export_options.plist
    artifacts:
      - build/ios/ipa/*.ipa
      - /tmp/xcodebuild_logs/*.log
      - flutter_drive.log
    publishing:
      # See the following link for details about email publishing - https://docs.codemagic.io/publishing-yaml/distribution/#email
      email:
        recipients:
          - user_1@example.com
          - user_2@example.com
        notify:
          success: true # To receive a notification when a build succeeds
          failure: false # To not receive a notification when a build fails
      slack:
        # See the following link about how to connect your Slack account - https://docs.codemagic.io/publishing-yaml/distribution/#slack
        channel: "#builds"
        notify_on_build_start: true # To receive a notification when a build starts
        notify:
          success: true # To receive a notification when a build succeeds
          failure: false # To not receive a notification when a build fails
      app_store_connect:
        auth: integration

        # Configuration related to TestFlight (optional)
        # Note: This action is performed during post-processing.
        submit_to_testflight: true
        beta_groups: # Specify the names of beta tester groups that will get access to the build once it has passed beta review.
          - group name 1
          - group name 2

        # Configuration related to App Store (optional)
        # Note: This action is performed during post-processing.
        submit_to_app_store: false
Let’s take a closer look at the major sections of the codemagic.yaml file.
Environment variables
In the environment variables section, you can define credentials (in encrypted format) and specify the versions of different tools, like Flutter, Xcode, CocoaPods, etc.
environment:
  flutter: stable
  xcode: latest
  cocoapods: default
TIPS: Instead of defining these environment variable in the codemagic.yaml file you should define these values in the Application environment variables section under the Environment variables tab. Learn more here.
Scripts
You can specify the commands to run in this workflow in the scripts section.
To get Flutter packages, use this:
- name: Get Flutter packages
  script: flutter packages pub get
To run Flutter analyze, you can use the following:
- name: Flutter analyze
  script: flutter analyze
Flutter unit tests can be run using:
- name: Flutter unit tests
  script: flutter test
Use the following to build the debug version of the app:
# Build debug Android .apk
- name: Build debug apk
  script: flutter build apk --debug
# Build debug iOS .app
- name: Build debug iOS app
  script: flutter build ios --debug --no-codesign
Artifacts
You can get the generated .aab (or the older .apk) or .ipa file by adding its path under the artifacts. Normally, the path looks like this:
# For Android
artifacts:
  - build/**/outputs/**/*.apk
  - build/**/outputs/**/*.aab
  - build/**/outputs/**/mapping.txt
  - flutter_drive.log
# For iOS
artifacts:
  - build/**/outputs/**/mapping.txt
  - build/ios/ipa/*.ipa
  - /tmp/xcodebuild_logs/*.log
  - flutter_drive.log
Publishing
To get a report of the build along with the generated artifacts in your email, specify the following:
publishing:
  email:
    recipients:
      - name@example.com # enter your email id here
For more information about publishing, refer to this link.
Code signing
You have to code sign your Android or iOS/macOS app in order to publish it to Google Play Store or App Store Connect, respectively.
You can follow the steps provided here to set up code signing:
If you are using the workflow editor, then just go to the Publish section and set up code signing for the respective platforms.
If you are using the codemagic.yaml file to generate release builds of Flutter projects, you can use the following commands:
# For Android release build
- name: Build release App Bundle with Flutter (automatic versioning)
  script: |
    flutter build appbundle --release --build-name=1.0.0 --build-number=$(($(google-play get-latest-build-number --package-name "$PACKAGE_NAME" --tracks="$GOOGLE_PLAY_TRACK") + 1))
# For iOS release build
- name: Build ipa with Flutter (automatic versioning)
  script: |
    flutter build ipa --release \
    --build-name=1.0.0 \
    --build-number=$(($(app-store-connect get-latest-testflight-build-number "$APP_STORE_ID") + 1)) \
    --export-options-plist=/Users/builder/export_options.plist
There are a few environment variables used in these commands. You can gain a better understanding of them by following the links to the articles on code signing given above.
Releasing app
Codemagic allows you to automatically publish your Android or iOS/macOS app to Google Play Store or App Store Connect, respectively.
You can follow the steps for releasing your app given in the articles below:
- Releasing Android app to Google Play Store
- Releasing iOS app to App Store Connect
- Releasing macOS app to App Store Connect
Check out the Codemagic publishing documentation.
Building on Codemagic
If you are using the codemagic.yaml file to define your build configurations, make sure that you have committed it to the version control system. Otherwise, if you are using the Flutter workflow editor, you are ready to proceed with the steps for building.
Follow the steps below to start a build:
Go to your project settings. If you are using the workflow editor, make sure that you have chosen the correct platforms and the build machine on which to run the build. Then, click Start new build or Start your first build (if it’s the first time).
Select a workflow, and click on Start new build.
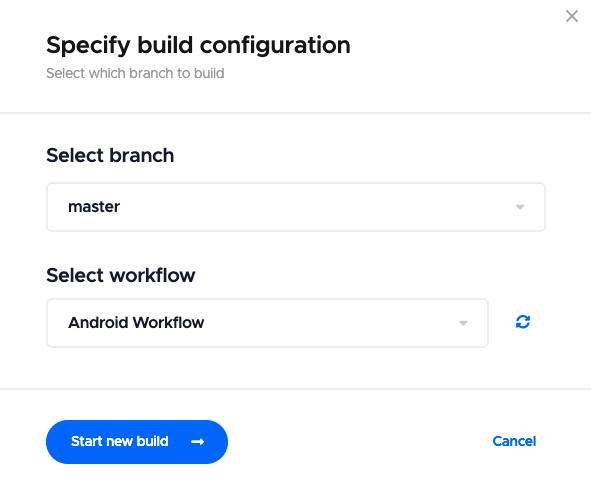
This will start a new build for your Flutter project.
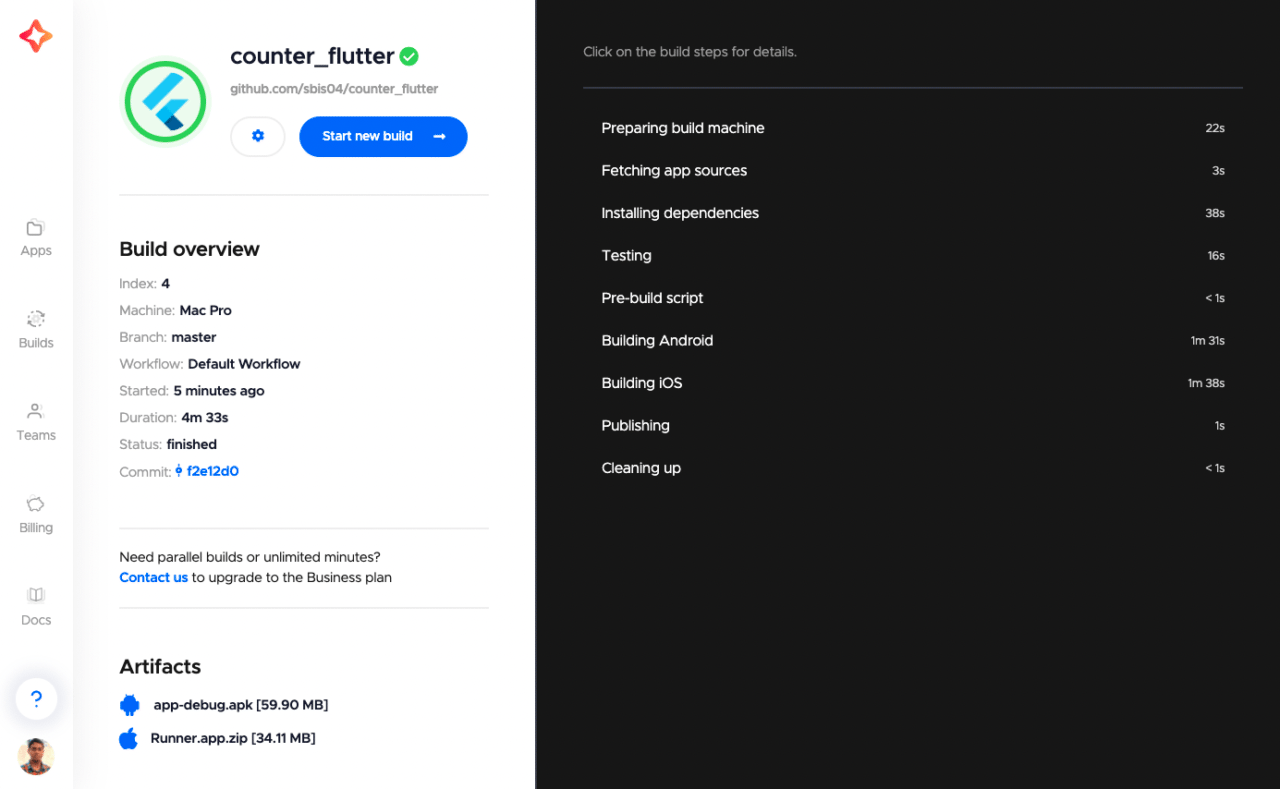
Congratulations! 🎉 Your first Flutter build on Codemagic CI/CD is complete!
Some information to keep in mind if you are building desktop apps:
- macOS apps can only be built on Mac machines
- Linux apps can only be built on Linux machines (paid minutes)
- Desktop and mobile apps cannot be built together
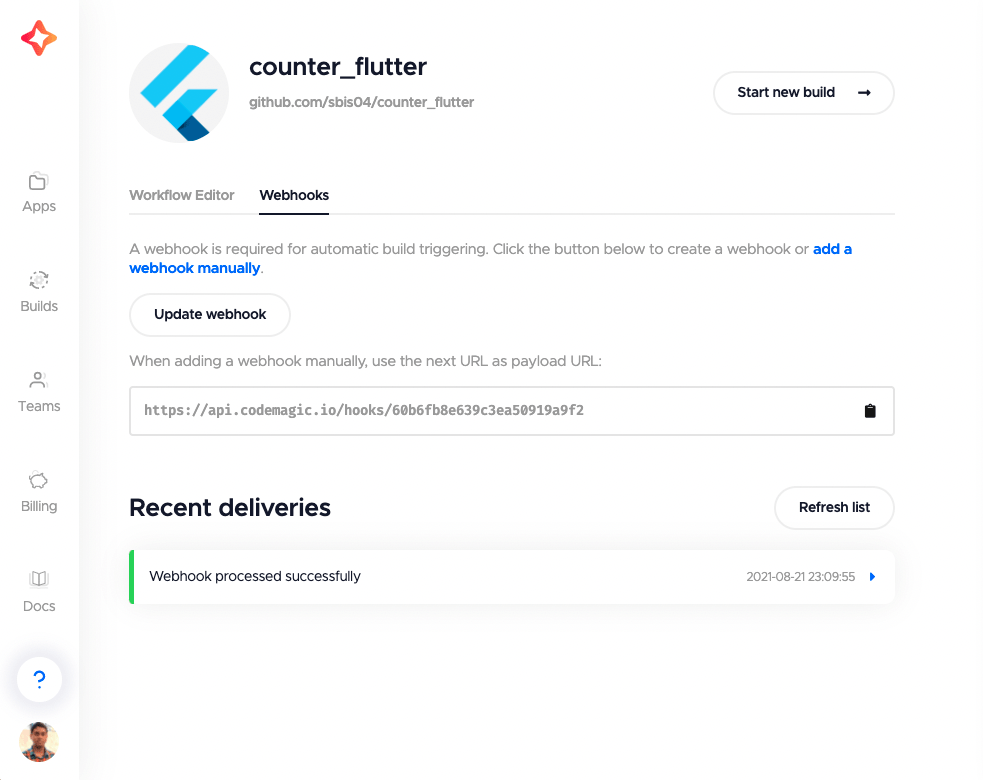
Webhooks
For automatically triggering builds in response to events you need to set up webhooks. You can check out the instructions for setting up webhooks with Codemagic here.
You can get the payload URL required for adding a webhook manually on the Webhooks tab inside the application settings. Also, the list of all triggered builds will be available on this page under the Recent deliveries section.
Conclusion
Although Codemagic started as an official CI/CD solution dedicated solely to Flutter apps, it now welcomes all mobile projects to the fastest CI/CD. With the magic of Codemagic, you can build, test and publish Flutter apps with zero configuration and run builds in controlled environments using custom workflows. If you have a native Android, iOS or React Native app, Codemagic has got your back. Just use the codemagic.yaml file, and you are ready to lift off!
Happy building!


