


Written by Souvik Biswas and updated in August 2021
In this article you will learn how to add Flutter to your new or existing Native iOS project and how to test it on Codemagic CI/CD using codemagic.yaml file.
Let’s start by building a native iOS app.
App Overview
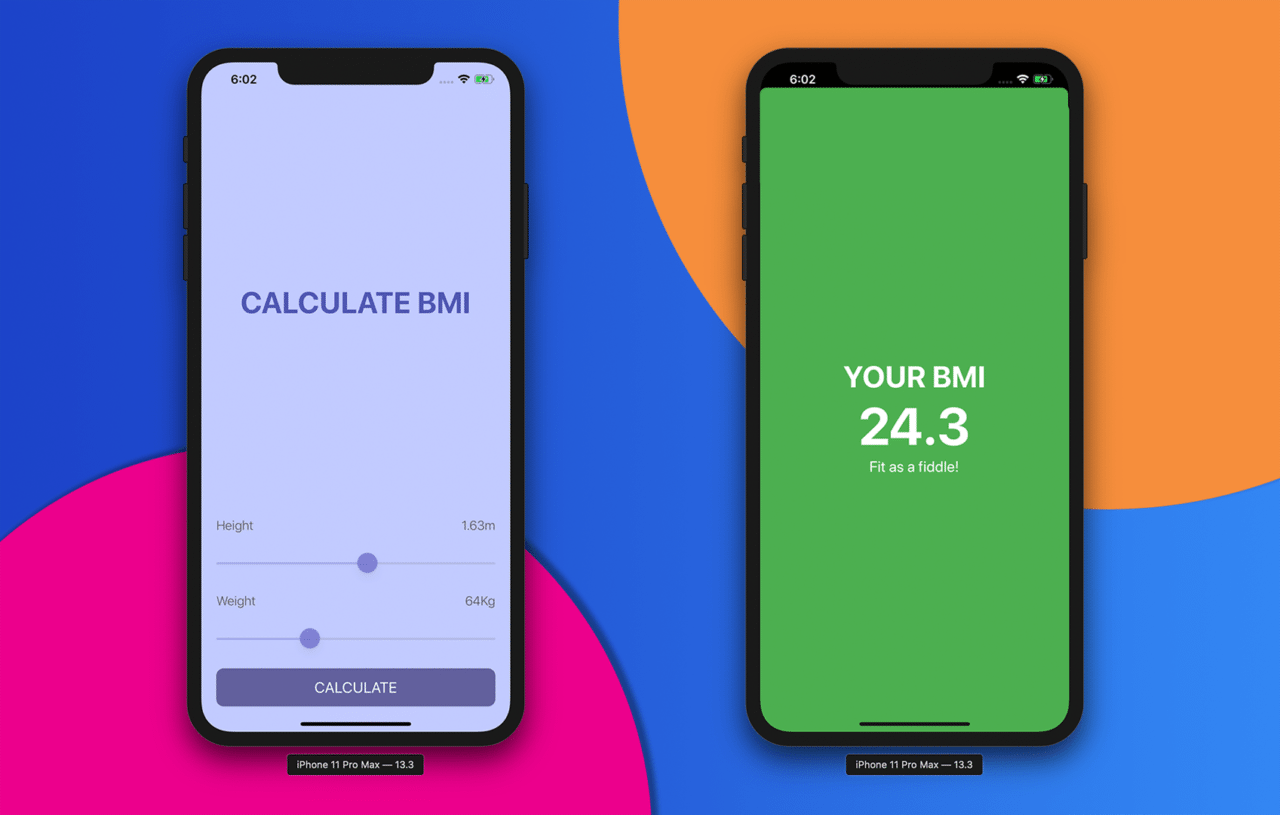
The app that we will be looking at is a simple BMI Calculator app.
It will have two screens:
1. BMI Calculation Screen (using Native iOS)
2. BMI Result Screen (using Flutter Module)
Creating the Native iOS app
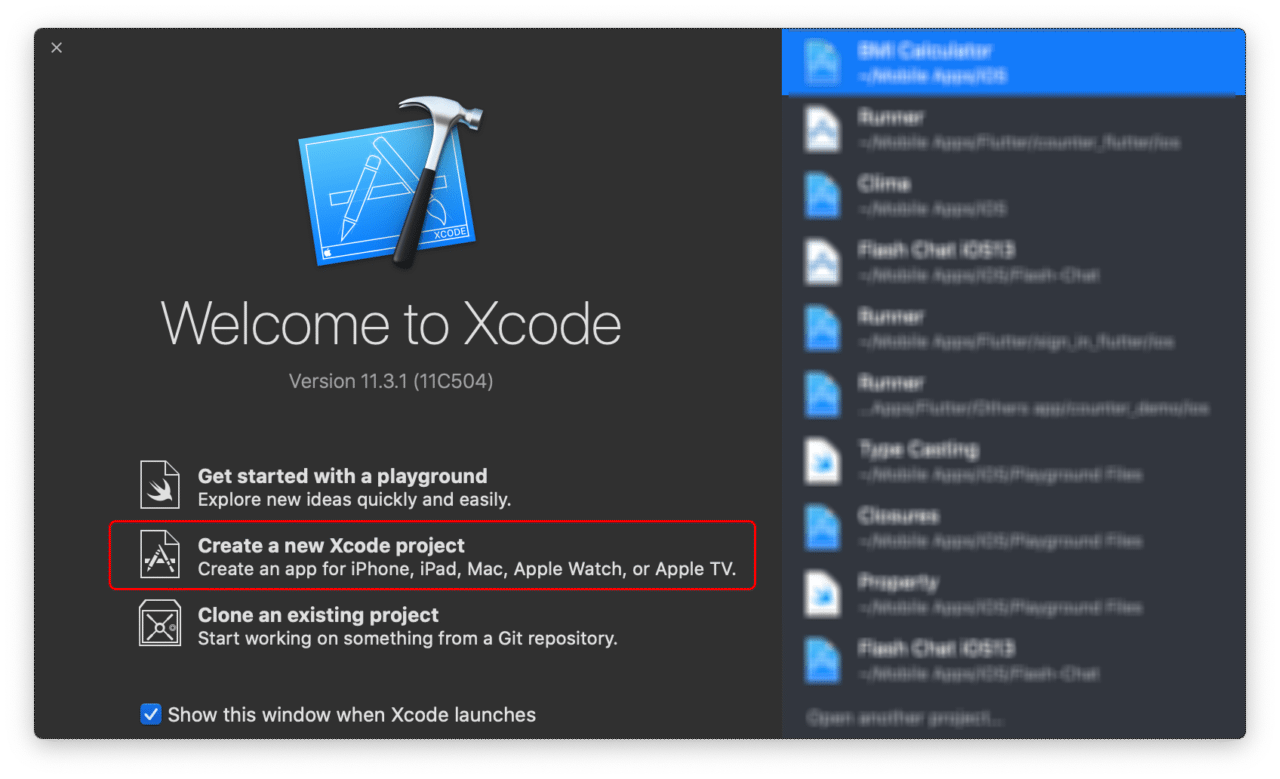
1. Start Xcode on your system.
2. Click on Create a new Xcode project.
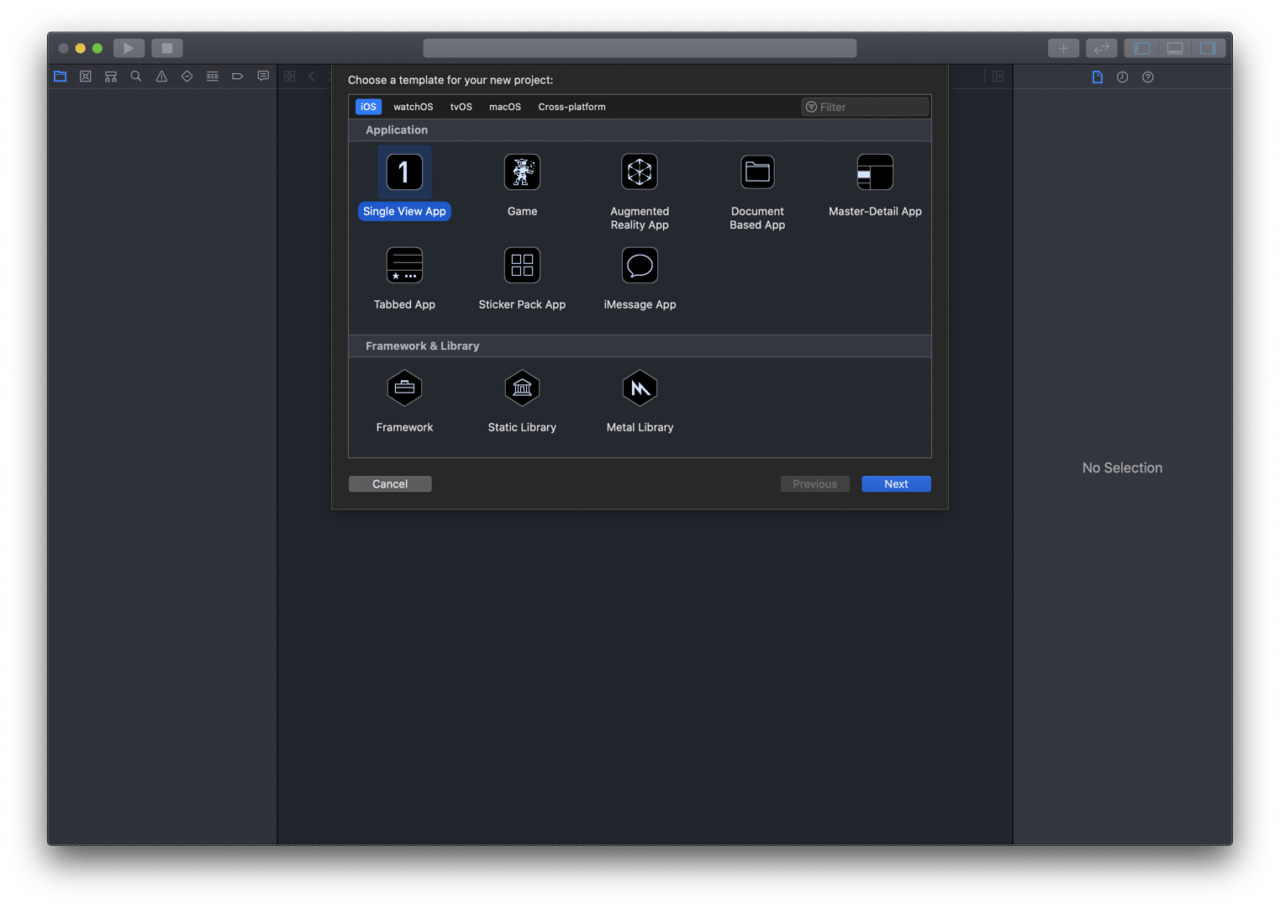
3. Go to the iOS tab and select Single View App. Click Next.
4. Enter the Product Name, select Team, and fill in the other details. Then click Next.
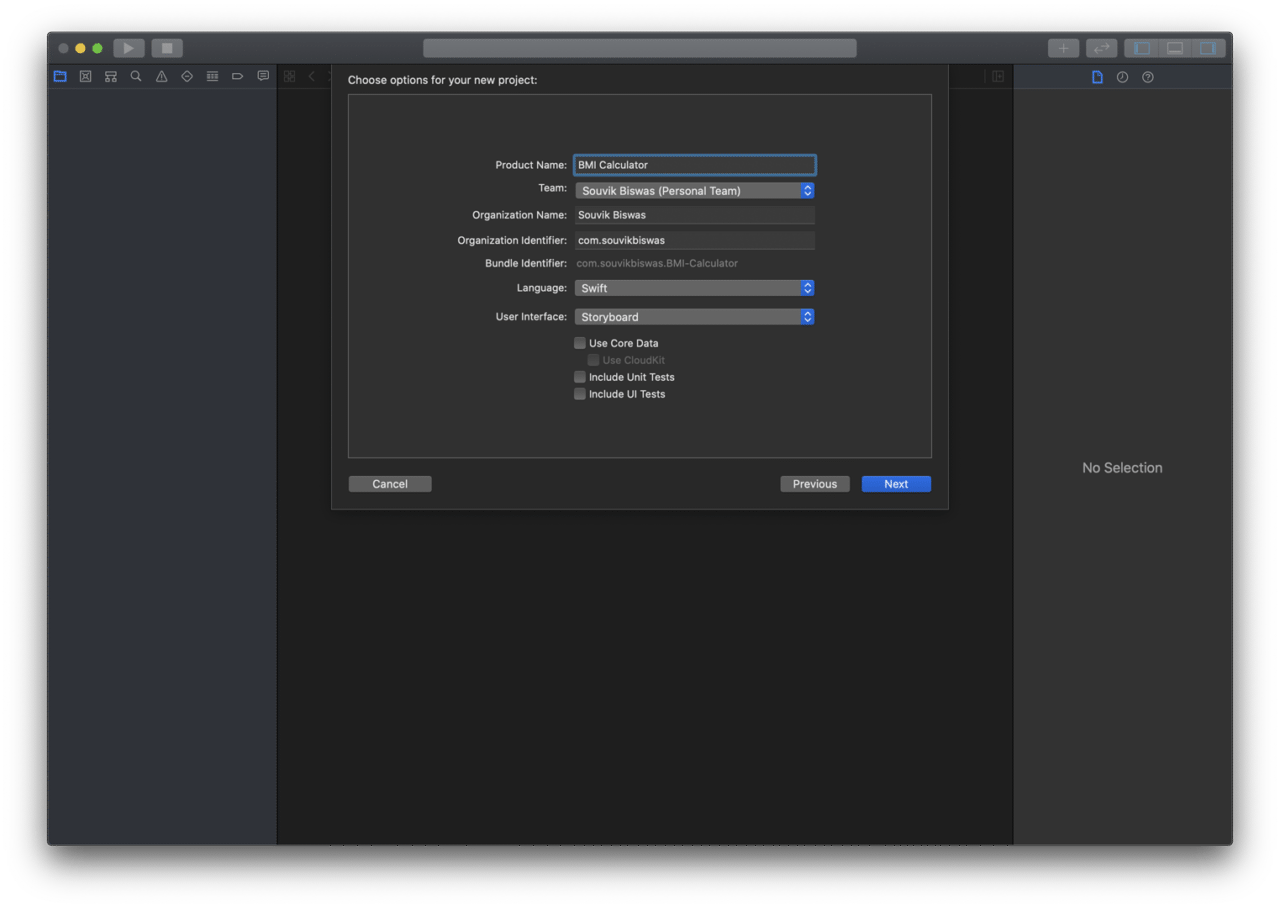
This will create an empty iOS project with all the required files.
Working on the iOS app
First of all, we have to complete the UI of the app. So, go to the file Main.storyboard and complete the UI design.
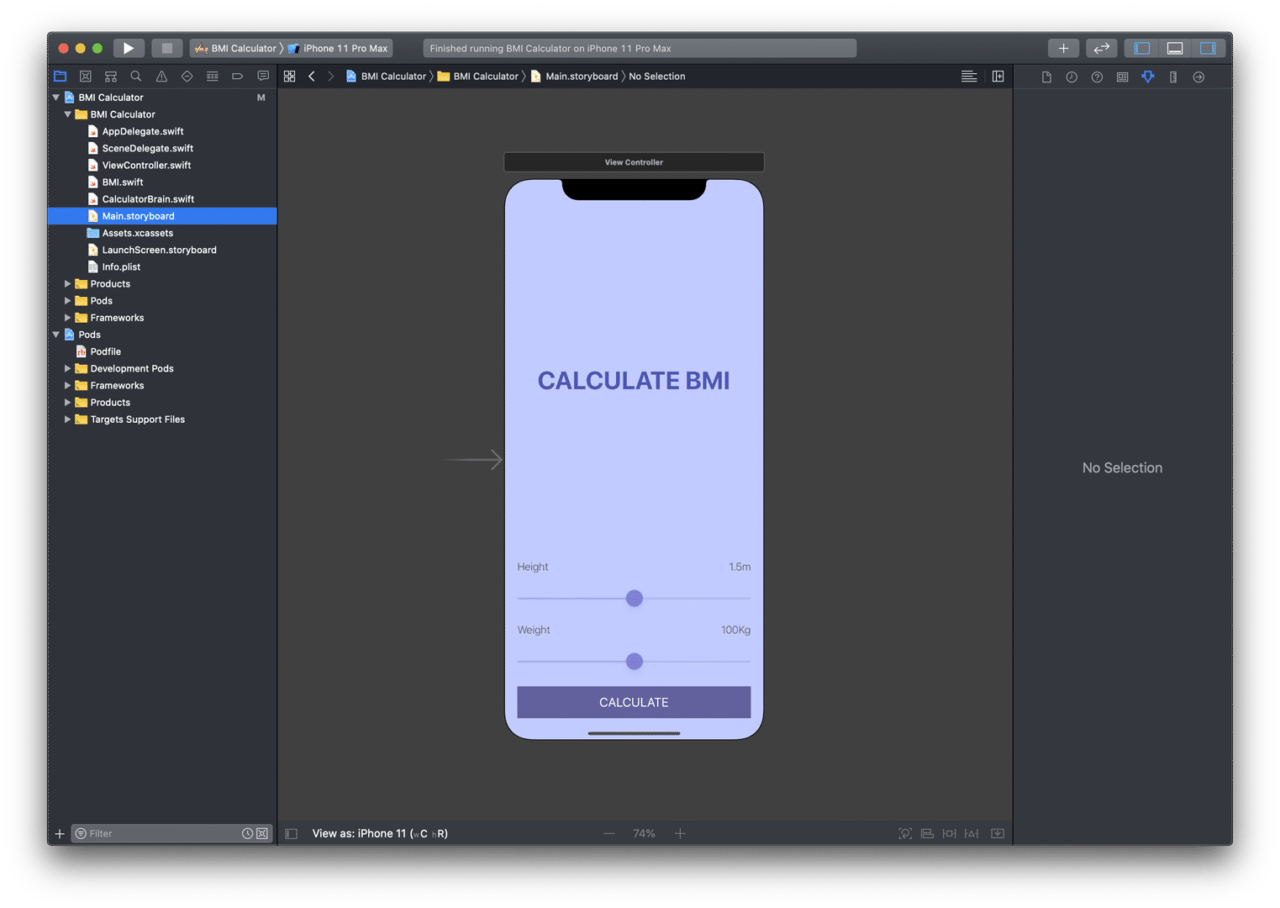
This will contain only one screen with some basic components. Link the UI components to the ViewController.swift file.
// ViewController.swift

import UIKit

class ViewController: UIViewController {

    // Reference to the UI components
    @IBOutlet weak var heightLabel: UILabel!
    @IBOutlet weak var weightLabel: UILabel!
    @IBOutlet weak var heightSlider: UISlider!
    @IBOutlet weak var weightSlider: UISlider!

    override func viewDidLoad() {
        super.viewDidLoad()
    }

    @IBAction func heightSliderChanged(_ sender: UISlider) {
        // Perform some action when height slider position
        // is changed.
    }

    @IBAction func weightSliderChanged(_ sender: UISlider) {
        // Perform some action when weight slider position
        // is changed.
    }

    @IBAction func calculatePressed(_ sender: UIButton) {
        // Perform some action when calculate button
        // is pressed.
    }

}
Now, we will be creating two new files to keep the project organized:
BMI.swift(This file will contain a BMI struct for structuring important BMI information)CalculatorBrain.swift(This file will be responsible for retrieving data and calculating the BMI of a person)
// BMI.swift

import UIKit

struct BMI {
    let value: Float
    let advice: String
    let color: String
}
// CalculatorBrain.swift

import UIKit

struct CalculatorBrain {
    var bmi: BMI?

    func getBMIValue() -> String {
        let bmiTo1DecimalPlace = String(format: "%.1f", bmi?.value ?? 0.0)
        return bmiTo1DecimalPlace
    }

    func getAdvice() -> String {
        return bmi?.advice ?? "No advice"
    }

    func getColor() -> String {
        return bmi?.color ?? "white"
    }

    mutating func calculateBMI(_ weight: Float, _ height: Float) {
        let bmiValue = weight / pow(height, 2)

        if bmiValue < 18.5 {
            bmi = BMI(value: bmiValue, advice: "Eat more pies!", color: "blue")
        } else if bmiValue < 24.9 {
            bmi = BMI(value: bmiValue, advice: "Fit as a fiddle!", color: "green")
        } else {
            bmi = BMI(value: bmiValue, advice: "Eat less pies!", color: "pink")
        }
    }
}
Complete implementing the methods of ViewController.swift file.
// ViewController.swift
// (with methods implemented)

import UIKit

class ViewController: UIViewController {

    var calculatorBrain = CalculatorBrain()

    @IBOutlet weak var heightLabel: UILabel!
    @IBOutlet weak var weightLabel: UILabel!
    @IBOutlet weak var heightSlider: UISlider!
    @IBOutlet weak var weightSlider: UISlider!

    override func viewDidLoad() {
        super.viewDidLoad()
    }

    @IBAction func heightSliderChanged(_ sender: UISlider) {
        heightLabel.text = String(format: "%.2fm", sender.value)
    }

    @IBAction func weightSliderChanged(_ sender: UISlider) {
        weightLabel.text = String(format: "%.0fKg", sender.value)
    }

    @IBAction func calculatePressed(_ sender: UIButton) {
        let height = heightSlider.value
        let weight = weightSlider.value

        calculatorBrain.calculateBMI(weight, height)

        let bmiValue = calculatorBrain.getBMIValue()
        let bmiAdvice = calculatorBrain.getAdvice()
        let bmiColor = calculatorBrain.getColor()

        print(bmiValue)
        print(bmiAdvice)
        print(bmiColor)
    }

}
If you run the app now, you will be able to see the calculated BMI value, advice and color value in the Xcode Console.
We will be sending these parameters to the BMI Result Screen (created using Flutter modules) through Platform Channel.
Creating Flutter Module
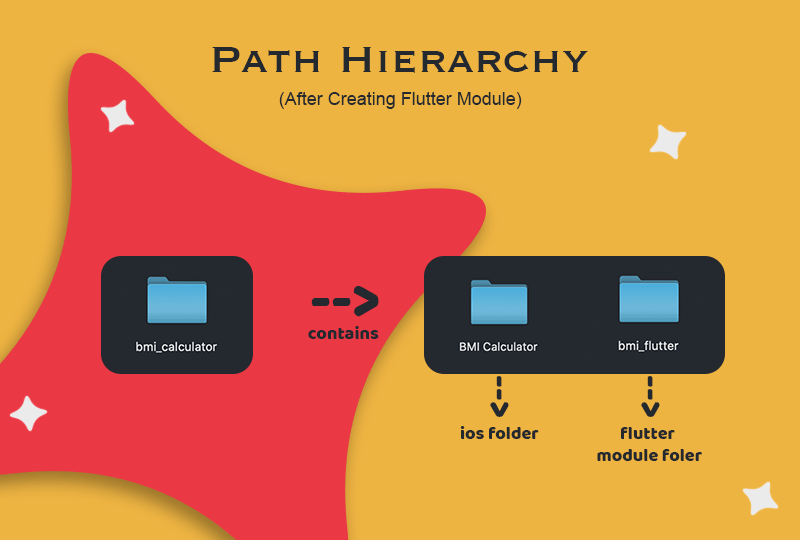
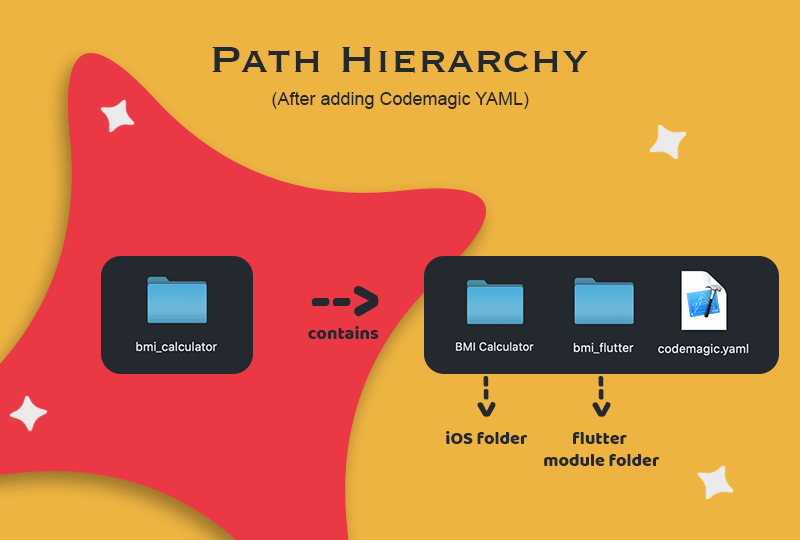
You should keep both the iOS project folder and the Flutter module folder in a root folder for easy accessibility.
The project directory structure followed by me for this app is as below:
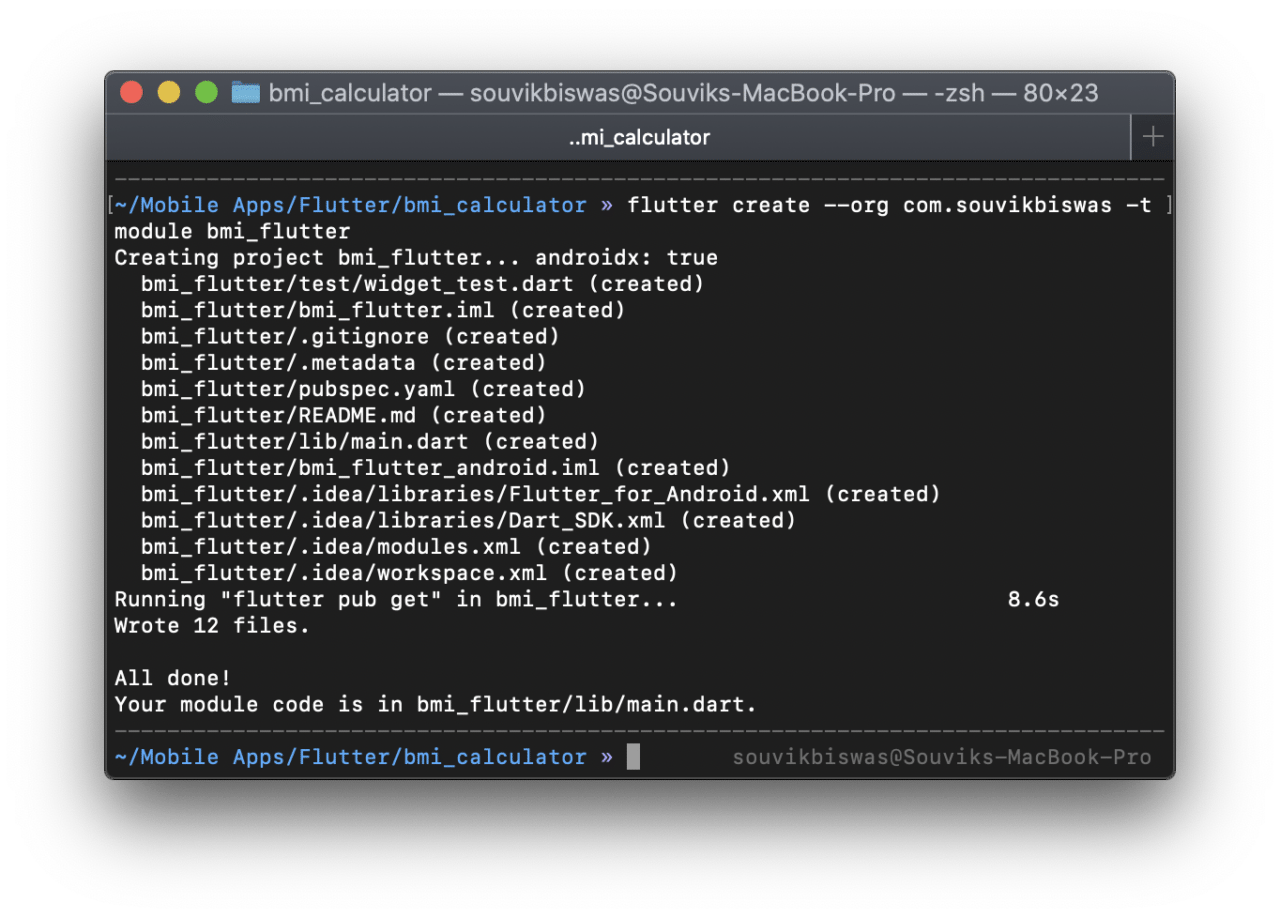
Run this command from the root directory to create the Flutter module:
flutter create --template module <module_name>
Or, you can also run this similar command:
flutter create -t module <module_name>
Replace the text in angle brackets with proper information.
--org <organization_id>is an optional parameter by which you can specify the organization id for this module. By default it is set to com.example.
Open the Flutter module folder using any code editor. You will find that it contains the demo Flutter Counter app.
Run the Flutter module on physical iOS device or Simulator to test if it is working properly.
Now, let’s move on to integrating the Flutter module to the native iOS project.
Integrating Flutter module to native iOS
The easiest option to integrate Flutter module to native iOS is using CocoaPods.
There are two other options for integrating Flutter module to a native iOS app, you can find them here.
If you do not have CocoaPods installed on your system, you can find the installation guide here.
Now, we have to create a Podfile.
If you already have a Podfile created in your iOS project, then you can skip the first step.
1. Run this command from the iOS project directory:
pod init
After creating the Podfile the whole project structure should be like this:
 bmi_calculator/
 ├── bmi_flutter/
 │   └── .ios/
 │       └── Flutter/
 │         └── podhelper.rb
 └── BMI Calculator/
     └── Podfile
2. Now, open the Podfile using Xcode.
3. Add the following code to your Podfile:
flutter_application_path = '../my_flutter'

load File.join(flutter_application_path, '.ios', 'Flutter', 'podhelper.rb')
Replace
my_flutterwith the name of your Flutter module folder.
4. For each Podfile target that needs to embed Flutter, you have to add this line:
install_all_flutter_pods(flutter_application_path).
5. Save and close the Podfile as well the Xcode.
6. Finally, run the following command to install the Pods:
pod install
7. Reopen the project using the file with .xcworkspace extension.
If you open the file with
.xcodeprojectextension, then you will get a lot of errors as the Podfile cannot be used with it.
You can refer to the Flutter Official Docs for more information.
Adding a Flutter screen to the iOS app
FlutterViewController is used to display a Flutter screen inside the native iOS app. But for using this, we will also need to create a FlutterEngine.
The proper place to create a FlutterEngine is inside the AppDelegate.swift file.
Replace the whole content of this file with the following code:
// AppDelegate.swift

import UIKit
import Flutter
import FlutterPluginRegistrant

@UIApplicationMain
class AppDelegate: FlutterAppDelegate {

    var flutterEngine : FlutterEngine?;

    override func application(_ application: UIApplication, didFinishLaunchingWithOptions launchOptions: [UIApplication.LaunchOptionsKey: Any]?) -> Bool {
        self.flutterEngine = FlutterEngine(name: "io.flutter", project: nil);
        self.flutterEngine?.run(withEntrypoint: nil);
        GeneratedPluginRegistrant.register(with: self.flutterEngine!);
        return super.application(application, didFinishLaunchingWithOptions: launchOptions);
    }

}
Now, we can just add the following lines to the ViewController.swift file in order to display the flutter screen:
// ViewController.swift

// ...
import Flutter

class ViewController: UIViewController {

    // ...

    @IBAction func calculatePressed(_ sender: UIButton) {

        // ...

        let flutterEngine = ((UIApplication.shared.delegate as? AppDelegate)?.flutterEngine)!;
        let flutterViewController = FlutterViewController(engine: flutterEngine, nibName: nil, bundle: nil);
        self.present(flutterViewController, animated: true, completion: nil)

    }

}
If you run your app now, you should be able to view the Flutter Demo Counter app screen by tapping on the CALCULATE button.
You can refer to the Flutter Official Docs for more information.
Completing the Flutter UI
The UI for the BMI Result Screen will be really simple, with just a few Text widgets.
Code for the BMI Result Screen UI:
// main.dart

import 'dart:convert';

import 'package:flutter/material.dart';
import 'package:flutter/services.dart';

void main() => runApp(MyApp());

class MyApp extends StatelessWidget {
  @override
  Widget build(BuildContext context) {
    return MaterialApp(
      title: 'BMI Calculator Module',
      theme: ThemeData(
        primarySwatch: Colors.blue,
      ),
      home: MyHomePage(),
      debugShowCheckedModeBanner: false,
    );
  }
}

class MyHomePage extends StatefulWidget {
  @override
  _MyHomePageState createState() => _MyHomePageState();
}

class _MyHomePageState extends State<MyHomePage> {

  Future<void> _receiveFromHost(MethodCall call) async {
    // To be implemented.

    // Will be used for retrieving data passed from
    // the native iOS app.
  }

  @override
  Widget build(BuildContext context) {
    return Scaffold(
      body: Container(
        color: Colors.blue,
        child: Center(
          child: Column(
            mainAxisSize: MainAxisSize.max,
            mainAxisAlignment: MainAxisAlignment.center,
            crossAxisAlignment: CrossAxisAlignment.center,
            children: <Widget>[
              Text(
                'YOUR BMI',
                style: TextStyle(
                    color: Colors.white,
                    fontSize: 40,
                    fontWeight: FontWeight.bold),
              ),
              Text(
                '23.7',
                style: TextStyle(
                    color: Colors.white,
                    fontSize: 70,
                    fontWeight: FontWeight.bold),
              ),
              Text(
                'Fit as a fiddle!',
                style: TextStyle(
                  color: Colors.white,
                  fontSize: 20,
                ),
              ),
            ],
          ),
        ),
      ),
    );
  }
}
Using Platform Channel
We will be using Platform Channel to pass data from the native iOS app to the Flutter module.
Setting up the Flutter Module (receiving data)
1. First of all, we have to create a channel with some name, inside the class _MyHomePageState.
// main.dart

static const platform = const MethodChannel('com.souvikbiswas.bmi/data');
2. Implement the method _receiveFromHost(), which will retrieve the data passed from the native part and get the data to display inside the Flutter module.
// main.dart

Future<void> _receiveFromHost(MethodCall call) async {
   var jData;

   try {
     print(call.method);

     if (call.method == "fromHostToClient") {
       final String data = call.arguments;
       print(call.arguments);
       jData = await jsonDecode(data);
     }
   } on PlatformException catch (error) {
     print(error);
   }

   setState(() {
     jData1 = jData;
     if (jData['color'] == 'blue') {
       color = Colors.blue;
     } else if (jData['color'] == 'green') {
       color = Colors.green;
     } else {
       color = Colors.pink;
     }
   });
 }
3. Initialize the platform in the _MyHomePageState() constructor and set the _receiveFromHost() method as Method Call Handler.
// main.dart

_MyHomePageState() {
     platform.setMethodCallHandler(_receiveFromHost);
}
4. Update the build method to show the data retrieved using the platform channel:
// main.dart

 @override
  Widget build(BuildContext context) {
    return Scaffold(
      body: Container(
        color: color, // Updated
        child: Center(
          child: Column(
            // ...
            children: <Widget>[
              Text(
                'YOUR BMI',
                // ...
              ),
              Text(
                jData1['value'], // Updated
                // ...
              ),
              Text(
                jData1['advice'], // Updated
                // ...
              ),
            ],
          ),
        ),
      ),
    );
  }
}
Setting up the iOS app (sending data)
1. Creating a channel for communicating with the Flutter module
// Define inside calculatePressed() method

let bmiDataChannel = FlutterMethodChannel(name: "com.souvikbiswas.bmi/data", binaryMessenger: flutterViewController.binaryMessenger)
2. Sending data using the channel
// Define inside calculatePressed() method

 let bmiDataChannel = FlutterMethodChannel(name: "com.souvikbiswas.bmi/data", binaryMessenger: flutterViewController.binaryMessenger)

 let jsonObject: NSMutableDictionary = NSMutableDictionary()

 jsonObject.setValue(bmiValue, forKey: "value")
 jsonObject.setValue(bmiAdvice, forKey: "advice")
 jsonObject.setValue(bmiColor, forKey: "color")

 var convertedString: String? = nil

 do {
     let data1 =  try JSONSerialization.data(withJSONObject: jsonObject, options: JSONSerialization.WritingOptions.prettyPrinted)
     convertedString = String(data: data1, encoding: String.Encoding.utf8)
 } catch let myJSONError {
     print(myJSONError)
 }

 bmiDataChannel.invokeMethod("fromHostToClient", arguments: convertedString)
Using Hot Reload & Hot Restart
You might be missing the Hot Reload and Hot Restart feature of Flutter. Though you are running an instance of Flutter within the native iOS app, still you will be able to use these Flutter features.
To use Hot Reload and Hot Restart, follow these steps:
1. Run the following command from the Flutter project directory:
flutter attach
2. Immediately, go to Xcode and run the app on device by clicking on the Run button present at the top-left corner.
3. If you take a look at the Terminal, you will notice that the connection is successful and you can now use Hot reload & Hot restart for the Flutter module running inside a native iOS app.
Building on Codemagic
For building a native iOS app with Flutter module, you have to use the codemagic.yaml file for defining the pipeline.
Create a file called codemagic.yaml in the root directory of the project. A basic structure of the YAML file is as follows:
workflows:
  default-workflow: # workflow ID
    name: Default Workflow # workflow name
    environment:
      vars:
        # Define the environment variables here
      flutter: v1.12.13+hotfix.8
      xcode: latest
      cocoapods: default
    scripts:
    artifacts:
      # Define the artifact paths here
    publishing:
      email:
        recipients:
          - user@example.com # your email address
Before you can start a build of your project, you have to add the project to Codemagic. Click on the Add application button present on the Codemagic dashboard.
If your are a new user of Codemagic, follow the getting started guide here.
Adding Environment variables
In order to generate iOS .ipa file, you need to set up the code signing for the app. Codemagic offers two types of code signing processes on the platform:
- Automatic code signing
- Manual code singing
For automatic code signing, the prerequisites are:
- Apple Developer Program membership
- App Store Connect admin access
For manual code signing, the prerequisites are:
- Signing certificate
- Certificate password (if password protected)
- Provisioning profile
In the environment variables section of the codemagic.yaml file, you can add the sensitive information in encrypted format as key-value pairs.
Add the following keys for automatic code signing:
APP_STORE_CONNECT_ISSUER_ID: Encrypted(...)
APP_STORE_CONNECT_KEY_IDENTIFIER: Encrypted(...)
APP_STORE_CONNECT_PRIVATE_KEY: Encrypted(...)
CERTIFICATE_PRIVATE_KEY: Encrypted(...)
You can follow the instructions here to generated the required information (also includes a video demonstration).
Add the following keys for manual code signing:
CM_CERTIFICATE: Encrypted(...)
CM_CERTIFICATE_PASSWORD: Encrypted(...)
CM_PROVISIONING_PROFILE: Encrypted(...)
We had already generated these files in the previous steps.
You can generate the encrypted version of variables by following these steps.
1. Go to the project Settings from Codemagic.
2. Click Encrypt variables.
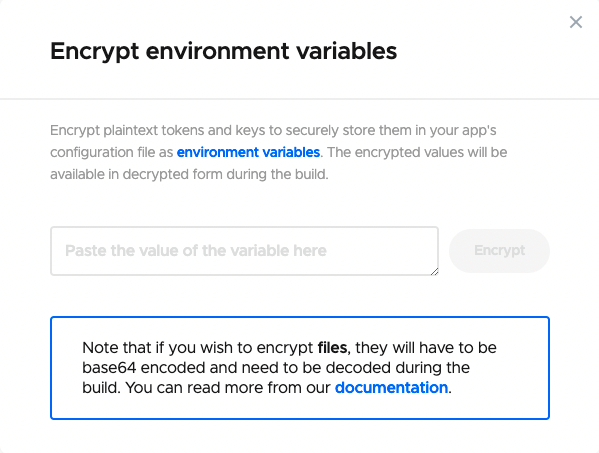
Here, you can enter the value of the variable and click Encrypt button to generate the encrypted value, copy this value and paste it beside the appropriate environment variable key.
For encrypting files, you will have to base64 encode them and copy-paste the generated value on Codemagic. They needs to be decoded during the build before using them.
TIPS: For simplicity, instead of defining these environment variable in the codemagic.yaml file you can also define these values in the Application environment variables section under the Environment variables tab. Learn more here.
Defining the script
I will be going through the build script, explaining line-by-line.
Also, as we have two folders, one for native iOS and the other for the Flutter module, we have to make sure that the commands are run in the correct folder.
So, let’s get started.
Getting dependencies:
- name: Get dependencies
  working_directory: bmi_flutter
  script: |
    flutter packages pub get
    find . -name "Podfile" -execdir pod install \;
Build the Flutter module only (this step is necessary in order to generate some files required by the native iOS app in order to retrieve the flutter module):
- name: Build Flutter module
  working_directory: bmi_flutter
  script: flutter build ios --release --no-codesign
Initializing keychain:
- name: Set up keychain
  script: keychain initialize
Automatic code signing step only: Fetching the iOS signing files and add them to the keychain:
- name: Fetch signing files
  script: app-store-connect fetch-signing-files $BUNDLE_ID --type IOS_APP_DEVELOPMENT --create
- name: Use system default keychain
  script: keychain add-certificates
Manual code signing step only: Setting up provisioning profile and signing certificate:
- name: Set up provisioning profile
  script: |
    PROFILES_HOME="$HOME/Library/MobileDevice/Provisioning Profiles"
    mkdir -p "$PROFILES_HOME"
    PROFILE_PATH="$(mktemp "$PROFILES_HOME"/$(uuidgen).mobileprovision)"
    echo ${CM_PROVISIONING_PROFILE} | base64 --decode > "$PROFILE_PATH"
    echo "Saved provisioning profile $PROFILE_PATH"
- name: Set up signing certificate
  script: |
    echo $CM_CERTIFICATE | base64 --decode > /tmp/certificate.p12
    if [ -z ${CM_CERTIFICATE_PASSWORD+x} ]; then
      # when using a certificate that is not password-protected
      keychain add-certificates --certificate /tmp/certificate.p12
    else
      # when using a password-protected certificate
      keychain add-certificates --certificate /tmp/certificate.p12 --certificate-password $CM_CERTIFICATE_PASSWORD
    fi
Setting up code signing for the iOS project:
- name: Set up code signing
  working_directory: BMI Calculator
  script: xcode-project use-profiles
Incrementing the build number and generating the
.ipafile:- name: Increment build number working_directory: BMI Calculator script: | #!/bin/sh set -e set -x agvtool new-version -all $(($BUILD_NUMBER + 1)) - name: Build ipa for distribution working_directory: BMI Calculator script: xcode-project build-ipa --workspace "$XCODE_WORKSPACE" --scheme "$XCODE_SCHEME"TIPS: You can add this flag
--disable-xcprettyto view the whole Xcode verbose output directly on the Codemagic UI during build.You can get more information about configuration options for build‑ipa command here.
Retrieve the generated artifacts
To get the .ipa file after build, you need to define the correct paths to the generated artifacts:
artifacts:
  - BMI Calculator/build/ios/ipa/*.ipa
  - BMI Calculator//tmp/xcodebuild_logs/*.log
  - bmi_flutter/flutter_drive.log
Before running the script, don’t forget to place the codemagic.yaml file in the root directory of the project.
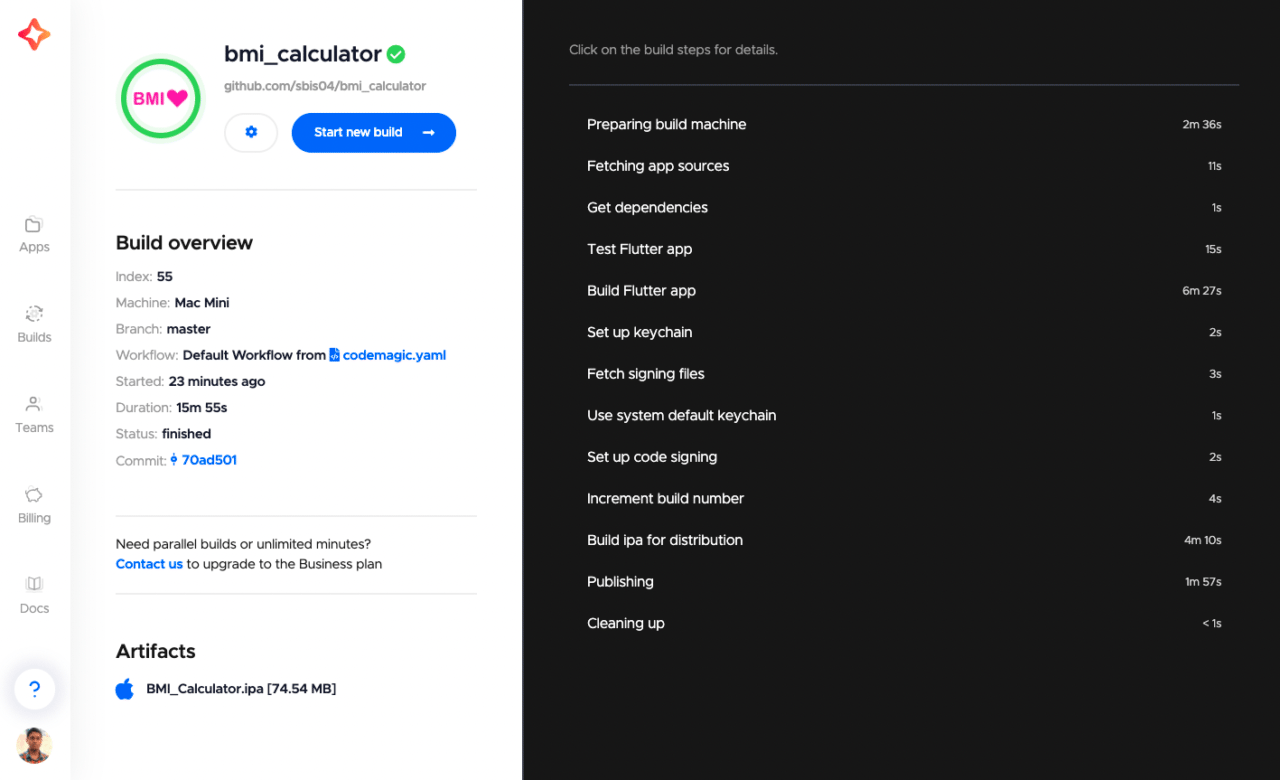
Running the build script
1. Go to your project from the Applications dashboard on Codemagic.
2. Click Start new build
3. Select the correct workflow and click Start new build to start the building process.

Let’s have a brief look into how you can perform testing on Codemagic.
Testing on Codemagic
It’s very simple to perform any testing on Codemagic using YAML.
Let’s add a demo unit test to the Flutter module.
import 'dart:convert';
import 'package:flutter_test/flutter_test.dart';

void main() {
  String jsonTest = '{' +
      '"value" : "44.4",' +
      '"color" : "pink",' +
      '"advice" : "Eat less pies!"' +
      '}';

  var jData = jsonDecode(jsonTest);
  test("Json Data Test", (){
    expect(jData['value'], "44.4");
    expect(jData['color'], "pink");
    expect(jData['advice'], "Eat less pies!");
  });
}
In order to test it on Codemagic CI/CD, we have to just include one more line to our script in codemagic.yaml file.
Add the following before building the Flutter module:
- name: Test Flutter app
  working_directory: bmi_flutter
  script: flutter test
Congratulations 🎉, you have successfully completed the building & testing process on Codemagic using YAML.
The whole YAML script for this build is available here.
Conclusion
The codemagic.yaml file makes it possible to build and test a native iOS app with a Flutter module on Codemagic CI/CD. Maintaining the YAML file is convenient, it gets checked into the VCS and is auto-detected by Codemagic CI/CD during the build. Access it locally and you can modify it even without internet connection.
Useful links and references
- The official documentation for integrating a Flutter module into your iOS project is here.
- The official documentation for Codemagic YAML is available here.
- You can get more information about the CLI tools here.
- The GitHub repo for this project is available here.
Souvik Biswas is a passionate Mobile App Developer (Android and Flutter). He has worked on a number of mobile apps throughout his journey. Loves open source contribution on GitHub. He is currently pursuing a B.Tech degree in Computer Science and Engineering from Indian Institute of Information Technology Kalyani. He also writes Flutter articles on Medium - Flutter Community.
More articles by Souvik:


