


Editor’s Note: First published in April 2019, updated in November 2020. We also recommend you read iOS Code Signing and Publishing with codemagic.yaml file.
Unless the device is jailbroken, all the apps that run on iOS devices need to be signed by trusted developers who have a valid certificate from Apple. Code signing is the process of digitally signing any form of the code to confirm the author of the code and guarantee that the code has not been changed or corrupted since it was signed. There are various security terms involved in the process of code signing, such as public key, private key, certificates, and digital signatures.
Code signing on Apple platforms, including iOS, relies on public-key cryptography based on the X.509 standard. In this post, we will explore how to code sign iOS apps and publish them to the App Store.
First, we will cover the iOS app distribution method using Xcode and and then Codemagic. With Xcode there are various configuration and manual steps required for submitting an app to the App Store Connect portal. With Codemagic we simply need to provide our certificate, profiles, and App Store credentials, and the rest of the app distribution work is done by Codemagic.
Note that if you want to publish Android apps to Google Play store, you will also need code signing for Android. To learn more about how to do this with Codemagic, visit this page. If you follow advice from both these pages, you would be able to publish your apps to both app stores.

Why code sign iOS apps?
Code signing makes the user feel safe while using the app, provided that the app has been developed by trusted developers. Every developer or organization wanting to develop iOS apps needs a certificate from Apple to make apps. Code signing ensures that nothing has been changed since the developer signed the code, meaning there is no chance of an attacker changing the code when it has been written by the developer.
In summary, code signing makes the apps secure for users. However, there are some limitations, as well. Code signing does not protect users against attacks from dynamic content, e.g., when the app is loading data from various third-party sources.
What is required to code sign apps?
There are various things we need to code sign our iOS apps. We will briefly address each one.
CSR (Certificate Signing Request)
This is the very first step in code signing iOS apps. The developer needs to create a certificate signing request (CSR) from their local machine, with some basic details confirming the developer’s identity. The CSR needs to be sent to the certificate authority (CA), which is Apple for the iOS platform. Apple then confirms the developer’s identity and issues a signing certificate to the developer. Anyone can create a CSR from their local macOS machine using the Keychain:
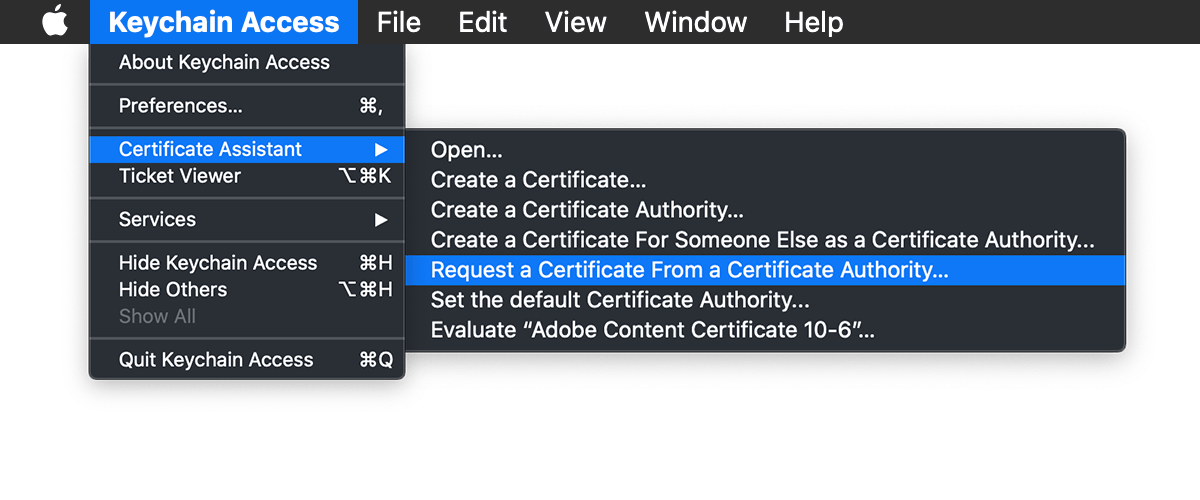
Open Keychain Access using Spotlight Search on Mac.
From the top menu bar, go to Keychain Access -> Certificate Assistant -> Request a Certificate From a Certificate Authority.
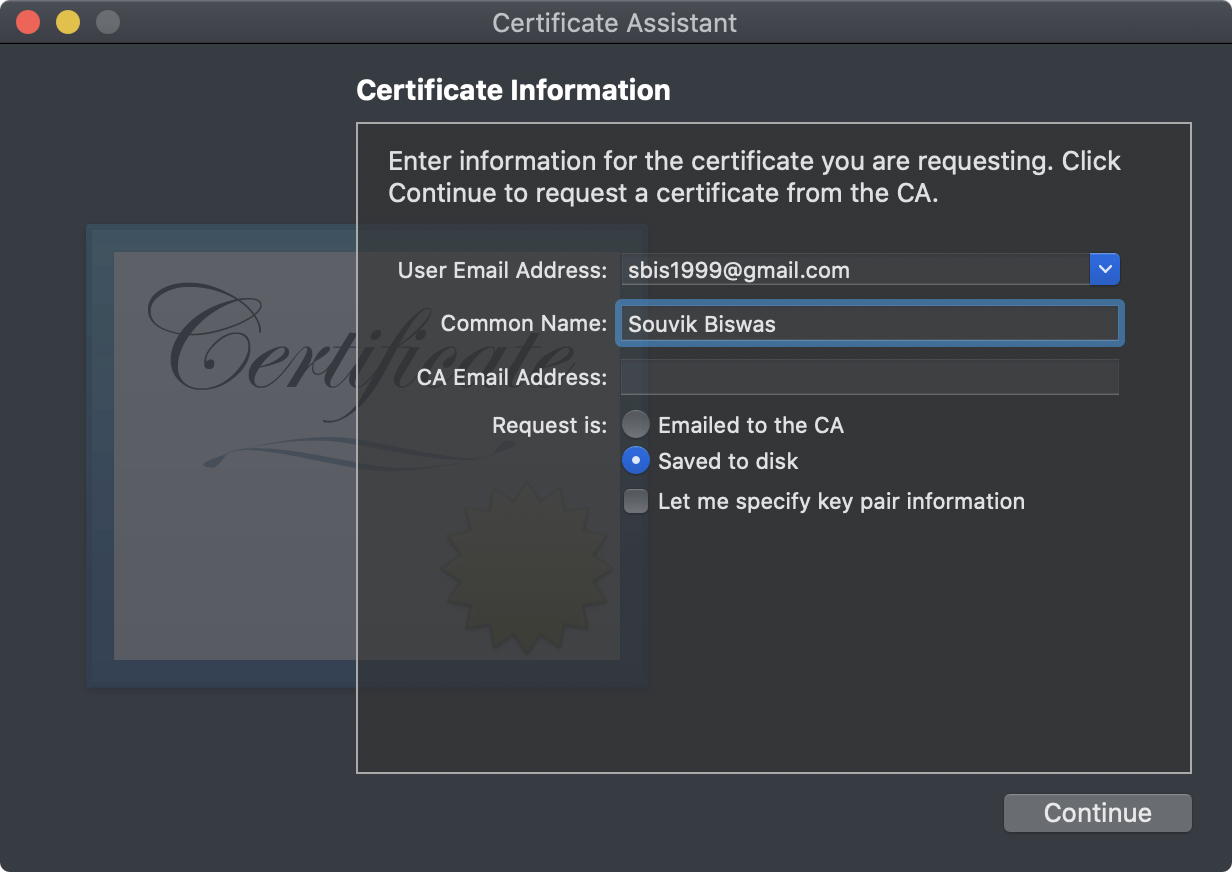
- Fill in the Certificate Information form. Leave the CA Email Address field empty. Select the option Saved to disk. Then, click on Continue.
- Now, you can click on Show in Finder to go to the folder where CSR is created.
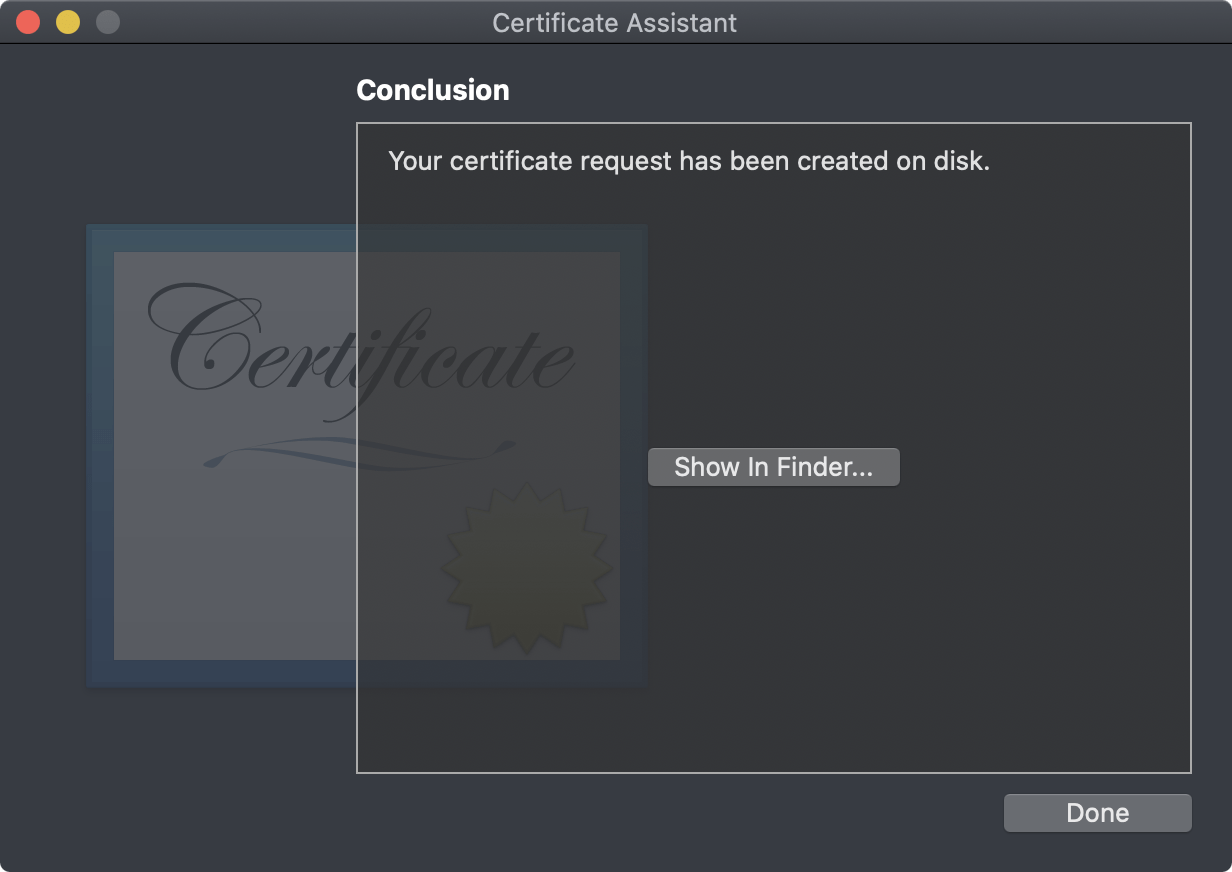
- Click on Done.
At the end of this process, you will have a CSR on your local machine.
Certificate
You will need an Apple Developer Program Membership in order to generate a certificate from the Apple Developer Portal. Apple will charge a fee of approximately $99/year for the developer membership. You can generate different types of certificates, e.g., development, distribution, or enterprise. As a developer, you can create a certificate for Development or Distribution.
A development certificate is used to develop apps internally, which are deployed on internal devices.
A distribution certificate is used to release an app to the App Store that can run on any device.
Follow the steps below to generate the distribution certificate:
Go to the Apple Developer Portal, and sign in using your Apple ID and password.
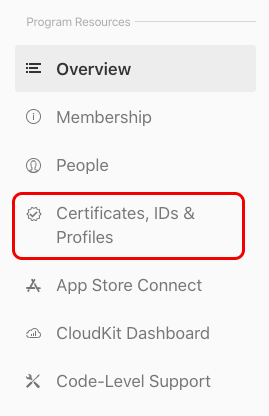
Select the Certificates, IDs & Profiles option from the left menu on the Dashboard.
Under the Certificates option, click on the “+” button.

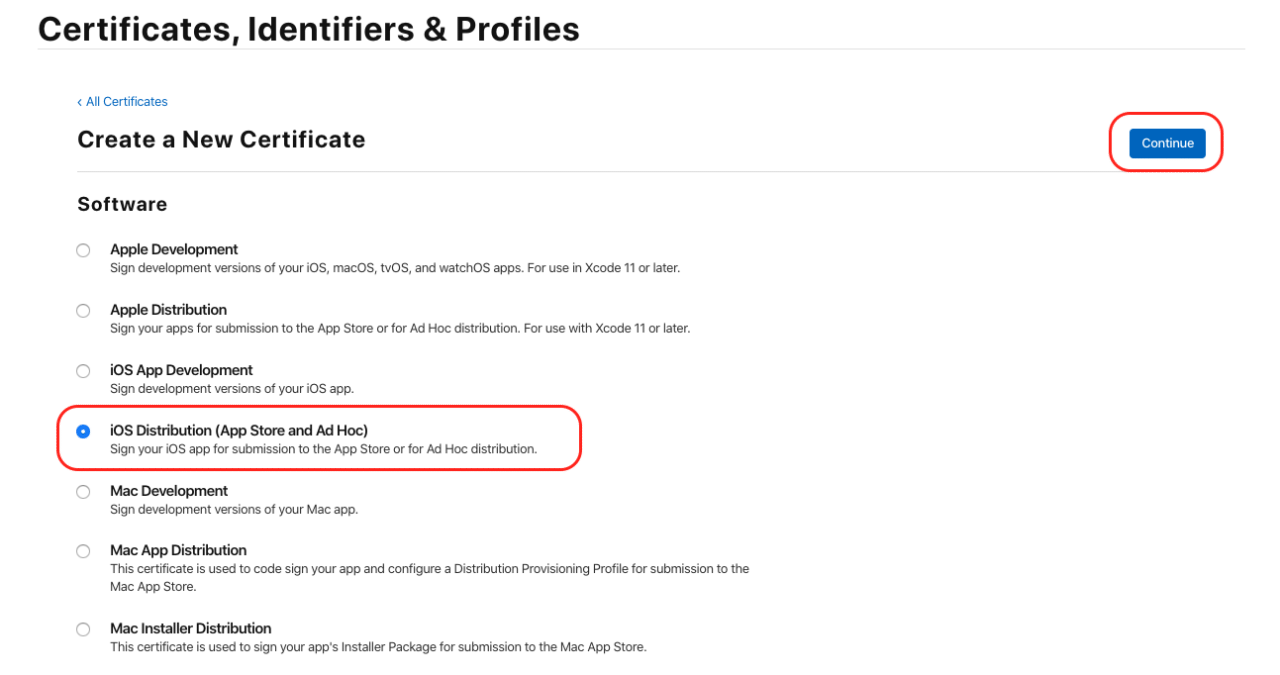
Select the iOS Distribution option, and click on Continue.
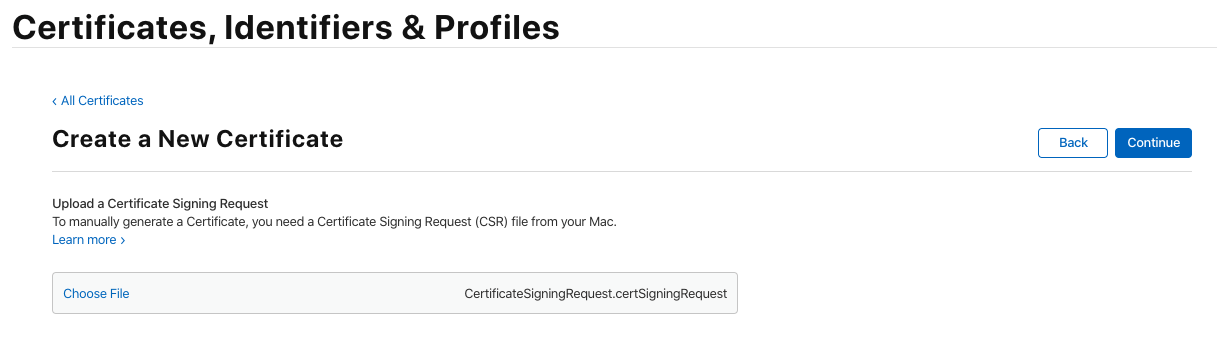
Click on Choose File to upload the CSR file that we had generated previously. Click Continue.
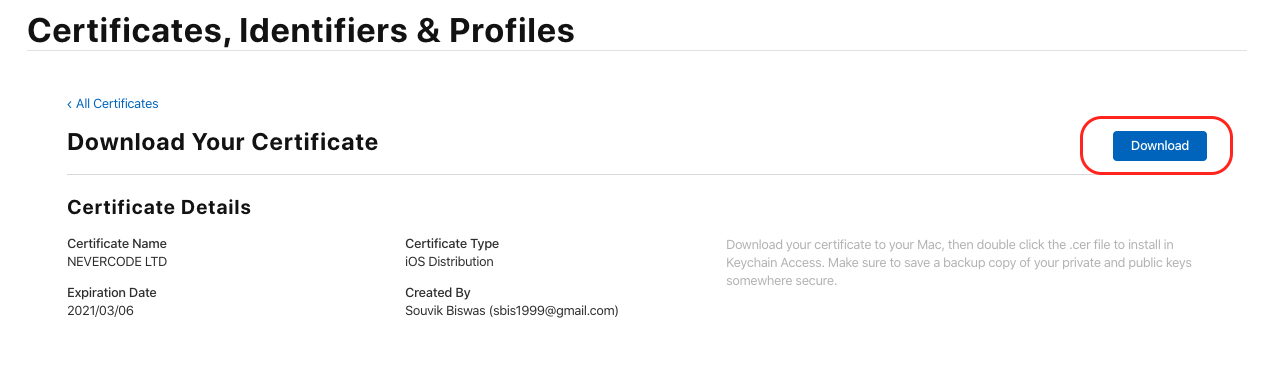
Now, you can Download the generated iOS Distribution Certificate to your local machine.
Double click on the downloaded certificate to add it to your local device’s Keychain.
You can export any certificate from your Keychain by right-clicking and selecting Export.
You will have to supply a Certificate Password for securing the certificate.
App ID
You have to register an App ID to make the app uniquely identifiable on the App Store after publication. This App ID will also be required for generating the Provisioning Profile in the next step.
The steps for registering an App ID are:
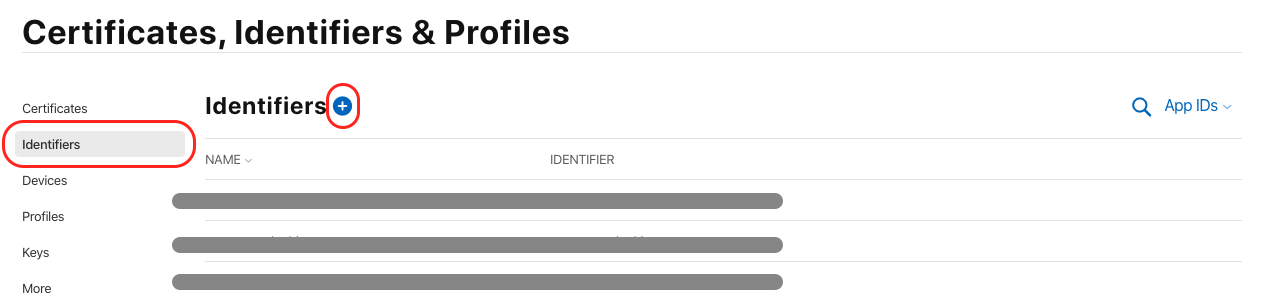
Go to the Identifiers option from the left menu, and click on the “+” button.
Select the App IDs option, and click on Continue.
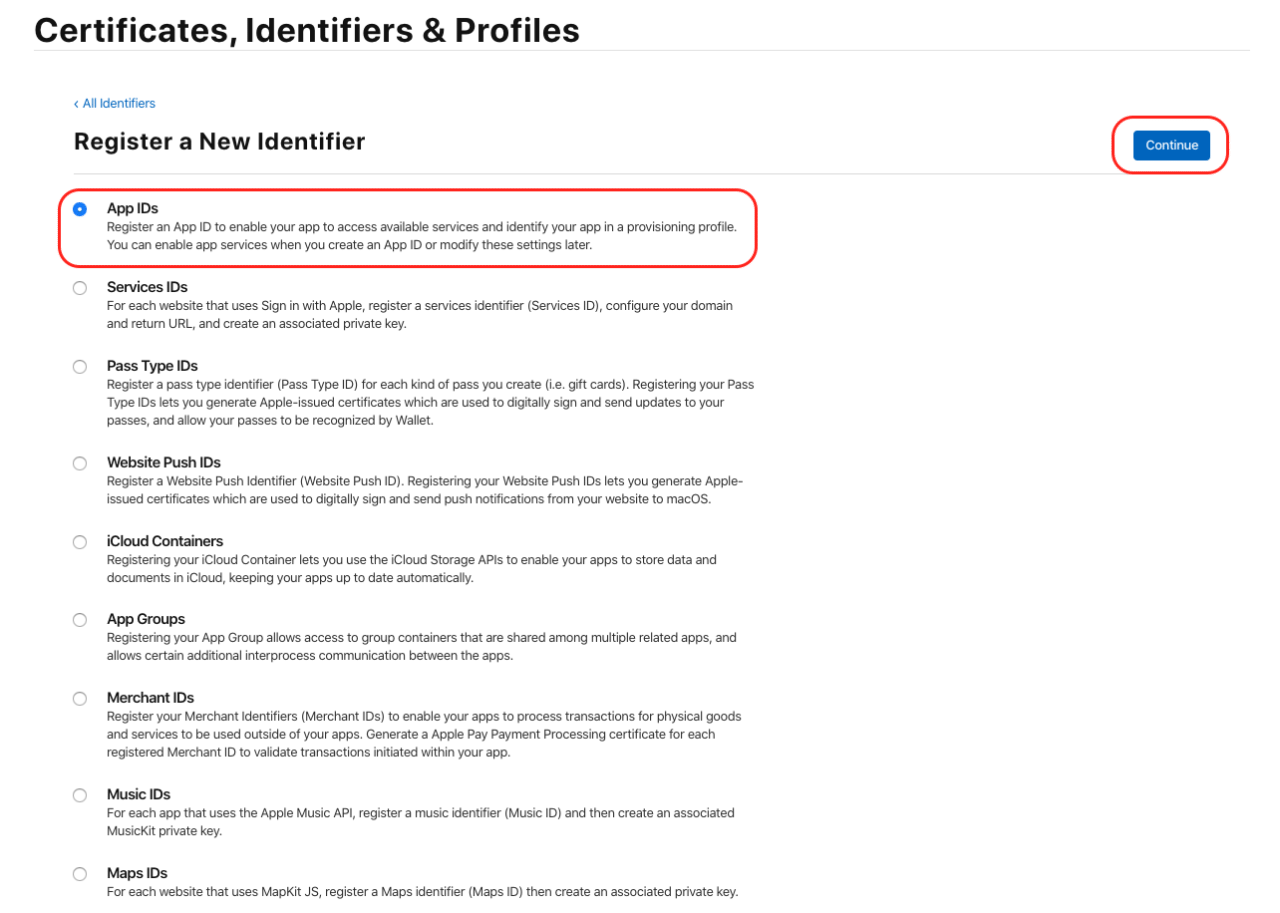
Enter the Description and Bundle ID of the app. Click on Continue.
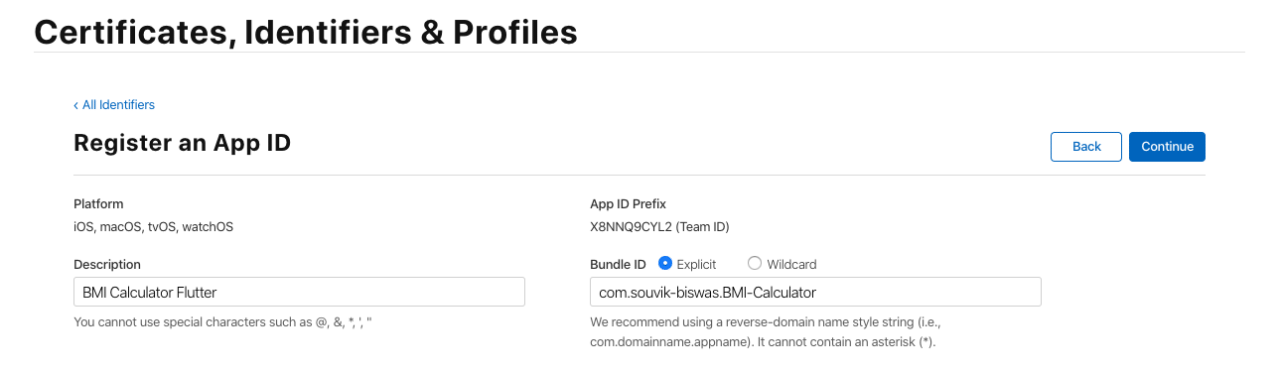
You will get the Bundle ID of your project under the Xcode General tab.
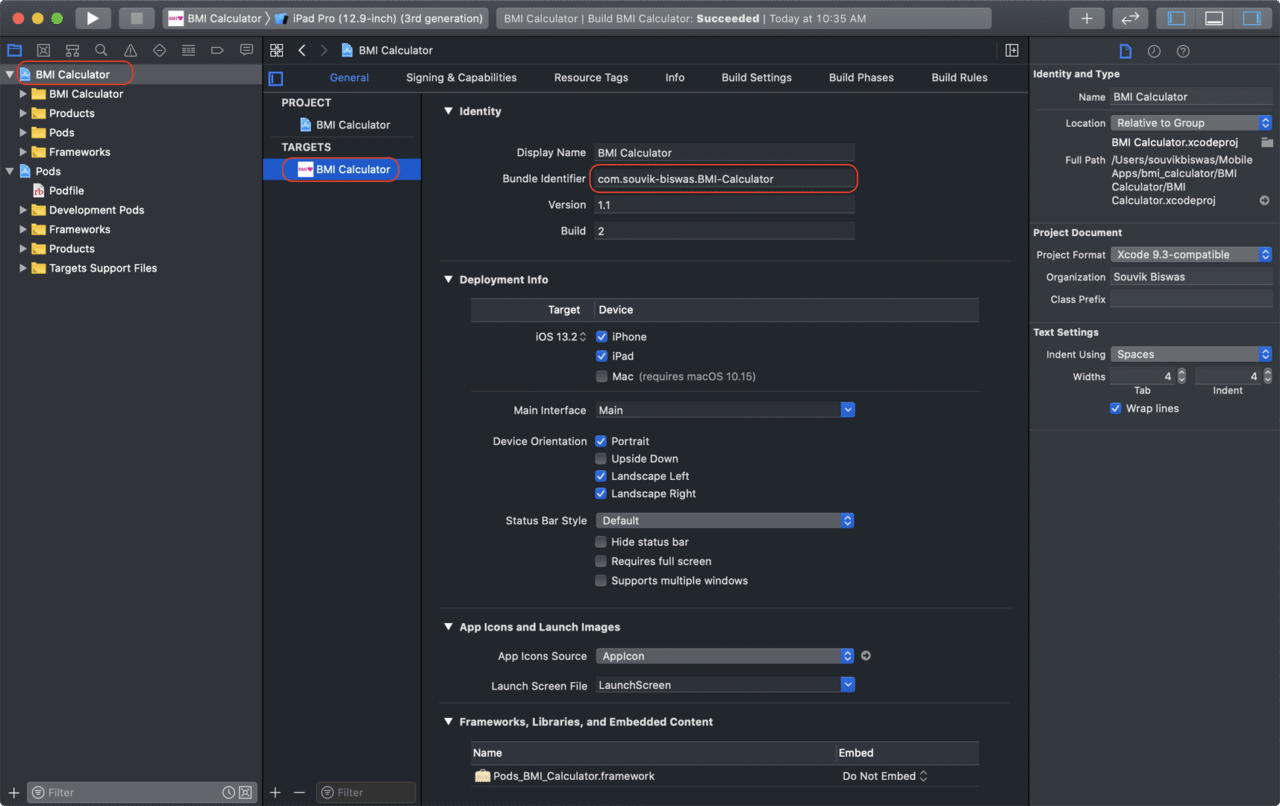
This Bundle ID needs to be unique. So, if the already defined Bundle ID of your project is not accepted in the portal, make sure you update the Bundle ID of the Xcode project with the accepted ID from the portal.
Click on Register.
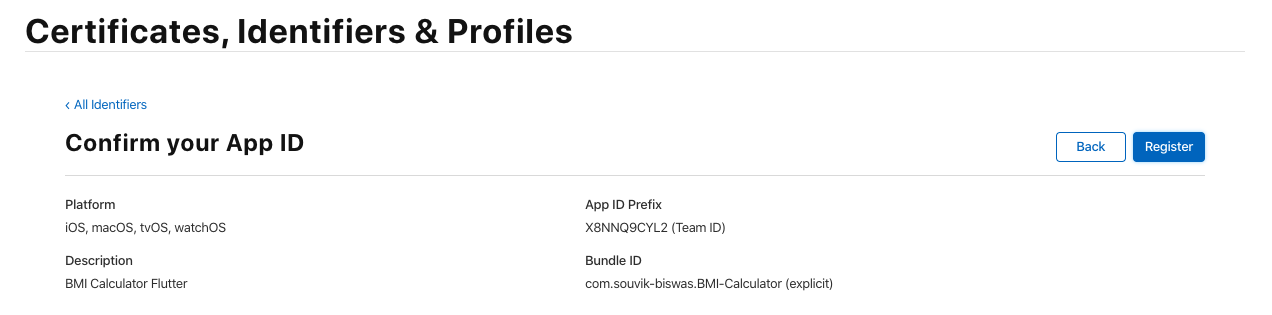
With this, you have successfully registered the Bundle ID of your iOS app.
Provisioning profiles
The provisioning profile is a combination of the Team ID, Bundle ID, App ID, Device ID, and Entitlements. It defines the rule for running the app inside the device. The provisioning profile’s role is to confirm:
- a specific app with an App ID
- that an app with that App ID can run on certain devices included in the provisioning profile. Development provisioning profiles have the list of devices included, while distribution provisioning profiles do not.
- that the app should only have those entitlements defined in the provisioning profile.
- that the app can only run trust based on the certificate embedded in the provisioning profile.
Provisioning profiles can also be created for development and distribution certificates. A Distribution Provisioning Profile is needed in order to publish an app to the Apple App Store. To generate a distribution provisioning profile, you will require the following:
- App ID
- Distribution Certificate
As we already have a registered App ID and an iOS Distribution Certificate, we can move on to generating the provisioning profile.
Follow the steps below:
Go to the Profiles option from the left menu, and click on the “+” button.
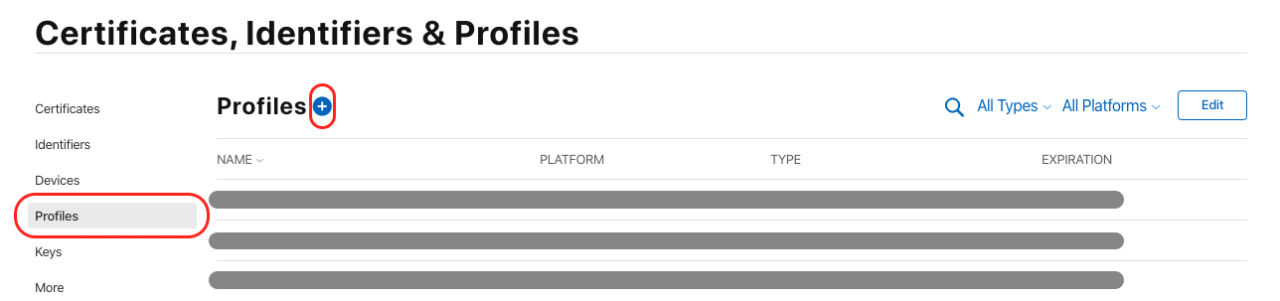
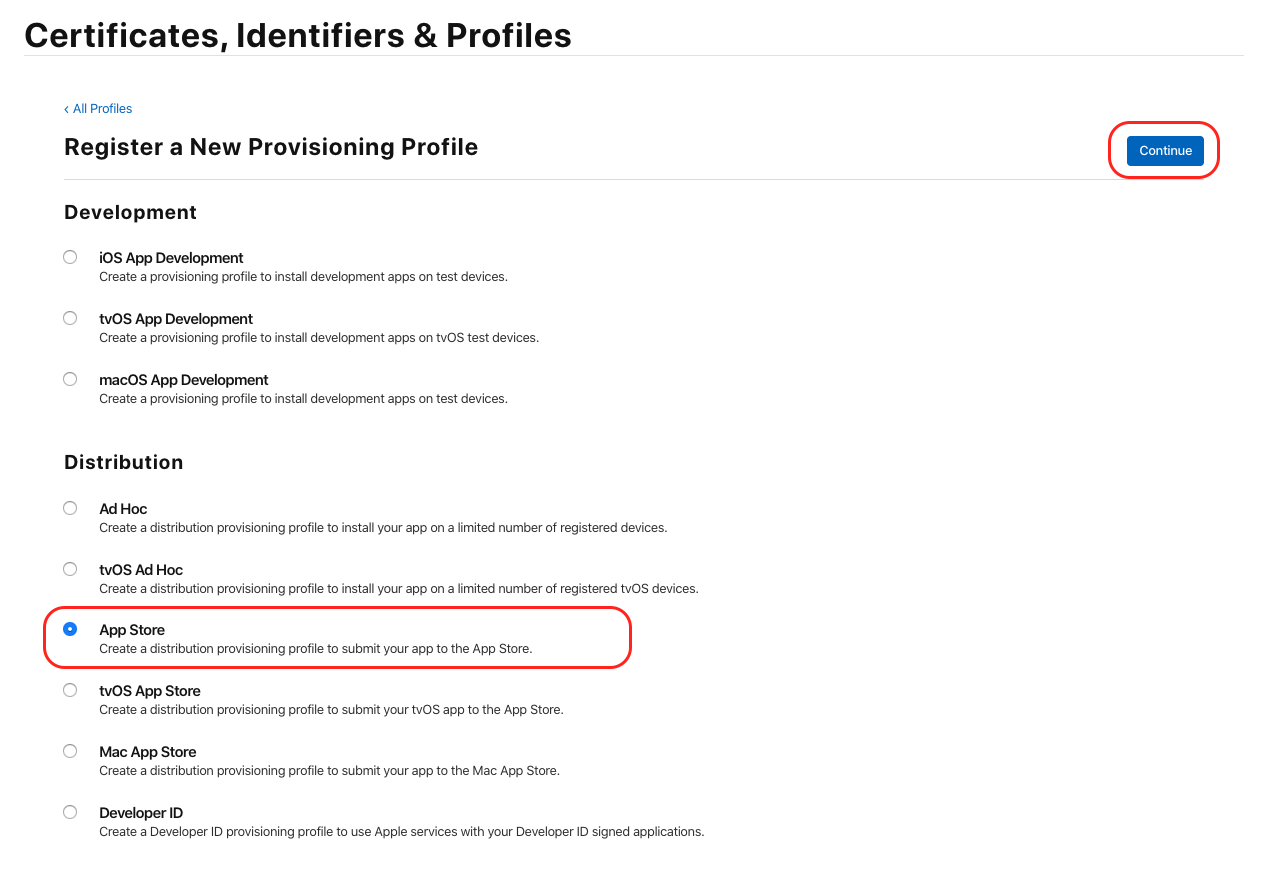
Select the App Store option from the list, and click on Continue.
This will help to generate a distribution provisioning profile for publishing the app to the Apple App Store.
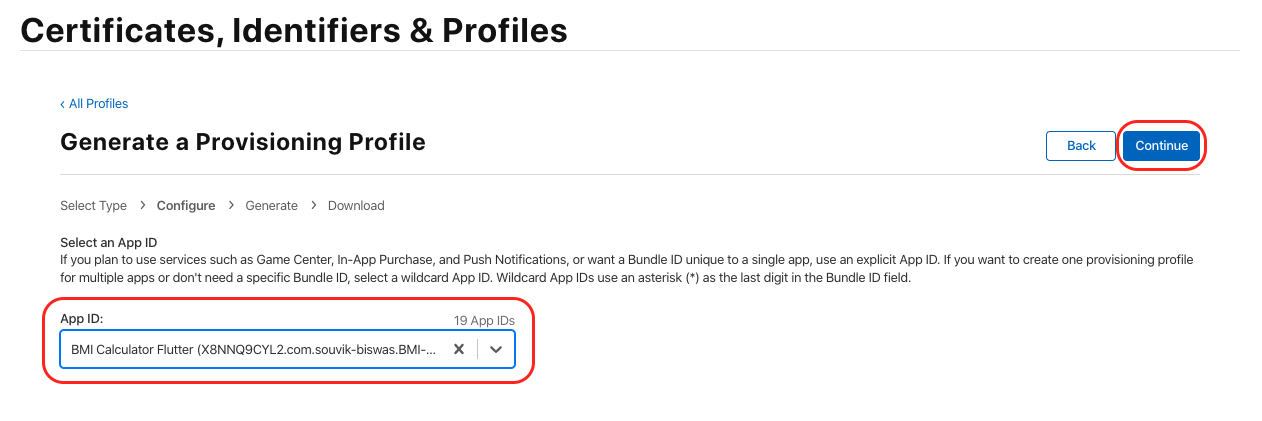
Select the App ID that we had registered previously from the drop-down list, and click on Continue.
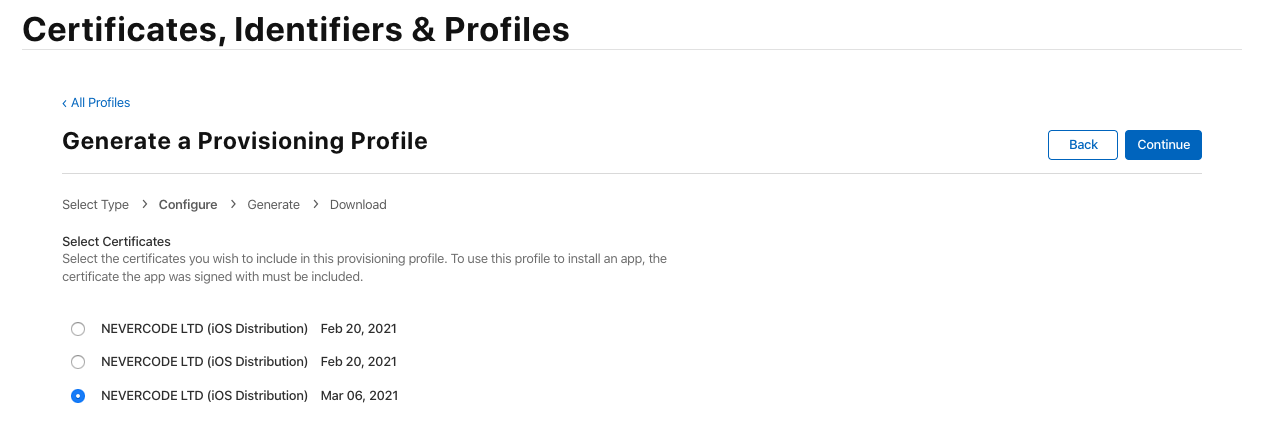
Select a Distribution Certificate with which the app was signed, and click on Continue.
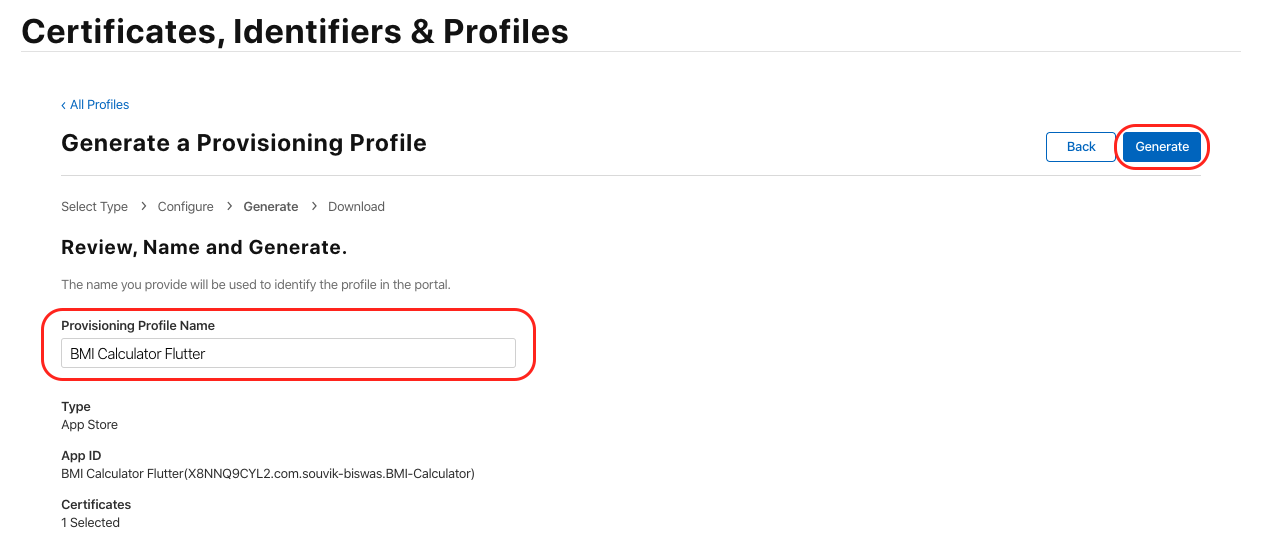
Enter a friendly Provisioning Profile Name for identifying the profile in the Apple Developer Portal. Click on Generate.
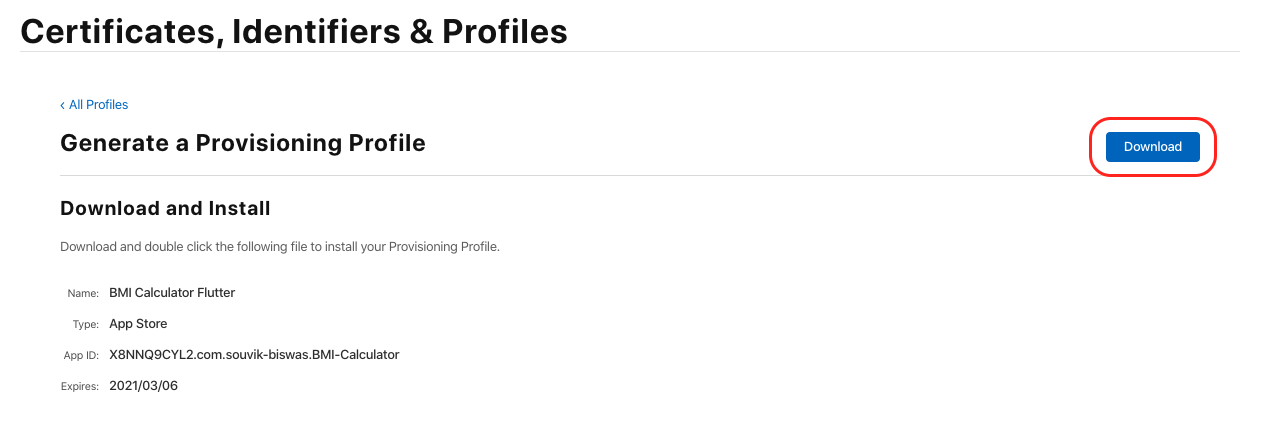
You can Download the distribution provisioning profile to your local machine.
Apple has very comprehensive documentation on the entire code signing process here. While code signing an iOS app, all components, including bundles, resources, frameworks, tools, scripts, libraries, plugins, Info.plist files, assets, and all other code, need to be code signed along with the individual components of the apps.
Xcode code signing
Now that you have all the things required for performing code signing, you have to configure Xcode to use the proper Provisioning Profile for the app. This is really simple:
Open the project using Xcode.
Select the root project directory, and go to the Signing and Capabilities tab.
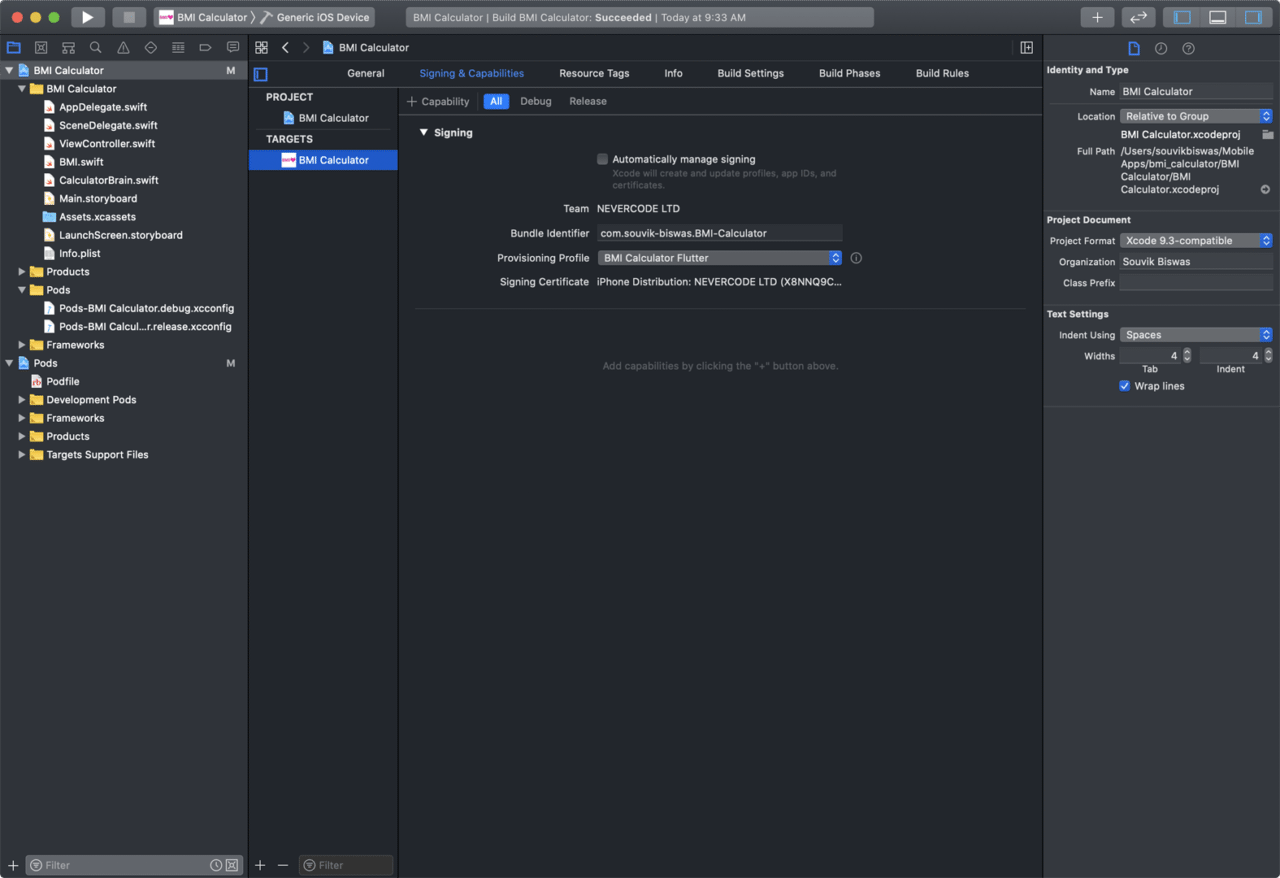
Here, you can either check Automatically manage signing or do the signing manually.
If you check the Automatically manage signing checkbox, then you will just need to select the Team from the drop-down list.
If you prefer to do it manually, then you will need to upload the Provisioning Profile from the local machine.
Creating App Profile
To upload the iOS app to App Store Connect, follow the steps below:
Log in to App Store Connect.
Go to My Apps.
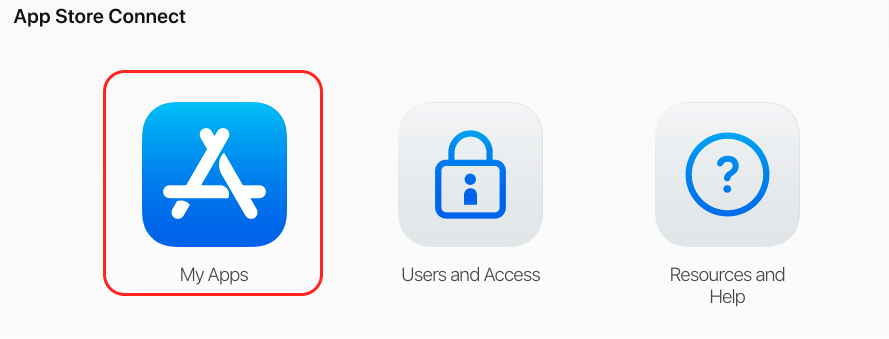
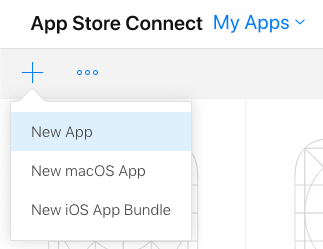
Click on the “+” button, and select New App.
Fill in the details on the form, and click on Create.
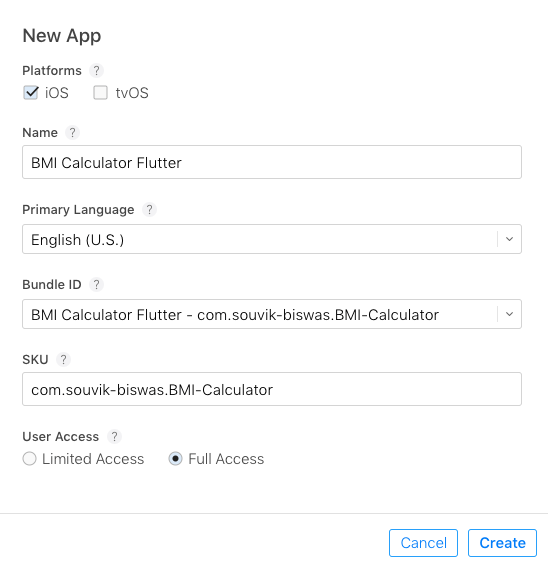
This will create a profile for your app, where you can upload the .ipa file of the app and add all the information required for publishing the app, like name, description, privacy policy, screenshots, etc.
Uploading the app using Xcode
Using Xcode, you can directly upload the .ipa file of the app to App Store Connect once the code-signing step is complete and the app profile is created on the App Store Connect portal.
In Xcode, select Generic iOS Device from the target devices list.
From the top menu, go to Product > Archive.
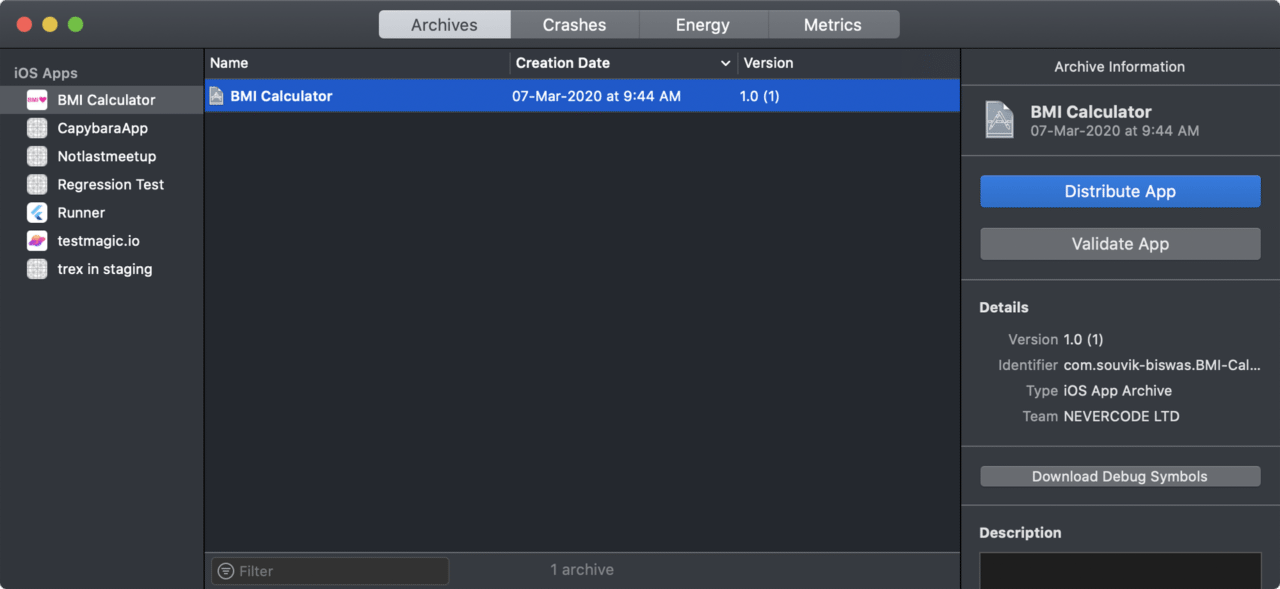
This will open a dialog box displaying all the archives that you’ve created in the past.
Select the recent build that you want to upload to App Store Connect, and click on Distribute App.
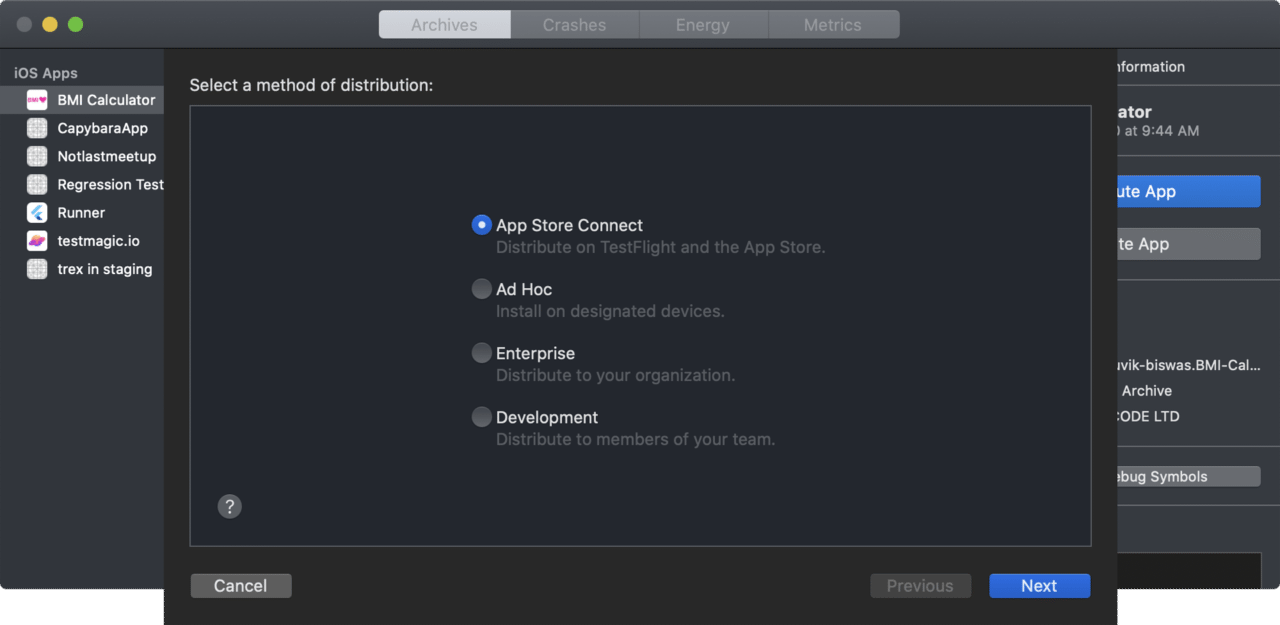
Select App Store Connect, and click on Next.
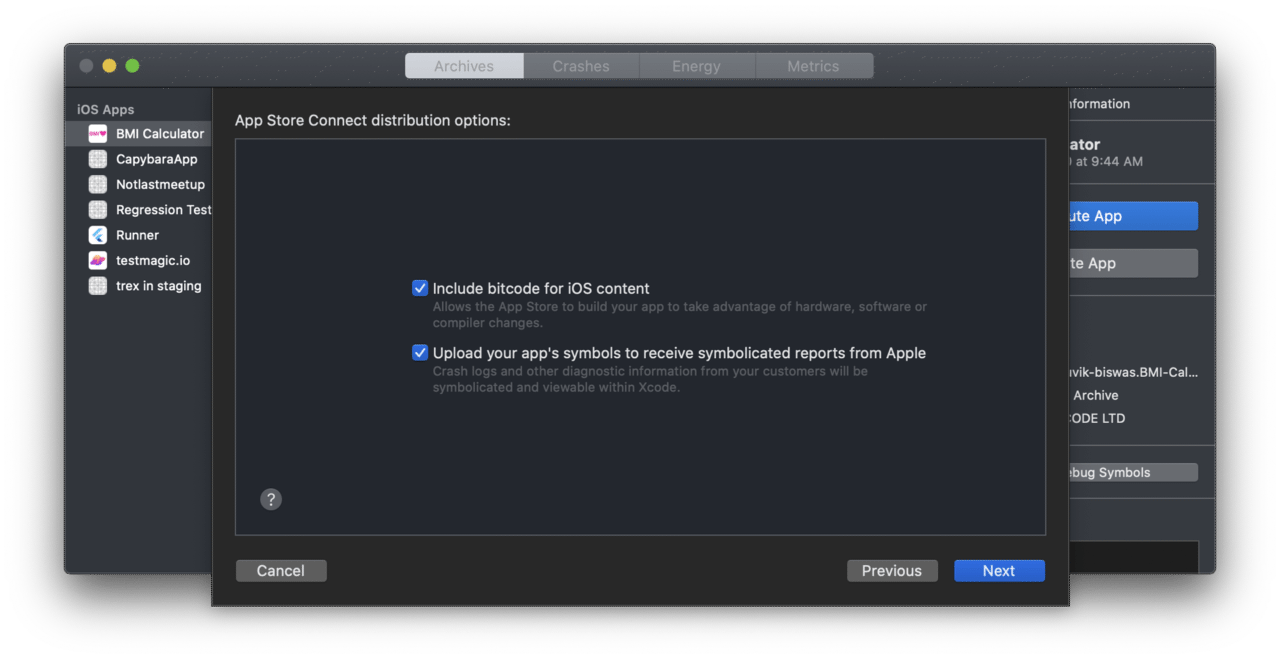
By default, both the checkboxes will be checked. You do not need to change anything here—just click on Next.
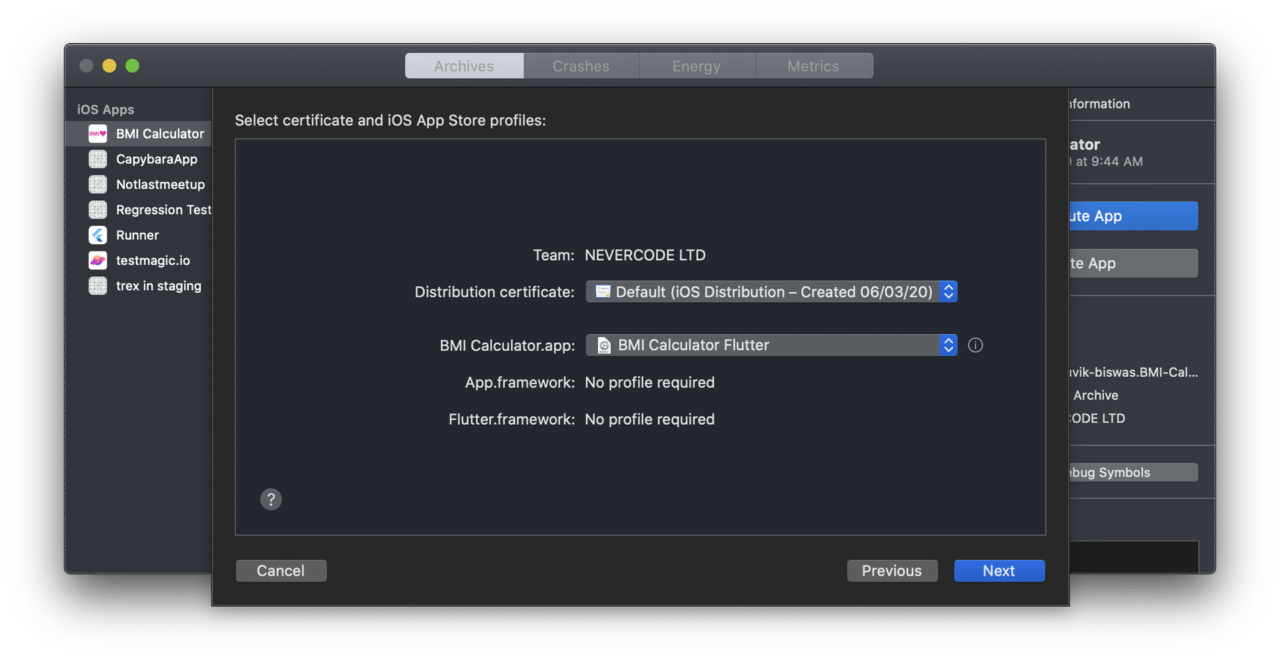
Select the Distribution Certificate and the App name from the drop-down list. Click on Next.
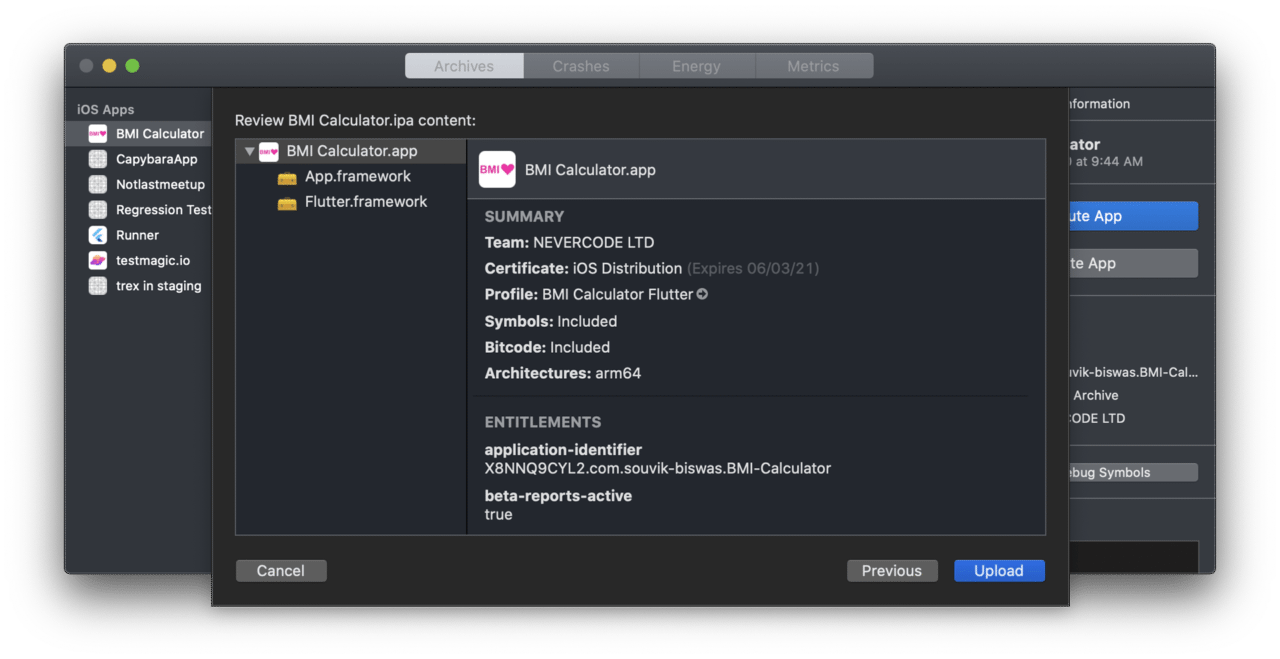
Verify the information, and click on Upload.
Once the upload process is complete, click on Done.
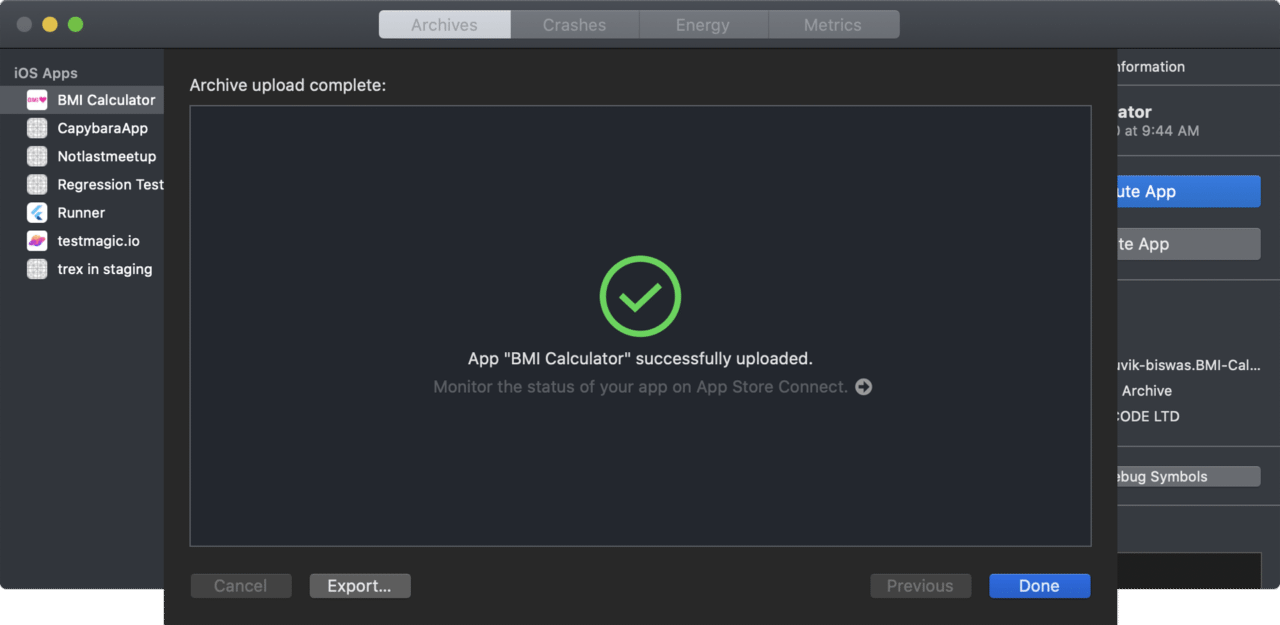
This will upload the build version of the app to App Store Connect. Now, you can go to the portal and fill in the required information for publishing the app to the Apple App Store.
Publishing the app
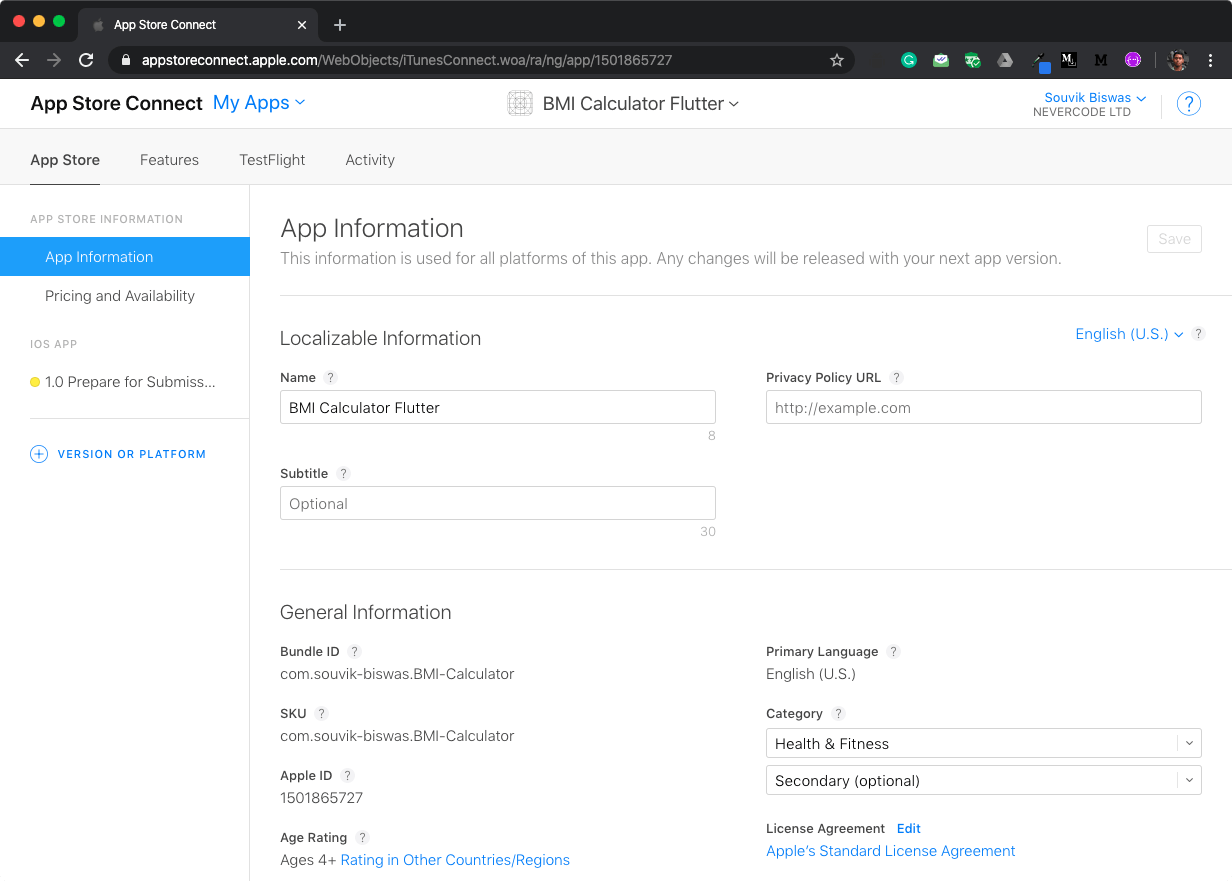
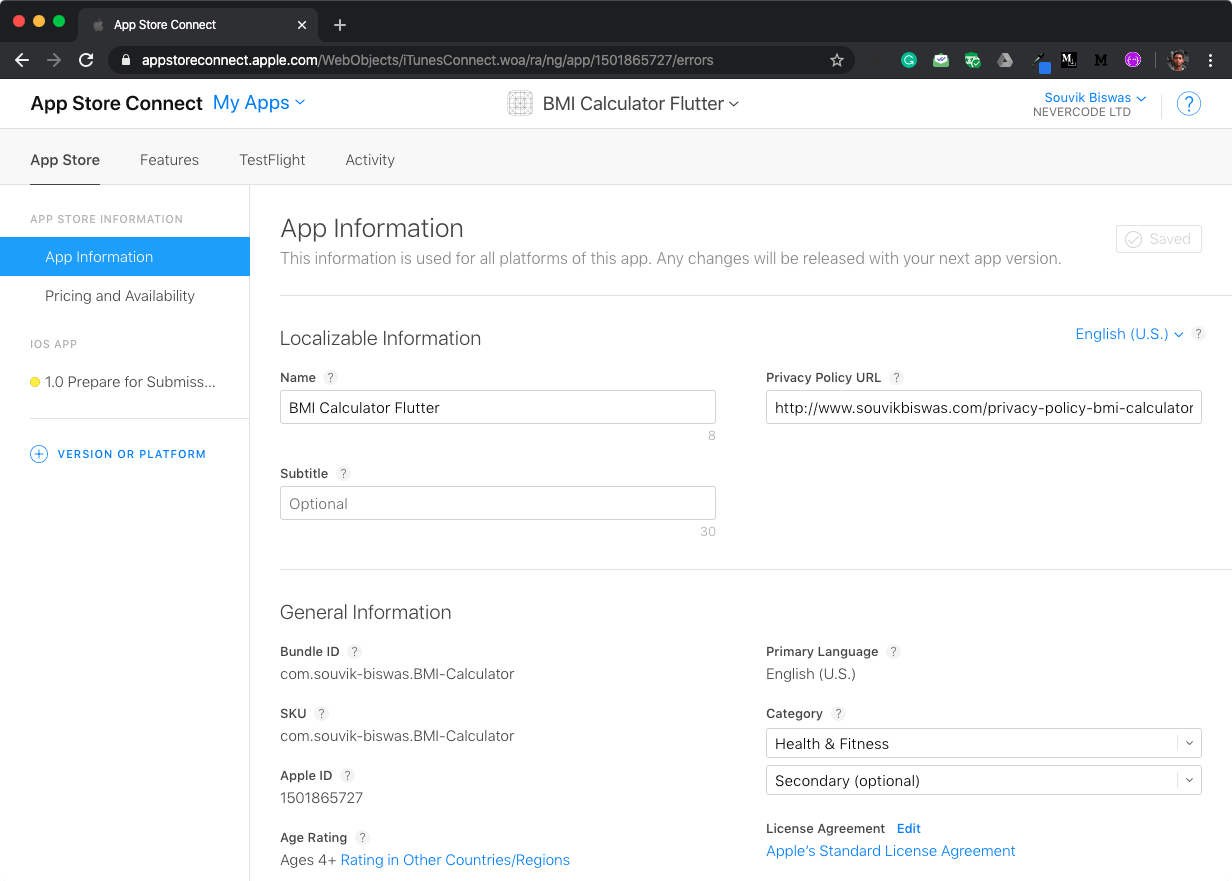
Go to your app on App Store Connect.
Under App Information, enter the Privacy Policy URL, select Age Rating and Category.
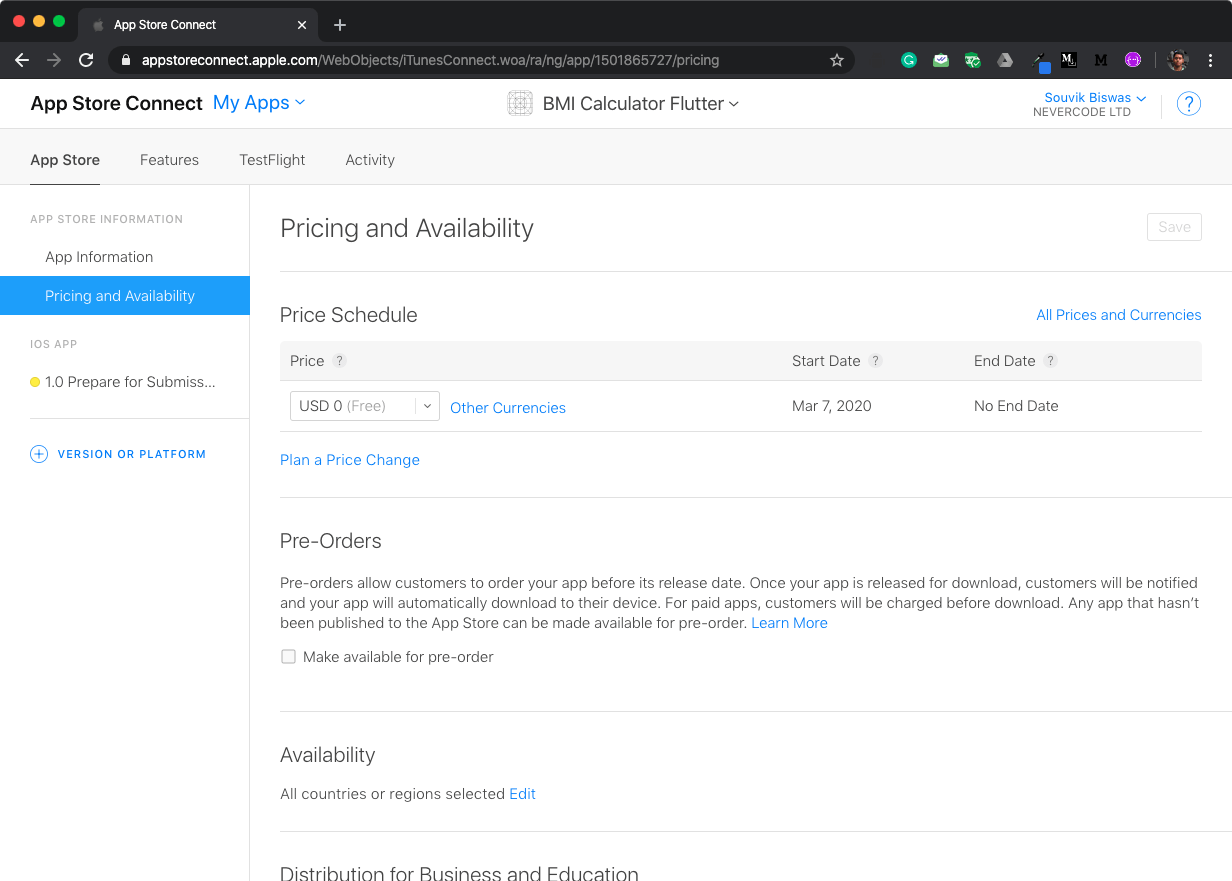
Under Pricing and Availability, select the price of the app and click on Save.
Go to the option Prepare for Submission, upload the Screenshots of the app for various screen sizes, and fill in all the other required information.
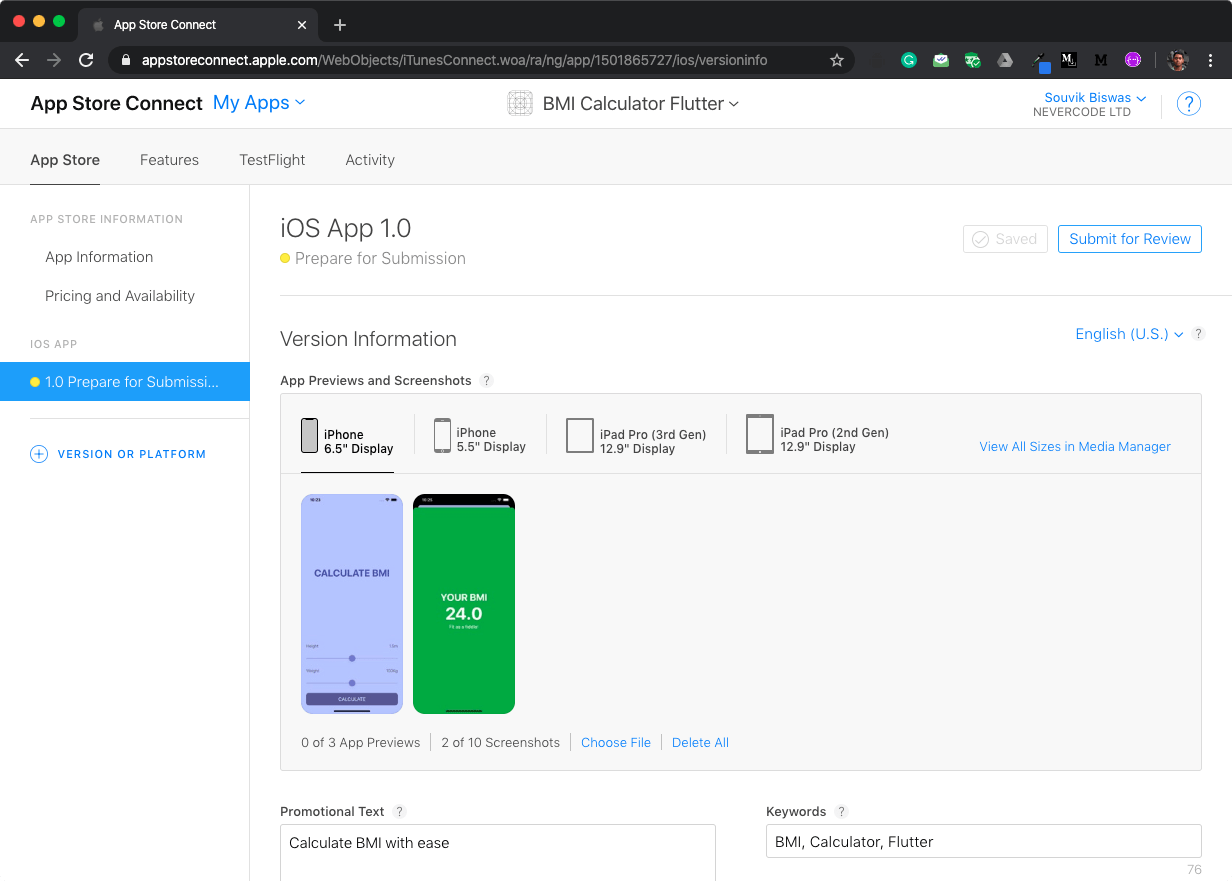
Select the Build version of the app that you want to publish, and enter the Copyright information.
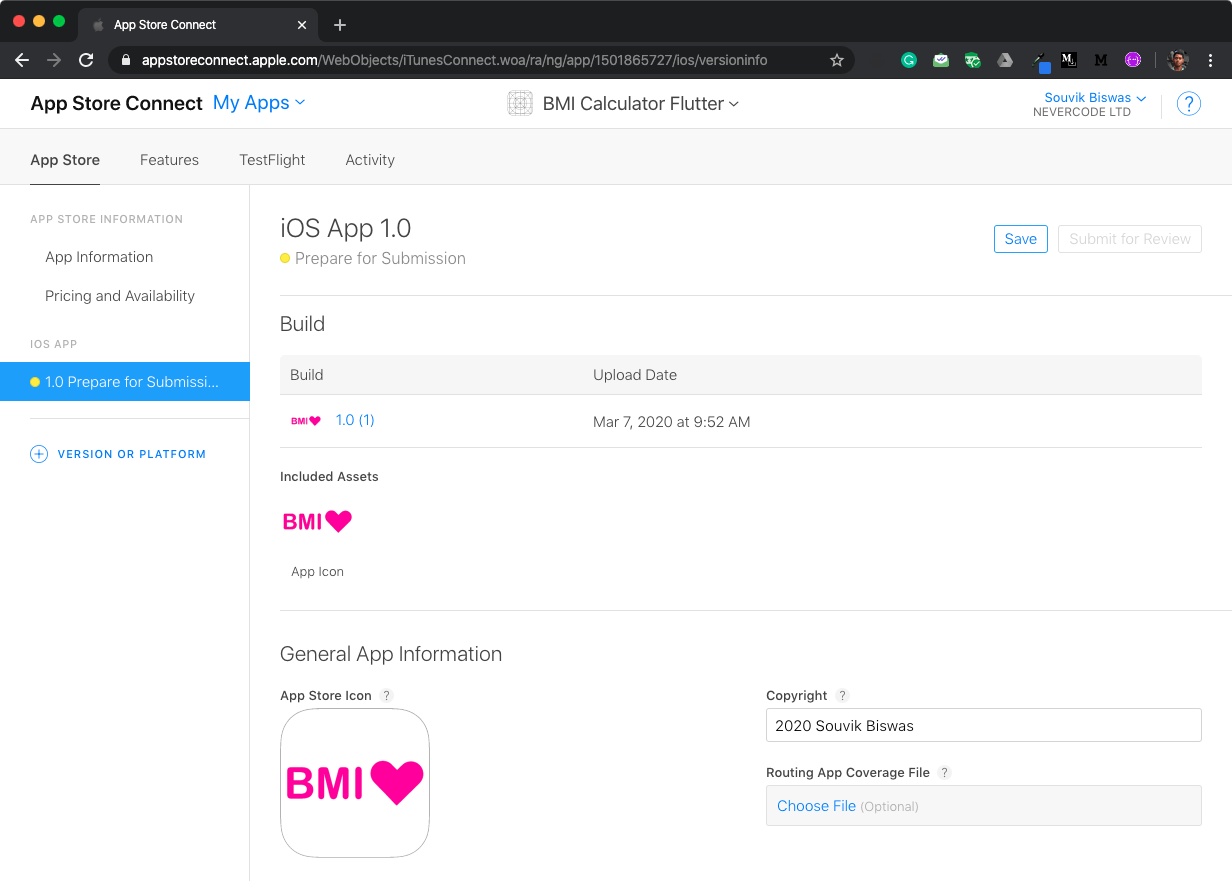
Click on Submit for Review.
Choose the appropriate options in the final form, and click on Submit.
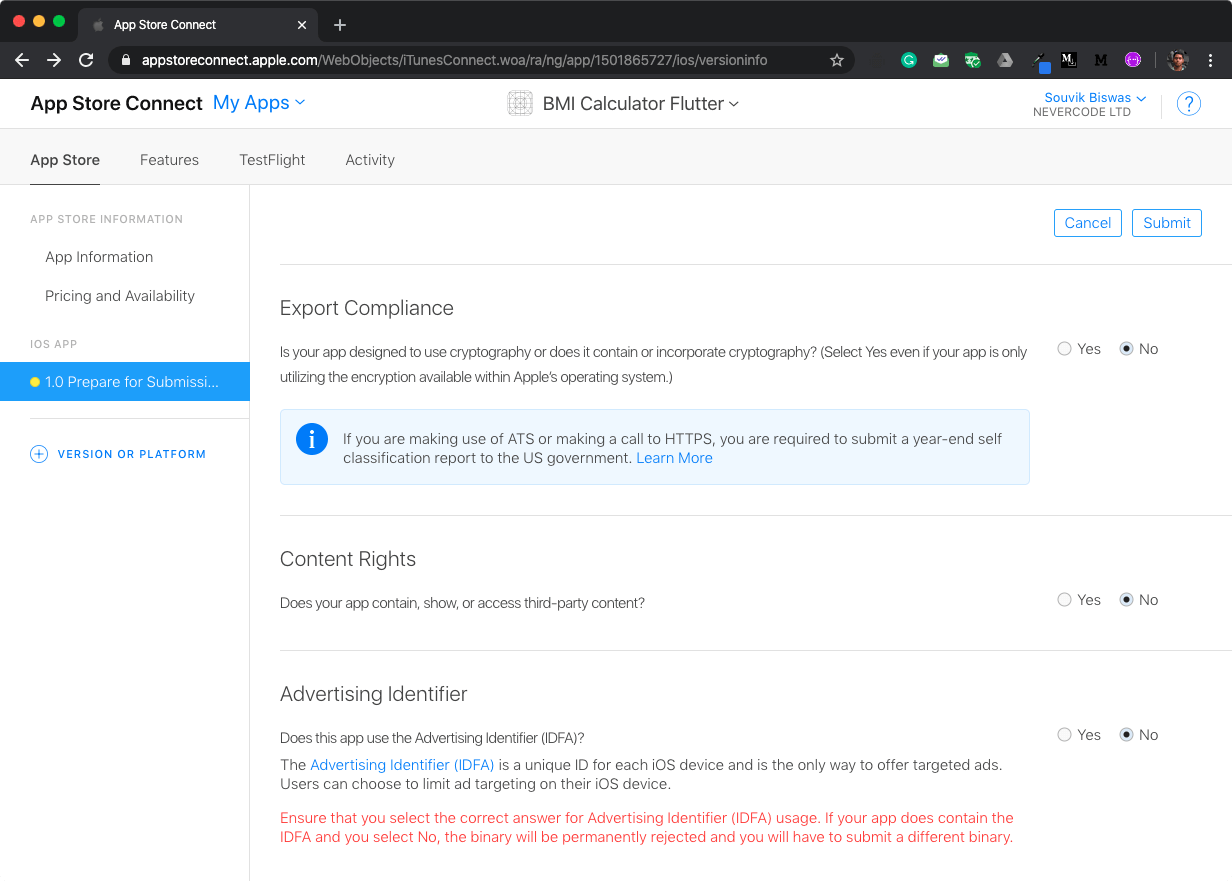
Finally, you have successfully sent your app for publishing. It will now go through a review process before it is uploaded to the Apple App Store.
Codemagic: Code signing and publishing
In a previous post, we explored how Codemagic code signs and distributes iOS apps. Codemagic allows both manual and automatic code-signing features. When you are ready to distribute the app, you can easily set up CI/CD for the app using Codemagic. (See the Getting Started Guide.)
You can also use codemagic.yaml to code sign your iOS app—take a look at this article.
Automatic code signing
To set up automatic code signing on Codemagic, navigate to Settings > Publish > iOS code signing >, and select Automatic.
If you do not have your Apple Developer Portal account connected to Codemagic, you will see a message like this:
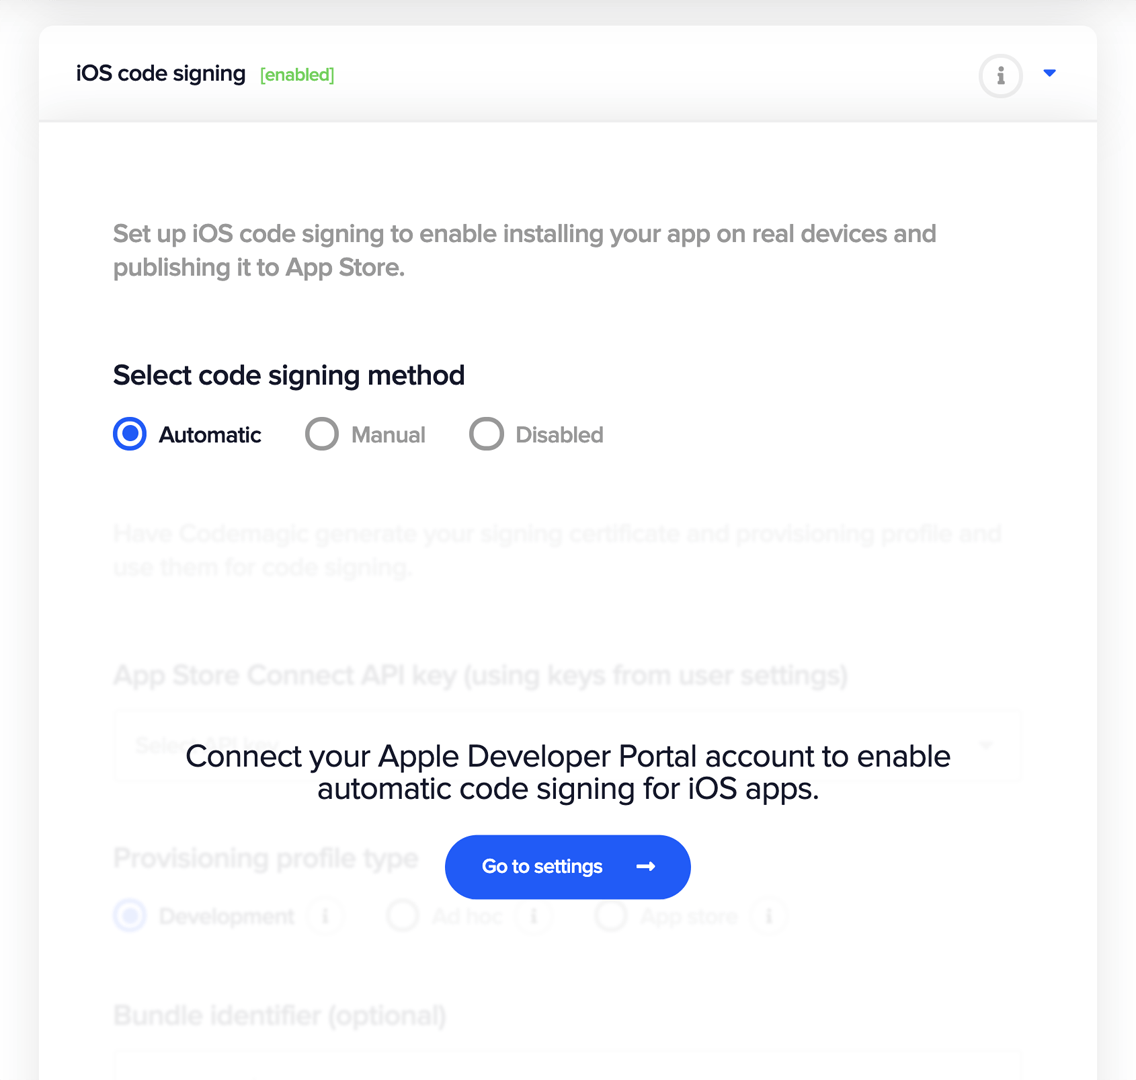
Go to User settings > Integrations, and connect your Developer Portal account. You will need to add the following information there:
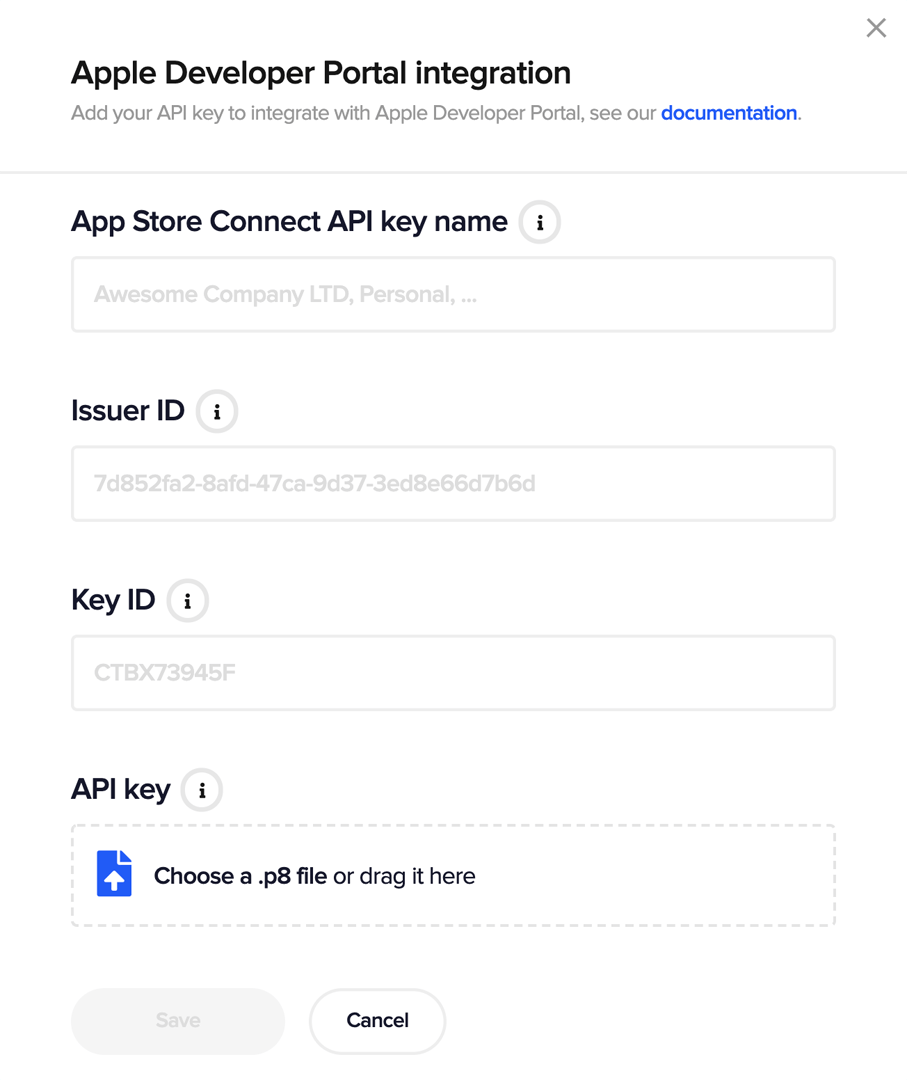
Follow the documentation here.
VIDEO: Flutter apps + Automatic iOS code signing
With Codemagic the automatic iOS code signing is possible via Flutter Workflow Editor:
Manual code signing
On Codemagic, you can do manual code signing by uploading the certificate and the provisioning profile you downloaded from the Apple Developer Portal. In the Codemagic app, navigate to Settings > Publish > iOS code signing > Manual, and upload your certificate and provisioning profile there.

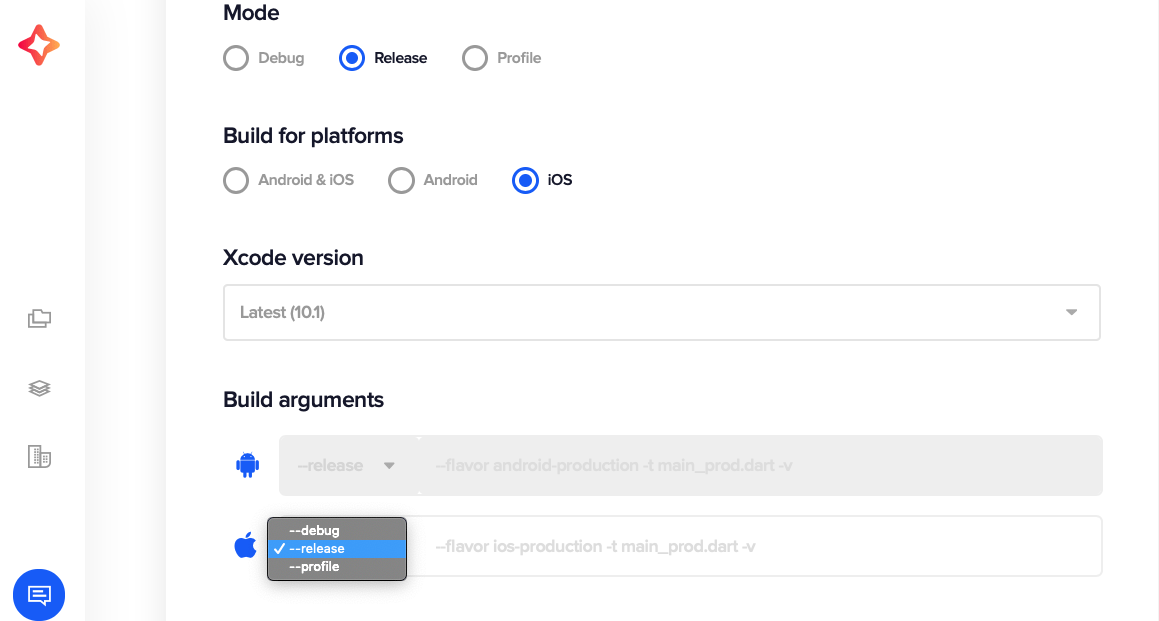
While building the app with Codemagic, we need to select Release mode so that the app can be distributed to the App Store.
In the Codemagic app settings, under Publish > App Store Connect, provide your Apple ID and the App-specific password.

Once Codemagic deploys the build artifact to App Store Connect, it will require some time for review. If it follows the App Store Review Guidelines, it will get deployed successfully to the App Store. You can follow the same process above to distribute apps to TestFlight.


VIDEO: Flutter apps + Manual iOS code signing
With Codemagic the manual iOS code signing is possible via Flutter Workflow Editor:
Xcode vs. Codemagic Distribution
We have now covered the iOS app distribution method using Xcode and Codemagic. In the process of releasing an app from Xcode, we have seen that there are various configuration and manual steps required for submitting an app to the App Store Connect portal. Also, remember that an engineer cannot work on anything else while Xcode is performing all these tasks. We need to have certificates in the local Mac, and the user needs to be logged in to Xcode with their App Store credentials. Most importantly, the user needs to have a macOS machine.
With Codemagic, however, we simply need to provide our certificate, profiles, and App Store credentials, and the rest of the app distribution work is done by Codemagic. Engineers do not have to babysit the distribution process. The most important thing is that you do not need to have a macOS machine.
Conclusion
You can use either local Xcode or a CI/CD tool to distribute apps to the App Store Connect portal. With Codemagic, we released the iOS version of the Flutter app to TestFlight in just a few steps, without a Mac, saving the engineers time. Codemagic has support for automatic signing, or if you want better control over provisioning profiles, it also supports customized signing.


