


This article is written by Mohammed Babelly
One of the great features that made Unity popular is its ability to provide builds for multiple platforms out of the box. But there may be scenarios in which you would like Unity to comprise just a part of your application, while the rest is written with some other framework. A typical use case is using Unity’s functionality inside a Flutter application.
Here are some of the reasons you may wish to do this:
- Increased performance: You can increase the performance of the app by using Unity for 3D graphics instead of Flutter’s 2D graphics capabilities alone.
- Better user experience: Embedding a Unity game in a Flutter application can provide a more immersive experience for users in which they can use Google’s Material and Apple’s Cupertino widgets in Flutter.
- Easier to reuse existing code: Existing Unity games can be easily integrated into Flutter applications, making it easier to reuse code and assets.
- Improved monetization: By combining the capabilities of Unity and Flutter, you can increase the app’s potential for monetization through in-app purchases and advertisements.
Communicating to the Unity app from a Flutter application is possible via the flutter_unity_widget package. So, in this article, let’s take a look at how to set it up and make an app with Flutter and Unity.
Topics
- Setting up the project structure
- Configuring the Unity project
- Configuring the Flutter project
- Sending messages to Flutter
- Sending messages to Unity
- Automating everything with Codemagic CI/CD
- Publishing the app to Google Play Store
Set up the project structure
The most important thing that we need to solve is making Flutter and Unity communicate with and recognize each other. To achieve this, we need to start by setting the project’s path so that they can communicate correctly.
You can do this by creating a new folder called unity/ in the root of your Flutter application and copying your whole Unity project into that folder. The expected path is unity/your-unity-game/...

Configure the Unity project
Once you’ve moved your Unity game to the new path inside your Flutter app, open your Unity project in Unity Editor. Now we can continue setting up the communication process.
In order for the communication to happen, you’ll need to import the fuw.unitypackage, which you can download from the official repo here.
Go to Assets → Import Package → Custom Package… and import your downloaded .unitypackage. Make sure to select all the files and click import.
💡 I used the
fuw-2022.1.7f1.unitypackagefile for this blog post.

After the package is imported, you should be able to see a new menu item in the Unity Editor called Flutter. If it’s there, we can continue.
Switch the platform to Android in your Build Settings.

Now, open Project Settings → Android tab → Other Settings and do the following:
- Disable
Multithreaded Rendering - Set your Package Name if you haven’t already
- Set the Minimum API Level to
28 - Set the Target API Level to
> 32 - Change the Scripting Backend to
Il2CPP - Check the
ARM64andARMv7Target Architectures

We have covered the prerequisites for building Unity Android apps in a separate blog post.
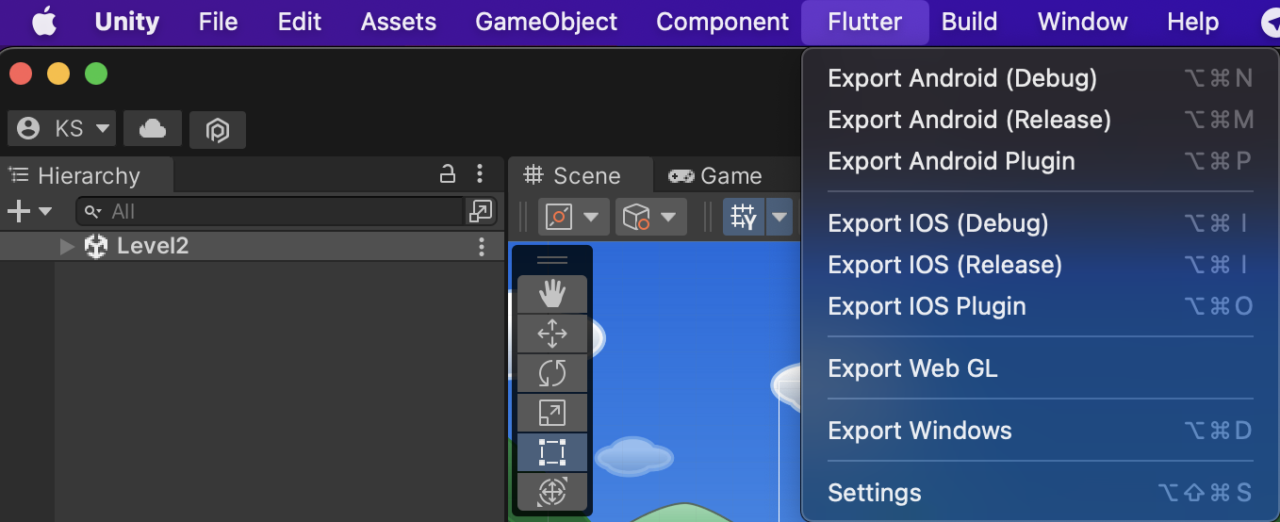
The only thing left to do is to select the Export Android option from the Flutter menu.
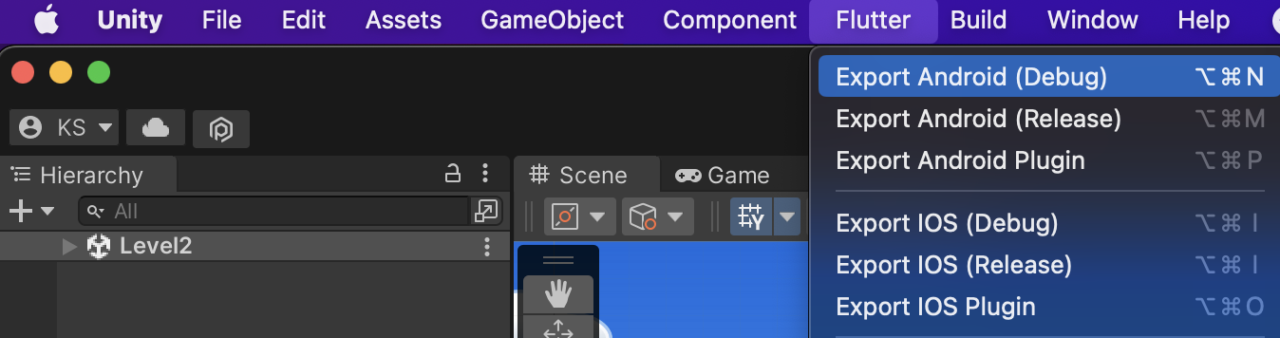
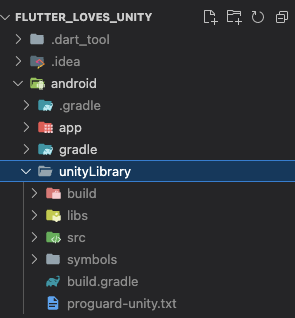
That’s it for the Unity Editor side. Now, if we open our Flutter application, we should see a folder called unityLibrary inside the android folder.
Let’s head to our Flutter application to find out what we need to configure there.
Configure the Flutter project
After we have exported the unityLibrary from Unity Editor, we need to make some configurations on the Flutter app side.
Modify the app/build.gradle file
Let’s change the following in our android/app/build.gradle file:
compileSdkVersion,minSdkVersion, andtargetSdkVersionUse the same values that we used when configuring our Unity application.ndkVersionUse the same NDK version that Unity is using — copy the NDK path from Preferences → External Tools in your Unity Editor.
💡 You can specify all of these values in your
local.propertiesfile and then read them from thebuild.gradlefile.
Modify the Build.cs file
The last change will be to our Build.cs file, which you can find under this path:
unity/your-game-name/Assets/FlutterUnityIntegration/Editor/Build.cs
- Comment out the namespace line to make the
Buildclass publicly accessible
// namespace FlutterUnityIntegration.Editor
- Remove the inheritance of the
EditorWindowclass
public static class Build //: EditorWindow
- Make all methods and variables static
- Add these lines to your
ModifyAndroidGradlemethod:
buildText = buildText.Replace("commandLineArgs.add(\"--dotnetprofile=unityaot-linux\")", "\n");
buildText = buildText.Replace("commandLineArgs.add(\"--enable-debugger\")", "\n");
buildText = buildText.Replace("commandLineArgs.add(\"--profiler-report\")", "\n");
buildText = buildText.Replace("commandLineArgs.add(\"--profiler-output-file=\" + workingDir + \"/build/il2cpp_\"+ abi + \"_\" + configuration + \"/il2cpp_conv.traceevents\")", "commandLineArgs.add(\"--configuration=\" + configuration)");
Use the widget with Unity in your Flutter app
Now let’s add the flutter_unity_widget package to your pubspec.yaml file and use the widget in our application like this:
    return Scaffold(
      key: _scaffoldKey,
      body: SafeArea(
        bottom: false,
        child: WillPopScope(
          onWillPop: null,
          child: Container(
            color: Colors.yellow,
            child: UnityWidget(
              onUnityCreated: onUnityCreated,
            ),
          ),
        ),
      ),
    );
If we run our application now, we should be able to play our Unity game inside of our Flutter application. Check out the source code of the final project here.
Send messages to Flutter
What would be more helpful than just running your Unity game inside of your Flutter application is being able to send messages between the two platforms.
In some cases, we may need to send some data from Unity to Flutter. To do this:
- In the Unity Editor, select the GameObject that should execute the communication, and select Inspector → Add Component → Unity Message Manager.

- Now, in your
MonoBehavioursubclass, importFlutterUnityIntegration.
using FlutterUnityIntegration;
- From the
UnityMessageManagerinstance, you can call theSendMessageToFluttermethod to send messages.
UnityMessageManager.Instance.SendMessageToFlutter("your-message-here");
- To receive the message from the Flutter side, use the
onUnityMessagecallback of aUnityWidgetlike this:
UnityWidget(
	   onUnityCreated: onUnityCreated,
     onUnityMessage: (msg) => print("Received message from unity: ${msg.toString()}"),
),
Send messages to Unity
OK, we now know how to send messages from Unity to Flutter, but it would also be great to have a feedback channel. So, we also want to have the ability to send messages back from Flutter to Unity. To achieve this, in our Flutter app, we need to specify the GameObject name, the name of the method we need to execute, and the message itself.
// Dart code
sendMessageFromFlutterToUnity(String message) {
    _unityWidgetController.postMessage(
      'GameObject',
      'MethodName',
      message,
    );
  }
In my case, I’m changing the game level when a Flutter button is clicked, so I’m sending a message with the level name to my LevelController and calling the level-changing method.
// C# code
public void ChangeCurrentLevel(String message){
        SceneManager.LoadScene(message);
}
And in my Dart code, I’m calling this function.
// Dart code
changeCurrentLevel(String levelName) {
    _unityWidgetController.postMessage(
      'LevelController',
      'ChangeCurrentLevel',
      levelName,
    );
  }
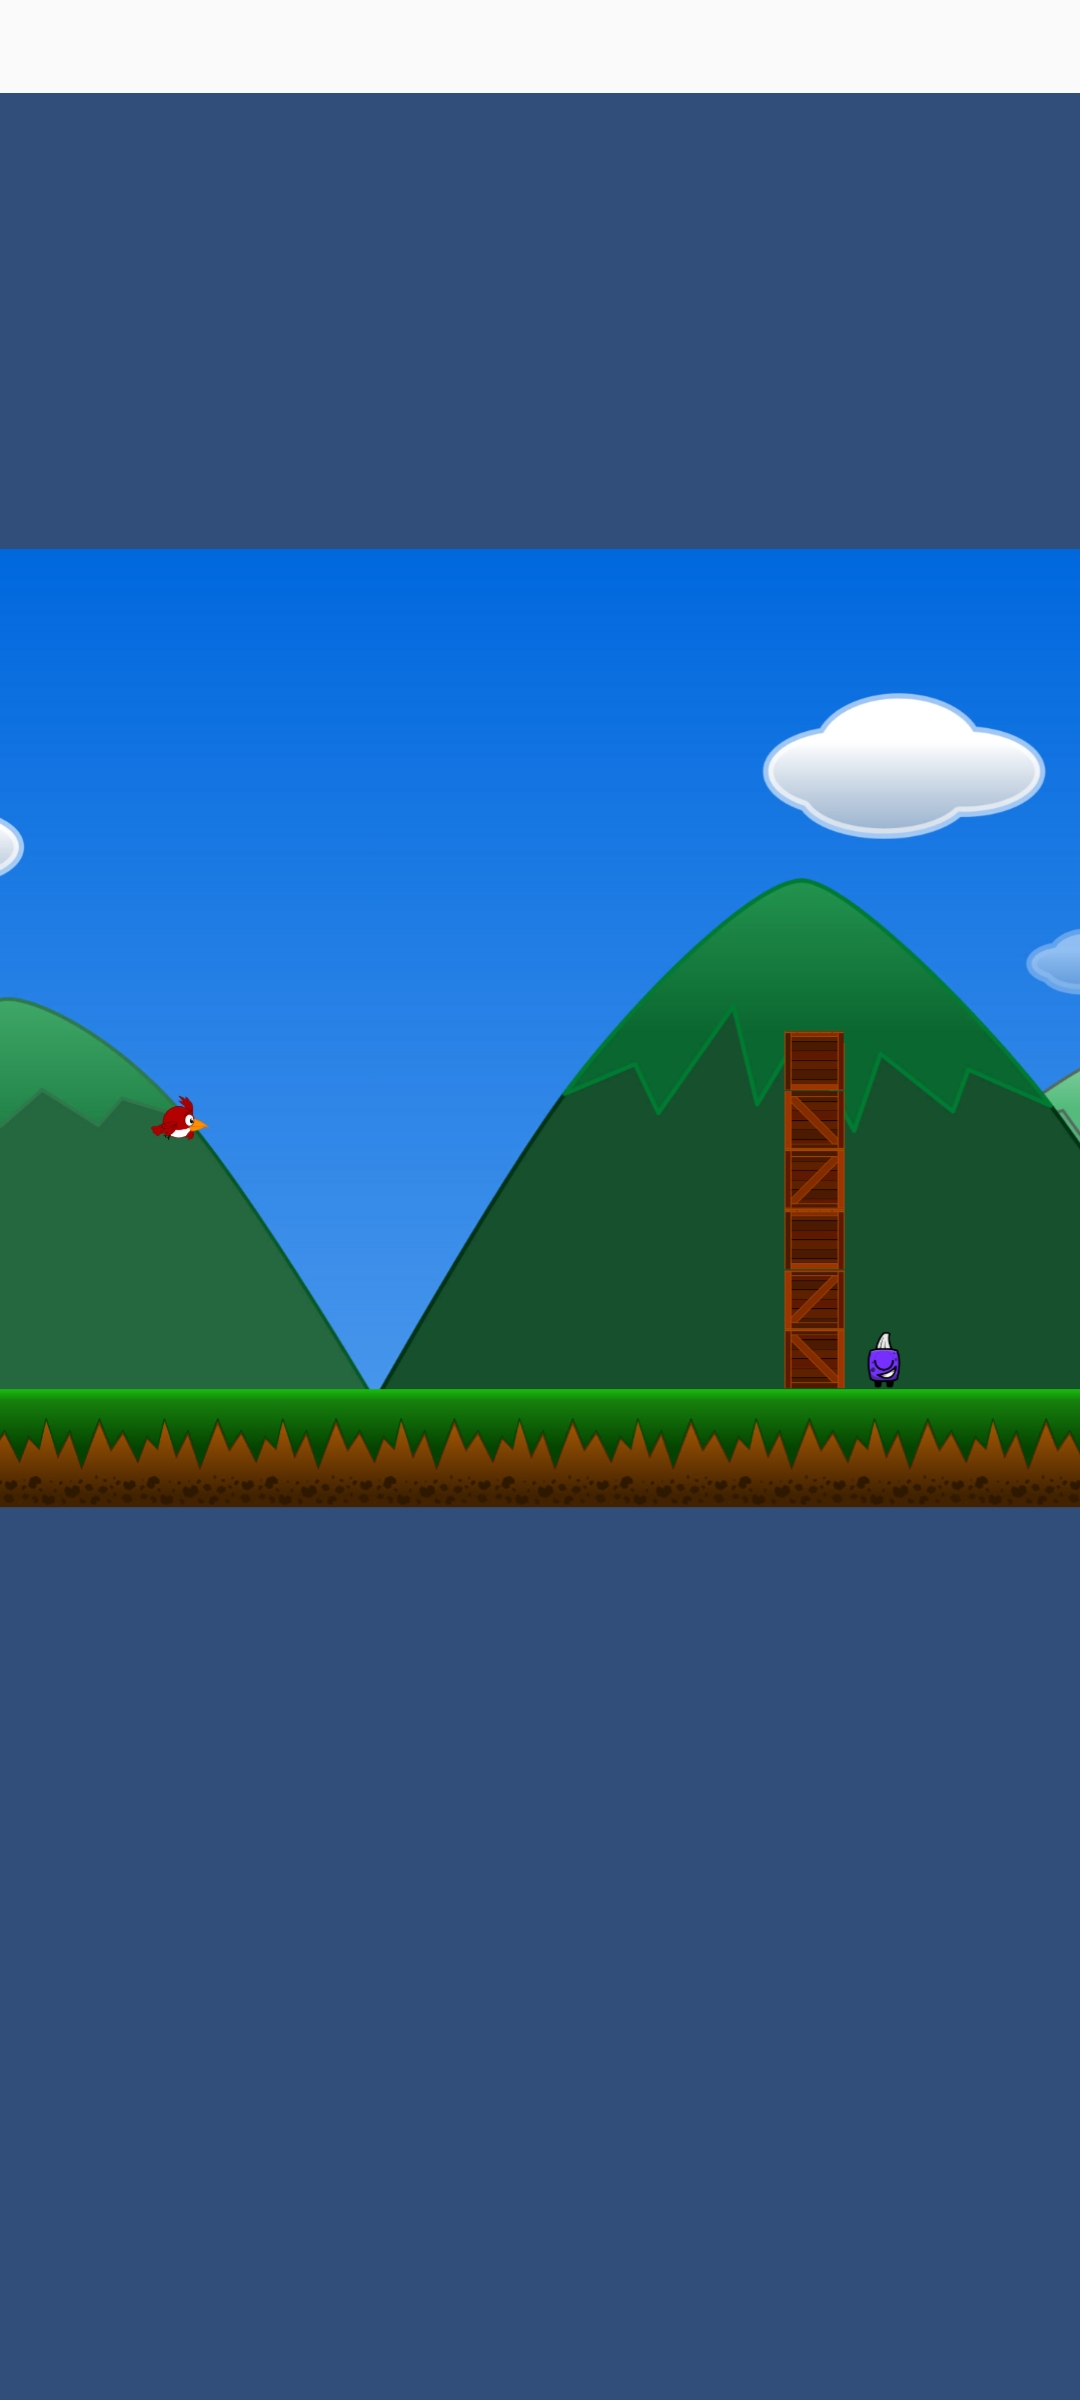
Here’s how a Unity game embedded into a Flutter app looks like:
Automate it all using Codemagic
Codemagic can manage the whole building and publishing process for you. All you need to do is configure your Unity and Flutter project as we discussed above, and Codemagic will automatically build your Unity library and continue to build the Flutter application.
Prerequisites
- An account with Codemagic. If you don’t have one, you can sign up here.
- A Unity Plus or Pro license.
If you’re new to Codemagic, you can read our blog post on Flutter Continuous Integration & Delivery (CI/CD) with Codemagic. But don’t worry — we’ll guide you through the steps, so there’s no need to be a Codemagic expert at this stage.
Add your Flutter project to Codemagic
To add your project to Codemagic, start by connecting it to a Git provider. If you have already done this, you can safely skip the next couple of subsections and go straight to the Add environment variables for Android app signing section. If not, proceed to add your project to a Git source control service, such as (GitHub, Bitbucket, or GitLab). Then follow the steps below to get started with Codemagic:
Connect Codemagic to the Git provider to which you uploaded your Unity project by going to the Integrations under the Settings section of Codemagic. Make sure you have given permission to access the repository where you have uploaded your app.
Navigate to the Applications page and click Add application.

Select the Team.
Select the Git provider:

Click Next: Authorize integration to authorize Codemagic. If you have already authorized your selected Git provider, click Next: Select repository instead.
Select your repository (or add the clone URL if you’re using the Others option) and the project type. Then click Finish: Add application.
You will be taken to the project settings. The Workflow Editor tab will be selected by default, but we’ll need to switch to codemagic.yaml.
Add your Unity credentials as secure environment variables to Codemagic
Your Unity serial number is used to activate Unity on the Codemagic build machine so that your Android project can be exported. The license is then returned in the publishing section of the YAML configuration, and it works even if one of the build steps fails. (Note, however, that if you manually cancel the build, the license will not be returned.)
To add the necessary Unity credentials to Codemagic, you will need to create an environment variable group called “unity” that contains environment variables named UNITY_SERIAL, UNITY_USERNAME, and UNITY_PASSWORD. This group of environment variables will be imported into the codemagic.yaml configuration file, as described in subsequent steps.
Create the required environment variables in Codemagic as follows:
- If you are using a Team, click on Teams > your Team name, and then click on Global variables and secrets. Otherwise, you can add the environment variables at the application level by clicking the Environment variables tab.
- Create a variable called
UNITY_SERIAL, and set the value to your Unity serial number. In the Select group dropdown, typeunityand click on the Create “unity” group button. Mark the variable as secure (the mark is actually ticked by default here and in all the following cases) to encrypt the value, and click the Add button. - Create a variable called
UNITY_USERNAME. Set the value to the email address used with your Unity ID, and add it to the “unity” group. Mark this as secure to encrypt the value, and click the Add button. - Create a variable called
UNITY_PASSWORD. Set the value to your Unity ID password, and add it to the “unity” group. Mark this as secure to encrypt the value, and click the Add button.

Note that the environment variable UNITY_HOME, which defines Unity’s installation location, is already set on the build machines. You can find the location on macOS here and the location on Windows here. In this tutorial, we’ll be using macOS machines.
Configure Codemagic for Unity Android apps using codemagic.yaml
Codemagic has the Unity SDK on both Windows and macOS machines. In this article, we’ll be using a macOS machine. To configure your build using YAML, go to your Unity project and create a new file inside the root directory called codemagic.yaml.
Add the following template to the file:
workflows:
  my-workflow:
    name: Workflow name
    max_build_duration: 120
    environment:
      groups:
        - ...
      vars:
        - ...

    scripts:
      - ...
    artifacts:
      - ...
    publishing:
      - ...
This is a basic workflow template for building apps on Codemagic. For more information, check out the docs.
Let’s modify the workflow by following the steps below:
Define an appropriate workflow name in the
workflowssection:workflows: unity-android-release-workflow: name: Unity Android release workflow max_build_duration: 120Import the environment variable groups you created earlier in the
groupssection:environment: groups: - unityIf you don’t want to use the default Unity Editor version, specify another version under the environment section. Check out the supported versions here:
environment:
      unity: 20XX.XX.XXfX
Set the following environment variables in the
varssection:vars: RELEASE_BUILD: DoBuildAndroidLibraryRelease GAME_FOLDER: <GAME_FOLDER_NAME>Replace the angle brackets with the appropriate values.
Under the
scriptssection, start by activating your Unity license:- name: Activate Unity License script: | $UNITY_HOME/Contents/MacOS/Unity -batchmode -quit -logFile \ -serial ${UNITY_SERIAL} \ -username ${UNITY_USERNAME} \ -password ${UNITY_PASSWORD}Unity build to export the Flutter Android library:
- name: Unity build to export the Flutter android library
        script: |
          $UNITY_HOME/Contents/MacOS/Unity -batchmode \
            -quit \
            -logFile \
            -projectPath /unity/$GAME_FOLDER \
            -executeMethod Build.$RELEASE_BUILD \
            -nographics \
            -buildTarget Android
-executeMethod Build.$RELEASE_BUILDtheBuildindicates to theBuild.csfile, and the$RELEASE_BUILDvariable refers to the Method name we want to execute.Set up local.properties:
- name: Set up local.properties
        script: |
          echo "flutter.sdk=$HOME/programs/flutter" >> "$CM_BUILD_DIR/android/local.properties"
          echo "ndk.dir=${UNITY_HOME%"Unity.app"}/PlaybackEngines/AndroidPlayer/NDK" >> "$CM_BUILD_DIR/android/local.properties"
Get Flutter packages:
- name: Flutter get packages
        script: flutter pub get
Build a release Flutter app:
- name: Flutter build apk
        script: flutter build apk --release
To retrieve the generated .apk, update the
artifactspath to the following:artifacts: - build/**/outputs/apk/**/*.apkUpdate the
publishingsection to return the Unity license:publishing: scripts: - name: Deactivate Unity License script: $UNITY_BIN -batchmode -quit -returnlicense -nographics
This completes the configuration of the codemagic.yaml file. If you want to see the full picture, you can find a working example of the codemagic.yaml file for Unity apps in the root folder of the sample project for this blog post. Now, just commit the file to your Git provider.
That’s it! You have successfully configured everything in both Unity and Codemagic, so it’s time to build your Unity Android project!
To learn about building and publishing Unity iOS apps with Codemagic, we suggest that you read this blog post.
Run your first build
To start building your Unity Android app using the YAML file, go to your app page on Codemagic, and click Start your first build. Select your workflow, and then click Start new build to start the build process. Depending on the project size, this can take from several to several dozen minutes.

Conclusion
Congratulations! 🚀 If you’ve been following the steps in this tutorial, you have successfully made Flutter and Unity communicate with each other and built a Flutter and Unity Android app using Codemagic. Well done! Thanks to Codemagic, the whole process has now been automated, which means you can save time and effort you would’ve otherwise spent manually building the Unity and Flutter sides separately.
You can also find a complete codemagic.yaml configuration file for building Unity and Flutter apps here. Need more details? Please refer to the docs.
If you feel like you’re stuck, don’t hesitate to ask for help: We try to answer every single question on GitHub Discussions, and users on the Professional or Enterprise plan can find guidance in the in-app chat.
Check out the source code of the final project here.


