


In this tutorial, Godwin Alexander Ekainu will show you how to add Google authentication for different flavors in your Flutter application. We will be using VS Code in this tutorial.
Intro
In this tutorial, we will learn the definitions of the different stages of production and their importance in development. We will also cover how to use different Firebase configurations in various environments. Additionally, we will learn about bloc widgets and what they do while managing our state in our Flutter application.
We will create a Flutter project to implement Google authentication for different flavors so that we can have different builds of the same application on our devices for testing.
Different stages
In large tech companies, projects are typically completed in three stages: development, staging, and production (though these stages might vary from company to company).
In these different stages, products are thoroughly tested to deal with bugs so that high-quality software products can be shipped to the consumer.
Development
In this stage, the initial building of the UI and integration of the API and back end are done in the development environment. The data you work with in this environment is usually a test API or test database, and none of the data is real. If new features are to be added to the application after release, they are first implemented from the development environment.
This stage involves a lot of code tests to ensure that the code is fully functional and the app performs efficiently. The type of testing performed in this stage is called unit testing.
Staging
In a staging environment, selected users can be brought in to test the app. This can give you a good idea of how the app will work once it goes live, as it can interact with real data. The staging environment tries to imitate production, so even if there is a major flaw and the system breaks, production doesn’t have to shut down.
All database migrations are tested at this stage. Features are also pushed to check for worst-case scenarios when new features are added. If new features break when pushed, the bugs are found and fixed.
If you have used WhatsApp Web, you have likely been prompted with a request to join a test program to test a new feature before it is made official. This is an example of what is known as beta testing.
Production
This is the stage in which the app goes live for users to try out. This is the most important phase for your company or client. In the production stage, you won’t want users to notice any major bugs, as you might end up losing users. Ideally, most of the major bugs in the software will have been dealt with in the previous stages by this point.
General development tip: You don’t need to roll out all of the software’s features at once. Prioritize keeping issues in check and ensuring the current features are stable before pushing out a new one.
Building our Flutter application
Manual configuration is needed to set up flavors in our Flutter application, which means we will have to work with many files in different directories. This might become very confusing, but things can be made a lot easier with the help of very_good_cli.
Setup
To create a new Flutter project, we will be using a Dart package called very_good_cli. This package will help us create a standard structure and set up all the environments we need in our application for both iOS and Android.
To install the tool, enter the following command in your terminal: dart pub global activate very_good_cli
After installing and activating very_good_cli, we can use the following command to create a Flutter project: very_good create my_app --desc "My new Flutter app" --org "com.custom.org"
Replace the content of your YAML file with the following:
name: googlesigninwithflavor
description: A Very Good Project created by Very Good CLI.
version: 1.0.0+1
publish_to: none
environment:
  sdk: ">=2.16.0 <3.0.0"
dependencies:
  bloc: ^8.0.3
  flutter:
    sdk: flutter
  flutter_bloc: ^8.0.1
  intl: ^0.17.0
  google_sign_in: ^5.2.4
  equatable: ^2.0.3
  firebase_core: ^1.14.0
  firebase_auth: ^3.3.13
dev_dependencies:
  bloc_test: ^9.0.3
  flutter_test:
    sdk: flutter
  mocktail: ^0.3.0
  very_good_analysis: ^2.4.0
flutter:
  uses-material-design: true
  generate: true
  assets:
    - asset/
File structure
lib
├─ app
│  ├─ bloc
│  │  ├─ google_sign_in_bloc.dart
│  │  ├─ google_sign_in_event.dart
│  │  └─ google_sign_in_state.dart
│  ├─ view
│  │  ├─ app.dart
│  │  └─ google_sign_in_view.dart
│  └─ app.dart
├─ dashboard
│  └─ dashboard.dart
├─ repository
│  └─ authentication_repository.dart
├─ bootstrap.dart
├─ generated_plugin_registrant.dart
├─ main_development.dart
├─ main_production.dart
└─ main_staging.dart
When we create our project, we see three different main files named according to the three stages of production. Each of these files can have different setups as required at that particular stage of production.
main_development.dart
main_production.dart
main_staging.dart
We can run any flavor by passing the following arguments into our terminal:
# For Development
flutter run --flavor development --t lib/main_development.dart
# For Staging
flutter run --flavor development --t lib/main_staging.dart
# For Production
flutter run --flavor development --t lib/main_production.dart
For Android, the file we usually deal with during setups for different flavors is the build.gradle file in our Android directory.
For iOS, the files we will work with are Xcode schemes. However, we won’t need to do this since they have already been generated for us by very_good_cli.

Setting up Firebase for our different environments
Recently, Firebase introduced the Firebase CLI, which has made configuring Firebase projects easy and seamless. However, there are some features it doesn’t support yet, like analytics and Google Sign-In. Since we will be using Google Sign-In, we need to manually set up Firebase. Therefore, we’ll be manually setting up our Firebase projects.
In our Firebase console, we will create three different projects as follows:
flavor devflavor stgflavor prod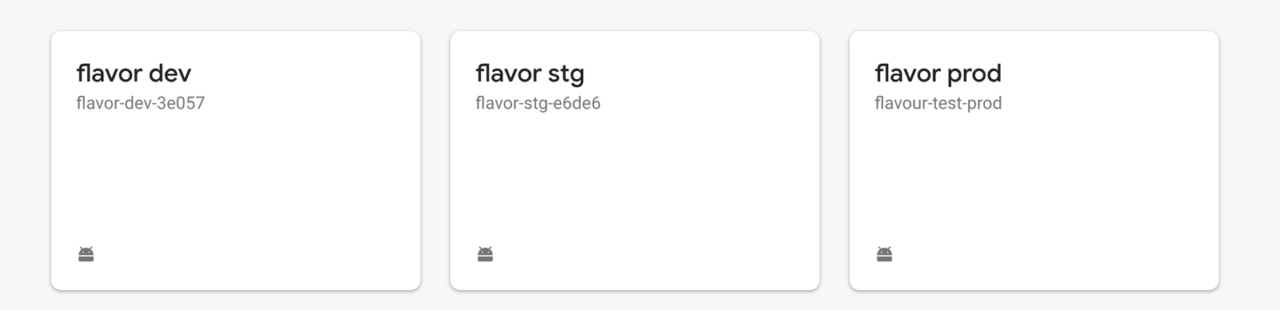
When registering our Flutter project in Firebase, we have to add .dev, .stg, or .prd to our Android package name.
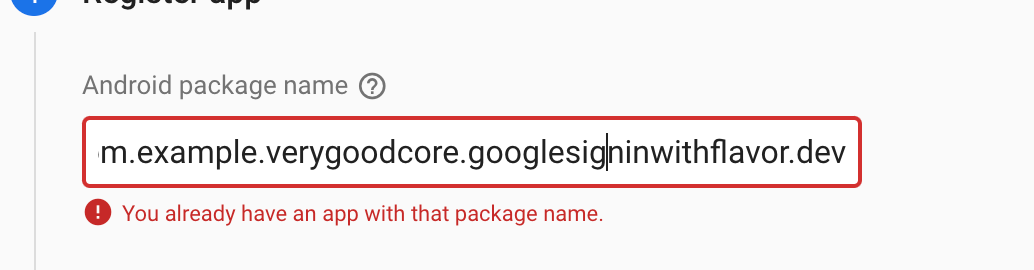
You can find the package name in your android/app/build.gradle file. It is displayed as the applicationId, as shown below.
 defaultConfig {
        applicationId "com.example.verygoodcore.googlesigninwithflavor"
        minSdkVersion flutter.minSdkVersion
        targetSdkVersion flutter.targetSdkVersion
        versionCode flutterVersionCode.toInteger()
        versionName flutterVersionName
    }
    flavorDimensions "default"
    productFlavors {
        production {
            dimension "default"
            applicationIdSuffix ""
            manifestPlaceholders = [appName: "Googlesigninwithflavor"]
        }
        staging {
            dimension "default"
            applicationIdSuffix ".stg"
            manifestPlaceholders = [appName: "[STG] Googlesigninwithflavor"]
        }
        development {
            dimension "default"
            applicationIdSuffix ".dev"
            manifestPlaceholders = [appName: "[DEV] Googlesigninwithflavor"]
        }
    }
For iOS
When registering for iOS, we also need to enter the correct bundle ID. However, Xcode can be difficult to navigate if you don’t have prior experience with it. We can find the bundle ID by following these steps:
Open Xcode
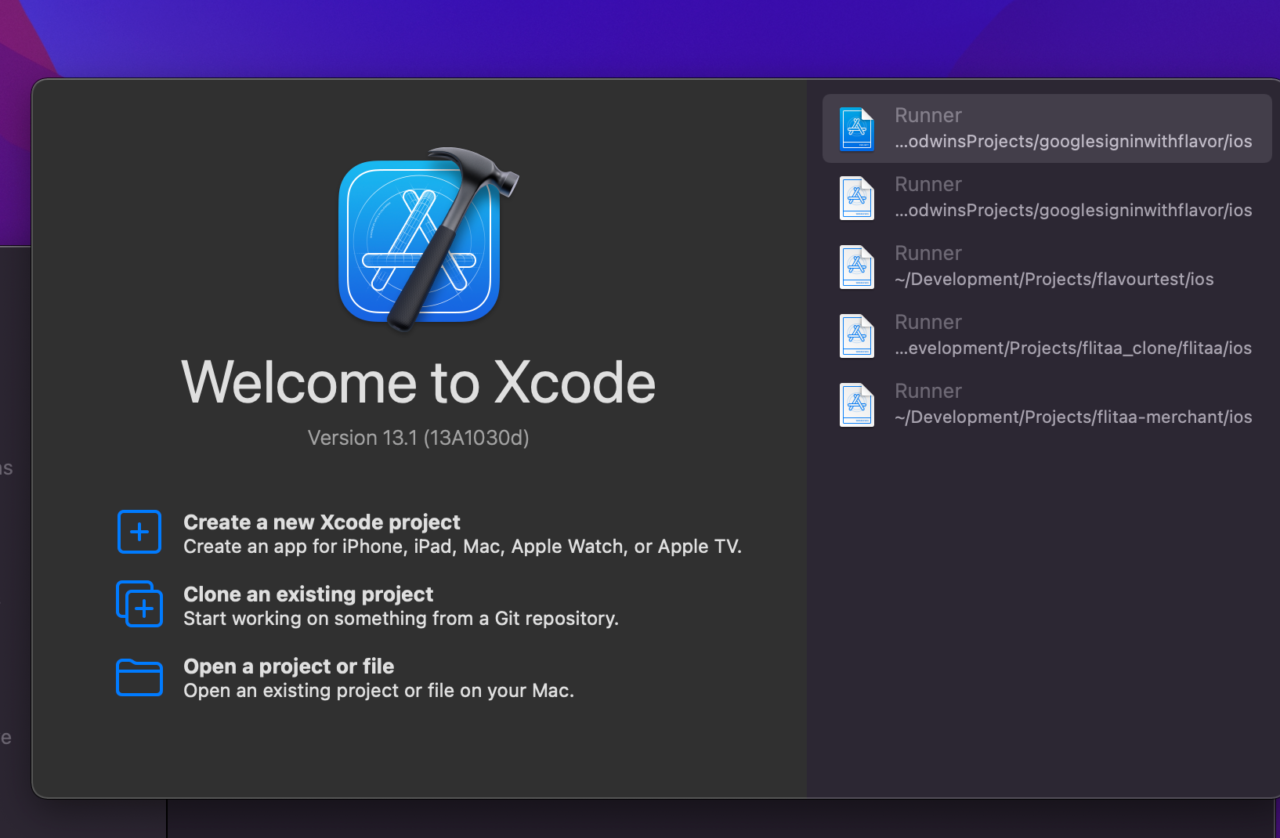
Click on
Open a project or file.Go to your Flutter project and open the iOS directory. Select the
Runner.xcworkspacedirectory.Next, click on the Runner dropdown. In the General View tab, select
Build Settings, and we will find our app bundle right there.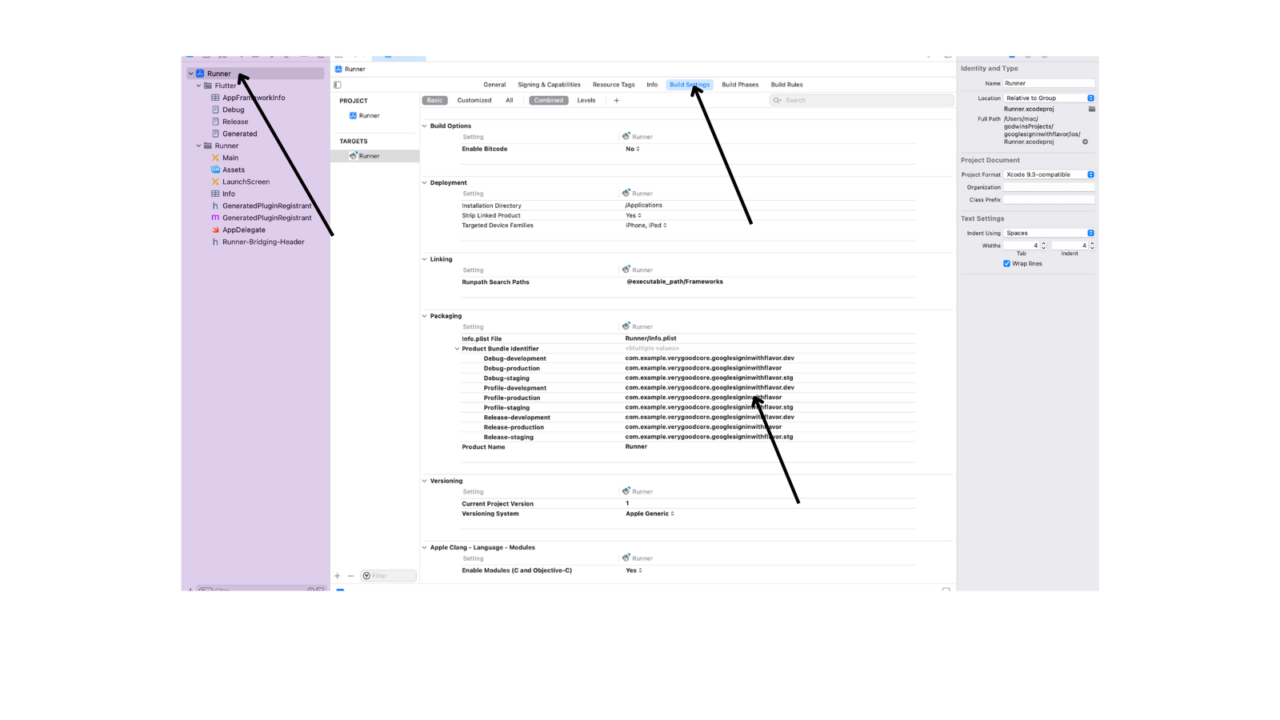
We’ll repeat these steps for all of our Firebase projects. After registration, we can download the google-services.json file for Android and GoogleService-Info.plist for iOS.
The google-services.json files will be moved to android/app/src/{respective environment}. For iOS, we will create a new config directory that has subdirectories of our environments and add GoogleService-Info.plist to the various environments. We will add this file to the Runner in Xcode. Read this Firebase guide for more information.
Setup to implement Google Authentication
To use Google authentication in our application, we need to enable Google Provider with the following steps. We will be enabling Google Provider in our development environment.
Go to Firebase. In this tutorial, we will start with the development project.
In the main navigation bar, select Authentication. You should see the following:
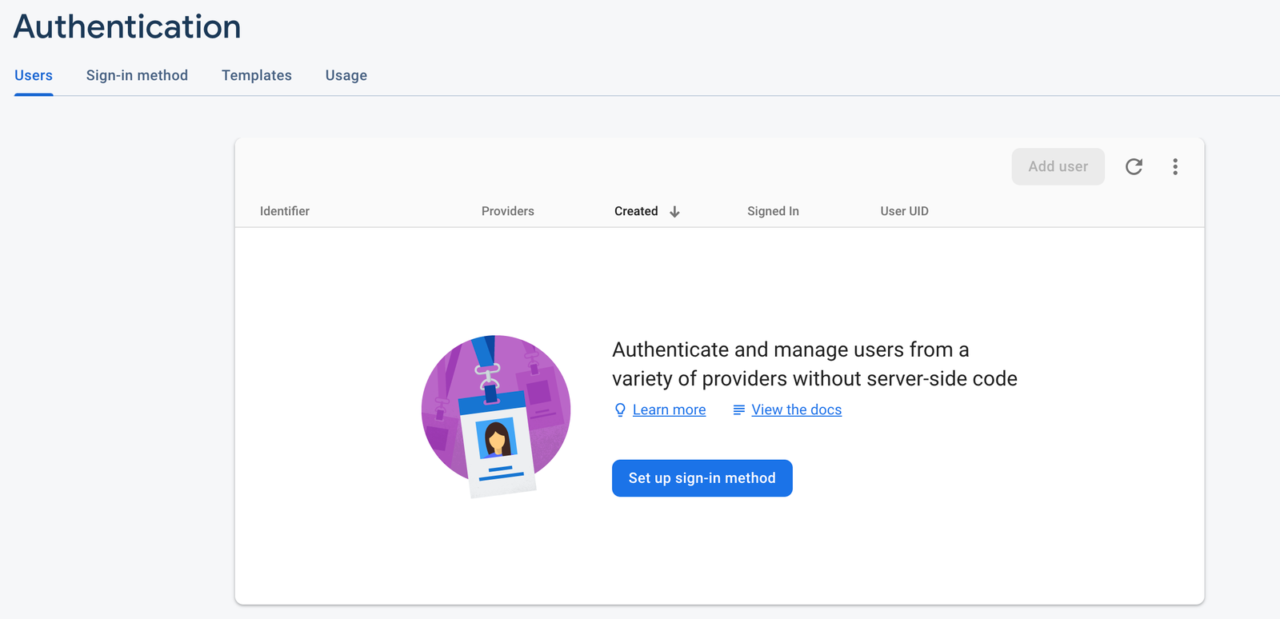
Next, click on
Set up sign-in method. A list of providers will be displayed. Select Google Sign-In, and then you should see this: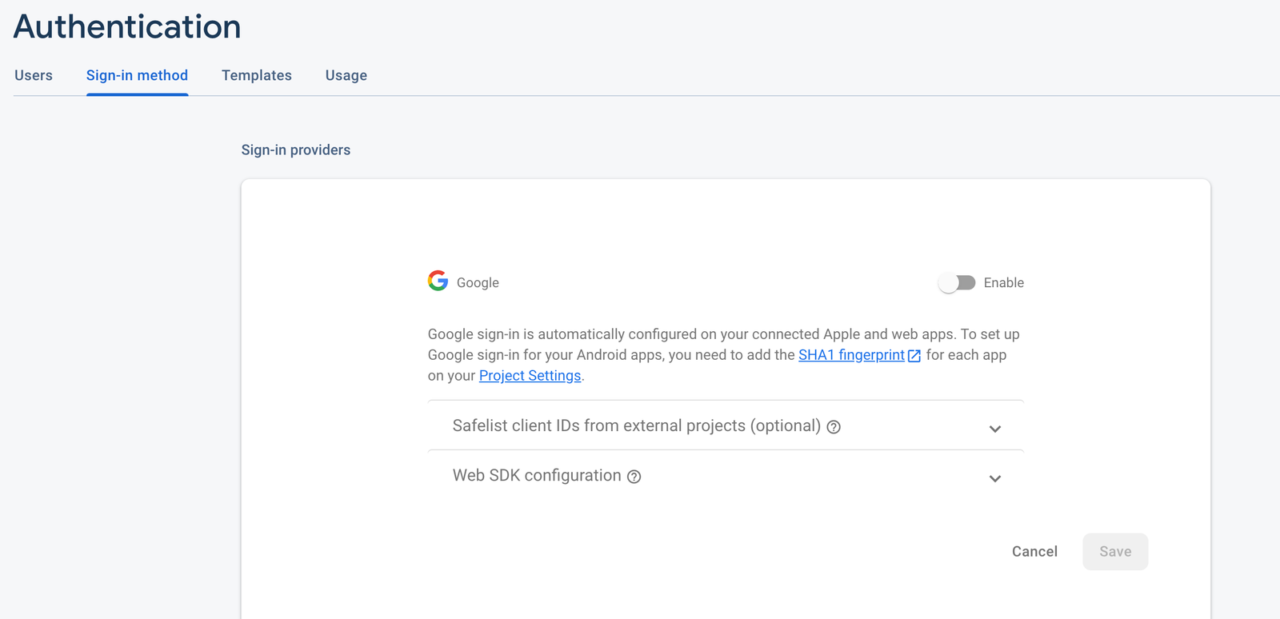
Toggle
Enableon and add a support email for the project, as shown in the image below. Then save your settings.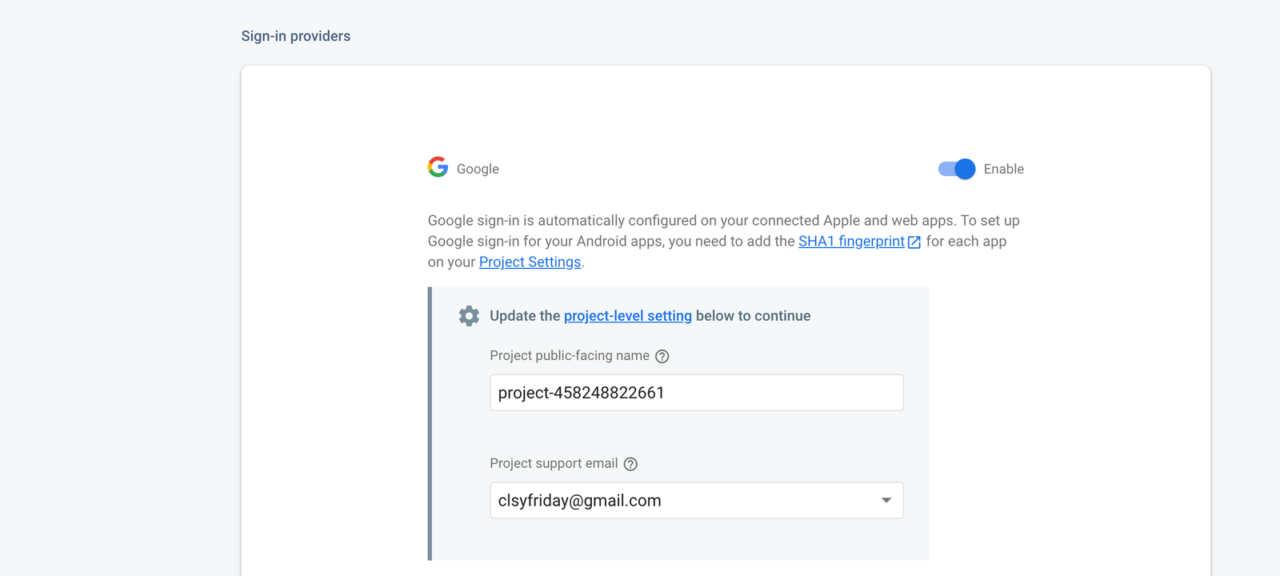
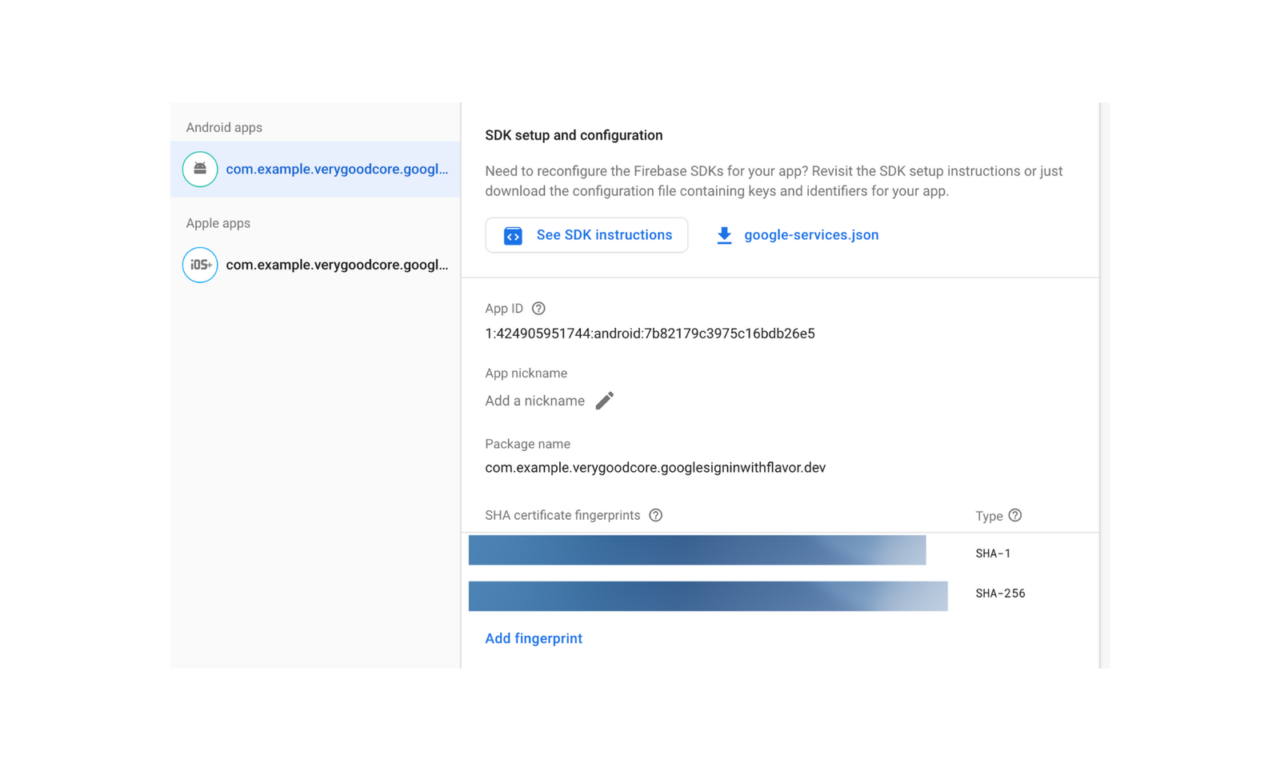
In the navigation bar, click the settings icon and select
Project settingsfrom the dropdown. Then scroll to the bottom of the page. We need to add aSHA-1 keyand aSHA-256 keyfrom our project.To add SHA keys or fingerprints, we would go back to our project, right-click on the Android folder, and click on
Open in an integrated terminal. This should open a new terminal for us in our VS Code environment.In your terminal, use the command
./gradlew signingReportto get the keys. After running this command, we should get various signing keys because of the multiple environments. Use the development debug SHA-1 keys in your terminal.Alternative: In your code editor’s terminal, you can change the directory to the Android folder and run the command.
Click the save button and download the updated
google-services.jsonfile. Replace thegoogle-services.jsonfile in your development environment. In our case, we will be adding it to the development environment.
Note: The SHA-1 key is required by Firebase to make Google Sign-In work properly.
We just enabled Google authentication! We will implement it in the next section.
Implementing Google Authentication in our Flutter project
We will be using bloc for our state management. Bloc is the state manager added by very_good_cli.
Creating a repository
The repository is like a service that serves our bloc with the data we need to send to our UI layer. The repository is responsible for making direct API calls as requested by the bloc. We will implement our repository as follows:
import 'dart:developer';
import 'package:firebase_auth/firebase_auth.dart';
import 'package:google_sign_in/google_sign_in.dart';
class AuthenticationRepository {
  Future<bool> signInWithGoogle() async {
    try {
      final user = GoogleSignIn().currentUser ?? await GoogleSignIn().signIn();
      if (user != null) {
        await GoogleSignIn().signOut();
      }
      final googleAuth = await user?.authentication;
      final credential = GoogleAuthProvider.credential(
        accessToken: googleAuth?.accessToken,
        idToken: googleAuth?.idToken,
      );
      await FirebaseAuth.instance.signInWithCredential(credential);
      return true;
    } catch (e) {
      log('An Error Occurred $e');
      return false;
    }
  }

  Future<void> handleSignOut() => GoogleSignIn().disconnect();
  // Future<void> signOut() async {
  //   final _googleSignIn = GoogleSignIn();
  //   _googleSignIn.disconnect();
  // }
}
Bloc events
For our project, we will be needing two events, GoogleSignInRequested and GoogleSignOutRequested. We can implement this with the following:
part of 'google_sign_in_bloc.dart';
abstract class GoogleSignInEvent extends Equatable {
  const GoogleSignInEvent();
  @override
  List<Object> get props => [];
}
class GoogleSignInRequested extends GoogleSignInEvent {}
class GoogleSignOutRequested extends GoogleSignInEvent {}
Creating bloc state
We will also need two states — one for when the user is Authenticated and another for when the user is UnAuthenticated:
part of 'google_sign_in_bloc.dart';
abstract class GoogleSignInState extends Equatable {
  @override
  List<Object?> get props => [];
}
class UnAuthenticated extends GoogleSignInState {}
class Authenticated extends GoogleSignInState {}
Creating our bloc
Our bloc will be exposing two states to our UI: Authenticated when the user is logged in and UnAuthenticated when the user logs out from the dashboard.
We will implement this as follows:
import 'package:bloc/bloc.dart';
import 'package:equatable/equatable.dart';
import 'package:googlesigninwithflavor/repository/authentication_repository.dart';
part 'google_sign_in_event.dart';
part 'google_sign_in_state.dart';
class GoogleSignInBloc extends Bloc<GoogleSignInEvent, GoogleSignInState> {
  GoogleSignInBloc({required this.authenticationRepository})
      : super(UnAuthenticated()) {
    on<GoogleSignInRequested>(_onGoogleSignInPressed);
    on<GoogleSignOutRequested>(_onGoogleSignOutPressed);
  }
  final AuthenticationRepository authenticationRepository;
  Future<void> _onGoogleSignInPressed(
    GoogleSignInRequested event,
    Emitter<GoogleSignInState> emit,
  ) async {
    final response = await authenticationRepository.signInWithGoogle();
    if (response) {
      emit(Authenticated());
    }
  }
  void _onGoogleSignOutPressed(
    GoogleSignOutRequested event,
    Emitter<GoogleSignInState> emit,
  ) {
    authenticationRepository.handleSignOut();
    emit(UnAuthenticated());
  }
}
Building our UI
Our app.dart class will render our homescreen like this:
import 'package:flutter/material.dart';
import 'package:googlesigninwithflavor/app/view/google_sign_in_view.dart';
class App extends StatelessWidget {
  const App({Key? key}) : super(key: key);
  @override
  Widget build(BuildContext context) {
    return MaterialApp(
      theme: ThemeData(
        appBarTheme: const AppBarTheme(color: Color(0xFF13B9FF)),
        colorScheme: ColorScheme.fromSwatch(
          accentColor: const Color(0xFF13B9FF),
        ),
      ),
      home: const GoogleSignInView(),
    );
  }
}
google_sign_in_view.dart will hold the implementation for our home screen and a sign-in button.
class GoogleSignInView extends StatelessWidget {
  const GoogleSignInView({Key? key}) : super(key: key);
  @override
  Widget build(BuildContext context) {
    return RepositoryProvider(
      create: (context) => AuthenticationRepository(),
      child: BlocProvider(
        create: (context) => GoogleSignInBloc(
          authenticationRepository: RepositoryProvider.of(context),
        ),
        child: Scaffold(
          appBar: AppBar(
            title: const Text('Sign In With Google'),
          ),
          body: const ShowSignInButton(),
        ),
      ),
    );
  }
}
In the code above, we used the RepositoryProvider widget to create an instance of our repository and a child that will give us access to the repository via RepositoryProvider.of(context).
We also used the BlocProvider widget to create an instance of our Bloc so that it can be accessed by the subtree or the children widgets.
Next, we will use the bloc in our children widgets like this:
class ShowSignInButton extends StatelessWidget {
  const ShowSignInButton({Key? key}) : super(key: key);
  @override
  Widget build(BuildContext context) {
    return BlocListener<GoogleSignInBloc, GoogleSignInState>(
      listener: (context, state) {
        if (state is Authenticated) {
          Navigator.push<Type>(
            context,
            MaterialPageRoute(builder: (_) => const DashBoard()),
          );
        }
      },
      child: Column(
        mainAxisAlignment: MainAxisAlignment.center,
        children: [
          Center(
            child: Image.asset(
              'asset/google2.png',
              height: 60,
            ),
          ),
          ElevatedButton(
            onPressed: () {
              context.read<GoogleSignInBloc>().add(GoogleSignInRequested());
            },
            child: const Text('Sign In With Google'),
          ),
        ],
      ),
    );
  }
}
Here, we used the BlocListner to navigate to a different screen based on the state emitted by the bloc.
We also passed the GoogleSignInRequested event to our ElevatedButton, so when a user clicks the button to sign in with Google, the event is passed to the bloc, and a request is made to the GoogleSignIn API.
Let’s also implement a dashboard screen to display the details of the authenticated user. To implement this, we will need to call the Firebase Auth instance to access the details of the current user. We will also create a logout button that will take the user back to the sign-in screen using the BlocListner widget:
class DashBoard extends StatelessWidget {
  const DashBoard({Key? key}) : super(key: key);
  @override
  Widget build(BuildContext context) {
    return RepositoryProvider(
      create: (context) => AuthenticationRepository(),
      child: BlocProvider(
        create: (context) => GoogleSignInBloc(
          authenticationRepository: RepositoryProvider.of(context),
        ),
        child: DashBoardDetails(),
      ),
    );
  }
}
class DashBoardDetails extends StatelessWidget {
  DashBoardDetails({
    Key? key,
  }) : super(key: key);
  final user = FirebaseAuth.instance.currentUser!;
  @override
  Widget build(BuildContext context) {
    return BlocListener<GoogleSignInBloc, GoogleSignInState>(
      listener: (context, state) {
        if (state is UnAuthenticated) {
          Navigator.of(context).pushAndRemoveUntil<Type>(
            MaterialPageRoute(builder: (context) => const GoogleSignInView()),
            (route) => false,
          );
        }
      },
      child: Scaffold(
        appBar: AppBar(
          title: const Text('Very Good Codemagic'),
        ),
        body: BlocBuilder<GoogleSignInBloc, GoogleSignInState>(
          builder: (context, state) {
            return Column(
              mainAxisAlignment: MainAxisAlignment.center,
              children: [
                const Center(
                  child: Text('Welcome to your Dashboard'),
                ),
                Text('${user.displayName}'),
                if (user.photoURL != null)
                  Image.network('${user.photoURL}')
                else
                  Container(),
                ElevatedButton(
                  onPressed: () {
                    context
                        .read<GoogleSignInBloc>()
                        .add(GoogleSignOutRequested());
                  },
                  child: const Text('Sign Out'),
                )
              ],
            );
          },
        ),
      ),
    );
  }
}
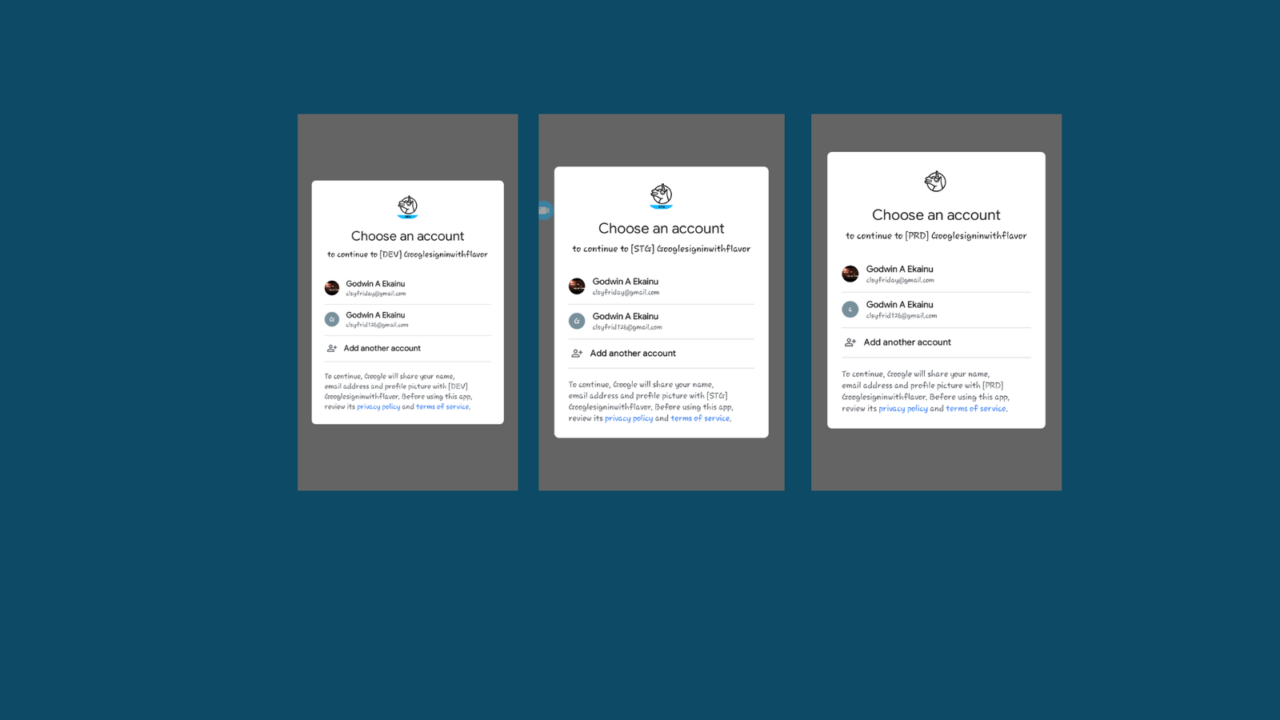
Hurray! 🎉 We just successfully created Google Sign-In authentication for our development, staging, and production environments.

Resources
This article is written by Godwin Alexander Ekainu. He is a Nigerian based software developer who is keen to passing knowledge and explaining complex topics to help other developers learn.You can find him from Twitter and LinkedIn.


