This article is written by Masaki Sato.
In this article, I will introduce the steps to release a Flutter app to the App Store using the Codemagic CI/CD.
If you have been uploading your app to App Store Connect manually using Xcode and want to simplify that process, I hope you find this article helpful 🙌
What you will achieve with this article
By following the steps in this article, you will be able to automate the upload of your app to App Store Connect.
In other words, during your daily development, you will be able to release to the store with the following flow:
Merge the trigger PR on GitHub (in the example below, from
developtomainbranch)
After a few minutes, the app build will be completed on Codemagic
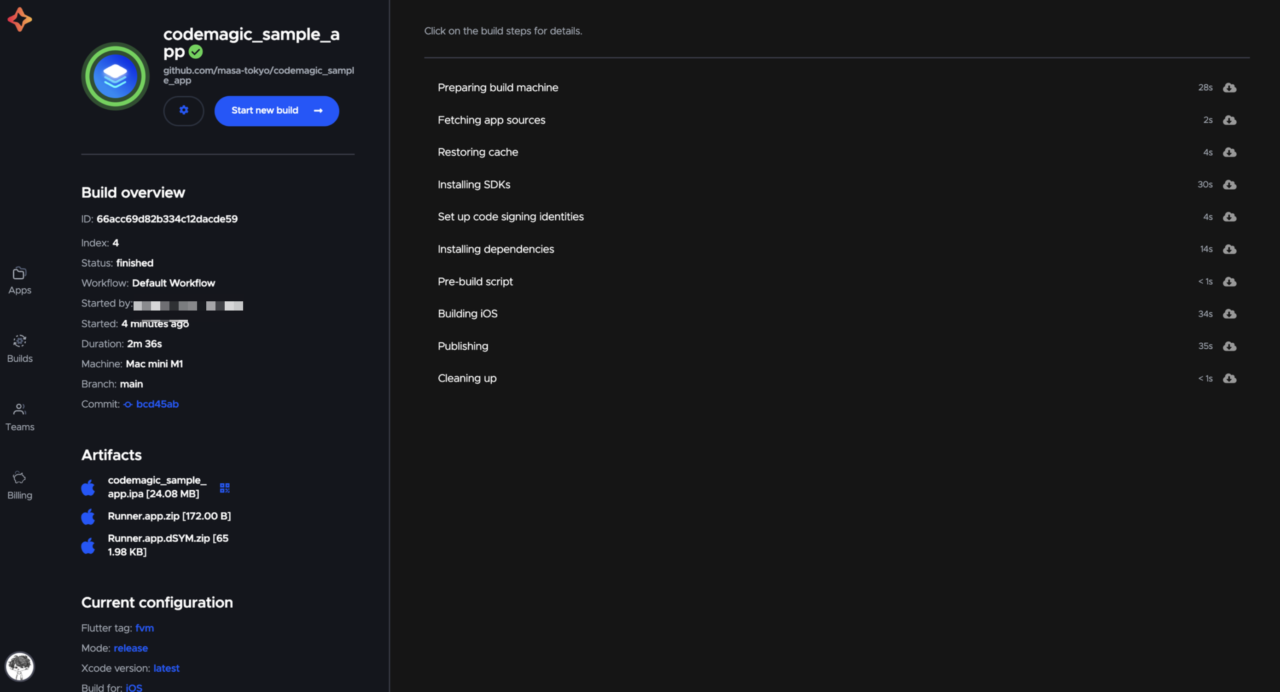
The app will be uploaded to App Store Connect, and you will be able to submit it for release

Requirements
To follow the steps in this article, you will need the following:
- A PC with macOS
- Membership registration for the Apple Developer Program
- App registration on App Store Connect
Preparation
First, let’s create the Bundle ID and API key needed to create the Codemagic workflow.
Confirming the Bundle ID
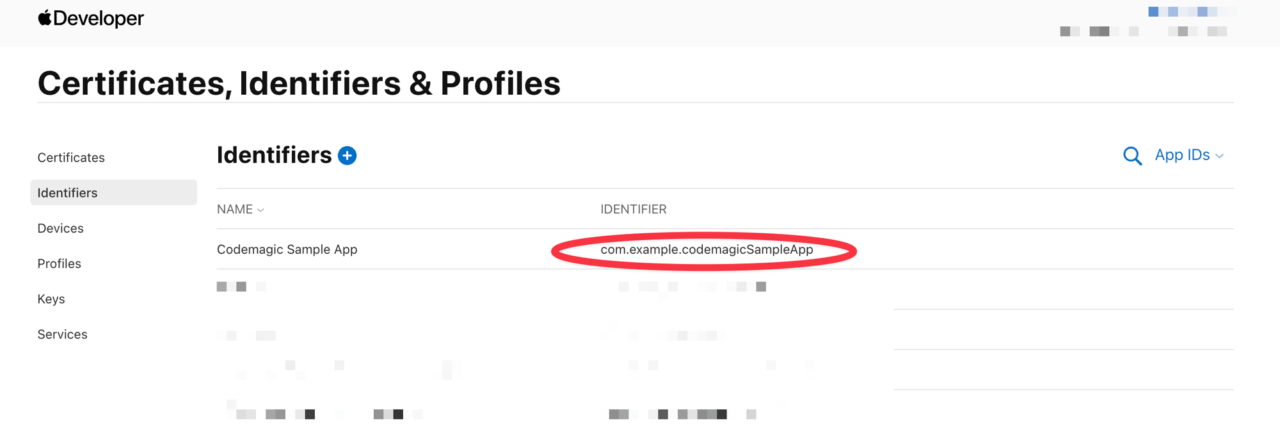
After logging into the Apple Developer Portal, go to the Identifiers page.
If the Bundle ID for the app (the same as registered in Xcode) does not exist, create a new one.
Confirm and save the value.
Creating an API Key
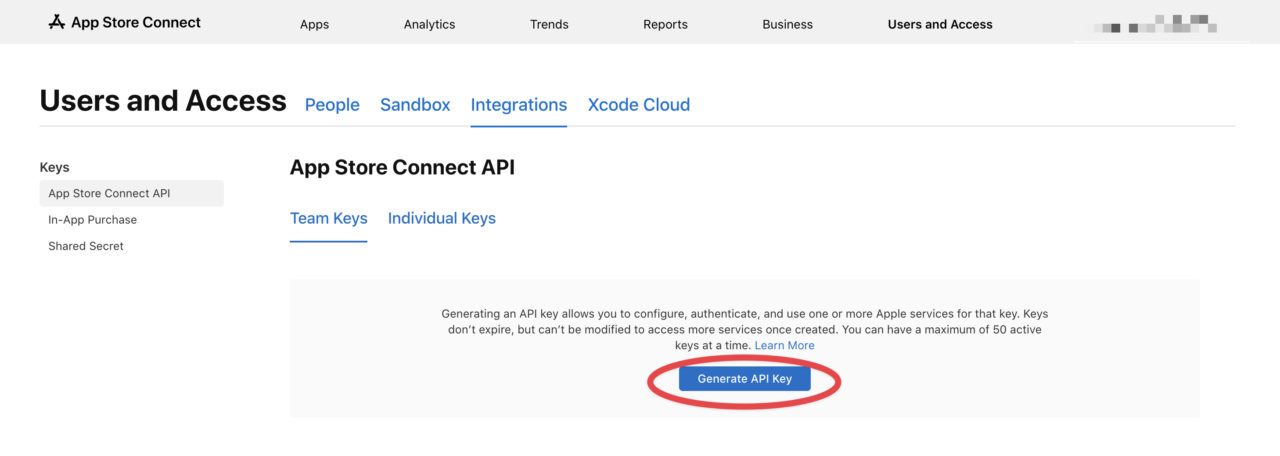
After logging into App Store Connect, go to Users and Access > Integrations.
Click the “Generate API Key” button to create a new API key.
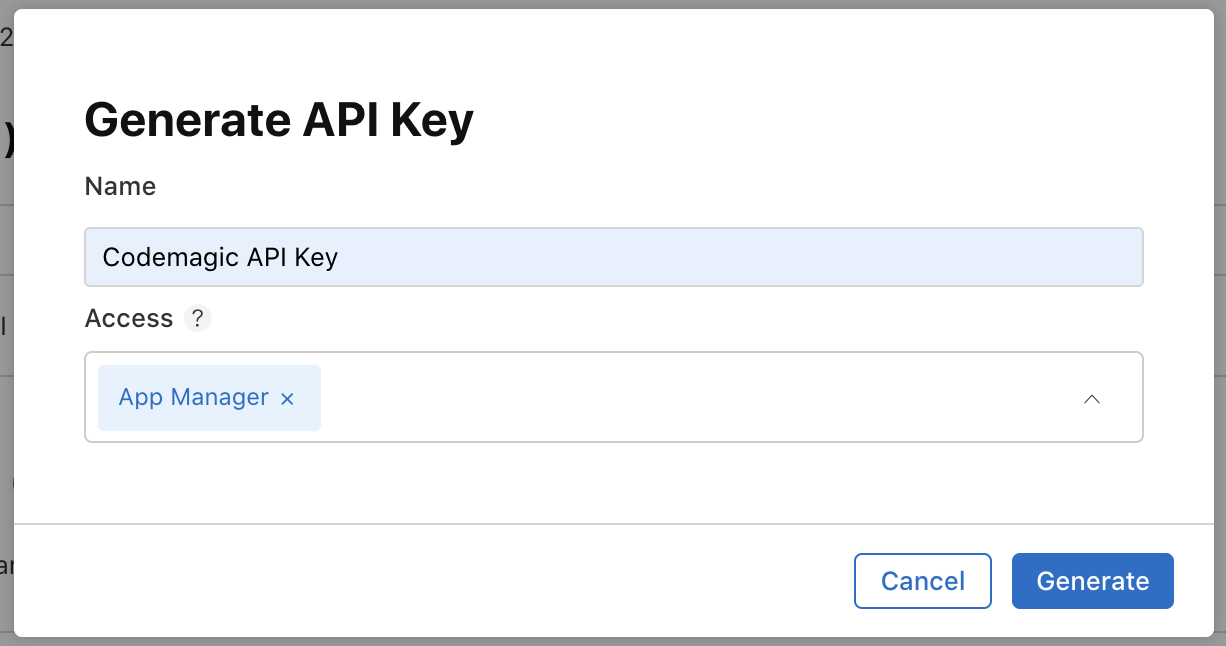
Enter the key name and access rights (App Manager) to generate the key.
Copy the Issuer ID and Key ID, and download the API key file.
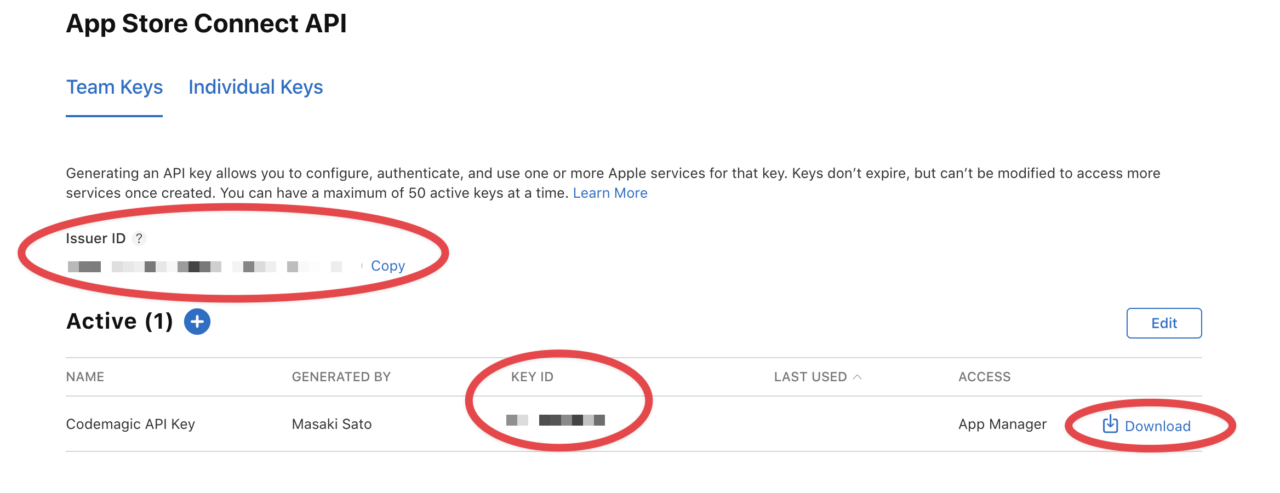
Keep these IDs and files handy as they will be needed in later steps.
What is Codemagic
Before we get into the steps using Codemagic, let me briefly introduce Codemagic.
Codemagic is a CI/CD tool specialized for Flutter development that automates testing, building, and deployment. It can be used for various projects such as iOS, Android, and React Native, but for Flutter projects, you can use a GUI tool called Workflow Editor. This allows intuitive development without the need to create a dedicated configuration file in the .yaml format.
You can start using it for free for personal use, with a sufficient free tier (500 minutes per month). For more details on pricing, please see here.
Initial Setup
Let’s actually start using Codemagic!
If you are already using Codemagic, skip unnecessary steps as needed.
Creating an Account
Create a new account from the link below.
Adding an App
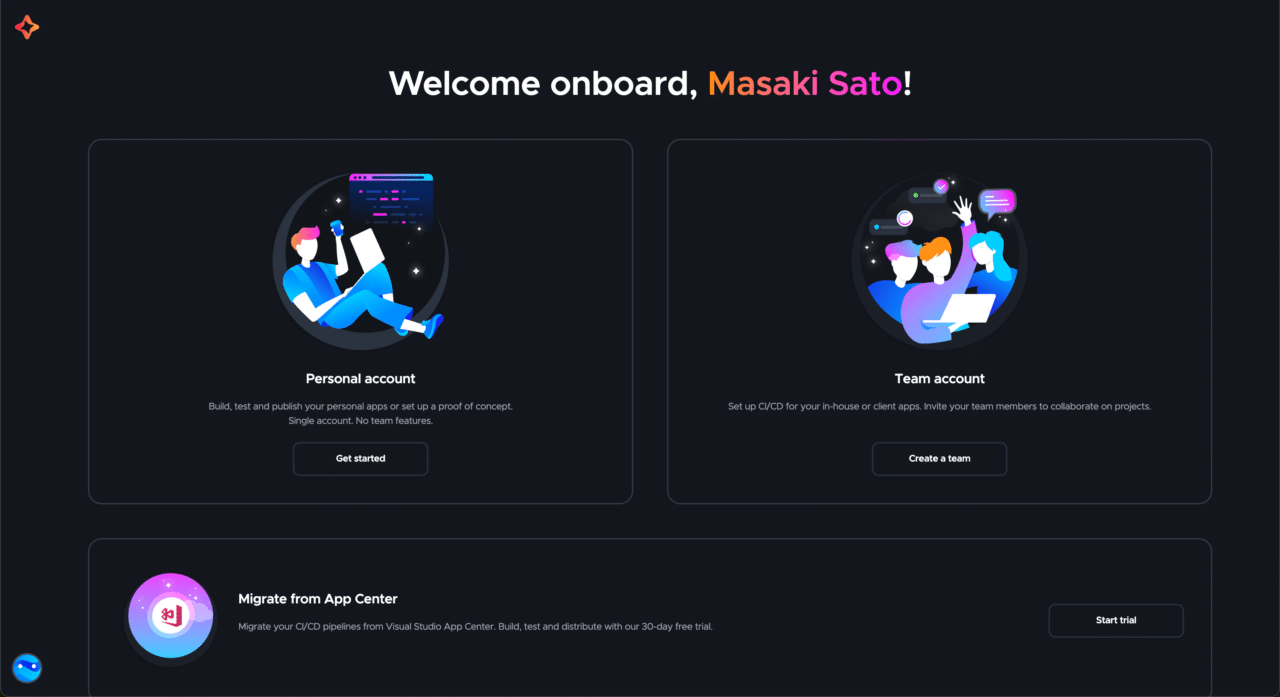
After signing up, choose an account type. You can start with Personal account without credit card information. For more details on Team account, see here.
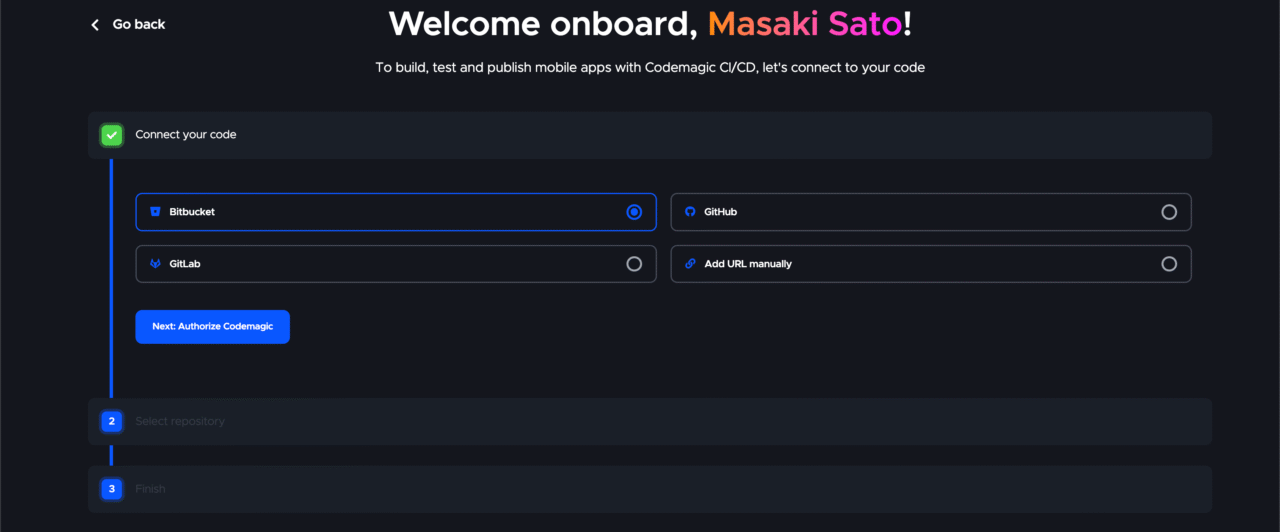
Select the Git Provider you want to connect. In this article, we will use GitHub as an example.
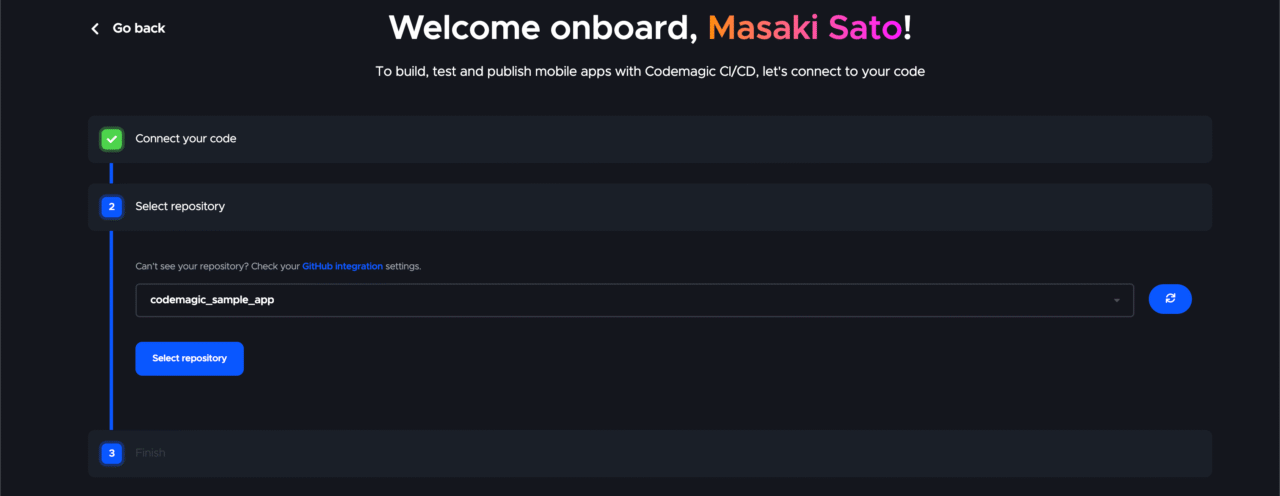
Link the GitHub repository of the app you want to add.
Once the app is created, the following Workflow Editor will open.
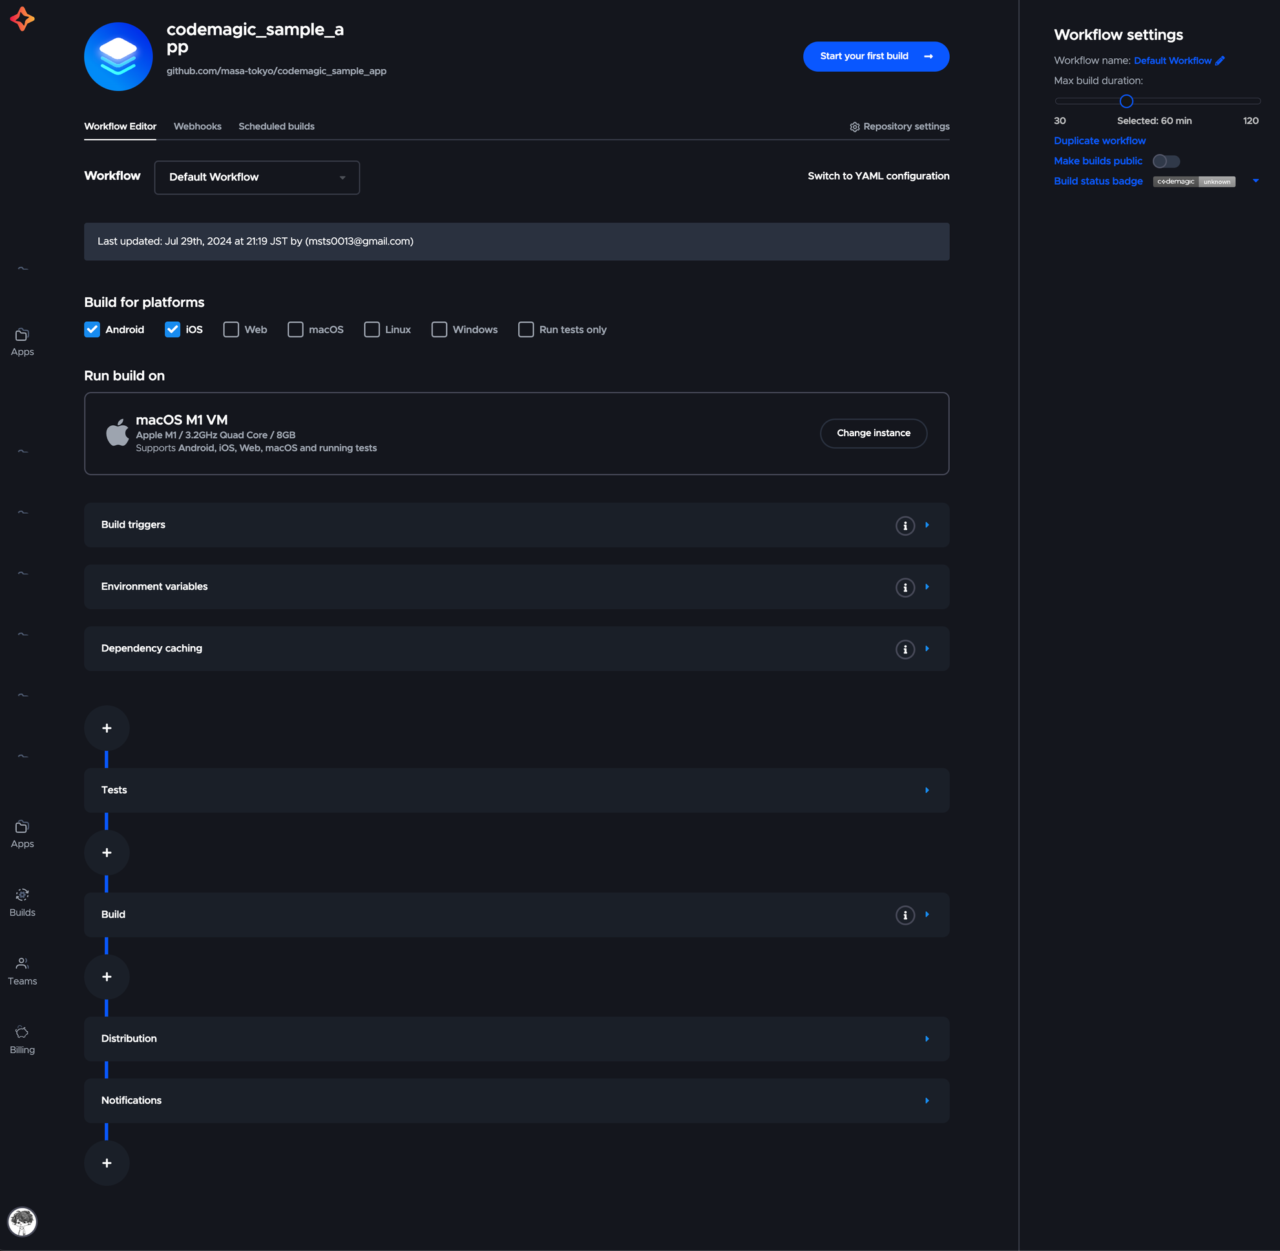
Let’s get familiar with Codemagic step by step from here!
- Step 1: Run your first build
- Step 2: Build a Flutter app
- Step 3: Upload to the store
- Step 4: Automate triggers
If you have been using Codemagic before, skip steps as needed.
Step 1: Run your first build
First, let’s successfully run your first build.
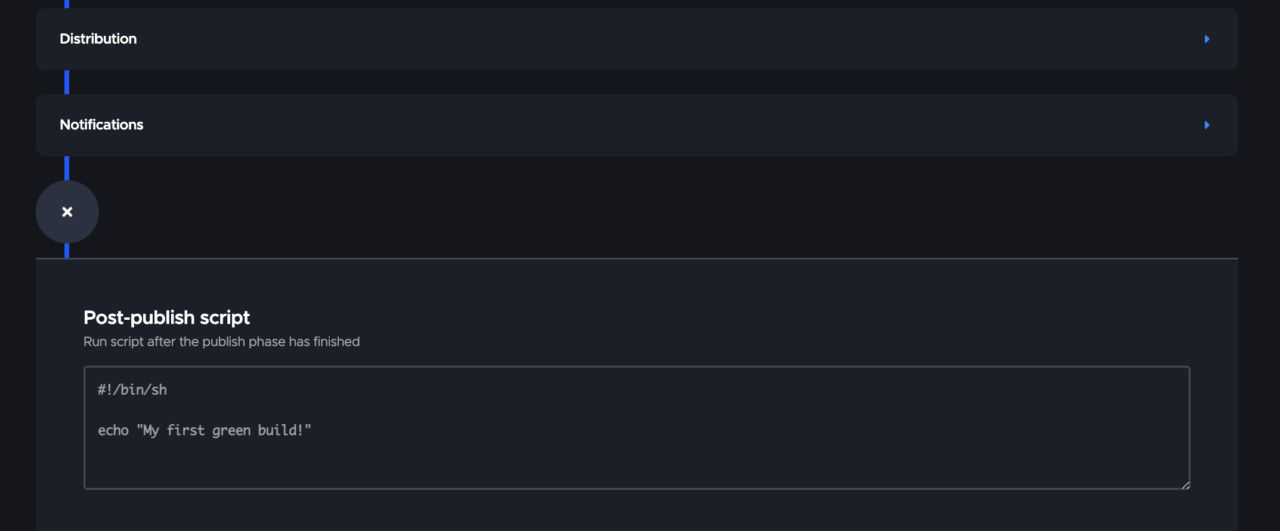
We will run a simple build that prints “My first green build!”.
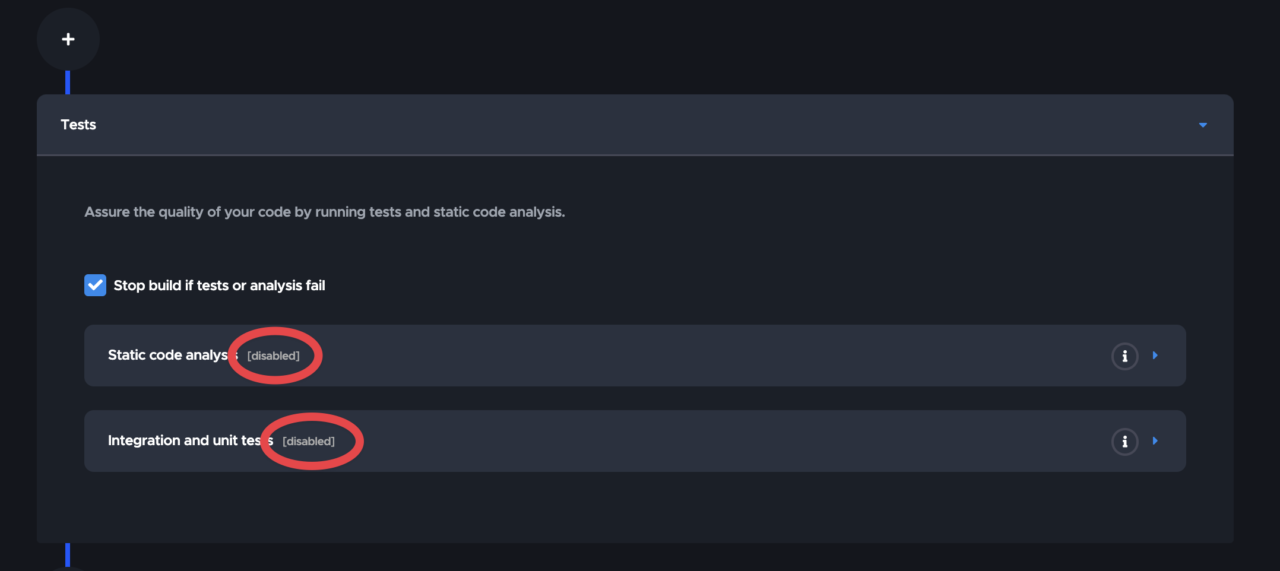
Check “Run tests only” for the Build for platforms.

Make sure the tests in the Tests section are disabled.
Click the + button after the Notifications section and enter as follows.
Save the changes from the top right of the screen.

Start the build.

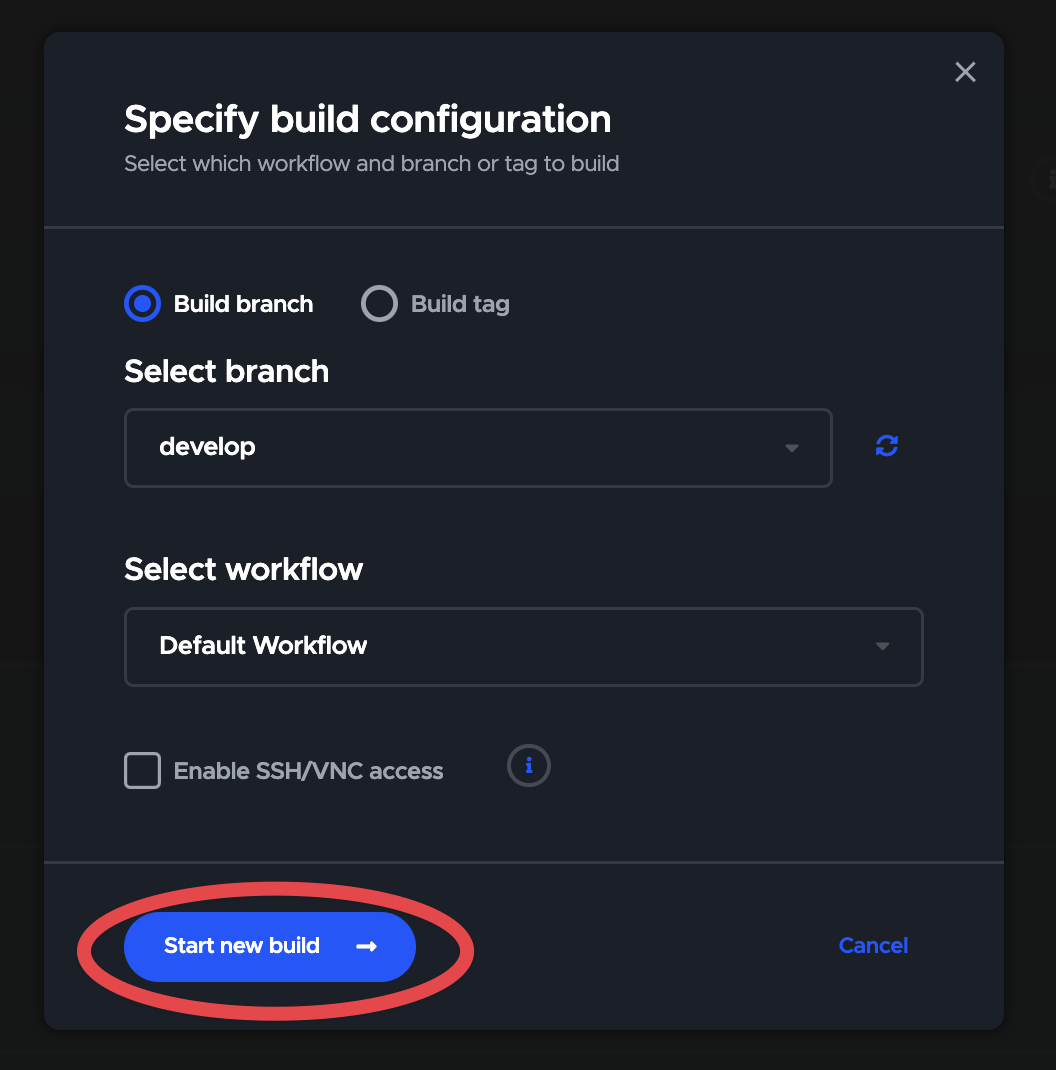
Congratulations 🎉
You have successfully run your first build!
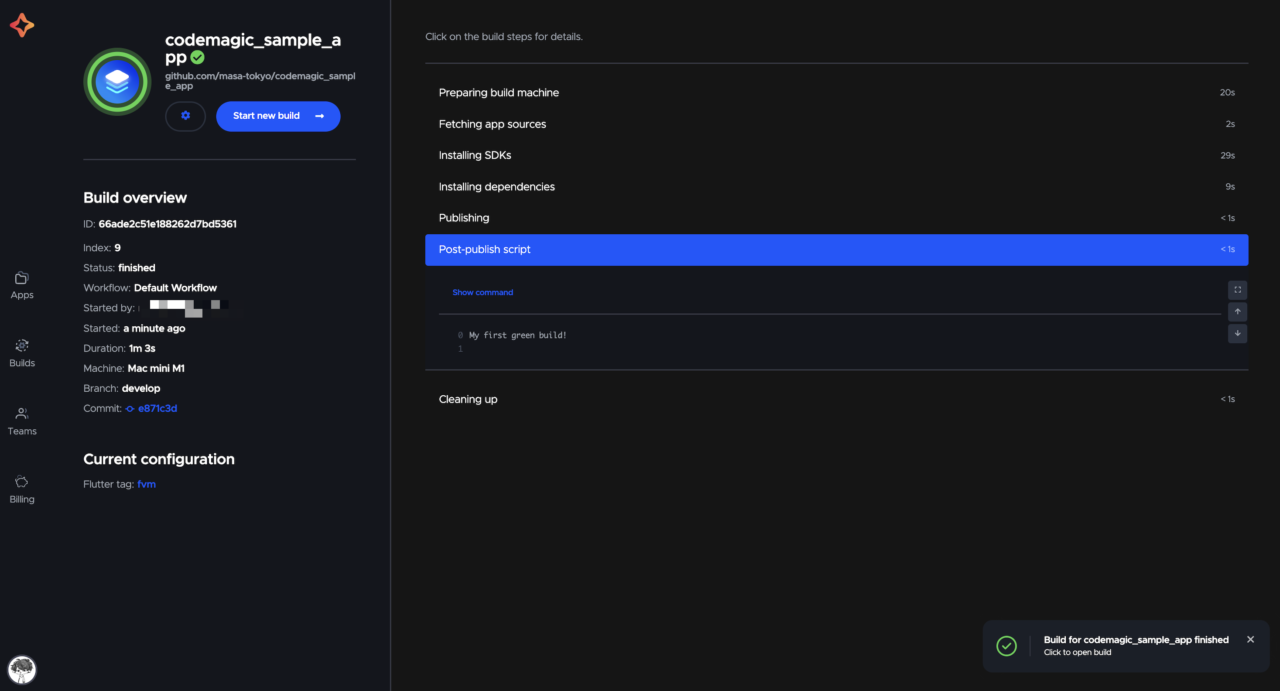
You can see that “My first green build!” is printed in the Post-publish script section.
Step 2: Build a Flutter app
Next, let’s build a Flutter app in the iOS environment.
Select iOS for the Build for platforms.

Set the environment for the build in the Build section.
Specify the usual execution environment for your app.
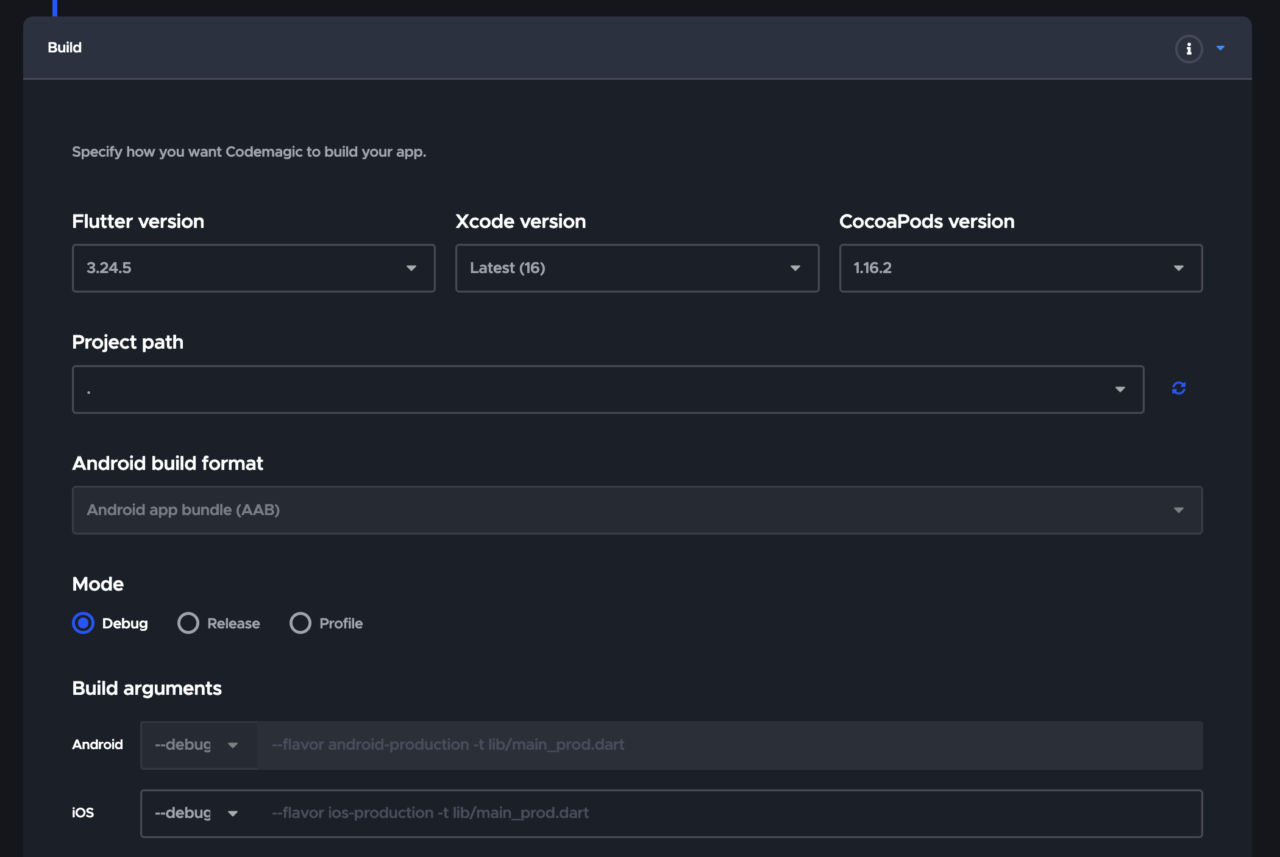
Save the changes and run the build.
The build is successful 👏
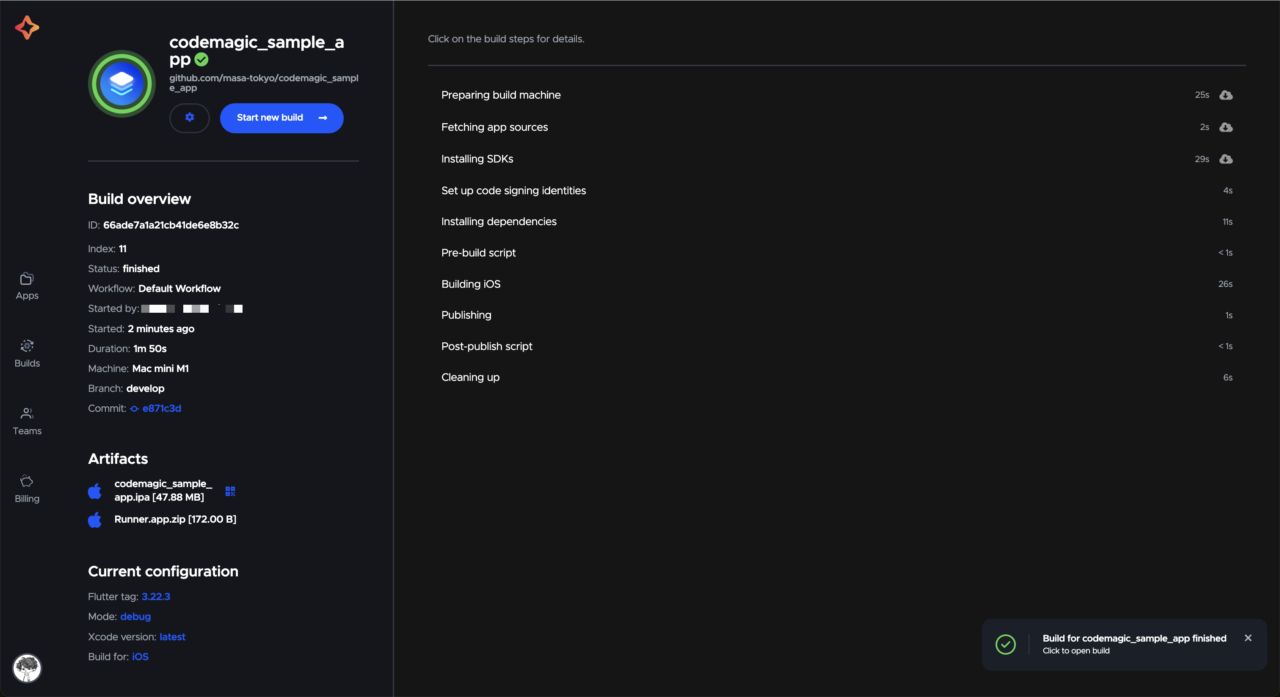
Step 3: Upload to the store
Finally, let’s upload the built app to App Store Connect.
This step might be a bit challenging, but let’s do our best 💪
Build
Since this is a release build, select the Release mode.

iOS code signing
In the Distribution section, perform iOS code signing necessary for integration with Apple services.
Select Automatic, and when the message above appears, navigate to the settings screen from Go to settings.
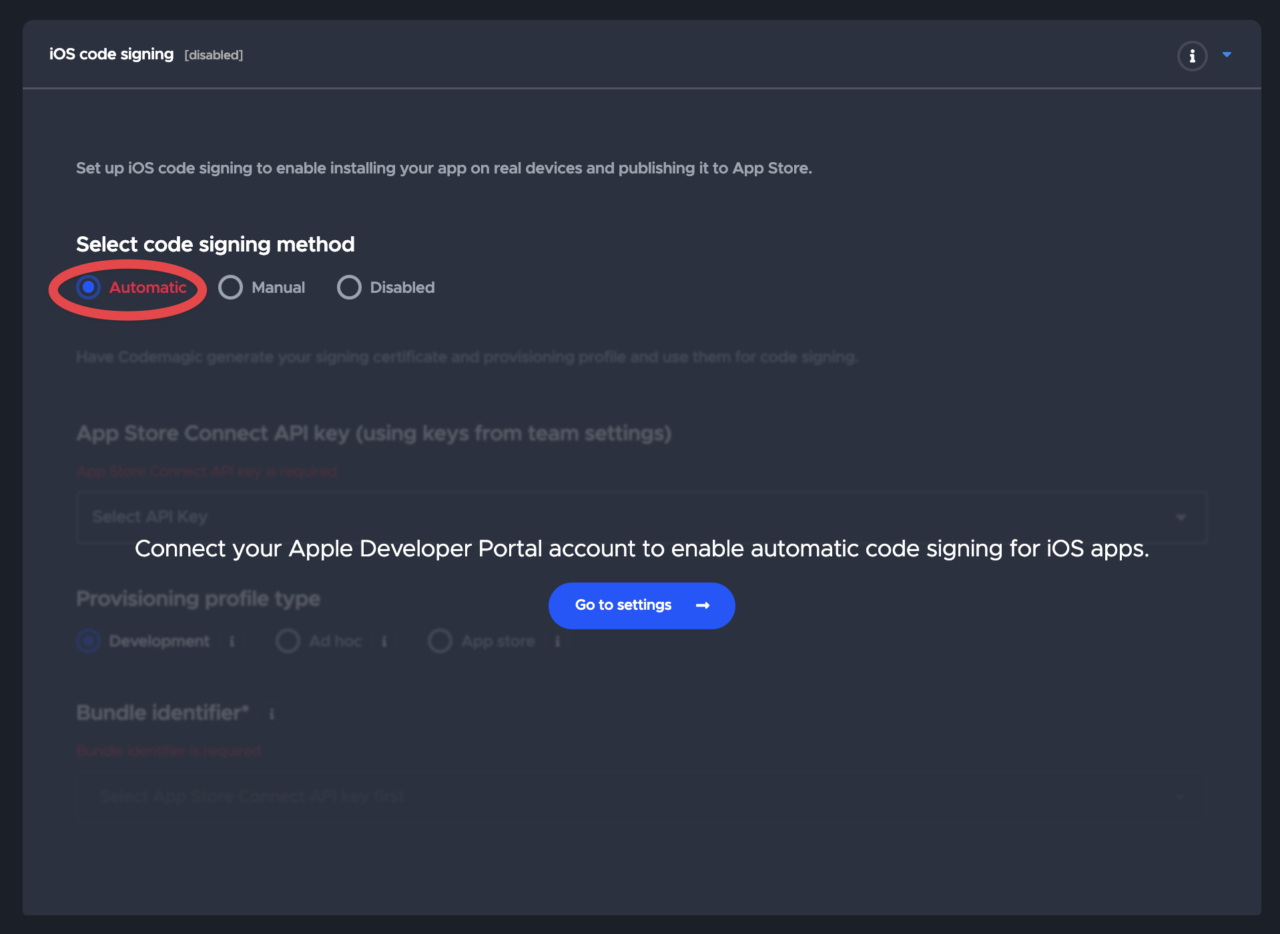
Since it transitions to a different screen, make sure the changes made before are saved.
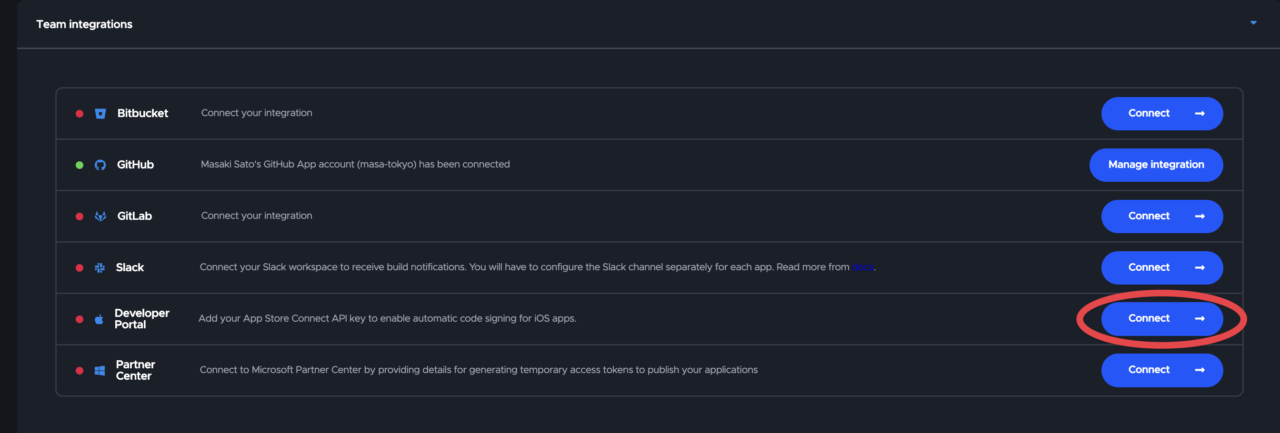
Click the Connect button in the Developer Portal.
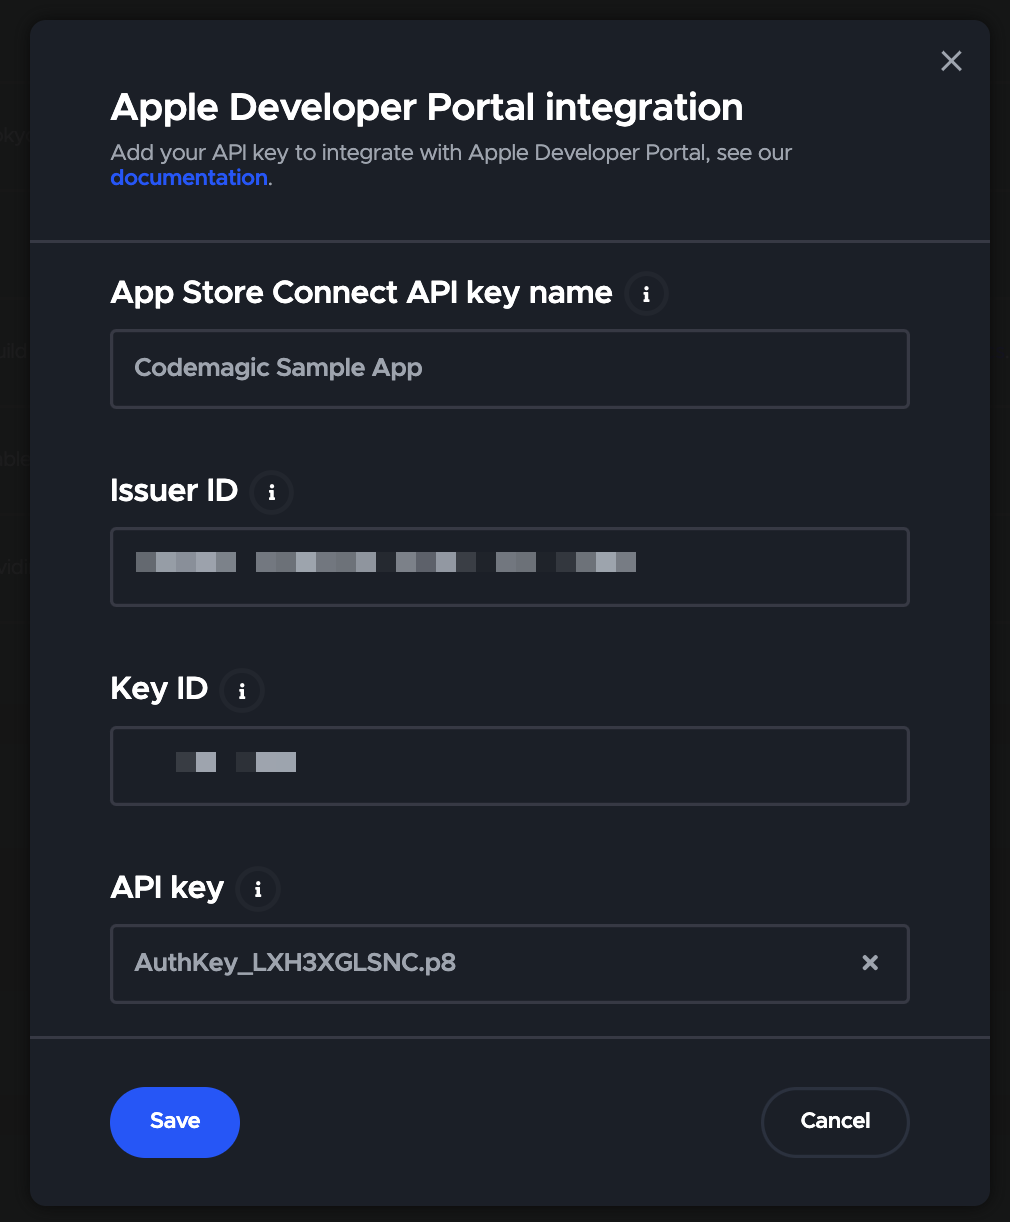
Add the Issuer ID, Key ID, and API Key file obtained from App Store Connect during the Preparation at the beginning of this article, and Save.
Return to the Workflow Editor and select the created key.

Select the App store for the Provisioning profile type.

Select the Bundle ID confirmed in the Preparation.

App Store Connect
Check “Enable App Store Connect publishing” and select the API Key created earlier.
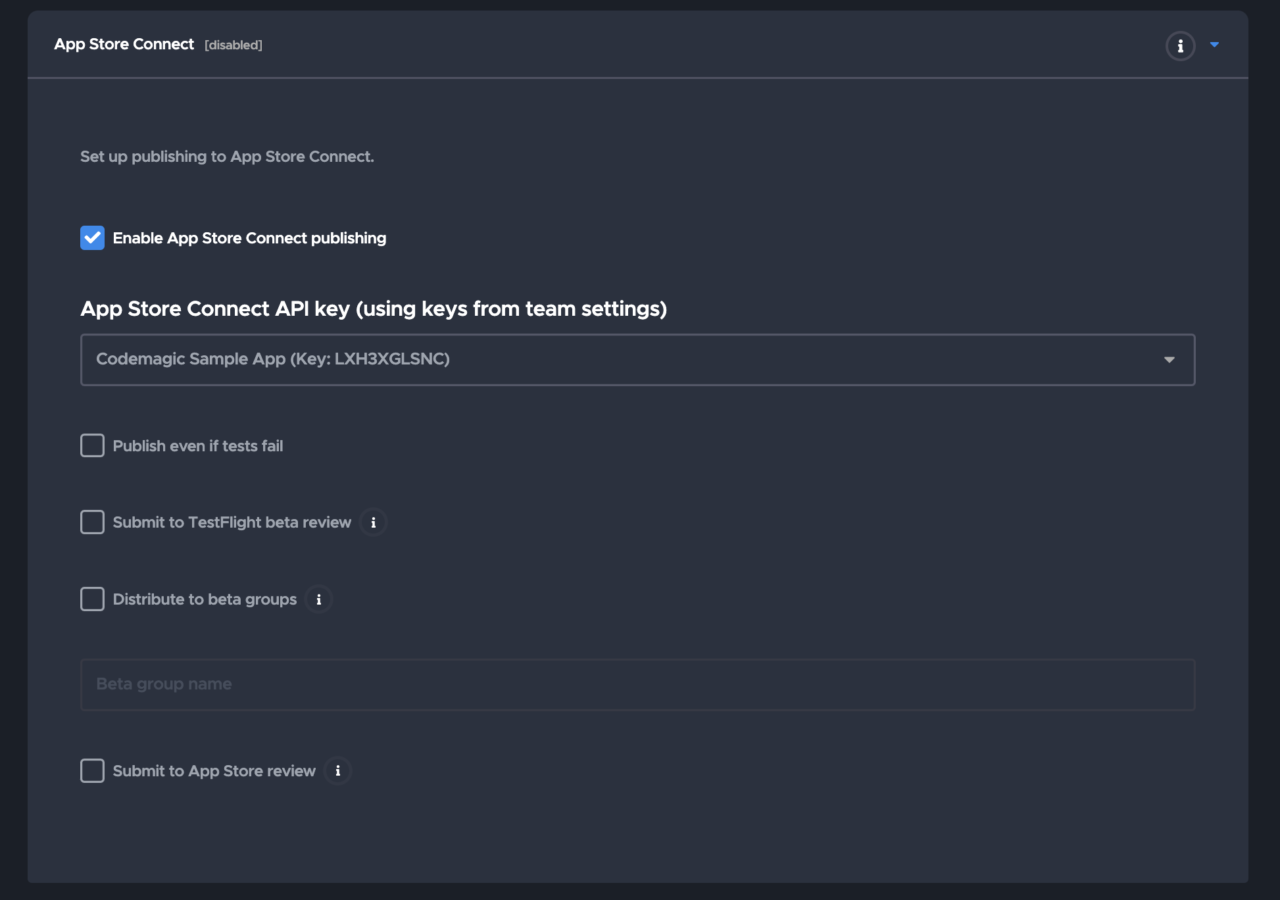
Once this is done, save the changes and run the build.
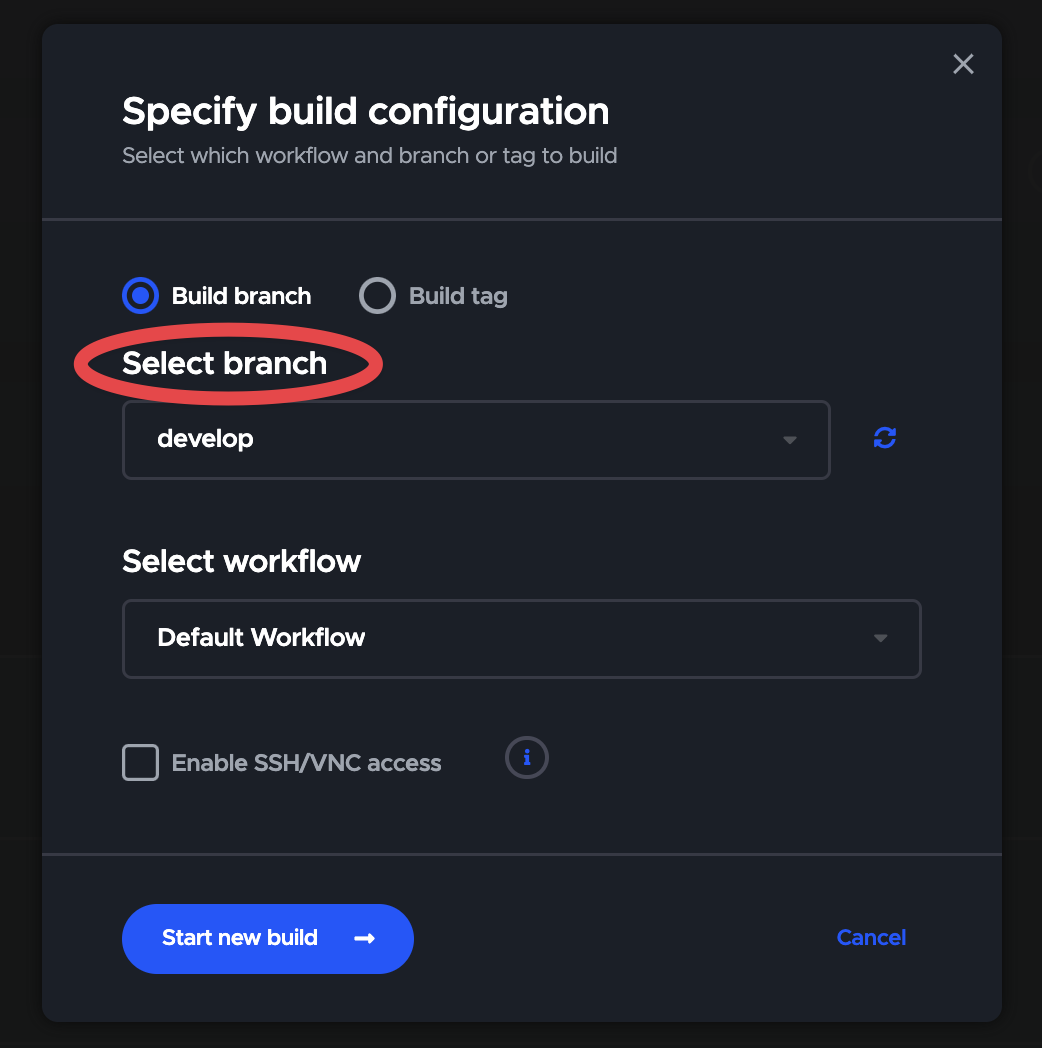
Make sure the appropriate branch is selected and start the build.
If an error occurs, check the error log details. For common errors, see this document.
Also, feel free to use the GitHub Discussion and Discord community.
When the build is successful, it will be uploaded to App Store Connect and can be selected from Add Build (it may take some time for the upload to be reflected).

You can now submit it for release 🥳

Step 4: Automate triggers
As the final step, let’s automate the build.
With the steps up to Step 3, you can already upload to App Store Connect, but by doing this step, you can build with just operations on GitHub, making it even more comfortable.
Open the Build triggers in the Workflow Editor.
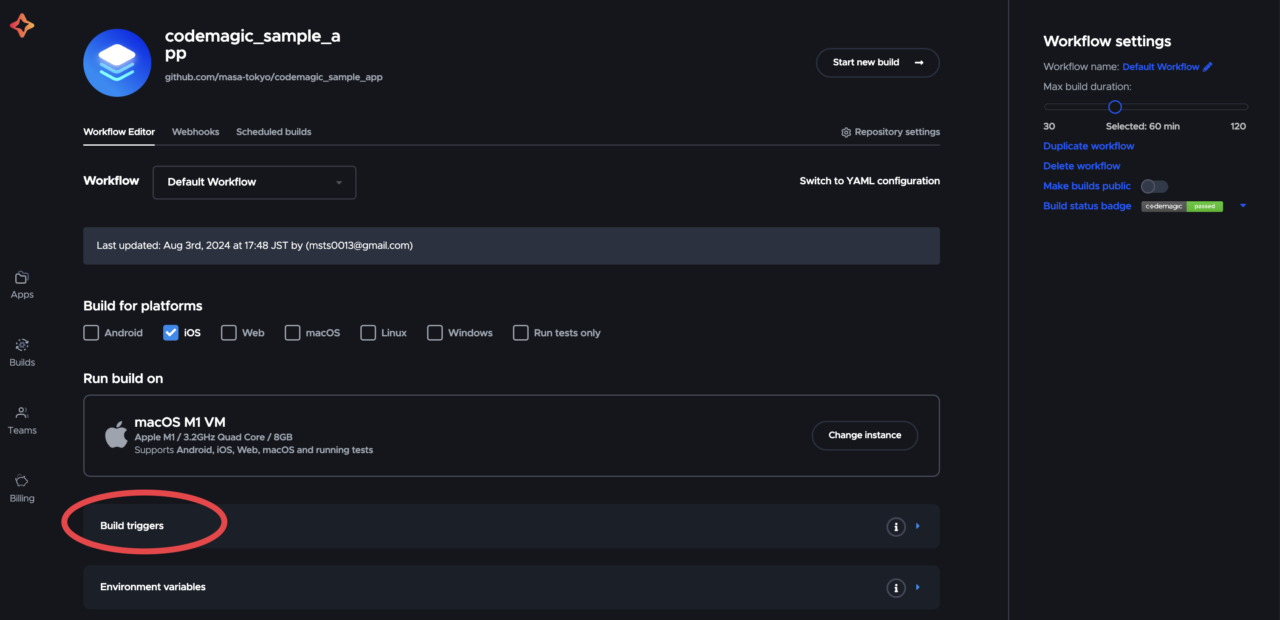
Select Trigger on push as the trigger type.

Enter the target branch and add it from Add pattern.
In the example below, it is set to trigger when a push is made to the main branch.

Actually create & merge a PR on GitHub and check the operation.

Make sure the build number is updated from the version uploaded in Step 3.
Conclusion
Great job 🙌
In addition to the automatic upload to App Store Connect this time, setting up the same process for Google Play will make your development flow even smoother. Please check out this article 👉 https://blog.codemagic.io/publishing-flutter-apps-to-playstore/
Let’s continue to enjoy developing comfortably with Codemagic!
If you have any questions or problems, please talk to the support community 💡
- GitHub Discussion: https://github.com/orgs/codemagic-ci-cd/discussions
- Discord community: https://discord.com/invite/pefznye93R
If you’ve already enabled billing, you can also get support from the in-app chat widget in the bottom right corner of the page.


