


This article is written by Kevin Suhajda
This post has been updated in July 2022 to introduce some fixes to the codemagic.yaml file and to reflect that you no longer need to contact Codemagic solution engineers to set up Unity machines for you, and you start using Unity on Codemagic right away, as it is preinstalled on Mac, Linux and Windows build machines.
Unity is a popular cross-platform game engine for creating 2D and 3D games for desktop, console, and mobile devices. It’s one of the top choices for building mobile games, augmented reality mobile apps, and hybrid apps that use a combination of Unity and Flutter or React Native.
This article will show you how to use Codemagic CI/CD to build, code sign, and publish your Unity iOS app directly to App Store Connect, from where you can distribute your app to testers or stakeholders using TestFlight or publish a release to the App Store. It’s worth noting that Codemagic allows you to build Unity iOS apps without installing Xcode locally. What’s more, you don’t even need to have a Mac!
Learn why you should use a CI/CD for your Unity projects from this blog post.
In this article, we won’t be focusing on the Unity project itself. Instead, we’ll go through the building and publishing steps. Here’s what we’ll do:
- Describe the prerequisites for building a Unity project on Codemagic and publishing it to App Store Connect;
- Set up Codemagic, including defining environment variables and tweaking the YAML file.
- Finally, we’ll add a couple of C# scripts to build the Xcode project and prepare it for publishing.
Prerequisites for building and publishing Unity iOS apps with Codemagic
First of all, to be able to follow all the steps in this article, you should have the following:
- A Unity Plus or Pro license.
- An active Apple Developer Program membership.
- Admin access to the Apple Developer Program to create an App Store Connect API key for automatic code signing.
- A Unity project checked into a Git-based version control system.
- An account with Codemagic. If you don’t have one, you can sign up here.
Adding your Unity project to Codemagic
The easiest way to add your project to Codemagic is through a Git provider. Add your project to a Git source control service, such as (GitHub, Bitbucket, or GitLab), and follow the steps below to get started with Codemagic:
Connect to the Git provider where you have uploaded your Unity project by going to the Integrations under Settings. Make sure you have given permission to the repository where you have uploaded your app.
Navigate to the Applications page, and click Add application.

Select the Team that has been given access to the Unity SDK instances. If you do not have access yet, contact Codemagic here.
Select the Git provider:
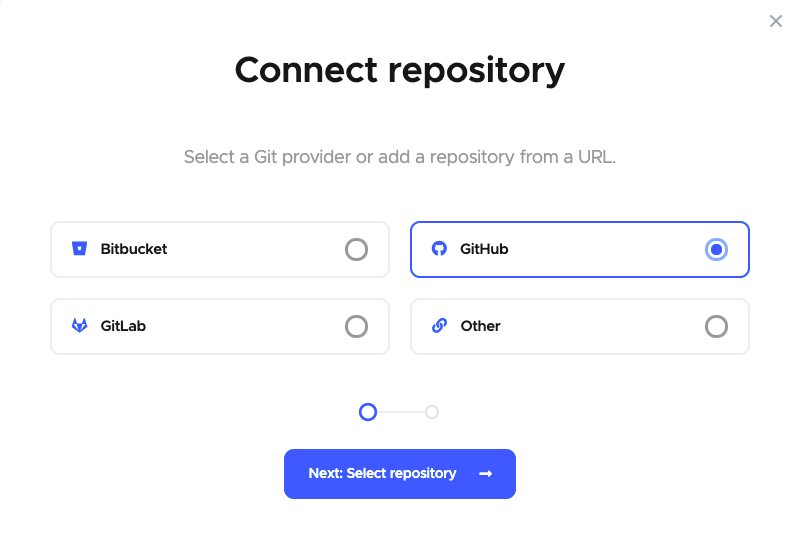
Click Next: Authorize integration to authorize Codemagic. If you have already authorized your selected Git provider, click Next: Select repository instead.
If you are using GitHub as your Git provider, then you need to perform one additional step before selecting the repository. Click Install GitHub App to set up the integration. You can learn more about configuring a GitHub app integration here.
Now, select the repository from the dropdown menu, and select Unity App as the project type. Then click Finish: Add application.
You will be taken to the project settings. The codemagic.yaml tab will be selected by default.
Add your Unity credentials as secure environment variables to Codemagic
Your Unity serial number is used to activate Unity on the Codemagic build machine so that your iOS project can be exported. The license is then returned in the publishing section of the YAML configuration so it is returned even if one of the build steps fails.
You will need to create an environment variable group called “unity” that contains environment variables named UNITY_SERIAL, UNITY_USERNAME, and UNITY_PASSWORD. This group of environment variables will be imported into the codemagic.yaml configuration file as described in subsequent steps.
Create the required environment variables in Codemagic as follows:
If you are using a Team, click on Teams > your Team name, and then click on Global variables and secrets. Otherwise, you can add the environment variables at the application level by clicking the Environment variables tab.
Create a variable called
UNITY_SERIAL, and set the value to your Unity serial number. In the Select group dropdown, typeunityand click on the Create “unity” group button. Mark the variable as secure (the mark is actually ticked by default here and in all the following cases) to encrypt the value, and click the Add button.Create a variable called
UNITY_USERNAME. Set the value to the email address used with your Unity ID, and add it to the “unity” group. Mark this as secure to encrypt the value, and click the Add button.Create a variable called
UNITY_PASSWORD. Set the value to your Unity ID password, and add it to the “unity” group. Mark this as secure to encrypt the value, and click the Add button.
Note that the environment variable UNITY_HOME, which defines Unity’s installation location, is already set on the build machines. You can find the location on macOS here and the location on Windows here.
Add environment variables for automatic iOS code signing for your Unity app
To learn more about iOS code signing, refer to this blog post
Codemagic allows you to automatically code sign Unity apps for iOS. For this, you’ll need to create the following environment variables in an environment variable group called “ios_credentils”:
APP_STORE_CONNECT_KEY_IDENTIFIER, APP_STORE_CONNECT_ISSUER_ID, APP_STORE_CONNECT_PRIVATE_KEY, and CERTIFICATE_PRIVATE_KEY.
So, staying in the same tab, you’ll need to create another variable group.
Create a variable called
APP_STORE_CONNECT_KEY_IDENTIFIER, and set the value to your App Store Connect API Key Identifier. In the Select group dropdown, typeios_credentials, and click on the Create “ios_credentials” group button. Mark the variable as secure to encrypt the value, and click the Add button.Create a variable called
APP_STORE_CONNECT_ISSUER_ID. Set the value to your App Store Connect API Issuer Id, and add it to the “ios_credentials” group. Mark the variable as secure to encrypt the value, and click the Add button.Create a variable called
APP_STORE_CONNECT_PRIVATE_KEY. Set the value to your App Store Connect API Private Key (.p8), and add it to the “ios_credentials” group. Mark the variable as secure to encrypt the value, and click the Add button.Create a variable called
CERTIFICATE_PRIVATE_KEY, and set the value to your iOS Distribution Certificate private key. Add it to the “ios_credentials” group. Mark the variable as secure to encrypt the value, and click the Add button.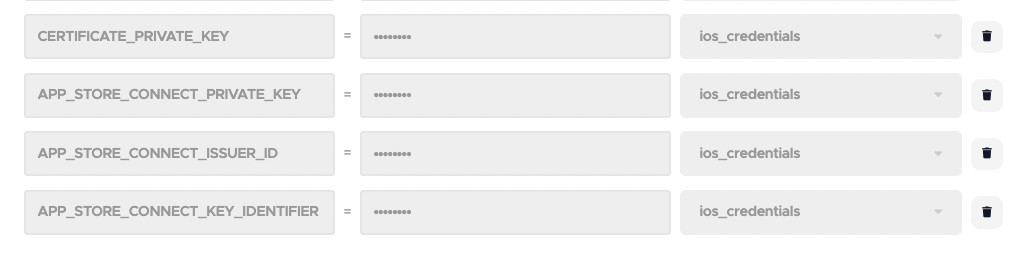
For guidance on creating an App Store Connect API key and how to obtain the required environment variable values, please refer to the documentation on signing iOS apps here.


Configuring Codemagic for Unity iOS apps using codemagic.yaml
Codemagic has the Unity SDK on both Windows and macOS machines, but since we need to build an app for iOS, we’ll be using the macOS machine in this article. To configure your build using YAML, go to your Unity project, and create a new file inside the root directory called codemagic.yaml.
Add the following template to the file:
workflows:
  my-workflow:
    name: Workflow name
    max_build_duration: 120
    environment:
      groups:
        - ...
      vars:
        - ...

    scripts:
      - ...
    artifacts:
      - ...
    publishing:
      - ...
This is a basic workflow template for building apps on Codemagic. For more information, check out the docs.
Note that the publishing section will publish your app to App Store Connect and make it available for testing by App Store Connect users in your organization. You just need to create an Internal Group and add the testers you would like to distribute the app to.
If you need to distribute your app to external TestFlight users or submit it directly to App Store Review, then you can find out how to configure this here. You can also check out this article on publishing apps to App Store Connect.
To generate an .ipa and publish it to the App Store, modify the workflow by following the steps below:
Define an appropriate workflow name in the
workflowssection:workflows: -unity-ios-release-workflow: name: Unity iOS release workflow max_build_duration: 120Update: At the time of writing this post, build machines with Unity have only been available to customers who have contacted Codemagic. Now that they are publicly available, you’ll need to specify the
instance_typeproperty (basically, the build machine type) in the configuration above. Refer to the documentation to choose the rightinstance_type.Import the environment variable groups you created earlier in the
groupssection:environment: groups: - unity - ios_credentialsSet the following environment variables in the
varssection:vars: UNITY_BIN: ${UNITY_HOME}/Contents/MacOS/Unity BUILD_SCRIPT: BuildIos UNITY_IOS_DIR: ios XCODE_PROJECT: "Unity-iPhone.xcodeproj" XCODE_SCHEME: "Unity-iPhone" BUNDLE_ID: <BUNDLE_ID> APP_STORE_APP_ID: <APPLE_ID>Replace the angle brackets with the appropriate values. You can find the
Bundle IdandApple Idin App Store Connect > App > General > App Information.Under the
scriptssection, initialize the macOS keychain:scripts: - name: Initialize macOS keychain script: keychain initializeActivate Unity with the following script:
- name: Activate Unity License
  script: |
    $UNITY_BIN -batchmode -quit -logFile -serial ${UNITY_SERIAL?} -username ${UNITY_USERNAME?} -password ${UNITY_PASSWORD?}
Export the Xcode project
- name: Build the Xcode project
  script: $UNITY_BIN -batchmode -quit -logFile -projectPath . -executeMethod BuildScript.$BUILD_SCRIPT -nographics
Fetch iOS signing files:
- name: Fetch signing files
  script: app-store-connect fetch-signing-files $BUNDLE_ID --type IOS_APP_STORE
Add the certificates to the keychain:
- name: Add certificates to default keychain
  script: keychain add-certificates
Add the provisioning profiles to Xcode:
- name: Set up code signing settings on Xcode project
  script: xcode-project use-profiles
Increment the build number:
- name: Increment build number
  script: |
    cd ios && agvtool new-version -all $(($(app-store-connect get-latest-testflight-build-number "$APP_STORE_APP_ID") + 1))
Build the .ipa:
- name: Build ipa for distribution
  script: xcode-project build-ipa --project "$UNITY_IOS_DIR/$XCODE_PROJECT" --scheme "$XCODE_SCHEME"
To retrieve the generated .ipa, update the
artifactspath to the following:artifacts: - build/ios/ipa/*.ipaUpdate the
publishingsection to return the Unity license, and publish to App Store Connect:publishing: scripts: - name: Deactivate Unity License script: $UNITY_BIN -batchmode -quit -returnlicense -nographics app_store_connect: api_key: $APP_STORE_CONNECT_PRIVATE_KEY key_id: $APP_STORE_CONNECT_KEY_IDENTIFIER issuer_id: $APP_STORE_CONNECT_ISSUER_ID
This completes the configuration of the codemagic.yaml file. If you want to see the full picture, you can find a working example of the codemagic.yaml file for Unity apps in the root folder of the sample project for this blog post. Now, just commit and add the file to your Git provider.

Add a build script to your Unity project
To build the Xcode project in headless mode, you’ll need a Unity build script. Let’s prepare it.
Open Unity on your local machine, and add a new C# script called Build in the project explorer in Assets/Editor.
Add the following to the file:
using System.Linq;
using System;
using UnityEditor;
using UnityEngine;

public static class BuildScript
{

    [MenuItem("Build/Build iOS")]
    public static void BuildIos()
    {
        BuildPlayerOptions buildPlayerOptions = new BuildPlayerOptions();
        buildPlayerOptions.locationPathName = "ios";
        buildPlayerOptions.target = BuildTarget.iOS;
        buildPlayerOptions.options = BuildOptions.None;
        buildPlayerOptions.scenes = GetScenes();

        Debug.Log("Building iOS");
        BuildPipeline.BuildPlayer(buildPlayerOptions);
        Debug.Log("Built iOS");
    }

    private static string[] GetScenes()
    {
        return (from scene in EditorBuildSettings.scenes where scene.enabled select scene.path).ToArray();
    }

}
The BuildIos method used to export the Xcode project to a folder called ios. A menu item is also added in the Unity UI, allowing you to export the Xcode project by clicking Build > Build iOS.
Add a post-build script to declare if your app uses encryption
When publishing your Unity app to App Store Connect, you will be asked if your app uses encryption. If you don’t want to manually answer this question each time you publish a new version, you can add another script in Unity to automatically answer it by setting the key ITSAppUsesNonExemptEncryption in the Info.plist file in the root of the Xcode project and setting the value to NO if the app doesn’t use encryption and YES if it does.
You can read more details about complying with encryption export regulations here.
To add the required post-build script, open Unity and add a new C# script called PostProcessing in the project explorer in the Assets/Editor directory, and then add the following to it:
using UnityEditor;
using UnityEditor.Callbacks;
using UnityEditor.iOS.Xcode;
using System.IO;

public class IosBuildPostprocessor
{

    [PostProcessBuild(1)]
    public static void EditPlist(BuildTarget target, string path)
    {
        if (target != BuildTarget.iOS)
            return;


        string plistPath = path + "/Info.plist";
        PlistDocument plist = new PlistDocument();
        plist.ReadFromFile(plistPath);

        PlistElementDict rootDict = plist.root;

        // Add ITSAppUsesNonExemptEncryption to Info.plist
        rootDict.SetString("ITSAppUsesNonExemptEncryption", "false");


        File.WriteAllText(plistPath, plist.WriteToString());
    }
}
This script will run after the Xcode project has been exported from Unity.
Set the iOS bundle identifier in Unity
You should set the bundle ID of your iOS application before building the Xcode project.
You can do this as follows:
- Open Unity and File > Build Settings.
- Make sure iOS is the selected platform, and click on the Player Settings button.
- Expand the Other Settings section.
- In the Identification section, check the Override Default Bundle Identifier option.
- Set the Bundle Identifier to match the identifier name you have used in your Apple Developer Program account.
- Set the Version as desired, e.g., 0.0.1. Codemagic will automatically increment the build number, so you can leave this set to 0.
Running your first build
Remember to commit all the changes you have made to your Git provider.
To start building your Unity iOS app using the YAML file, go to your project page on Codemagic, and click Start your first build. Select your workflow, and then click Start new build to start the build process. Depending on the project size, this can take from several to several dozen minutes.
Conclusion
Congratulations! Your Unity iOS app should now be built and published to App Store Connect. And the whole process is now automated! There’s no need to bother with manual builds, code signing, and uploads anymore! Also, you don’t even need to have a Mac or to install Xcode to build Unity iOS apps with Codemagic.
In this article, we’ve covered how to build and publish your Unity iOS app to App Store Connect with Codemagic. You can find a complete codemagic.yaml configuration file for building Unity iOS apps here. For building Unity apps for Android, please refer to the docs.
Building and publishing Unity apps with Codemagic should be quite simple and straightforward, even though the article seems to be lengthy. However, if you got stuck at some point, we are always here to help: We try to answer every single question on Slack, and for those on Professional or Enterprise plans, our experts are always available in the in-app chat.
Happy building!


