


Written by Arnold Veltmann
Firebase Hosting provides fast and secure hosting for your web application, static and dynamic content, and microservices.
If you are interested in finding out more about what Firebase Hosting is capable of, it is recommended to take a further look at their official documentation.
In this blog post we’ll look into how we can set up Codemagic to automatically publish your web application to Firebase Hosting. While we are using a Flutter web application as an example, it is also possible to set it up with different web applications.
Set up Firebase for your project
To set up Firebase hosting for your project, you will have to add and configure a new project in your Firebase console.
- Navigate to the Firebase console
- Click Add project.
- Set up a name for your project.
- Choose whether to enable Google Analytics.
- Either continue or finish with Create project.
Once you have set your project up online, you will need to add Firebase hosting to your project. To do this, you will need to first install Firebase CLI on your local machine:
npm install -g firebase-tools
When using Linux or Mac, you can also install the CLI using the curl command:
curl -sL https://firebase.tools | bash
The next step is to get authenticated, for this enter this into your command line:
firebase login
After entering the command, a browser window should pop up and prompt you to choose the account you wish to connect with. Select the account that you used to set up your project in Firebase console.
Now everything should be set up for adding Firebase to your project. Navigate to the root of your project and run:
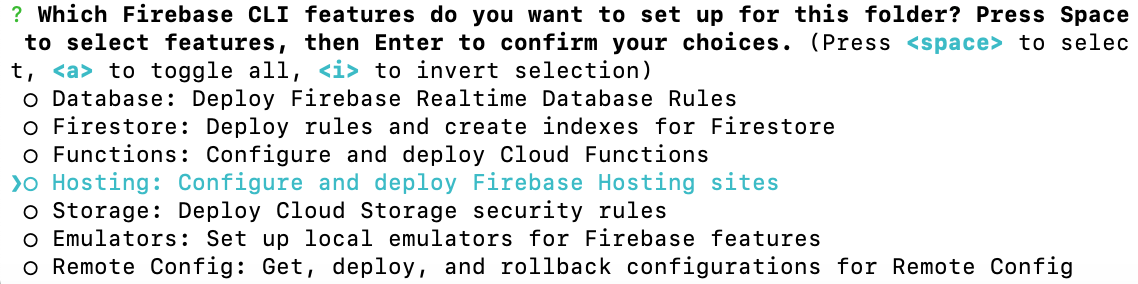
firebase init
Use the arrow keys to scroll to Hosting and then press space to select it.
As we want to add Firebase to our existing Flutter project, choose Use an existing project from the next menu:

From the next menu, we can again use arrow keys to navigate to the Firebase project that we have set up for using with our application and press enter to select it:

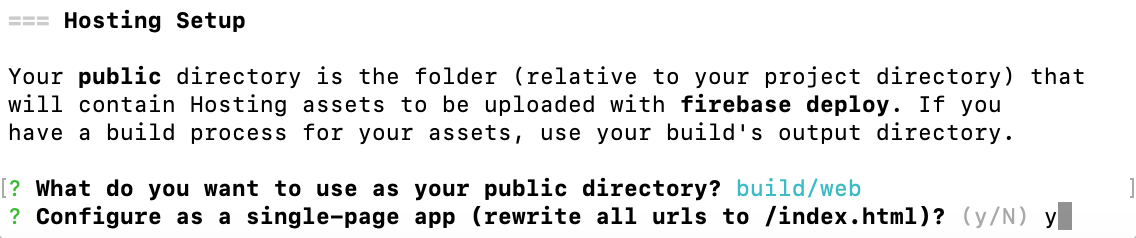
In the next step, for Flutter projects, enter build/web as your public directory (note that for non-Flutter web apps this might differ) and choose to configure as a single-page app:
Once this is done, Firebase should be successfully set up for your project locally. To confirm that, check that firebase.json and .firebaserc have been added to your project. Then push these changes to your repository.
We can now go ahead and configure Firebase hosting from Codemagic.
Set up Firebase hosting on Codemagic
In order to get your web app published after building with Codemagic, you will need to do the following:
- Step 1. Add Firebase token to environment variables. For this you will first need to retrieve your token on the local machine, encrypt it and add it to your environment variables either in the UI or in codemagic.yaml.
- Step 2. Set up a script for publishing to Firebase hosting. To publish your application to Firebase hosting, you will need to set up a script that publishes the app after the build is completed. This can be done in the post-build script in the UI or in codemagic.yaml.
No extra steps are needed as Codemagic virtual machines already come with Firebase CLI preinstalled.
Now let’s go through the Codemagic setup both for builds configured in the UI and in codemagic.yaml.
Encrypting your Firebase token
To get started, you will first need to retrieve your token using the command firebase login:ci which provides your token as output in the terminal after you authenticate your login in the browser.
Next, you will need to encrypt the token. You can conveniently do that in Codemagic UI.
Navigate to your project in Codemagic and click Encrypt environment variables on the right sidebar (if it’s a Flutter project) or at the bottom of the page for other types of projects.
Paste your token into the interface to encrypt it. Note that if you’re using the UI, encryption of the token is not necessarily needed; however, if you want to add the token to your codemagic.yaml file, this part is required so as to not expose your Firebase token when you push the file to source control.
Setting Firebase hosting up for builds configured in the UI
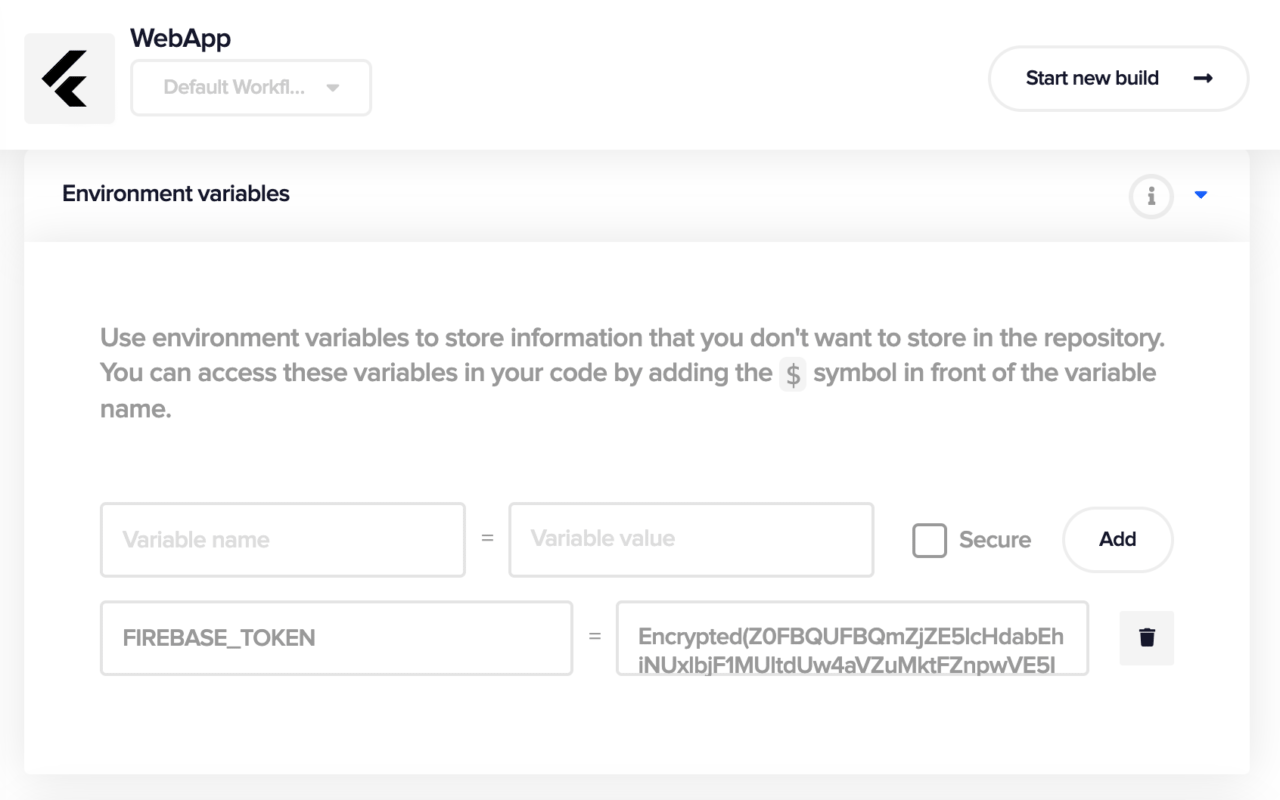
If you’re using the UI to configure your builds, you can add the token in App settings > Environment variables:
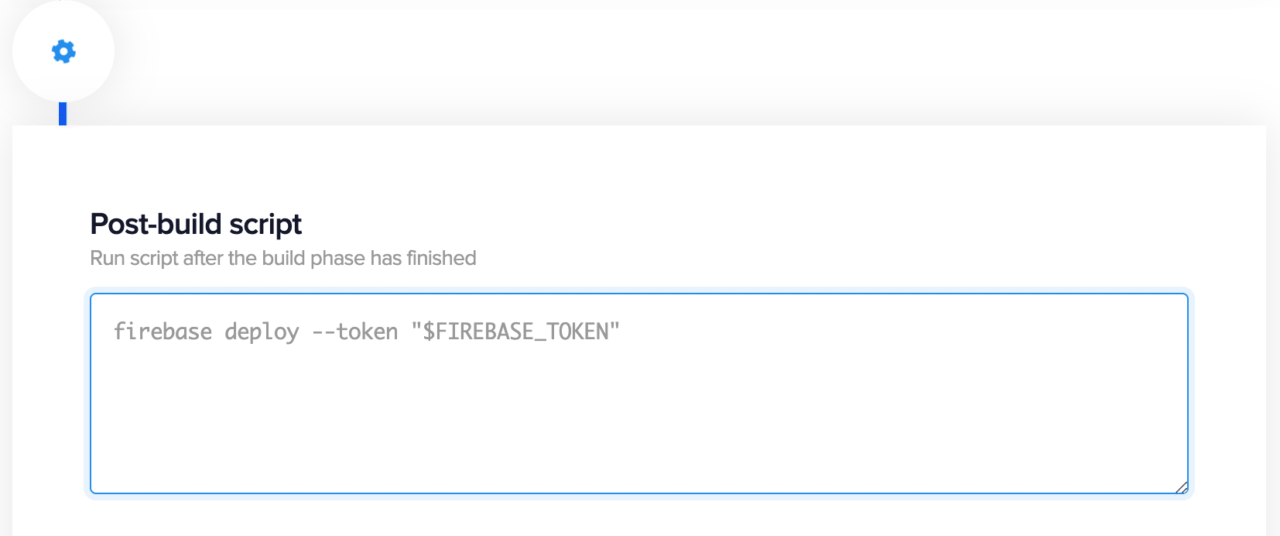
Then navigate further down and click on the + sign between Build and Publish. In the post-build script field, add the following script:
firebase deploy --token "$FIREBASE_TOKEN"`
Finally, save the settings. Your app will be then published to Firebase hosting the next time you build.
Setting Firebase hosting up for builds configured in codemagic.yaml
Add your encrypted token as an environment variable like this:
environment:
  vars:
    FIREBASE_TOKEN: <insert your encrypted token here>
Then add the script for publishing to Firebase hosting in the scripts section. Make sure that you add the publishing step after the building step:
- name: Publish to Firebase Hosting
  script: firebase deploy --token "$FIREBASE_TOKEN"
Here is an example of a full workflow for building a Flutter web app and publishing it to Firebase hosting:
workflows:
  publish-to-firebase:
    name: Publish to Firebase hosting
    max_build_duration: 60
    environment:
      vars:
        FIREBASE_TOKEN: <insert your encrypted token here>
      flutter: beta
      xcode: latest
      cocoapods: default
    scripts:
      - flutter packages pub get
      - flutter config --enable-web
      - name: Build Web
        script: |
          flutter build web --release
          cd build/web
          7z a -r ../web.zip ./*
      - name: Publish to Firebase Hosting
        script: firebase deploy --token "$FIREBASE_TOKEN"
    artifacts:
      - build/web.zip
      - flutter_drive.log
    publishing:
      email:
        recipients:
          - arnold@nevercode.io
To conclude
Whether you are using .yaml or UI to build your web app, setting up publishing to Firebase hosting with Codemagic is pretty straight-forward and can be easily set up in a short span of time.
When the build is successful, you can see your application published to Firebase Hosting. You can find the direct URL to the deployed build also from the log output in Codemagic UI:
✔  Deploy complete!

Project Console: https://console.firebase.google.com/project/your-project/overview
Hosting URL: https://your-project.web.app
References
Official documentation:
- Firebase hosting - the documentation
- Firebase console - for setting up the Firebase project
- Firebase Release Notes - search for “hosting” in order to see which SDKs have been updated
- Google Analytics - more information about Google Analytics
Codemagic documentation:
- Environment variables - information about using environment variables with Codemagic
- Encryption - more information about encrypting sensitive information with Codemagic
- Using the .yaml file - documentation regarding using the ´codemagic.yaml` file to manage workflows with Codemagic
This article is written by Arnold Veltmann who’s a support engineer at Codemagic.


