


")
In this article, we will learn how to use Firebase for iOS in React Native projects and publish the app using CI/CD via Codemagic.
Firebase is a popular cloud-hosted Backend-as-a-Service (BaaS) provided by Google to enrich the mobile and web development experience. Firebase allows developers to add a vast variety of services into their apps. Some of the most popular services are:
User authentication
Cloud Storage
Deep links
Crashlytics
Test lab
Analytics
Web hosting
Developers use Firebase services for various purposes. Firebase natively supports Android, iOS, web, Unity and even Google’s chatbot building service named Dialogflow.
This article is written by Sneh Pandya
Prerequisites
Before we start, we require the following:
Access to the Firebase Console linked with a Google account
A React Native project in which Firebase services will be added
A completed environment setup for the React Native project focusing on iOS
In this article, we will use the ReactNativeFirebaseApp to set up Firebase services related to iOS in our React Native app. Similar setup steps can be followed for the Android version of the React Native app.
Set up a new project on Firebase Console
To get started with Firebase services, you need to have a Google account. Then follow the steps below to create a new project in the Firebase Console:
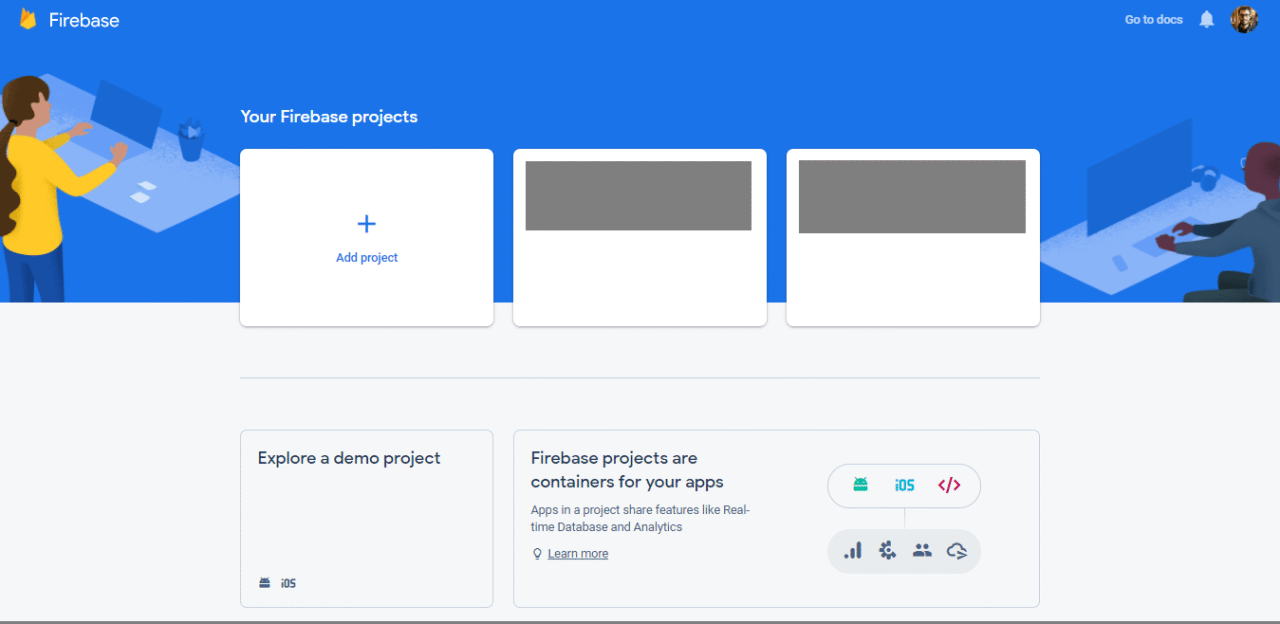
Go to the Firebase Console, and log in with your Google account.
Click on the Add project button.
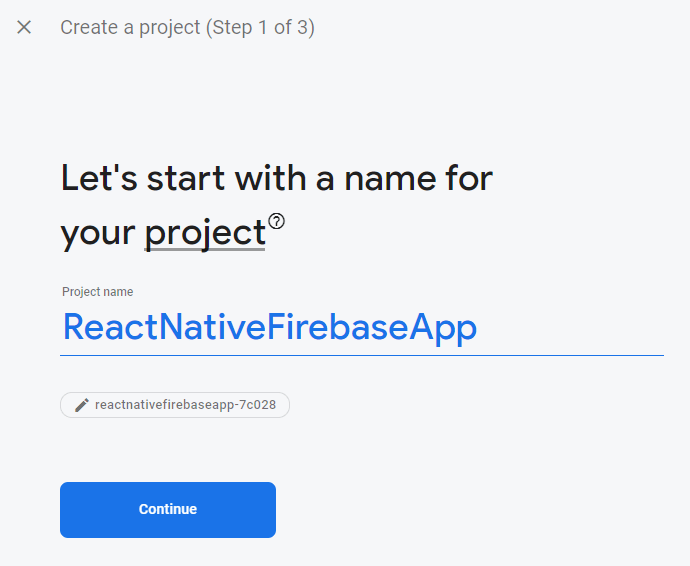
- Enter a Project name of your choice, and click on Continue.
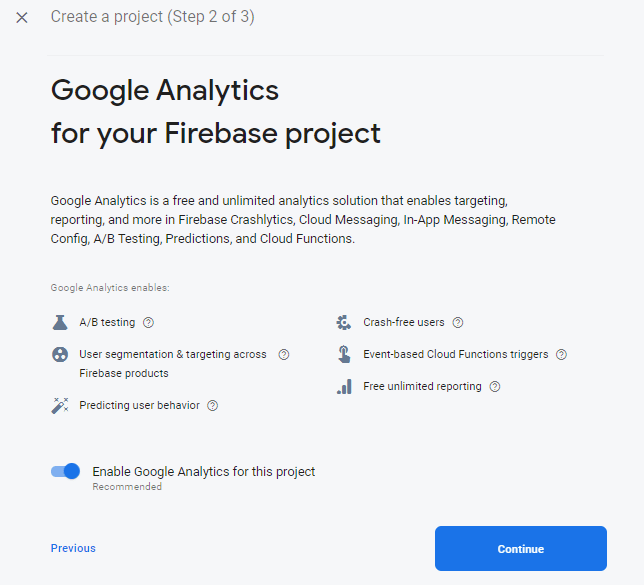
- We will set up Crashlytics for our React Native app for iOS in this article, so keep Google Analytics for this project enabled, and click Continue.
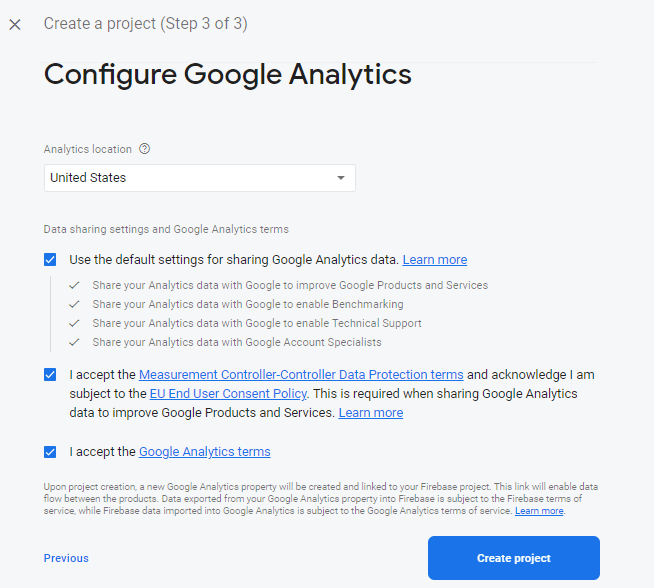
- Select your home country or the country where your organization is located. The country selection does not affect how Google processes and collects the data. Click on Create project.
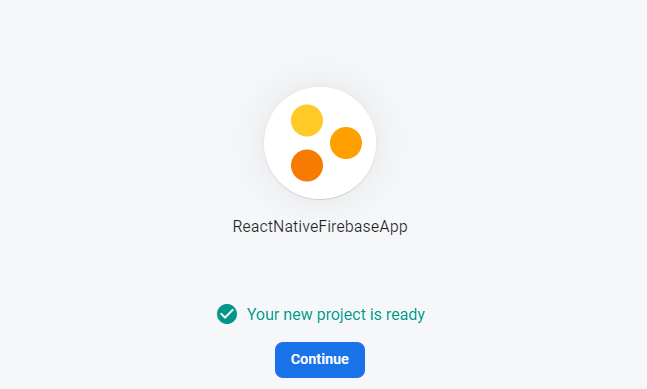
- Let the project setup complete. Once done, you will see a completion status like below. Click on Continue.
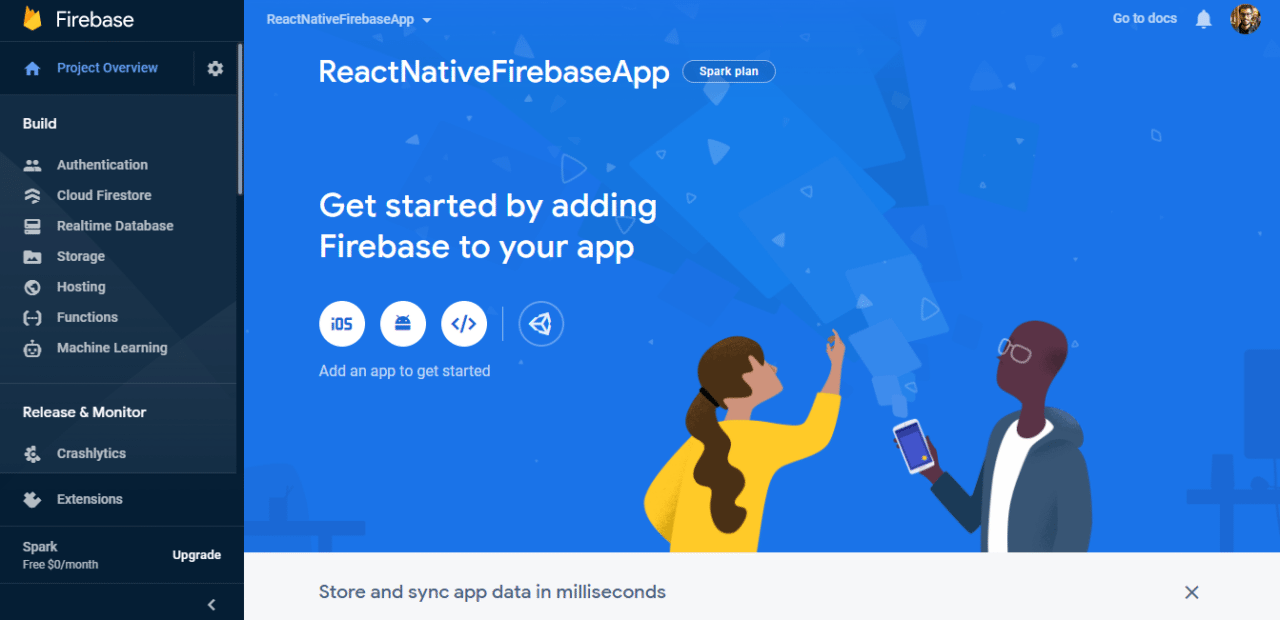
You will be redirected to the Firebase project dashboard.
Set up a new React Native application
Now, let’s add our iOS app configuration to the Firebase project. React Native creates directories for both Android and iOS, labeled as android and ios, respectively.
To complete the Firebase setup for iOS in React Native apps, you need to follow platform-specific steps. There are two ways to add Firebase to a React Native project:
Using Firebase Web SDK
Using react-native-firebase
To create a new application, run the commands below:
npm install -g expo-cli // To add Expo CLI on your machine

npx react-native init ReactNativeFirebaseApp // To set up a new React Native app

cd ReactNativeFirebaseApp
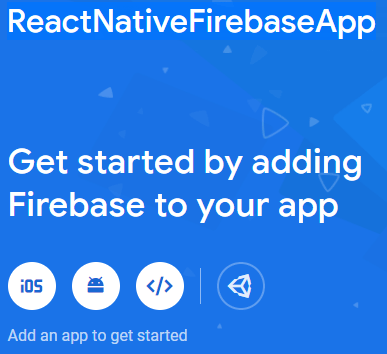
- On the Firebase Project Dashboard, click on the iOS icon.
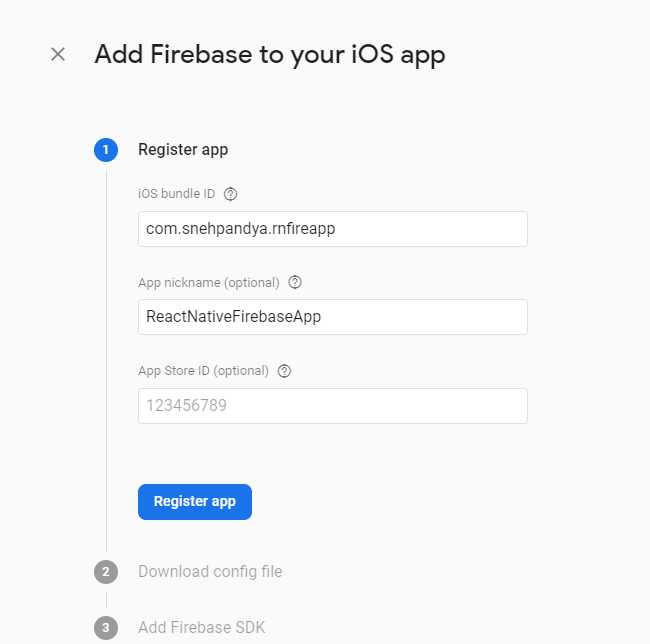
- You will be asked to fill in the details for your app, among which only bundle ID is mandatory for now. You can get the bundle ID of the iOS app from Xcode. Open the
iosdirectory in Xcode, then click on the Runner section in the top-left corner. Copy the Bundle Identifier in the General tab of your main target.
If you prefer using the command line, you can execute the following command by providing the scheme and project workspace of the iOS app.
cd ios $ xcodebuild -workspace Runner.xcworkspace/ -scheme Runner -showBuildSettings | grep PRODUCT_BUNDLE_IDENTIFIER
This will display the bundle identifier of the app. In our case, it’s com.snehpandya.rnfireapp. Enter the details in the Firebase Console, and click on Register app.
- In the next step, download the
GoogleService-Info.plistfile provided by Firebase, and put it in the iOS app directory.
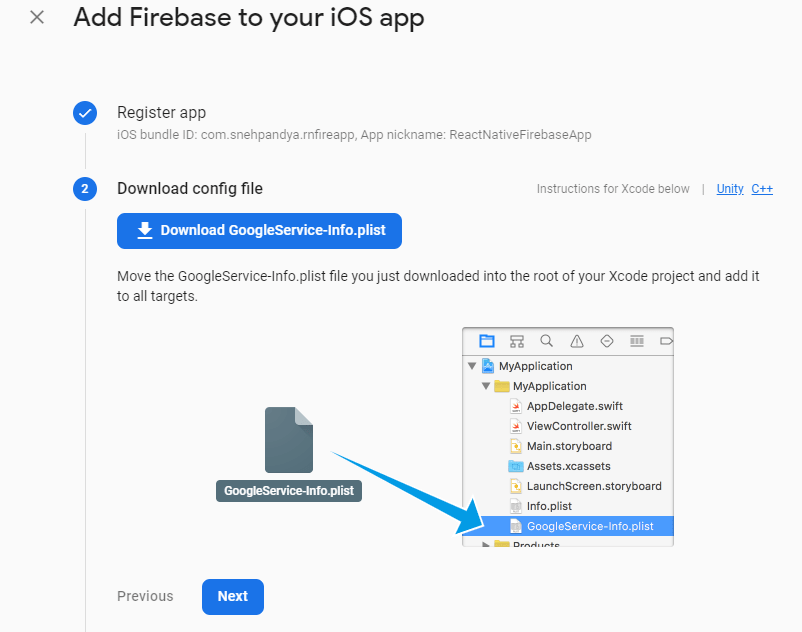
Open the
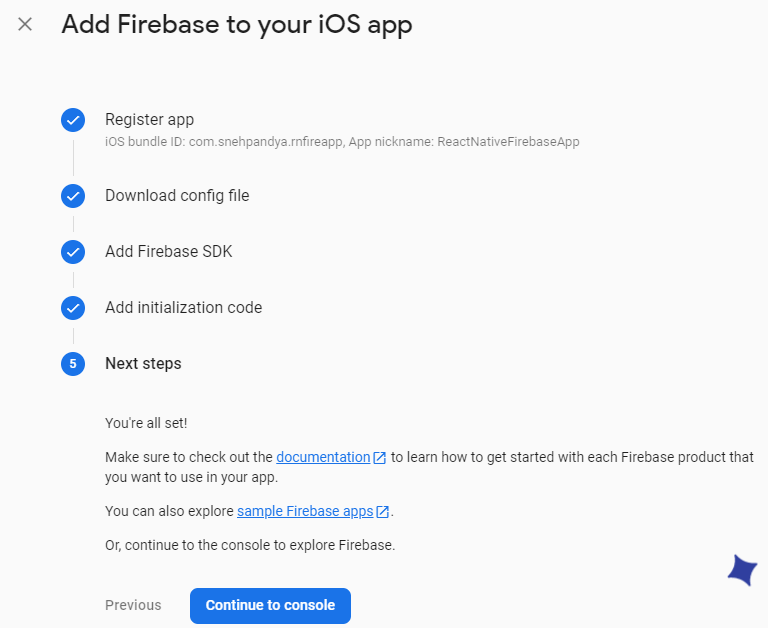
iosfolder of the project directory in Xcode by right-clicking and selecting Open in Xcode. Now, drag and drop the file that you downloaded into the Runner sub-folder. When a dialog box appears, make sure that Runner is selected in the Add to targets box. Then click Finish.For an iOS app setup, Firebase walks you through a few more steps. However, you don’t have to perform them to set up your current app. So skip to the last step, and click Continue to console.
- Once redirected, on the Firebase Console dashboard, you will see that the iOS version of your React Native app has been added to the Firebase.
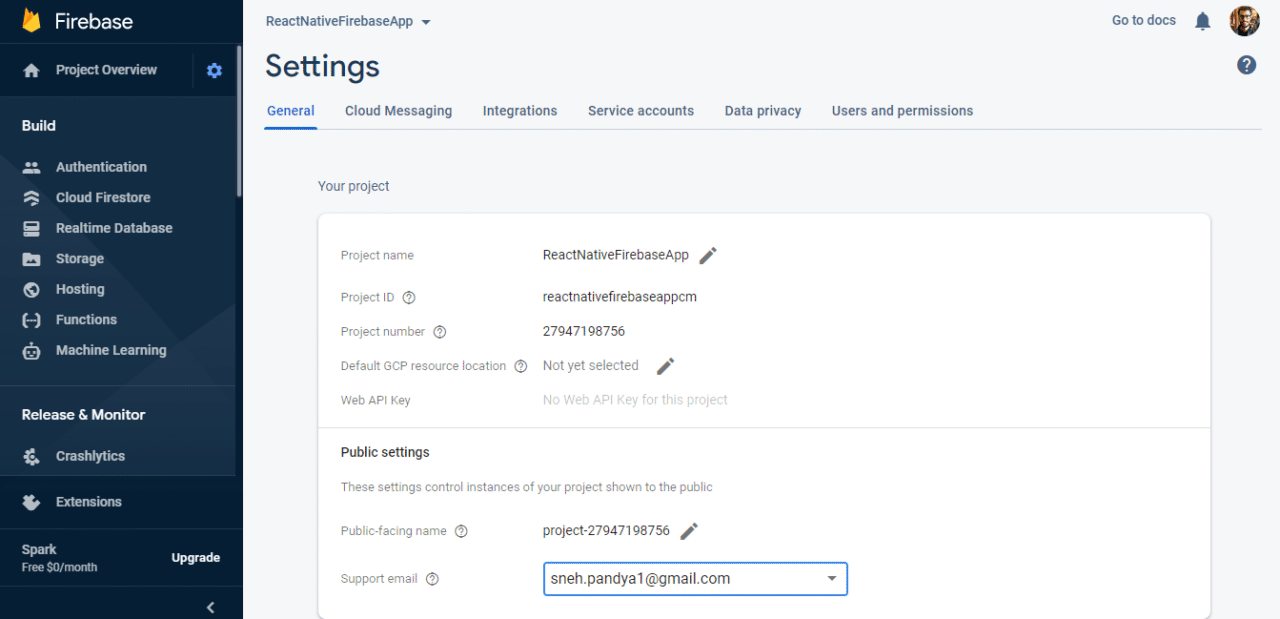
- Click the gear icon beside Project Overview, then click Project Settings, and navigate to the General tab. Now, enter your email in the Support email field as shown in the image.
Add Crashlytics to your React Native app
The Firebase SDK works as a bridge between Firebase services and the React Native app to access APIs. You can find a full list of available Firebase services and platform-specific documentation on the Firebase Documentation page.
To configure Firebase services in our React Native app:
Open the
ios/folder in Xcode.Right-click on the project, and then select Add files to …
Select the
GoogleService-Info.plistfile that we downloaded earlier, and make sure the Copy items if needed checkbox is enabled.Open the
Podfile, and add theFirebaseCrashlyticspod. Also, for an optimal experience, it is recommended to add theFirebaseAnalyticspod, as shown below:
pod 'Firebase/Crashlytics'
pod 'Firebase/Analytics'

pod install
- To access and use the Firebase SDK configuration on iOS, add the following into the
/ios/ReactNativeFirebaseApp/AppDelegate.mfile:
import Firebase // Add to the top of the file

- (BOOL)application:(UIApplication *)application didFinishLaunchingWithOptions:(NSDictionary *)launchOptions {
  // Add at the top of didFinishLaunchingWithOptions method
  FirebaseApp.configure()

  // ...
}
To initialize Crashlytics and automatically upload crash reports, go to Xcode, and navigate to the project file on the left pane.
From the Select a project or target dropdown, select your build target.
Select the Build Phases tab, then click + > New Run Script Phase.
In the Run Script section, add a new script as shown below:
"${PODS_ROOT}/FirebaseCrashlytics/run"
- Add the app’s dSYM location as an input file, as shown below, to enable crash log reporting:
${DWARF_DSYM_FOLDER_PATH}/${DWARF_DSYM_FILE_NAME}/Contents/Resources/DWARF/${TARGET_NAME}
- Finally, go to the
iosproject root directory, and run your project to verify and complete the initialization.
cd ios/
pod install --repo-update
cd ..
npx react-native run-ios
Set up Firebase for Codemagic
Codemagic is a versatile CI/CD solution for all types of mobile apps, including React Native. You can easily set up your React Native apps with minimal steps on the platform to automate your continuous integration and continuous delivery pipelines. If you are new to Codemagic, you can read the Getting Started guide.
Currently, our app is configured with Firebase Crashlytics. We will now configure our React Native project on Codemagic. Before we proceed, it is crucial to keep the privacy and security of our confidential keys intact.
While setting up Firebase for our project, we downloaded the GoogleService-Info.plist file and kept it in the local ios directory. This file includes sensitive configuration data and API keys for Firebase to verify and communicate with our app. For this reason, it should not be exposed, and hence, we will exclude it from our version control system like Git.
In the root directory of our project, open the .gitignore file, and add the exclusion as shown below. This will prevent the file from being tracked or committed by the version control system.
ios/ReactNativeFirebaseApp/GoogleService-Info.plist
After successfully excluding the configuration file, we still need the credentials for successful build generation on Codemagic. In order to provide them, we will upload an encrypted version of the file on Codemagic, which will be securely decrypted during build generation. The credentials will be wiped from Codemagic machines after the build is complete.
Follow the steps below to provide the encrypted version of the file:
Navigate to your project on the Codemagic dashboard.
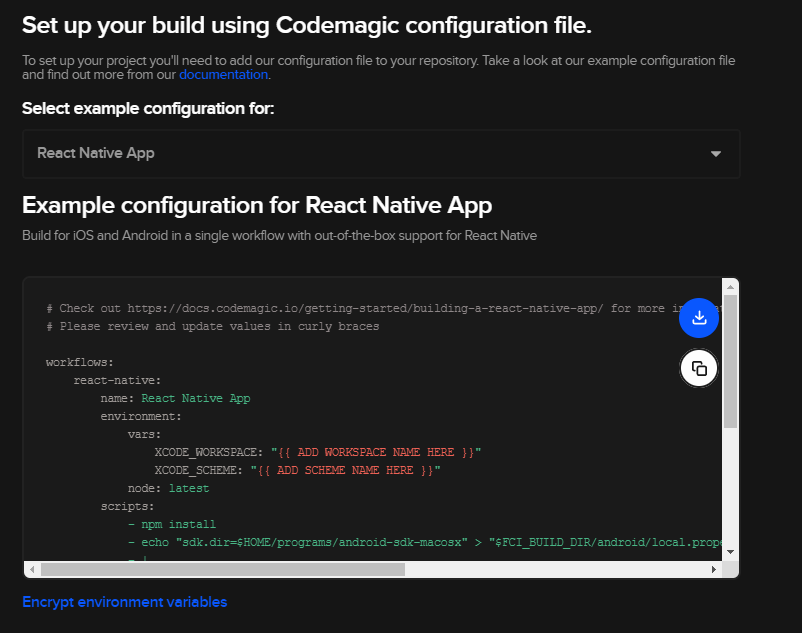
Choose the React Native build type for your app.
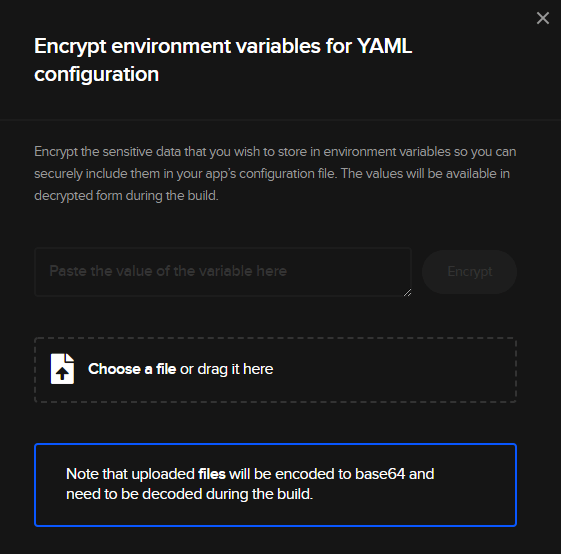
You will be shown the build configuration page, as shown below. Click on Encrypt environment variables at the bottom of the page.
- Drag and drop or upload the
GoogleService-Info.plistfile in the dialog. It will now generate an encrypted version of your file. Copy the encrypted string.
Download the
codemagic.yamlfile in the root directory of your project, and edit theXCODE_WORKSPACEandXCODE_SCHEMEvariables to provide appropriate values to each of them.Add the copied encrypted string as shown below under the
scriptsblock in thecodemagic.yamlfile:
echo $FIREBASE_IOS | base64 --decode > $CM_BUILD_DIR/ios/Runner/GoogleService-Info.plist
This script will decode the base64 string to make use of the configuration and API keys during the build.
Commit the
codemagic.yamlfile to the version control system. Then click on Check for configuration file.Now, click on Start new build to build the app.
We have successfully completed the setup and configuration of our React Native app for iOS with Firebase on Codemagic CI/CD.
Conclusion
With the popularity of React Native combined with Firebase’s services, your apps can be supercharged! Codemagic plays a key role, providing versatility and support for building, deploying and publishing apps for your end-users.
Useful links and references
Here’s a practical guide on React Native + Firebase + Codemagic for Android.
Practical guides on Firebase with Flutter for iOS and Android on Codemagic can be found here and here, respectively.
Learn how to load Firebase config in Codemagic with environment variables here.
Here’s a guide on Continuous Integration and Delivery for React Native apps.
Here’s a guide on how to develop and distribute iOS apps without Mac with React Native and Codemagic.
A guide on app distribution using the Gradle plugin in Codemagic can be found here.
A guide on Firebase app distribution using CLI can be found here.


