


State management is one of the most important skills every front-end or mobile app developer should master. Not only does it make the application more fluid or performant, but it also makes the code more easily maintainable when good tools are used. In the React Native ecosystem, you can find Redux, which is the most popular library used for state management, even ahead of React’s Context API. Redux is followed closely by Recoil, which (unlike Redux) is very easy to set up. Which of these two state management solutions should you choose for your next project?
In this article, we’ll compare these two state management solutions by using both of them to build a simple counter application with React Native.
Redux vs Recoil: Architecture
Redux architecture
The Redux architecture relies on one rule: All of your application states live in one container. To change the state, you’ll have to create a new state based on the current state and a requested change. This is why Redux has these three main components:
- A store that holds all of your app’s state
- An action, which is immutable data that describes a state change
- A reducer that changes the app’s state using the current state and action
Redux comes with some problems, though, including the following:
- Steep learning curve
- Too much boilerplate code
- Involves restructuring your project
- Lack of concurrent mode support
- General approach is not React-like
- Difficult to achieve code splitting
- No built-in async support
Recoil architecture
Recoil is a brand-new experimental JavaScript state management library that addresses many of the problems developers face when developing large applications using the existing Context API. Recoil has two main components — atoms and selectors.
Atoms are units of the state. They are also updatable and subscribable. This means that when an atom is updated, each subscribed component is re-rendered with the new value.
Selectors are pure functions that accept atoms or other selectors as arguments. When these upstream atoms or selectors are updated, the selector function is re-evaluated.
Components can subscribe to selectors just like they can to atoms. They are then re-rendered when a selector changes. Selectors can transform the atom state either synchronously or asynchronously.

Redux vs Recoil: Fight
To really understand the difference between Redux and Recoil, let’s quickly create a simple React Native application that increments a counter with the click of a button.
Setting up the project
First of all, you’ll need to set up a project. We’ll be making a mobile application using React Native. So, make sure you have your environment ready for React Native. In this example, I am working on a Linux machine.
npx react-native init ReduxVsRecoil
Once that’s done, we can add Redux and create the first version of the counter application.
Adding Redux
In this step, we’ll be adding Redux packages.
yarn add redux react-redux
Redux is a stand-alone library, and react-redux gives us access to some hooks to make development easier with React.
Adding reducers
As stated earlier, in Redux, actions are objects that describe what has to be done.
On the other hand, Redux reducers are simple functions that check which action is performed and update the state based on the action.
To make this clearer, let’s create a folder called store in the src directory. This directory will contain all the actions and reducers we’ll be writing. In this directory, let’s create a reducer — a file called counterReducer.js.
const counterReducer = (state = 0, action) => {
  switch (action.type) {
    case 'INCREMENT':
      return state + 1;
    case 'DECREMENT':
      return state - 1;
    default:
      return state;
  }
};

export default counterReducer;
For this reducer, the state is hard-coded to 0. Next, we need to register the reducer. For this, Redux provides the helper function combineReducers. This function will turn all reducers into a single reducer that can be passed to the createStore API. We’ll talk more about this API in the next sections. For now, inside the store directory, let’s create a file called reducers.js and implement the combineReducers function there.
import {combineReducers} from 'redux';
import counter from './counterReducer';

const allReducers = combineReducers({
  counter,
});

export default allReducers;
Adding actions
Actions in Redux are JSON objects that describe what has to be done. Let’s add the action that will increment our value. To get started, create a file called actions.js in the store directory.
export const increment = () => {
  return {
    type: 'INCREMENT',
  };
};

export const decrement = () => {
  return {
    type: 'DECREMENT',
  };
};
After that, we need to create the store that the React Native application will use to update the state. Inside the src/store directory, let’s create a file called index.js.
import {createStore} from 'redux';
import allReducers from './reducers';

const store = createStore(allReducers);

export default store;
The Redux store is created using the createStore API. We can now register the store within our React Native application.
Wrapping the React Native project
Before we start importing and dispatching actions, we need to create a global store. To bring our counter app’s functionality to life, we must connect everything we’ve done with Redux to the app.
We need to import Provider from react-redux and wrap it around the entire app in our src/index.js file. The provider connects the global state to the app. Provider takes an argument called store in which we must pass the created store.
/**
 * @format
 */
import React from 'react';
import {AppRegistry} from 'react-native';
import App from './App';
import {name as appName} from './app.json';
import {Provider} from 'react-redux';
import store from './store';

const ReduxApp = () => {
  return (
    <Provider store={store}>
      <App />
    </Provider>
  );
};

AppRegistry.registerComponent(appName, () => ReduxApp);
React-Redux comes with two hooks that can speed up state selection and action dispatching: useDispatch and useSelector.
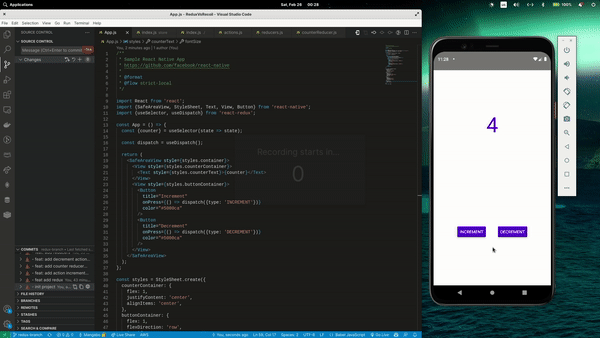
Let’s rewrite the App.js file to create the counter and start incrementing and decrementing it.
/**
 * Sample React Native App
 * https://github.com/facebook/react-native
 *
 * @format
 * @flow strict-local
 */

import React from 'react';
import {SafeAreaView, StyleSheet, Text, View, Button} from 'react-native';
import {useSelector, useDispatch} from 'react-redux';

const App = () => {
  const {counter} = useSelector(state => state);

  const dispatch = useDispatch();

  return (
    <SafeAreaView style={styles.container}>
      <View style={styles.counterContainer}>
        <Text style={styles.counterText}>{counter}</Text>
      </View>
      <View style={styles.buttonContainer}>
        <Button
          title="Increment"
          onPress={() => dispatch({type: 'INCREMENT'})}
          color="#5000ca"
        />
        <Button
          title="Decrement"
          onPress={() => dispatch({type: 'DECREMENT'})}
          color="#5000ca"
        />
      </View>
    </SafeAreaView>
  );
};

const styles = StyleSheet.create({
  counterContainer: {
    flex: 1,
    justifyContent: 'center',
    alignItems: 'center',
  },
  buttonContainer: {
    flex: 1,
    flexDirection: 'row',
    justifyContent: 'space-around',
    alignItems: 'center',
    width: '70%',
  },
  container: {
    flex: 1,
    backgroundColor: '#fff',
    alignItems: 'center',
    justifyContent: 'center',
  },
  counterText: {
    fontSize: 70,
    color: '#5000ca',
  },
});
export default App;
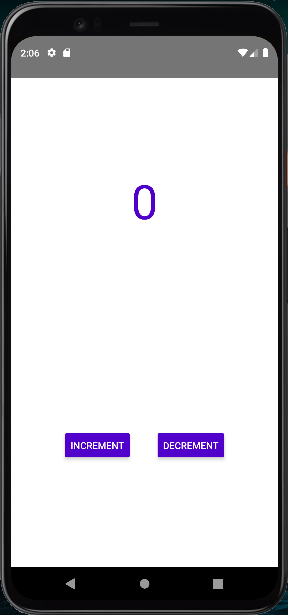
Finally, this is the result you’ll have.
Let’s see how we can build the same counter application using Recoil with fewer steps.


Adding Recoil
First of all, we need to install the recoil package.
yarn add recoil
Once that’s done, we can freely configure the package.
Configuring Recoil
To be able to use Recoil, we need to wrap the <App /> in RecoilRoot in the src/index.js file.
/**
 * @format
 */
import React from 'react';
import {AppRegistry} from 'react-native';
import App from './App';
import {name as appName} from './app.json';
import {RecoilRoot} from 'recoil';

const RecoilApp = () => (
  <RecoilRoot>
    <App />
  </RecoilRoot>
);

AppRegistry.registerComponent(appName, () => RecoilApp);
Now we are ready to use Recoil. Let’s create our first atom and read the value from it.
Creating a counterState atom
An atom is a piece of state. Atoms can be read from and written to any component. This also makes the component that reads the value of an atom automatically subscribe to this atom.
Inside the src/App.tsx, let’s create an atom called counterState.
import React from 'react';
import {SafeAreaView, StyleSheet, Text, View, Button} from 'react-native';
import {atom, useRecoilState} from 'recoil';

const counterState = atom({
  key: 'counterState',
  default: 0,
});
...
The key here is a unique ID to help with atom selection. It also needs a default value — in this case, it’s 0.
Next, let’s create a state that will read from the counterState. For this, we’ll be using the useRecoilState() hook.
...
const App = () => {
  const [counter, setCounter] = useRecoilState(counterState);
...
Finally, let’s create the increment and decrement buttons.
...
const App = () => {
  const [counter, setCounter] = useRecoilState(counterState);

  return (
    <SafeAreaView style={styles.container}>
      <View style={styles.counterContainer}>
        <Text style={styles.counterText}>{counter}</Text>
      </View>
      <View style={styles.buttonContainer}>
        <Button
          title="Increment"
          onPress={() => setCounter(counter + 1)}
          color="#5000ca"
        />
        <Button
          title="Decrement"
          onPress={() => setCounter(counter - 1)}
          color="#5000ca"
        />
      </View>
    </SafeAreaView>
  );
};
...
And here’s the final code of the App.js file.
/**
 * Sample React Native App
 * https://github.com/facebook/react-native
 *
 * @format
 * @flow strict-local
 */

import React from 'react';
import {SafeAreaView, StyleSheet, Text, View, Button} from 'react-native';
import {atom, useRecoilState} from 'recoil';

const counterState = atom({
  key: 'counterState',
  default: 0,
});
const App = () => {
  const [counter, setCounter] = useRecoilState(counterState);

  return (
    <SafeAreaView style={styles.container}>
      <View style={styles.counterContainer}>
        <Text style={styles.counterText}>{counter}</Text>
      </View>
      <View style={styles.buttonContainer}>
        <Button
          title="Increment"
          onPress={() => setCounter(counter + 1)}
          color="#5000ca"
        />
        <Button
          title="Decrement"
          onPress={() => setCounter(counter - 1)}
          color="#5000ca"
        />
      </View>
    </SafeAreaView>
  );
};

const styles = StyleSheet.create({
  counterContainer: {
    flex: 1,
    justifyContent: 'center',
    alignItems: 'center',
  },
  buttonContainer: {
    flex: 1,
    flexDirection: 'row',
    justifyContent: 'space-around',
    alignItems: 'center',
    width: '70%',
  },
  container: {
    flex: 1,
    backgroundColor: '#fff',
    alignItems: 'center',
    justifyContent: 'center',
  },
  counterText: {
    fontSize: 70,
    color: '#5000ca',
  },
});
export default App;
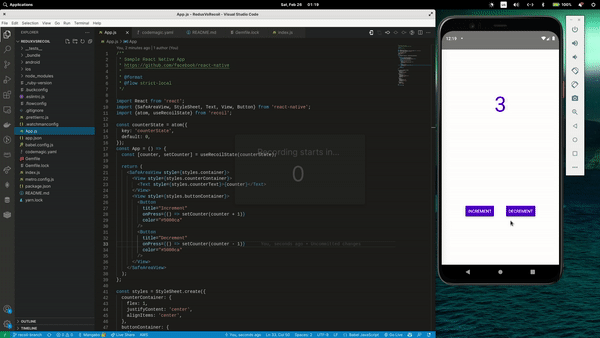
This produces a similar result with less code and a much simpler process.
Building the project with Codemagic
Codemagic helps you write CI/CD pipelines for mobile or desktop applications, including building, testing, and publishing your apps. We’ll be writing a CI/CD pipeline for our counter application to build, test, and publish it. Here, I’ll focus on Android builds.
Setting up Codemagic
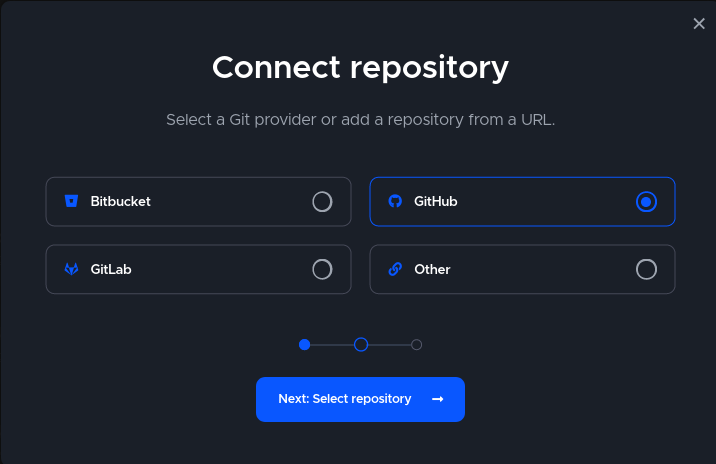
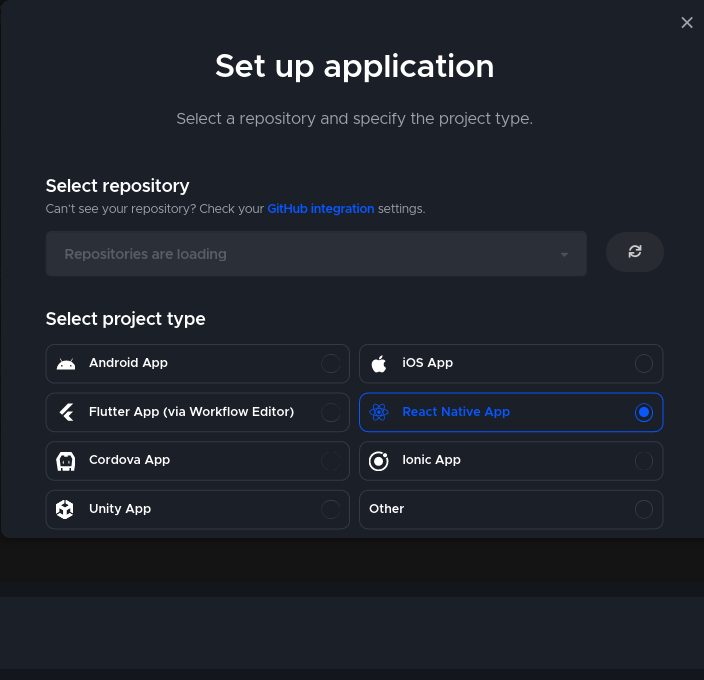
First of all, make sure you have an account on Codemagic. Then add a new application and select the repo service you use to save your source code. I am working with GitHub here, but you can choose whichever service you want.
Once that’s done, you can select your project. Make sure that the project type is set to React Native App.
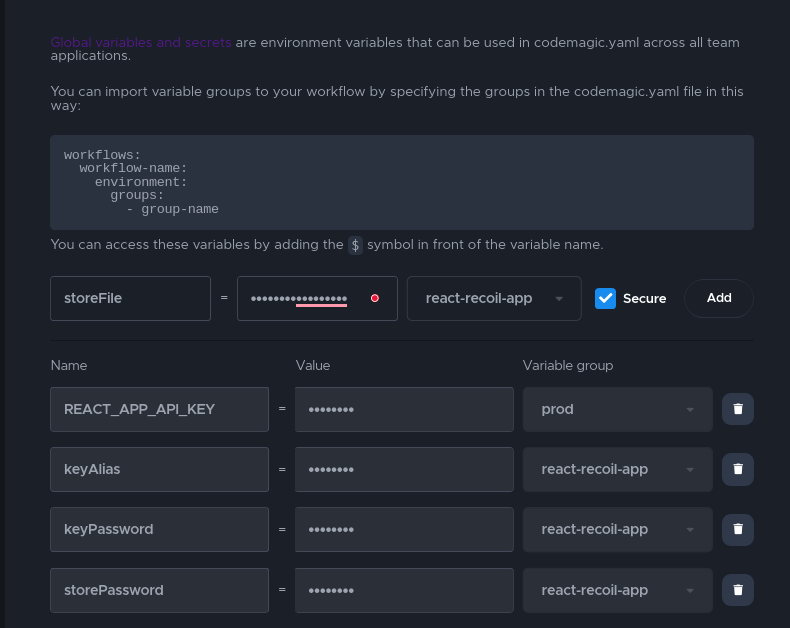
The next step is to encrypt the environment variables for YAML configuration.
    storePassword=android
    keyPassword=yourpassword
    keyAlias=androiddebugkey
    storeFile=keystore.keystore
Environment variables
In the project configuration stage, you can see a tab named Environment variables.
Create a group name called redux-recoil-app (you can change it according to your needs), and add the values according to your key.properties file.
Going back to the code, create a file named codemagic.yaml at the root of your project. It should contain the following content:
workflows:
    react-native-android:
        name: React Native Android
        max_build_duration: 120
        instance_type: mac_mini
        environment:
            groups:
                - react-recoil-app
            vars:
                CM_KEYSTORE_PASSWORD: Encrypted()
                CM_KEY_PASSWORD: Encrypted()
                CM_KEY_ALIAS: Encrypted()
            node: 16.14.0
        scripts:
            - yarn install
            - echo "sdk.dir=$HOME/programs/android-sdk-macosx" > "$CM_BUILD_DIR/android/local.properties"
            - |
                chmod -R 777 $CM_BUILD_DIR
                echo $CM_KEYSTORE | base64 --decode > $CM_BUILD_DIR/keystore.jks
                # build Android
                cd android
                ./gradlew assembleRelease
        artifacts:
            - android/app/build/outputs/**/*.apk
You can find this file in the GitHub repo for the sample project.
React or Recoil — which should you choose for your next React Native project?
Given what we’ve seen, Recoil definitely looks much more simple, elegant, and intuitive than Redux. But Redux is the result of many years of research and development, while the infrastructure around Recoil is still in its infancy.
So, if you are working on a React Native project that will eventually grow very large, Redux is a great way to go. The boilerplate code can be overwhelming at first, but it’ll help with code architecture and organization.
If you are starting a small React Native project and React.Context doesn’t work for you, Recoil is an excellent option. It’s a simple and easy way to manage your application’s state, and depending on your needs and knowledge of code architecture and organization, you may be able to use it to its fullest. However, you’ll need to have clear rules on how to organize the atoms, selectors, and other features of Recoil to avoid confusion when the codebase grows larger.
Conclusion
Thank you for reading this article. I hope it gives you a basic understanding of Redux and Recoil so that you can choose the best option for your React Native project and start making something with it on your own.
You can find the source code for the project on GitHub.
Kolawole Mangabo is a full-stack engineer who works with Python and JavaScript. Currently busy building things in a food-tech company by day and fintech products by night, he’s also a technical writer who covers Django, React, and React Native on his personal blog.


