


This article is updated in July 2021
Now, you can establish a temporary remote access/connection to the virtual MacOS build machine on which your Codemagic builds run during each session.
In case you are not a Codemagic user yet, you can sign up here:
There are two ways to connect to the remote machine:
- SSH Access
- VNC Viewer
This article is written by Souvik Biswas
Pre-installed software
The remote MacOS machine has multiple versions of Xcode, iOS Simulator(s), and other important software required for testing and debugging your Flutter projects beforehand.
You can run your Flutter apps on iOS Simulator to test their performance and also make configuration changes to your Flutter projects in Xcode without owning a Mac yourself.
The full list of pre-installed software is available here.
Getting access to the virtual build machine
To get access to the virtualbuild machine using either SSH or VNC Viewer, follow the steps below.
NOTE: Establishing an SSH or VNC connection to the virtual machine is possible only for manually triggered builds.
Open your project on Codemagic.

Click on Start new build
In the Specify build configuration dialog box, select your correct branch and workflow, and again click on Start new build to start the build process.

As the build starts, expand the “Explore build machine via SSH or VNC client” tab, wait for some time and you will see some instructions for establishing an SSH or VNC connection.

Access using SSH
The SSH connection will allow you to access the build machine only through the terminal and run commands on it.
The scripts for establishing an SSH connection work natively on Linux and MacOS. But if you want to run on Windows, you will need additional software.
To establish an SSH connection, you just have to run a curl command from the terminal (on Linux and MacOS).
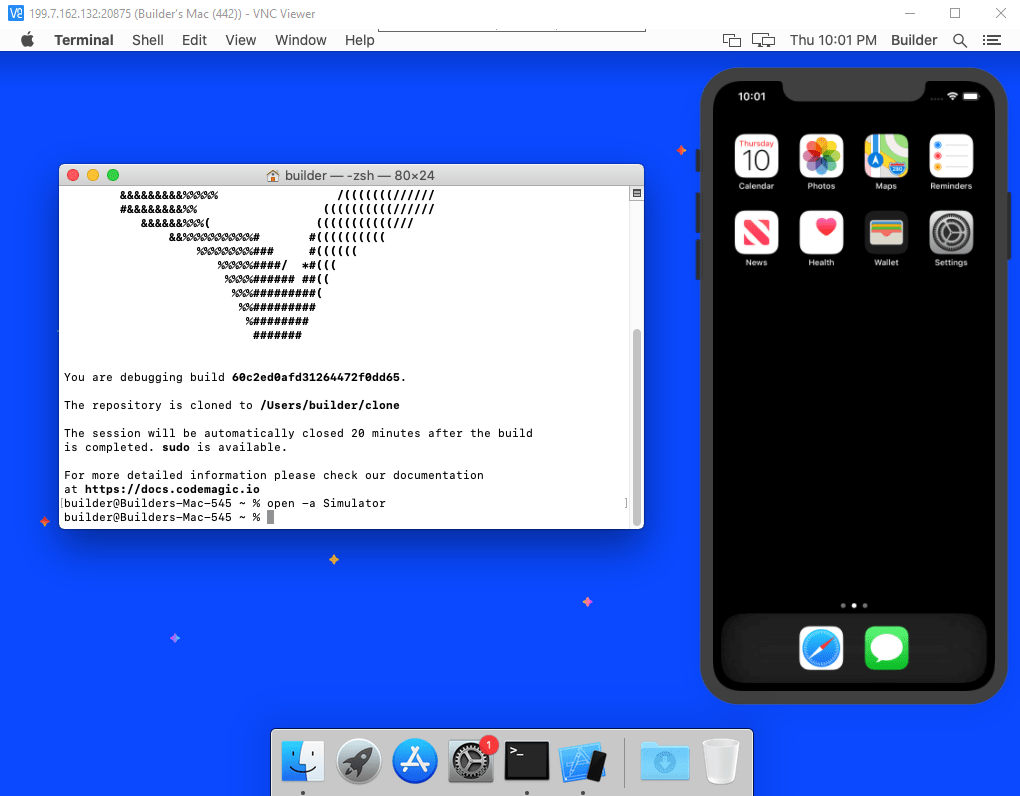
Copy and paste the curl command in the terminal. Press Enter to connect to the remote MacOS system.

Now you have access to the VM.
Your cloned project will be available in the path /Users/builder/clone. Navigate to the path just by running this command:
cd clone

The SSH session will remain active for a maximum of 20 minutes after all the build steps are complete or until the maximum build duration limit is reached, whichever comes first.
SSH access is a great option for debugging your builds. You can see the processes running during the CI job, reproduce all commands run during the build or debug your custom scripts. You will have full control over the VM with sudo access.
TIPS: You can rerun the bash commands from the
codemagic.yamlscript directly on the builder machine with SSH access and see if it produces a correct output.All the environment variables are accessible to you. You can view them by running the command
printenvon the builder.
Access using VNC Viewer
The VNC Viewer will allow you to access the remote build machine using a graphical interface. This allows you to run your Flutter app on the Simulator and understand its performance even without owning a MacOS machine yourself.
Download VNC Viewer.
Install and run VNC Viewer.
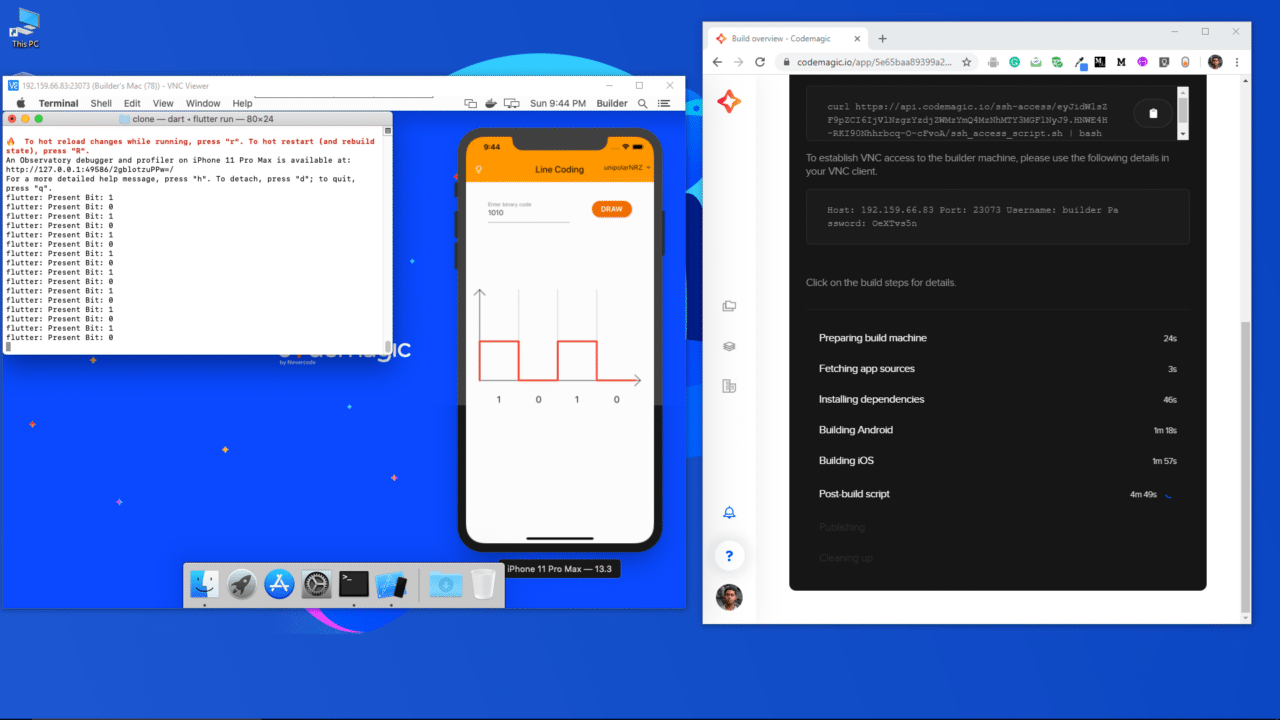
Now, copy and paste the Host ID and Port number into the VNC Server Address field in this format:
<Host ID>:<Port number>(for example:192.159.66.83:16543), then press Enter.
You will get a warning message; just click on Continue.

Enter the Username and Password as generated in the Codemagic UI, then click on OK.

You are now connected to the remote MacOS build machine and you will see the desktop of the system once the connection is established.
The VNC session will remain active for a maximum of 20 minutes after all the build steps are complete or until the maximum build duration limit is reached, whichever comes first.
How to access different applications
If you are not familiar with the MacOS environment, you might find it difficult to access different applications in the remote Mac. Don’t worry – you can launch various applications using the Terminal.
You can get access to the Terminal by clicking on it’s icon present in the Dock.
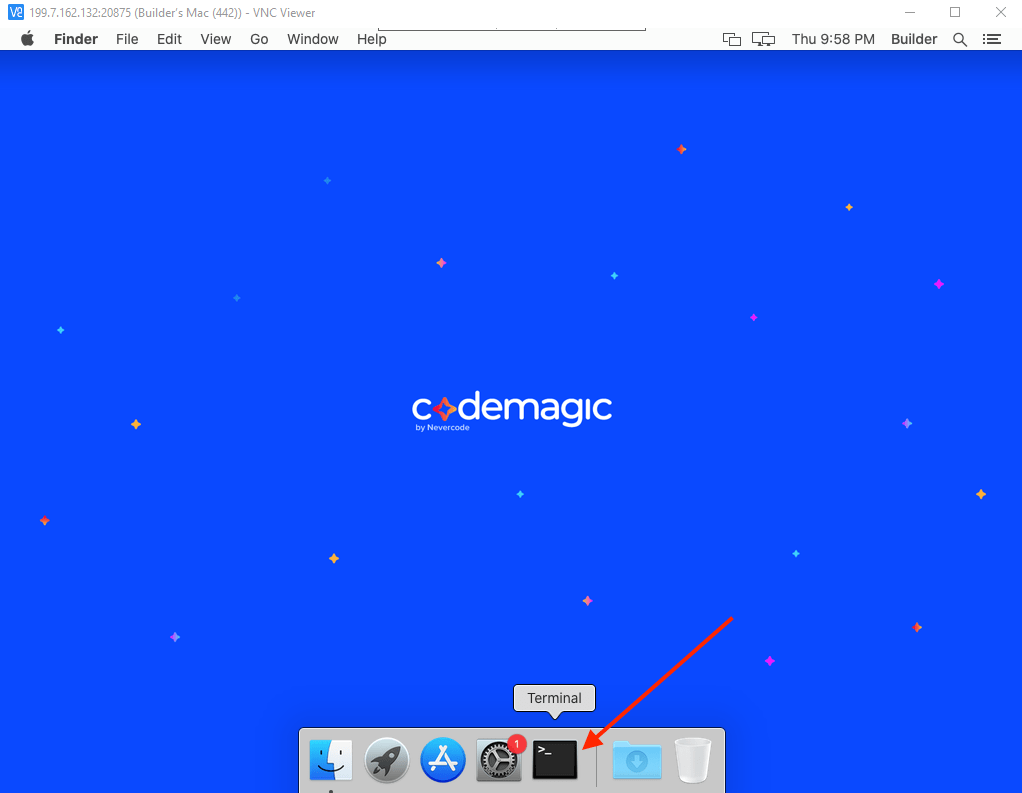
With Terminal, you can easily launch Safari, Xcode, Simulator and various other applications on the Mac.
Running on Simulator
If you are not a MacOS user, then the first thing you will probably want to do is to run your Flutter app on iOS Simulator. Let’s look into how you can run your app on Simulator.
First of all, start an iOS Simulator on the virtual MacOS system.
The build machines are equipped with different versions of Simulator; you should first test the app on the target iOS version for which you are building.
You can see all the Simulator versions installed on the build machine by using the following command:
xcrun simctl list
You can run the default Simulator version by using the command:
open -a Simulator
Or you can launch any of the Simulator present on the system by specifying the UDID of the device, using the command:
open -a Simulator --args -CurrentDeviceUDID <device UDID>
To run the app on the Simulator, you have to go to the cloned Flutter app directory. The clone of your project will be available in the path /Users/builder/clone on the VM.
You can navigate to that easily by using the command:
cd clone
Then you can run the app using the command:
flutter run

Wait for the project to load up on the Simulator.
Making iOS configuration changes
To make any configuration changes to the iOS part of your Flutter project, you have to use Xcode on the VM.
You can launch the default version of the Xcode using the command:
xed -x
To see which version of the Xcode is currently selected, you can use the command:
xcode-select -p
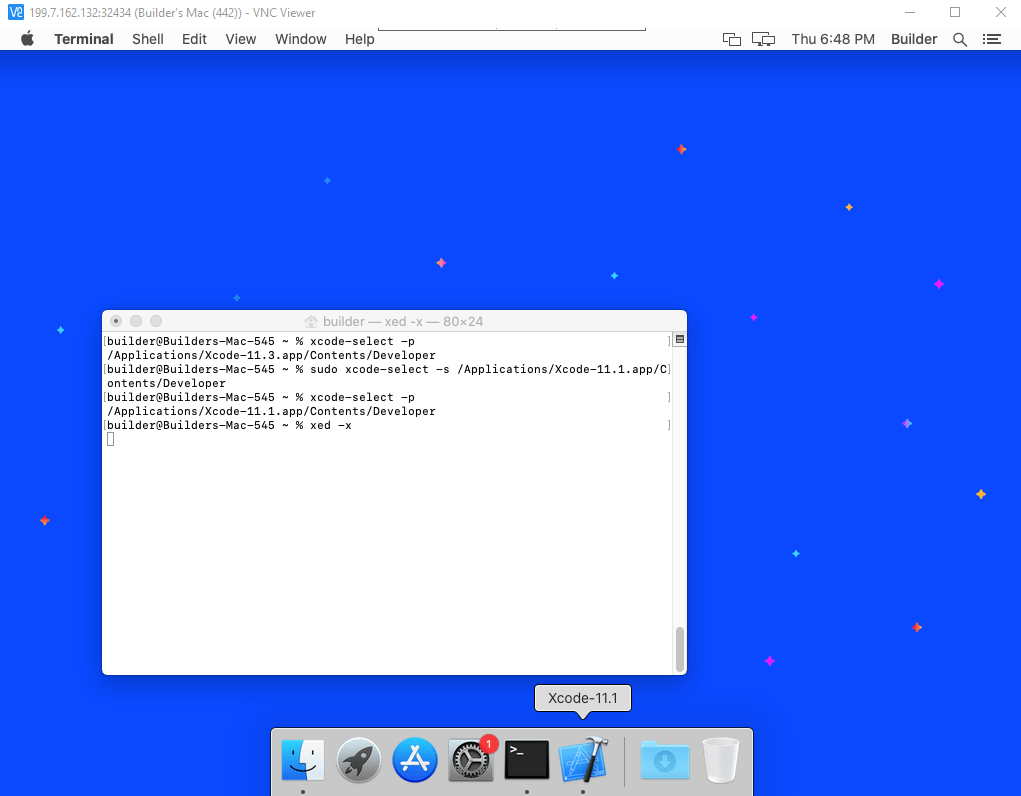
To change the Xcode version you can use:
sudo xcode-select -s /Applications/Xcode-<version>.app/Contents/Developer
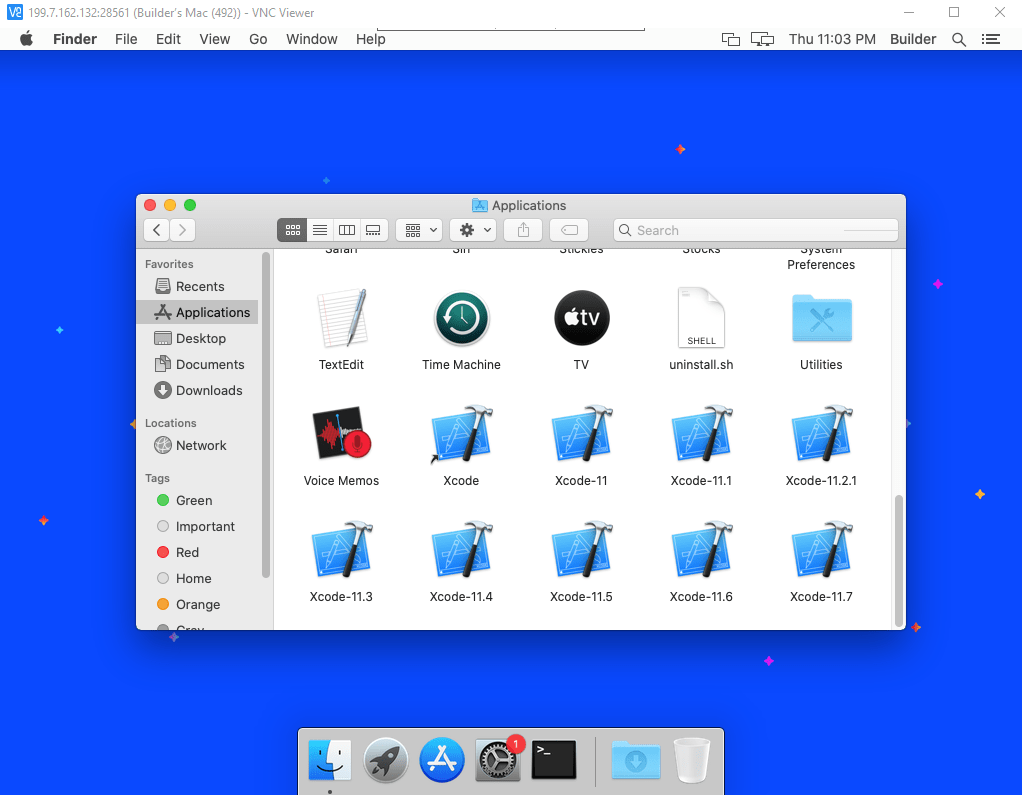
Replace the
<version>with any of the version available on the system. You can see the versions present on the system by going to the Applications folder from the Finder of the build machine.
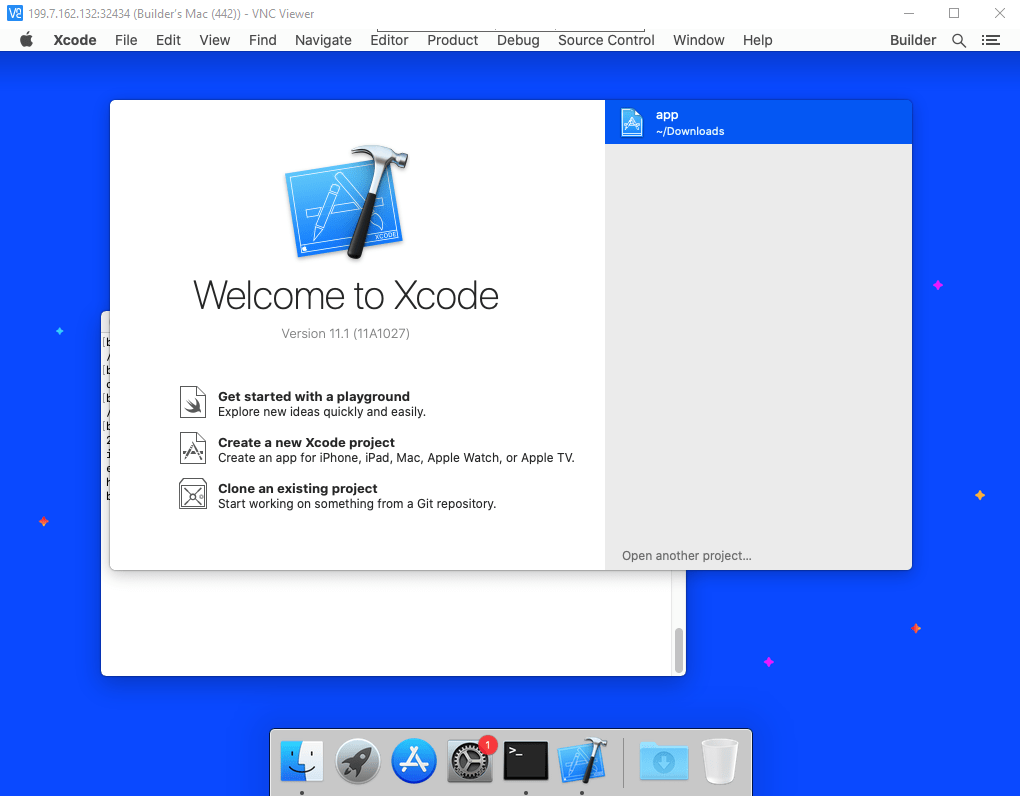
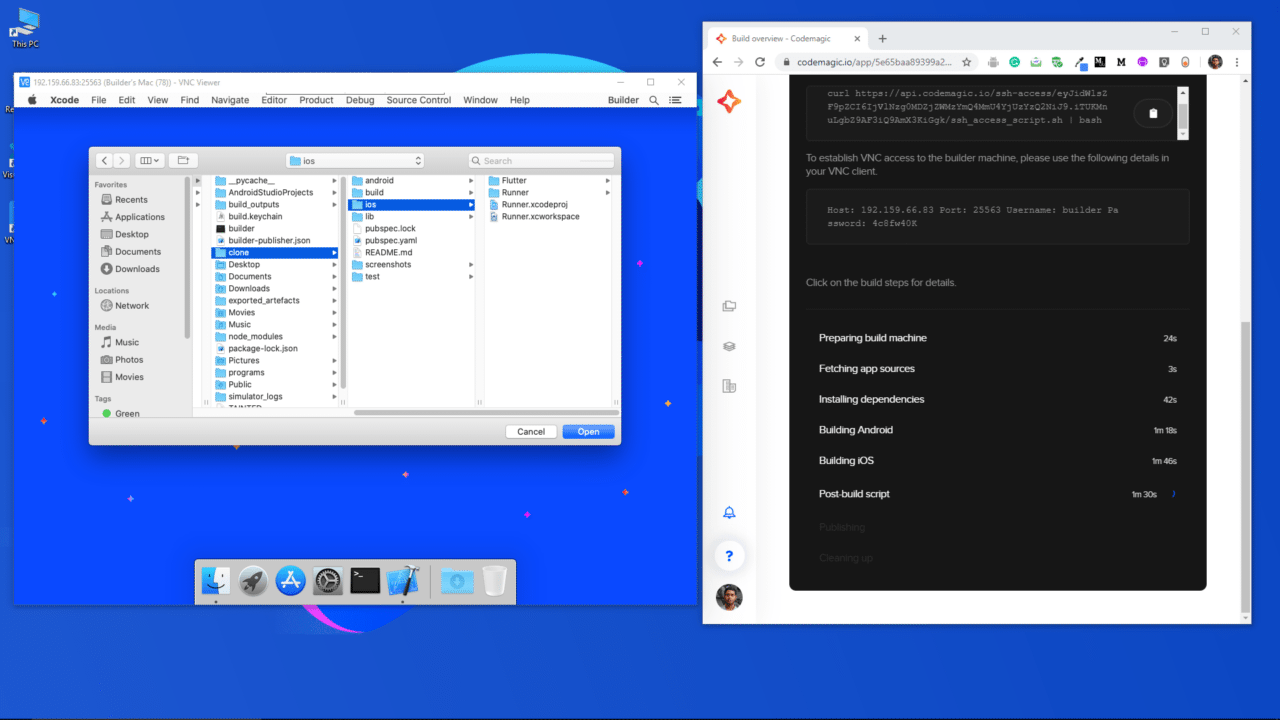
After opening Xcode, click on Open another project.

Now, you have to navigate to the ios folder of your Flutter project and open it on Xcode. From the top dropdown, select builder.
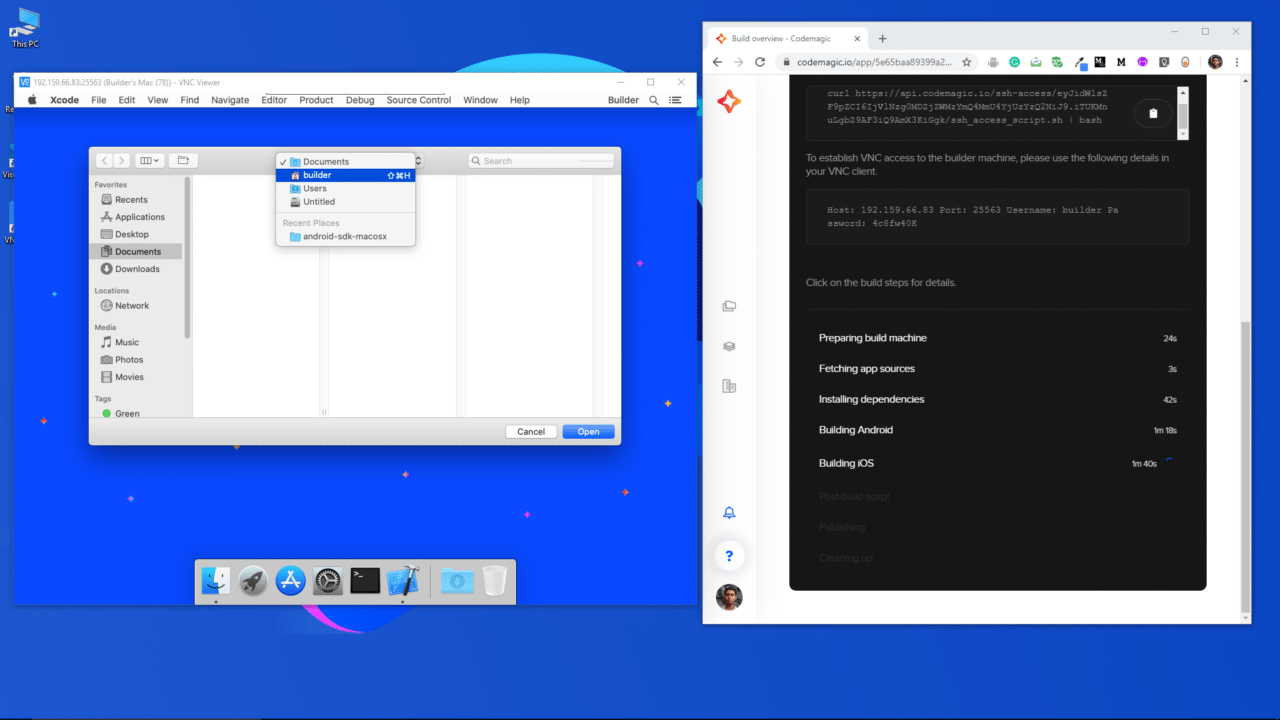
Then go to clone -> ios and click on Open.
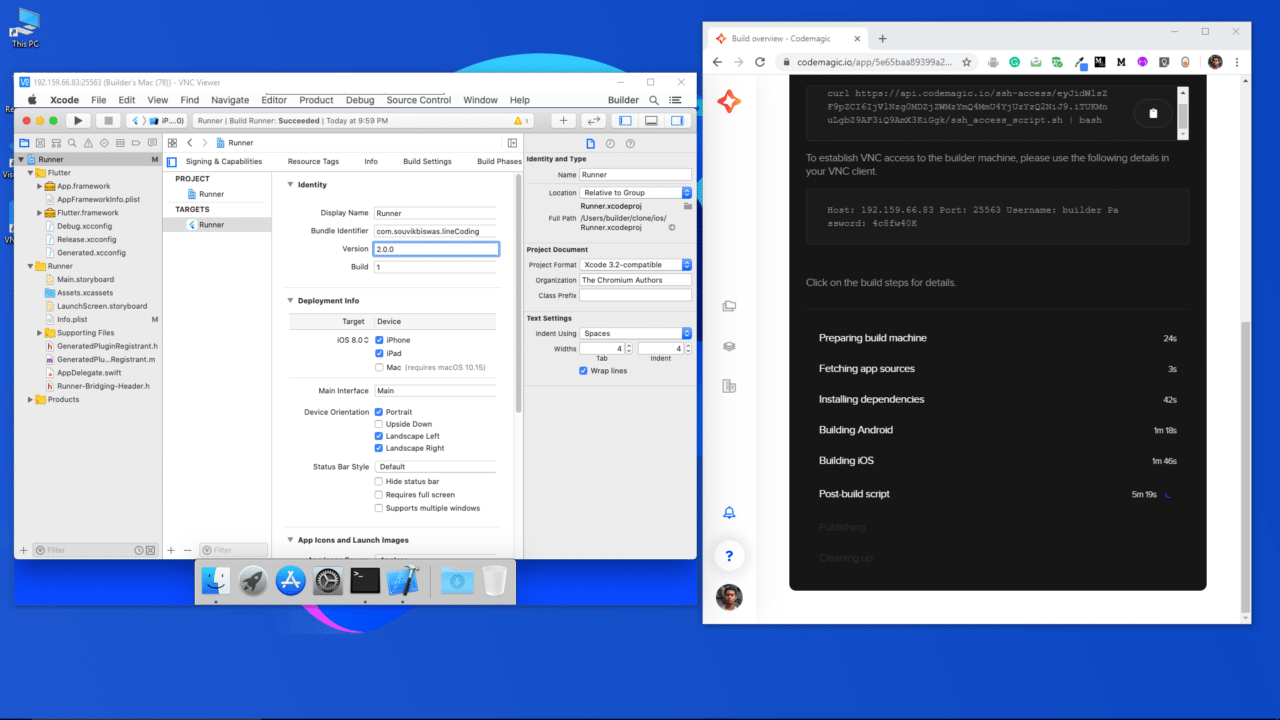
The project will now open up in Xcode. You can go to the Runner from the left sidebar if you want to make any changes to your iOS app version or Bundle ID.

You can also generate a Provisioning profile and Developer signing certificate for your project from Xcode.
A guide for generating code signing files (such as provisioning profile and certificate) is available here.
It is also very easy to save any configuration changes that you make on this VM. The repository is cloned from your GitHub/GitLab/Bitbucket account, so you can directly commit the changes using git and push them to your account.
For demonstration, I have just updated the version of the iOS app inside Xcode.
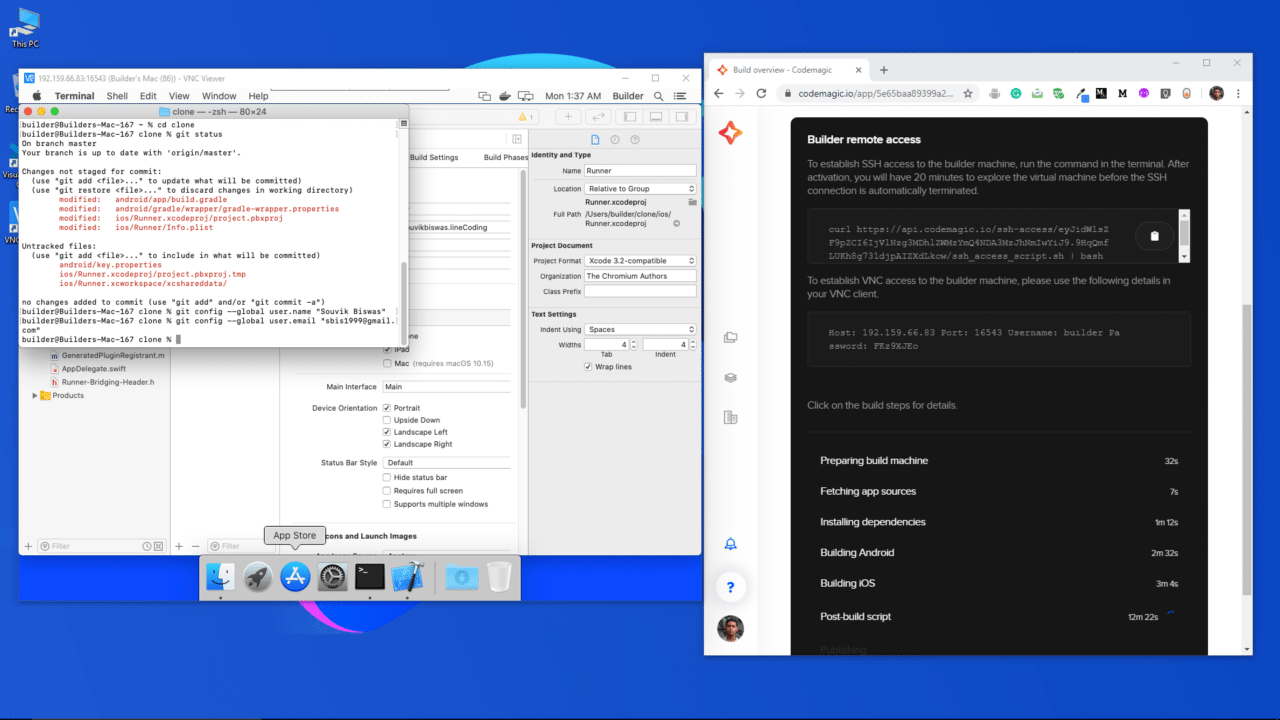
Now, open up the Terminal and navigate to the project directory.
cd clone
Then, run the following command to see the changed files:
git status

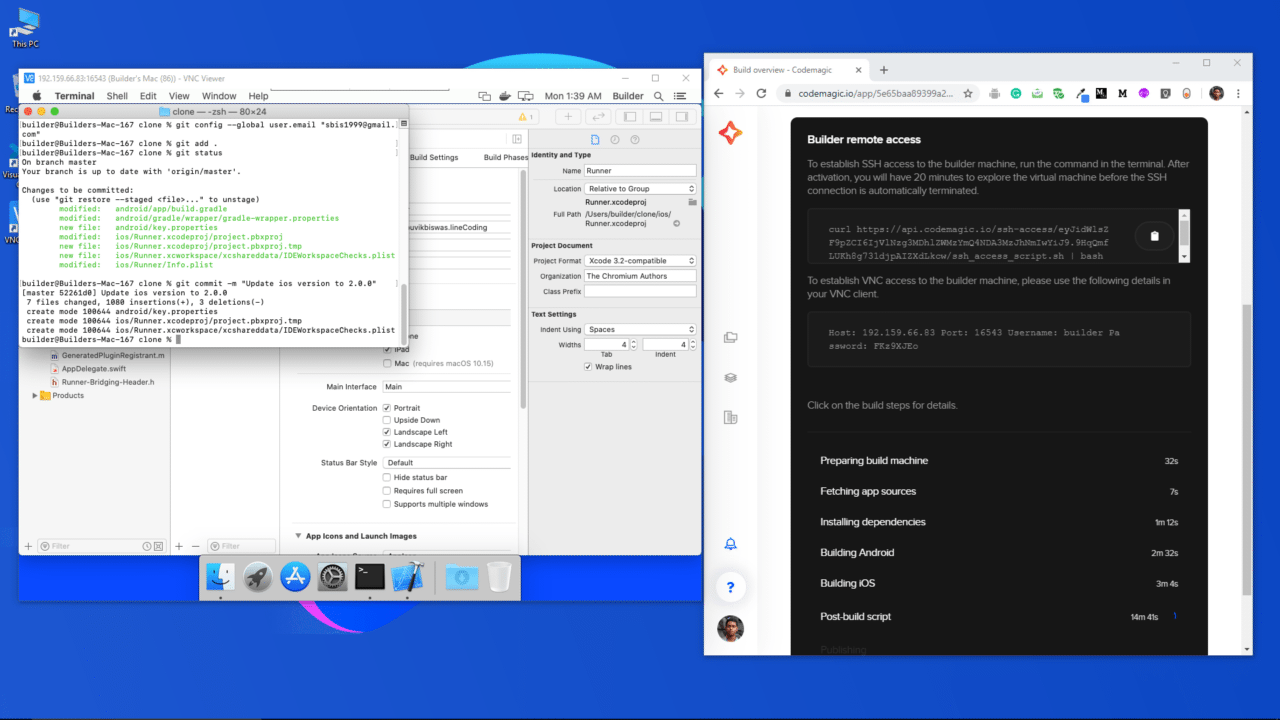
Before committing the files to Git, run the following two commands to define the correct author of the changes:
git config --global user.name "<your_name>"
git config --global user.email "<your_email>"
Replace
<your_name>with your name and<your_email>with your email address.
Commit the changed files using the commands:
git add .
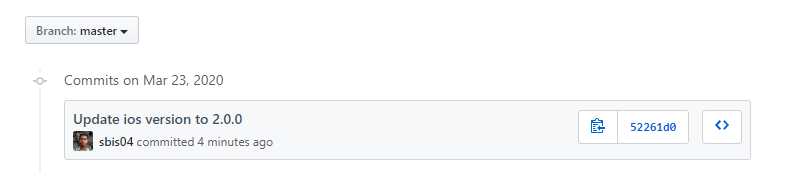
git commit -m "Update ios version to 2.0.0"
If you only want to commit the ios directory (instead of
git add .), run:git add ios
You can check whether the changes are done under the correct author by running the command:
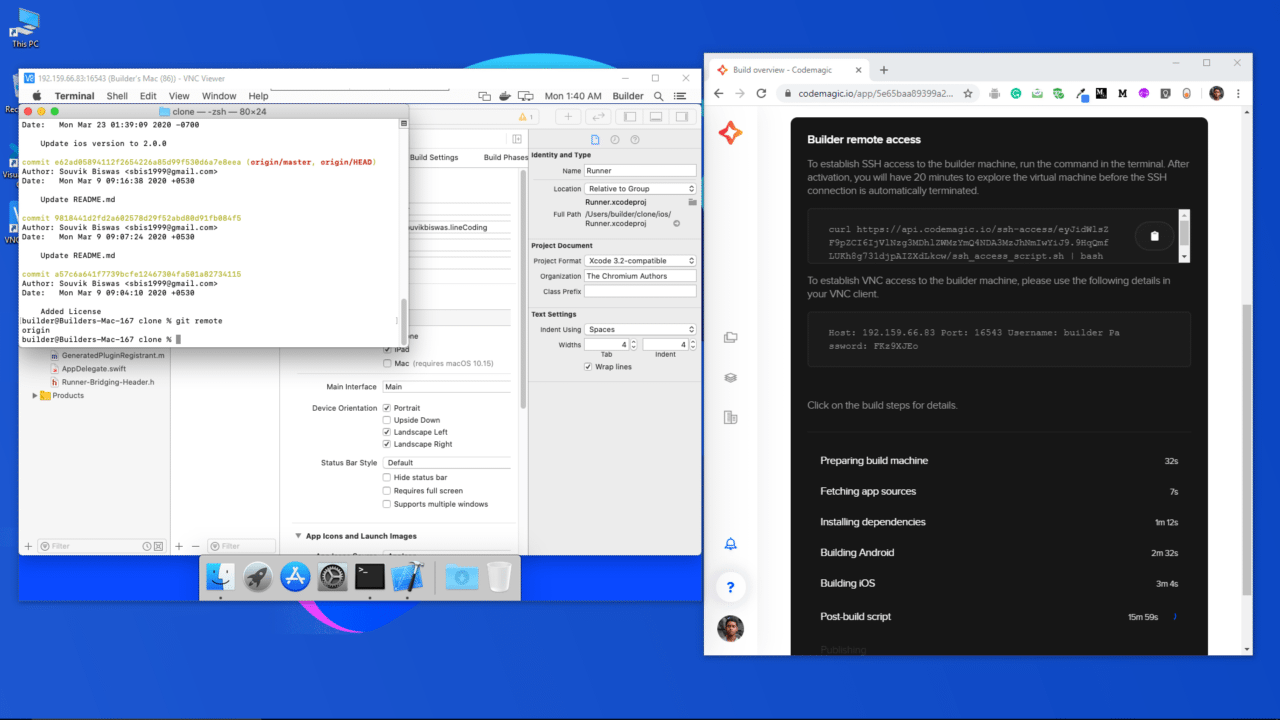
git log

Check whether any remote is available for the project.
git remote
Push the changes using the command:
git push origin master

You can check the project on your GitHub account to verify whether the changes are done.
Conclusion
Remote access to the virtual MacOS machine opens up a whole new possibility for people who don’t have access to a MacOS system. Now they can even run and test their Flutter apps on the Simulator and make any configuration changes to their project using Xcode (pre-installed on the VM). Code signing also becomes much easier with direct access to the VM.
The Official Docs for Remote access are available here.
Souvik Biswas is a passionate Mobile App Developer (Android and Flutter). He has worked on a number of mobile apps throughout his journey. Loves open source contribution on GitHub. He is currently pursuing a B.Tech degree in Computer Science and Engineering from Indian Institute of Information Technology Kalyani. He also writes Flutter articles on Medium - Flutter Community.


