


Written by Sneh Pandya
Editor’s Note: This post was originally published in August 2020 and has been updated in November 2020.
In this step-by-step tutorial we will show you how to create a React Native project from installing all the needed software and dependencies to ensuring the quality of your React Native app. How to get started with React Native by installing Expo CLI or React Native CLI and install Xcode (for Mac OS) and Android Studio.
In this article you will learn:
- What is React Native?
- Expo CLI vs React Native CLI - which one to use?
- Step 1: Install Expo CLI or React Native CLI
- Step 2: Install Xcode (for Mac OS)
- Step 3: Install Android Studio
- Step 4: Install IDE
- Step 5: Create your first React Native app from scratch
- Step 6: Set up React Native project on CI/CD
So, let’s get started, but first, let us know how many mobile app projects do you have in Git repositories?
What is React Native?
React Native is an open-source cross-platform mobile application development framework developed by Facebook in 2015. It is widely used by developers, from advanced developers in Android and iOS to React beginners, and even people who are getting started with programming for the first time in their career. Since its initial release in 2015, popularity of the framework is consistently growing.
Nearly 58% of all respondents on the Stack Overflow Developer Survey 2020 state that they are either using React Native and have expressed interest in continuing to develop apps with it. React Native is considered a preferred alternative of Flutter, an open-source cross-platform mobile application development framework developed by Google. React Native uses messages from the JavaScript thread instead of HTML or CSS. React Native also allows developers to write native code in languages such as Java for Android and Objective-C or Swift for iOS, which makes it even more flexible.
Read more:
>> What is Flutter? Benefits and limitations
>> Flutter vs React Native: A Developer’s perspective
>> How to build and publish apps for iOS without a Mac with Codemagic
Install React Native: Expo CLI vs React Native CLI
You can either use Windows, Linux or Mac OS to get started with React Native. Both the iOS and Android environments are available on Mac OS, whereas Linux and Windows only support Android environment. We will assume that you are using macOS for React Native development, but you can always follow the similar instructions for Windows and Linux as well.
In general there are two possible ways to get started with React Native:
- Expo CLI
- React Native CLI
React Native official setting up the development environment documentation is recommending to use Expo CLI if you are new to app development.
Expo CLI is a safe bet for a new React Native developer, since it has set of tools built around React Native, so that you only need a recent version of Node.js and a phone or emulator to get started within minutes. On the other hand when you use Expo CLI to develop your application you are limited to the Expo ecosystem, which might get burdening once building a very complex app with a lot of manual work around the lot of fine range configuration.
However, then you can easily switch to React Native CLI and no questions asked!
Installing Expo CLI
You will need Node 12 LTS or later on your local machine to use this method. Use npm to install the Expo CLI command line utility:
npm install -g expo-cli
Installing React Native CLI
For Mac OS
You will need to install Node, the React Native command line interface, a JDK, and either Android Studio or Xcode.
The recommended way is to install Node and Watchman using Homebrew. Run the following commands in a Terminal after installing Homebrew:
brew install node
brew install watchman
Most of the tools come with Xcode. If you have already installed Node on your system, make sure it is Node 8.3 or newer. Watchman is a tool by Facebook for watching changes in the filesystem. It is highly recommended you install it for better performance.
For Windows and Linux
You will need Node, the React Native command line interfa*ce, Python, a JDK, and Android Studio. While you can use any editor of your choice to develop your app, you will need to install Android Studio in order to set up the necessary tooling to build your React Native app for Android.
React Native has a built-in command line interface. Rather than install and manage a specific version of the CLI globally, we recommend you access the current version at runtime using npx, which ships with Node.js.
With npx react-native <command>, the current stable version of the CLI will be downloaded and executed when the command is run. If you previously installed a global react-native-cli package, please remove it, as it may cause unexpected issues.
Installing Xcode (for Mac OS)
The easiest way to install Xcode is via the Mac App Store. Installing Xcode will also install the iOS Simulator and all the necessary tools to build your iOS app. If you have already installed Xcode, make sure it is version 9.4 or newer.
You will need to install the Command Line Tools for Xcode. Open Xcode, then choose Preferences… from the Xcode menu. Go to the Locations panel and install the tools by selecting the most recent version in the Command Line Tools dropdown.
You will also need to install CocoaPods. Use the command below to do that:
sudo gem install cocoapods
Installing Android Studio
Download and install Android Studio. Choose a Custom setup when prompted to select an installation type. Make sure the boxes next to all of the following are checked:
- Android SDK
- Android SDK Platform
- Android Virtual Device
If the checkboxes are grayed out, you will have a chance to install these components later on. You can also install and set up a device or an emulator for Android development.
To find more information for dependencies and softwares, please refer to the React Native documentation here.
Installing IDEs
App development using React Native can be done on any editor or IDE of your choice. You can use IntelliJ, Visual Studio Code, Sublime Text, Atom and more. The choice of editor/IDE is completely up to you. Once we have finished the setup for our favourite editor, we can start developing apps using React Native.
>> Visual Studio Code vs Android Studio – Functionality, Search and Source Control
Create React Native app using Expo CLI
Run the following commands to create a new React Native project named ‘FirstProject’ using Expo CLI:
expo init FirstProject
cd FirstProject
npm start
This will start a development server for you. To run the app, install the Expo client app on your iOS or Android phone and connect to the same wireless network as your computer. On Android, use the Expo app to scan the QR code from your terminal to open your project. On iOS, use the built-in QR code scanner of the Camera app.
Once you’ve set up Android Studio or Xcode, you can launch your app on an Android virtual device or real device using USB by running:
npm run android
Or on the iOS Simulator (macOS only) by running:
npm run ios
Create React Native app using React Native CLI
Run the following commands to create a new React Native project named FirstProject using React Native CLI:
npx react-native init FirstProject
cd FirstProject
npx react-native start
This will start a Metro Bundler development server for you. Once you’ve set up Android Studio or Xcode, you can launch your app on an Android virtual device or real device using USB by running:
npx react-native run-android
On the iOS Simulator (macOS only) you can do this by running:
npx react-native run-ios
You will be able to see the app running in the emulator/simulator or a real device.
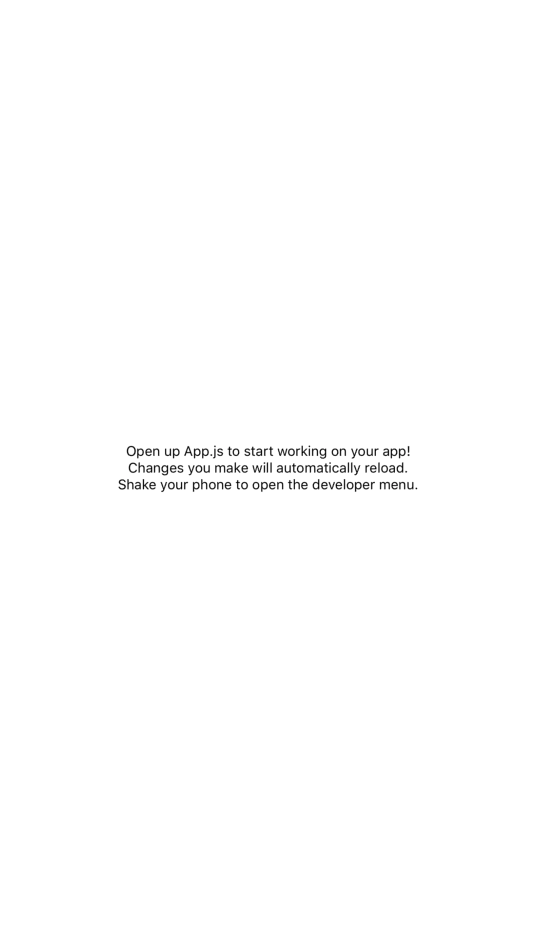
Voilà! We have successfully run our first React Native app.
React Native project structure
Now we will understand the directory structure of the React Native app. Here’s how the typical project structure looks like:
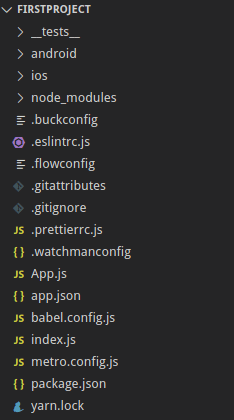
The files responsible for project configurations, like package.json, are placed at the root of the project directory. We have separate directories for the iOS and Android apps. __tests__ directory consists of tests that can be run on the project. node_modules is the heart of a React Native application, containing smaller modules for the app. node_modules directory is initialized and the dependencies installed when the project is initially set up. index.js file serves as the main starting point of the application. As the app runs on our device, it starts to serve content placed in the index file. package.json file specifies dependencies and versions for the project. app.json is a simple file that contains the application name.

Setting up your React Native app on CI
Building React Native apps is relatively complex and cumbersome if you want to do it yourself on the blank server. The React Native stack is versatile, yet it has a lot of tools and components that you need to install before you can actually start the build process. The steps include provisioning installation, installing iOS and Android dependencies, installing module dependencies, etc.
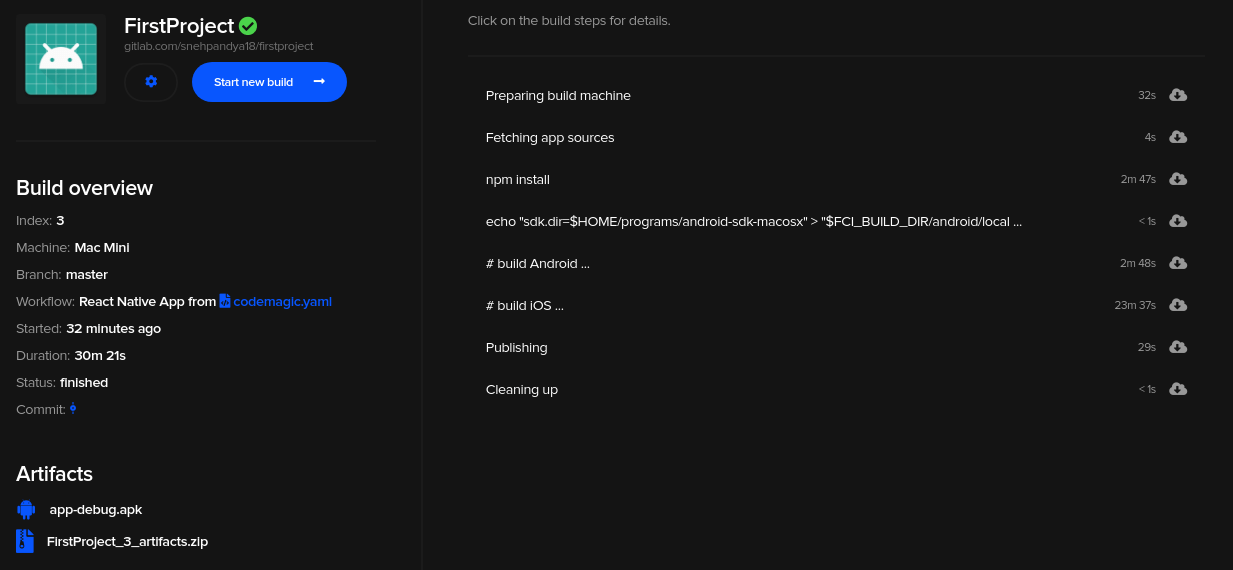
Luckily, Codemagic does all this work for us; simply visit the Codemagic website and register yourself with your GitHub, GitLab or Bitbucket account and point your app to Codemagic or do it here:
You can find the getting started guide for React Native to set up your React Native app using Codemagic CI/CD. The default workflow of Codemagic is to build, test and publish the artefacts of your iOS and Android builds. We have our source code of the demo test app flutter testing on Github, we have built the “CI” branch and we are following as a build output without any configuration.
Conclusion
With growing popularity in the domain of cross-platform solutions, React Native continues to leave its mark for the developers and industries keen to make use of it. We hope this article helps you get started with React Native and launch your own apps!
More articles about React Native
- React Native getting started guide with Codemagic CI/CD
- How to build React Native UI app with Material UI
- Flutter vs React Native: A developer’s perspective
Sneh is a Product Manager based in Baroda. He is a community organizer at Google Developers Group and co-host of NinjaTalks podcast. His passion for building meaningful products inspires him to write blogs, speak at conferences and mentor different talents. You can reach out to him over Twitter (@SnehPandya18) or via email (sneh.pandya1@gmail.com).


