


This article has been updated in October 2022
Most software companies face one big challenge, delivering their product on time and meeting the deadline. To make their work easier there’s an amazing tool known as CI/CD.
In this article we will take a look at the following topics:
- What is CI/CD?
- Choosing between Self Hosted and Cloud based CI/CD
- What is a CI/CD Pipeline?
- Benefits of using CI/CD
- Why a dedicated CI/CD is necessary for Flutter?
- Continuous Integration and Delivery (CI/CD) for Flutter apps
- Top reasons to use Codemagic CI/CD for React Native apps
- Getting started with Codemagic CI/CD for React Native apps
- Getting started with Codemagic CI/CD for native iOS apps
- Getting started with Codemagic CI/CD for native Android apps
Let’s take a deep dive into CI/CD.

What is CI/CD?
CI/CD is a tool that helps to automate the tedious tasks, from building the app to deploying it into production, which makes every developer’s life a lot easier. There are different kinds of CI/CD solutions available for app, web, and even for ML/AI.
The acronym CI stands for Continuous Integration and CD can either mean Continuous Delivery or Continuous Deployment. Let’s explore these in more details.
In this article we will mostly be focusing on CI/CD for mobile apps.
Continuous Integration (CI)
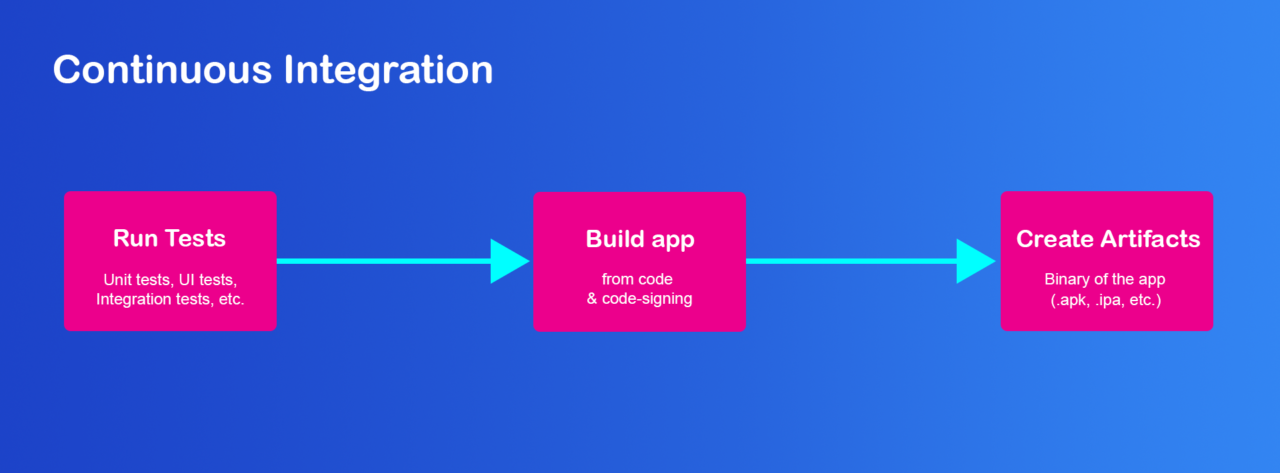
The process of Continuous Integration (for app) mainly comprises of the following steps:
- Running various tests (Unit tests, Integration tests, etc.)
- Building the app (from code)
- Creating artifacts (.apk, .ipa, etc.) which can be later used in the distribution.
The Continuous Integration for ML/AI is a bit different from the traditional CI steps.
- In building stage of ML/AI, data is also sent along with the code.
- Also there is an additional stage after building, that is the training stage for the ML model, which takes the most compute time in the entire process.
- A trained ML model is generated as the artifact in this case.
For more information regarding CI/CD for ML & AI, you can take a look at this article.
Continuous Delivery (CD)
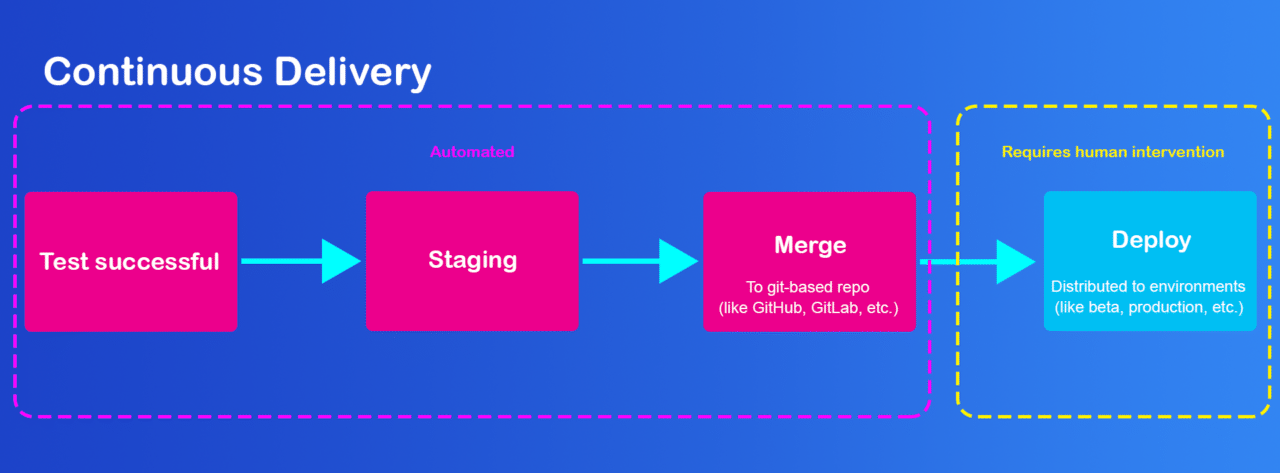
Continuous Delivery is used to release a newly built version of your app to the customers as quickly as possible. Every time a new version is built successfully, it can merged with the git-based repository hosting platform (like, GitHub, GitLab, etc.) and you can easily deploy the new version of your application at any point of time with the click of a button.
Continuous Deployment (CD)
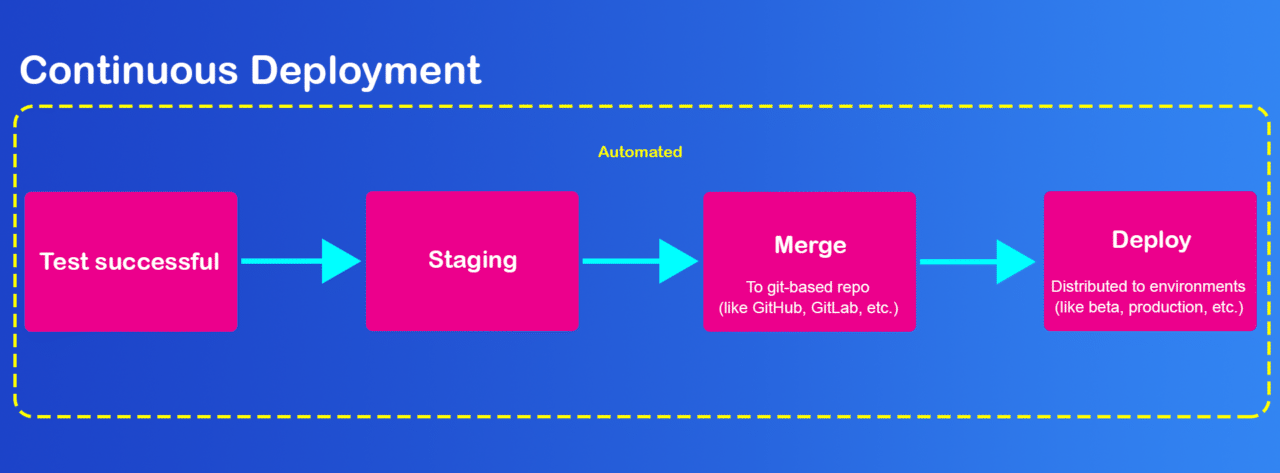
Continuous Deployment goes one step further than the continuous delivery. It also prevents the last level of human intervention in the pipeline by automating the deployment of your app build. Only a failed build or test will prevent a new change to be deployed into production. This is mainly used to accelerate the app production, to get faster feedbacks from the customers. Also, teams following this process of deployment, doesn’t need to have a Release Day anymore!
Choosing between Self Hosted and Cloud based CI/CD
The CI/CD platform market has grown over the years as DevOps become more mainstream, and now encompasses a huge variety of tools, each with their own flavor. While it’s great to have choices, it proved to be a really tough decision to choose the right tool.
Some of the pros and cons of these two kinds of CI/CD solution are listed below.
Self-hosted CI/CD
Self-hosted CI/CD solutions basically run on the local machine of the user with the software packages installed on that machine. Some examples of self-hosted CI/CD tools are Jenkins, TeamCity, etc.
Pros
- One of the biggest benefits of a self-hosted solution is extensibility. Some self-hosted services can be customized with plugins to enable functionality that is not included “out of the box”.
- Managing security of the entire CI/CD system is your own responsibility. This can be an extremely time consuming and difficult job, but you do not have to rely on the security of the external providers. Eliminating the need to go outside of your private networks helps to minimize security threats.
Cons
- You have to maintain your own hardware systems and keep the softwares updated for preventing build failures in the future.
- Initially, there can be a very time intensive setup process for linking your projects with VCS, issue tracking and notification systems.
- Have to manage all the authentication needed for the team members for accessing the projects.
Cloud-based CI/CD
Cloud-based CI/CD (also known as SaaS tools) uses hardware systems and the softwares stored on a cloud server. Some examples of cloud-based CI/CD tools are Travis CI, CircleCI, Codemagic, etc.
Pros
- The biggest benefit of using cloud-based CI/CD solution is that you do not have to maintain any hardware or software infrastructure. All the software updates are also handled by the cloud based CI/CD provider.
- Initial setup is fast and easy. Also most of the SaaS CI/CD solutions have a good integration with git based VCS like GitHub, GitLab, Bitbucket, etc.
Cons
- There might be some extra cost that you have to bear, as per the service you will be using. And the price of a Cloud based CI/CD service may go up as your team gets larger.
- All Cloud based CI/CD solutions do not have support for all platforms, tools, and environments.
What is a CI/CD Pipeline?
The path that software follows from start to finish for its deployment is known as a pipeline. In other words, it is the step by step specification that a new version of software follows.
You can also setup notifications at the end of every important process of the pipeline, so that all the team members remain in sync during the whole timeline of the project. Most of the CI/CD solutions provide a easy setup of the notifications in terms of email, Slack, etc.
Pipelining is used to automate the process of deployment because you just have to specify the pipeline script once, and from the next time onwards the whole script will run with just click of a button.
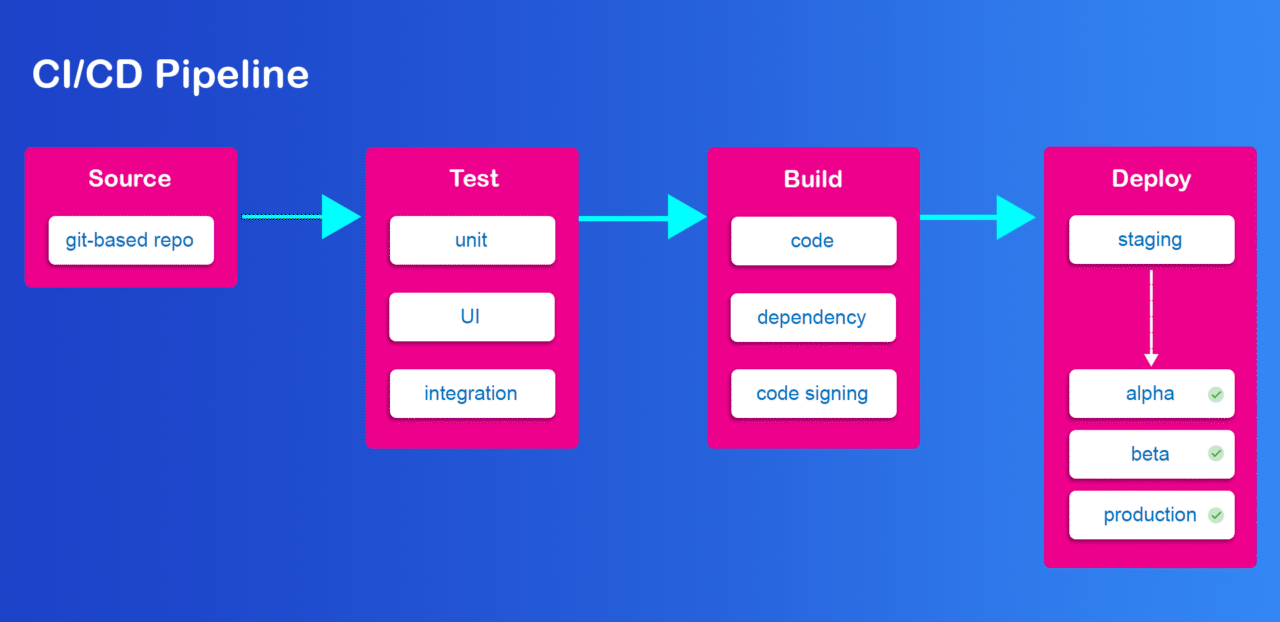
Some of the main steps that every pipelining script contains are:
- Source phase
- Testing phase
- Building phase
- Deployment phase
Source Phase
This is the phase which marks the starting point of a CI/CD pipeline. It is mostly a source code repository (like GitHub, GitLab, etc.). A change in the code present in the repository triggers a pipeline script to run.
Testing Phase
In the testing phase, all automated tests are run to validate the correctness of the code. This phase may consist of several types of tests, like Unit tests, UI tests, Integration tests. This acts as a safety net that prevents some of the unusual bugs from reaching the end-users. A failure during the testing phase exposes problems in the code that might have been looked over by the developer while writing the code.
Building Phase
In this phase the code and dependencies are combined to create a runnable instance of the software. If this step fails then there is an issue with the code or its dependencies.
In case of an app, code signing is an important step in this phase if you are building it for production use and want to deploy it to Google Play Store or Apple App Store.
Deployment Phase
At this phase the software is properly tested and the build artifact is ready to be deployed. There are multiple ways to deploy the final artifact, for example “alpha”, “beta” or “production” environment.
CI/CD Benefits – why should you use a CI/CD tool?
CI/CD makes it a lot easier for teams to stay organized and make fast deployments on time by continuously integrating code into one repository that is shared by your entire team and then taking that code and continuously delivering it into production.
The main and most obvious benefit of CI/CD is that it enables your team to bring your product to market quickly while continuing to meet the needs of your clients by enabling you to roll out new features and fixes just as quickly and effectively.
Let’s take a more detailed look at some of the biggest advantages that come with introducing CI/CD tools to your development process in order to better understand what CI/CD is and how having a CI/CD pipeline can help you.
Improved Code
One of the most obvious benefits of CI/CD is that your team’s code quality is almost guaranteed to improve. When your developers have the ability to integrate their code into a single, common repository regularly and in small batches, it becomes more of a collaborative effort. CI/CD tools make it easier for your entire team to view the code and improve on it instead of the usual process of having developers work in isolation and then submit larger batches of code every few days or weeks. Since the Ci/CD pipeline encourages small but more regular code changes to be submitted, the chances of bad or buggy code making it deep into your production cycle are greatly reduced.
Improved Communication
Developers are usually not incredibly communicative by nature, which is why companies often employ various collaboration methods such as scrum and AGILE to get teams to collaborate better. Using a CI/CD pipeline naturally increases and improves communication and collaboration by giving all of your entire team one framework in which they all participate. CI/CD unites your entire team, from your product managers to the developers and your QA engineers, increasing transparency and making it much easier for team members to communicate and always know what other people in the team are working on.
Easier Performance Monitoring
One of the best things about CI/CD is that it makes it incredibly easy for you to monitor how the app you have released is faring. How well is it performing? How reliable is it? How is it behaving? All of these metrics can be very easily monitored using CI/CD. Not only is monitoring the health of your app a breeze, it’s also very easy to make fixes whenever you notice something that needs improvement. In today’s world of development, apps need to be deployed quickly and often. This means that the performance of your apps can be expected to be unpredictable. CI/CD pipelines make it easy to monitor your apps and easily glean high-quality metrics and insights that are going to help your team keep your app functioning at a high level.
Better Fault Isolation
CI/CD makes it easier for your testers to not only identify problems but also determine the exact location of the issue in order to expedite its resolution. When we talk about fault isolation in development, we are referencing system design and the efforts to limit the negative results of any error by making sure that we know where it’s coming from and is located. A CI/CD pipeline helps you to simplify the process of fault isolation so that you can find the root of the problem before it spreads throughout your entire system. By designing your system with CI/CD, you are limiting the scope of any problems your app might face in order to minimize the potential damage incurred by your system.
Faster MTTR
MTTR (mean time to repair) is basically the time that it takes your team to repair a broken feature and measuring this will help you to keep track of how much time your team spends recovering from bugs and other errors and issues. CI/CD reduces MTTR drastically in the same way that it improves the overall quality of your code. Since the code changes are smaller and the fault isolations are easier to locate, the time it will take your team to fix any issues and problems will decrease. Furthermore, once the issue has been uncovered, the CI/CD pipeline makes sure that the fix is quickly and accurately tested before the new code is deployed.
More Reliable Testing
Most of the benefits of using CI/CD tools revolves around the fact that CI/CD encourages teams to introduce new code to the projects in smaller but faster increments, instead of working on a big chunk of code for months and then spending just as much time testing and deploying it. Testing also benefits from the CI/CD process for this reason. Since the changes being introduced to the code are small and specific, the testing process is also significantly more accurate as a result. That’s why many believe say that CI/CD also inevitably leads to something that is called “continuous reliability,” meaning that the continuous merging of new features that are quality-controlled makes sure that all stakeholders are going to get exactly what they expect from the app and the overall development project.
Faster and More Regular Releases
Implementing a CI/CD pipeline will also inevitably lead to accelerated release cycles for your team. When your testing is better, then your fixes are faster and your releases are more regular. The fact that CI/CD tools continuously deploy code after testing means that the code is being developed in a continuously moving system, which keeps the code in a release-ready state at all times. The best way to speed up your release rates is by establishing a delivery mechanism that’s standardized and automated, which is exactly what CI/CD does.
Read customer case study: Criton: Codemagic has allowed our team to decrease publication time by 95%
Smaller Backlog
If your backlog is constantly growing because of small fixes and non-critical defects that nonetheless need to be given attention, implementing CI/CD could be the perfect way to trim your backlog significantly. Many of the small fixes that bloat your backlog are caused by issues that will never make it to production when using CI/CD tools. When your team doesn’t have to deal with a laundry list of small bugs and quick fixes every day, it allows them to focus on the big picture, which is developing new features and keeping your clients happy.
Increased Customer Satisfaction
At the end of the day, there is nothing more important than customer satisfaction and knowing that the people who are using your app are happy with the way it is working for them. One of the best ways to achieve customer satisfaction is to make sure that your customer feedback cycle is regular and honest. If you are getting quality feedback from your clients, implementing CI/CD tools enables you to turn their suggestions into real features and improvements sooner than later. Enabling feedback during the continuous development process helps improve usability and makes it much easier and faster to add all of the improvements and get rid of all of the shortcomings listed by your client.
Decreased Costs
CI/CD is a particularly excellent solution for companies that pay their developers by the hour and want to save money by finding ways to speed up the development and maintenance process. The automation of the CI/CD pipeline speeds up development, improves code quality, speeds up testing, increases reliability, and improves communication. All of this leads to your team being able to get more work done in less time. Even if you are not paying your development team by the hour, CI/CD helps you to maximize your team’s efforts by letting them focus on the big picture and the continued evolution of the application instead of being bogged down with bug fixes and inefficient processes, increasing overall ROI for your company.
Easy Maintenance and Updates
Another benefit of CI/CD is that maintenance is usually performed during non-business owners, which not only saves time for your team but also makes sure that your clients are not experiencing downtime when they need the application most. And since the release cycle is shorter and deployment is continuous, that means that the changes that are being made during maintenance tend to be smaller and are practically unnoticeable when everything is being handled through a CI/CD pipeline.
If you’re ready to start with CI/CD for mobile apps, you can sign up for Codemagic here:
Why a dedicated CI/CD is necessary for Flutter?
Flutter is a cross-platform app development framework created by Google, which uses a single codebase for mobile (Android & iOS), web and desktop.
You can use most of the CI/CD tool with Flutter, but in that case, you need to set up for each platform separately, which completely overlooks the advantage of having a single code base. Apart from this, you might have to use separate pipelines for generating the build artifacts for each platform, which is really very painful.
So, there is a need for a dedicated CI/CD tool that can do all the steps, from building to deployment, for every platform using just a single pipeline.
Codemagic was introduced as the first dedicated CI/CD solution only for Flutter. But now it also has support for non-Flutter apps using codemagic.yaml. This makes it capable of building, testing and delivering native Android & iOS apps with Flutter modules added to it.
Simple workflow
You can define workflows on Codemagic simply by using the Codemagic UI. You can use a single workflow for multiple platforms, or you can just make separate workflows for different platforms and run them concurrently.
Codemagic Docs for Creating multiple workflows
Multiple platform support
Codemagic has support for Android, iOS, Web, macOS and Linux, which is a must have for a dedicated CI/CD tool for Flutter.
Painless code signing
As you might know code signing is an important step for publishing an Android or iOS app to Play Store or App Store respectively. Codemagic provides really easy code signing process for both the mobile platforms. Even you can sign your iOS apps without owning a Mac yourself.
Codemagic Docs for Android code signing
Codemagic Docs for iOS code signing
Great testing support
Codemagic supports all types of Flutter tests including unit, integration and widget tests as well as static code analysis with flutter analyze.
Advanced configuration with YAML
This feature helps you to specify the whole pipeline using a single YAML file, known as codemagic.yaml. Additionally, you can use this advanced feature for running your native apps with Flutter Modules.
You can check out this article for more info about adding Flutter modules to a native Android project.
Continuous Integration and Delivery (CI/CD) for Flutter apps
Now we will go through the steps to show how easy it is to set up CI/CD for your Flutter, native Android, native iOS, React Native apps using Codemagic CI/CD.
Requirements
In order to set up your Flutter, native iOS, native Android or React Native app on Codemagic, you need a couple of things.
- Obviously, your Flutter, React Native or native Android or iOS app with some tests. Keep in mind that the app should be hosted on GitHub, GitLab or Bitbucket.
- Optional code signing details, like certificates and provisioning profiles, if you want to publish to App Store or Play Store.
- Optional Slack workspace for sending build reports and artifacts.
That’s it. You are now ready to add CI/CD for your app. Now, let’s go over the basics with examples from real apps. We will not cover code signing and publishing in this tutorial as these topics will be covered separately.
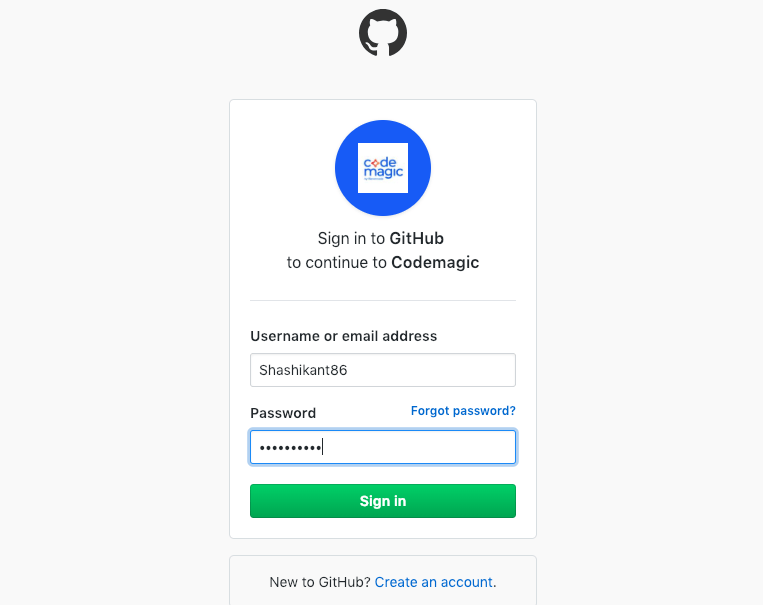
Register for Codemagic
The first step is to visit the codemagic.io website and register yourself with your GitHub, GitLab or Bitbucket account. Note that you can integrate all these repositories with one Codemagic account to have all your apps in one place.
Applications Dashboard
Once you sign in, you will see the Codemagic dashboard with the app repositories. You can filter or search the list to find your app that you want to build. As this is your first visit, you will see something like this:
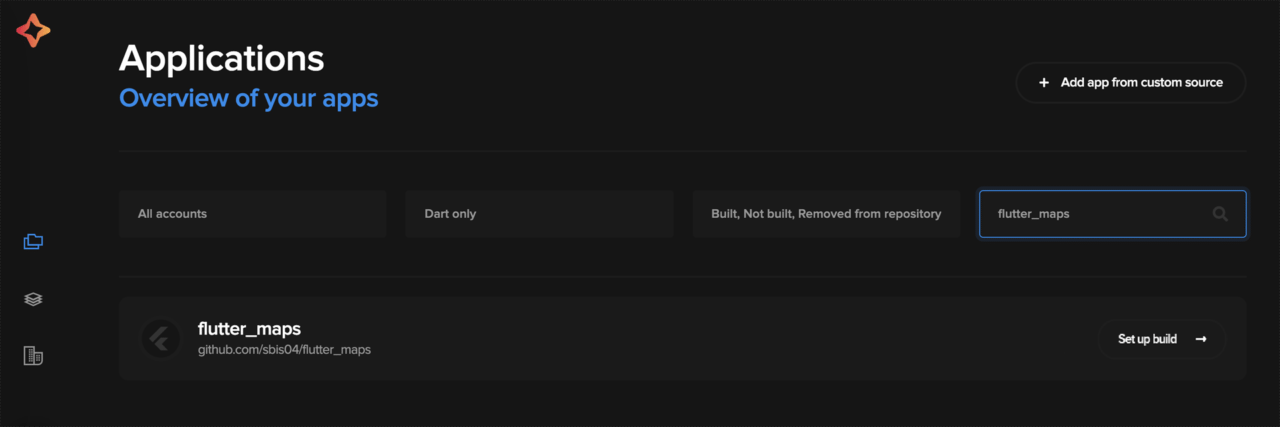
You can click on the Set up build button for configuring your build workflow.
If you have an app that is already configured, but you have not started a build yet, then you will see like this:
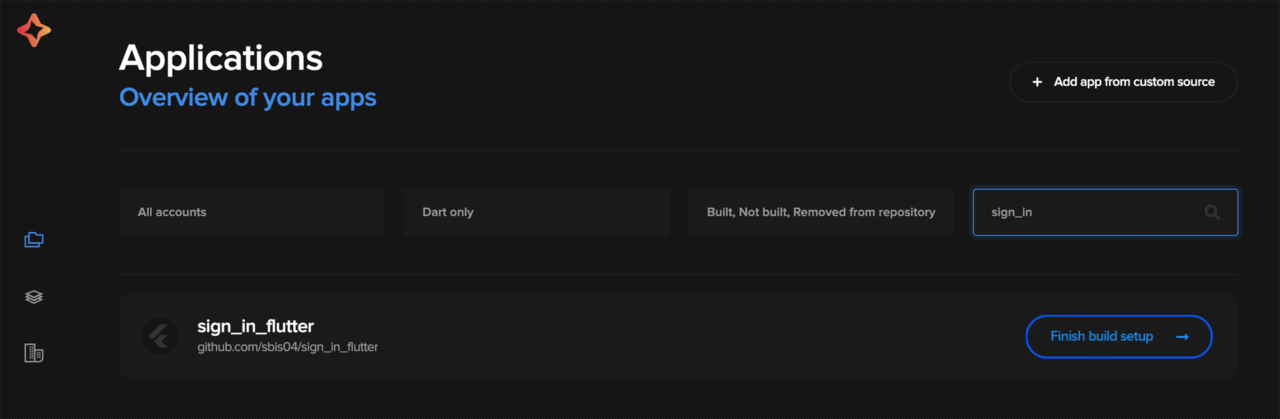
You can click on Finish build setup to modify your configuration and then start your build.
P.S. If you have a previously built application on Codemagic, it will look like this:
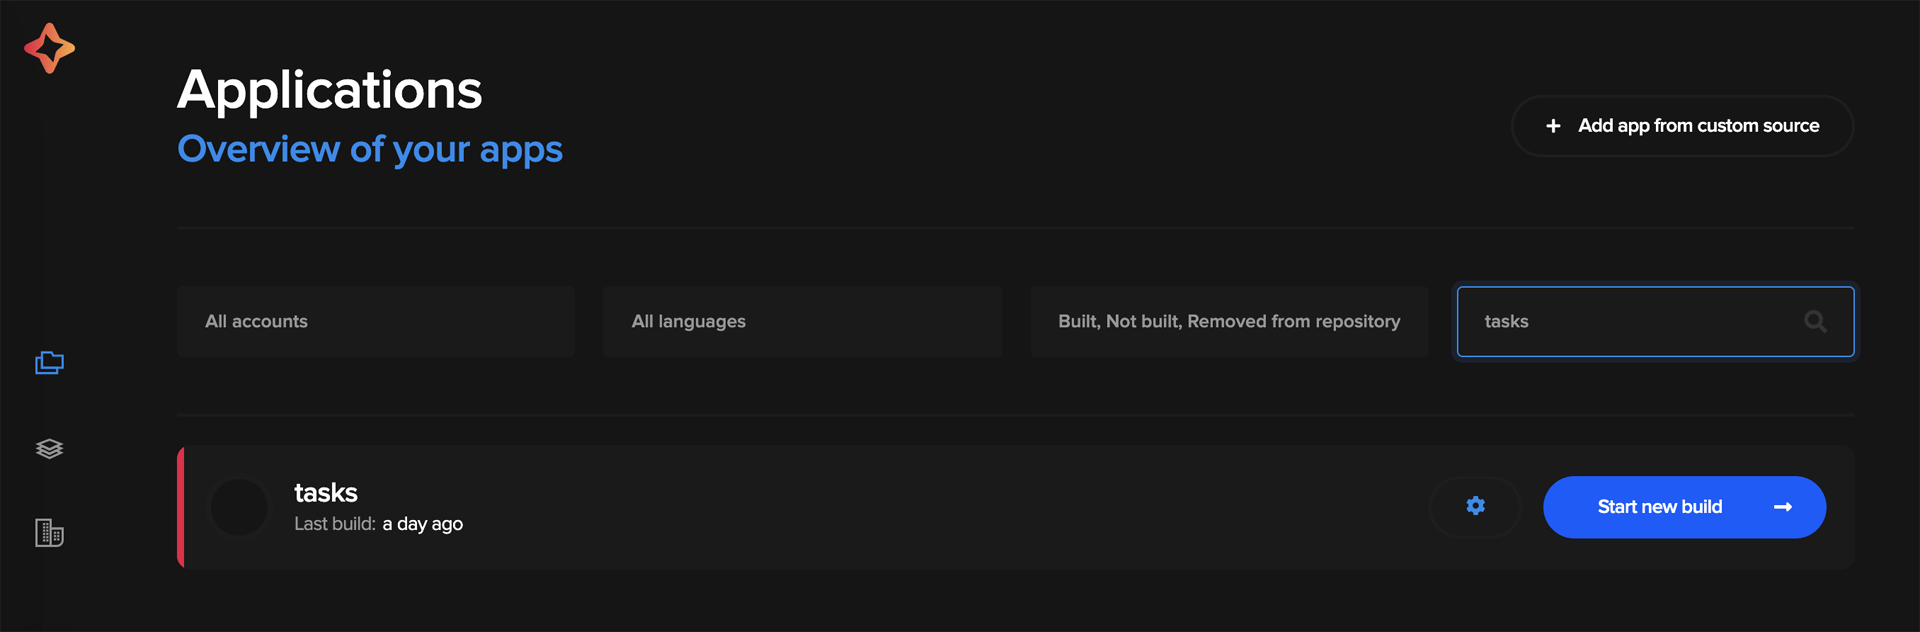
You can click on Start new build to start a build with the previous configuration, or click on Settings (the gear icon) to modify it.
Configure your build
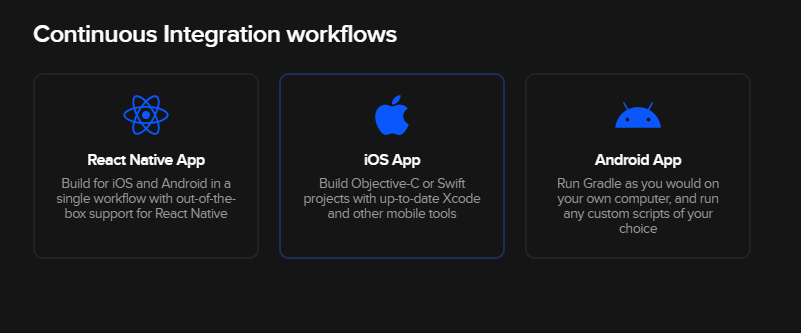
As you click on the Set up build button, you will arrive on this page. Here you can select the type of your project.
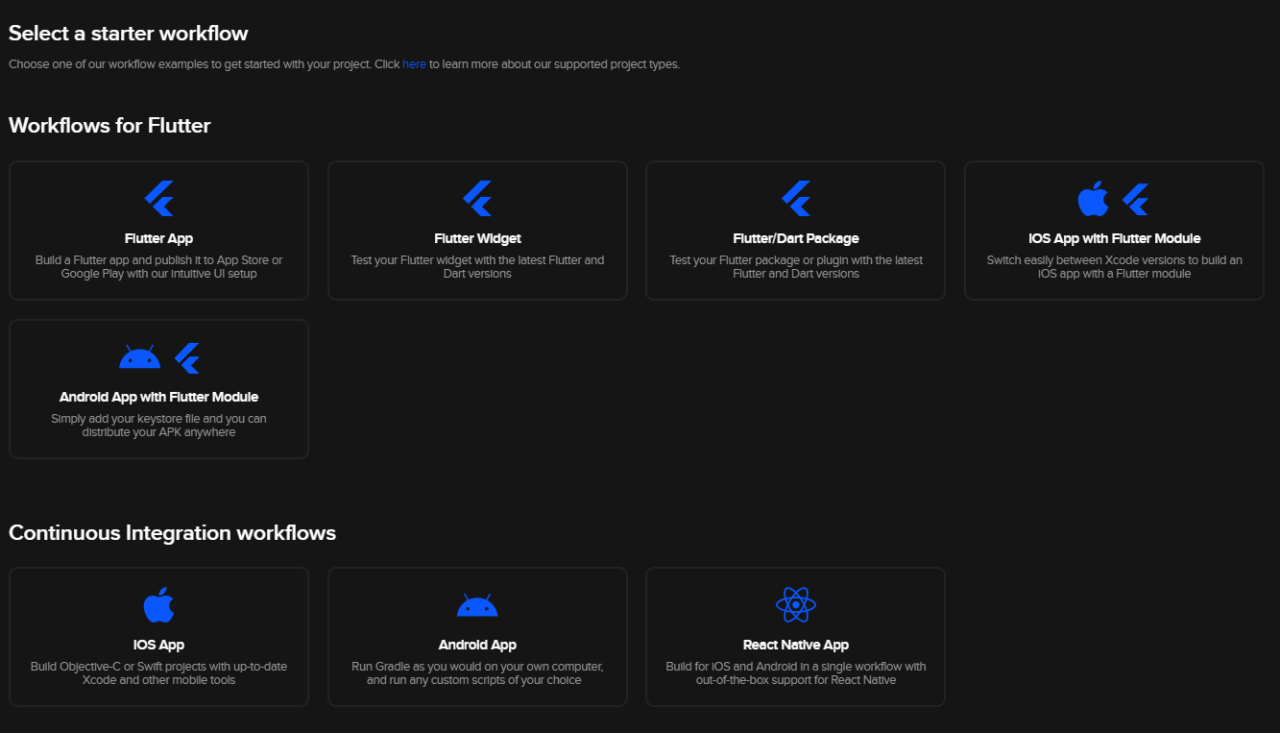
Just choose suitable option from the list. On selecting an option, you will be taken to the workflow configuration screen.
Flutter configuration
Now, on this page you can configure the build workflow for your Flutter app using the UI.
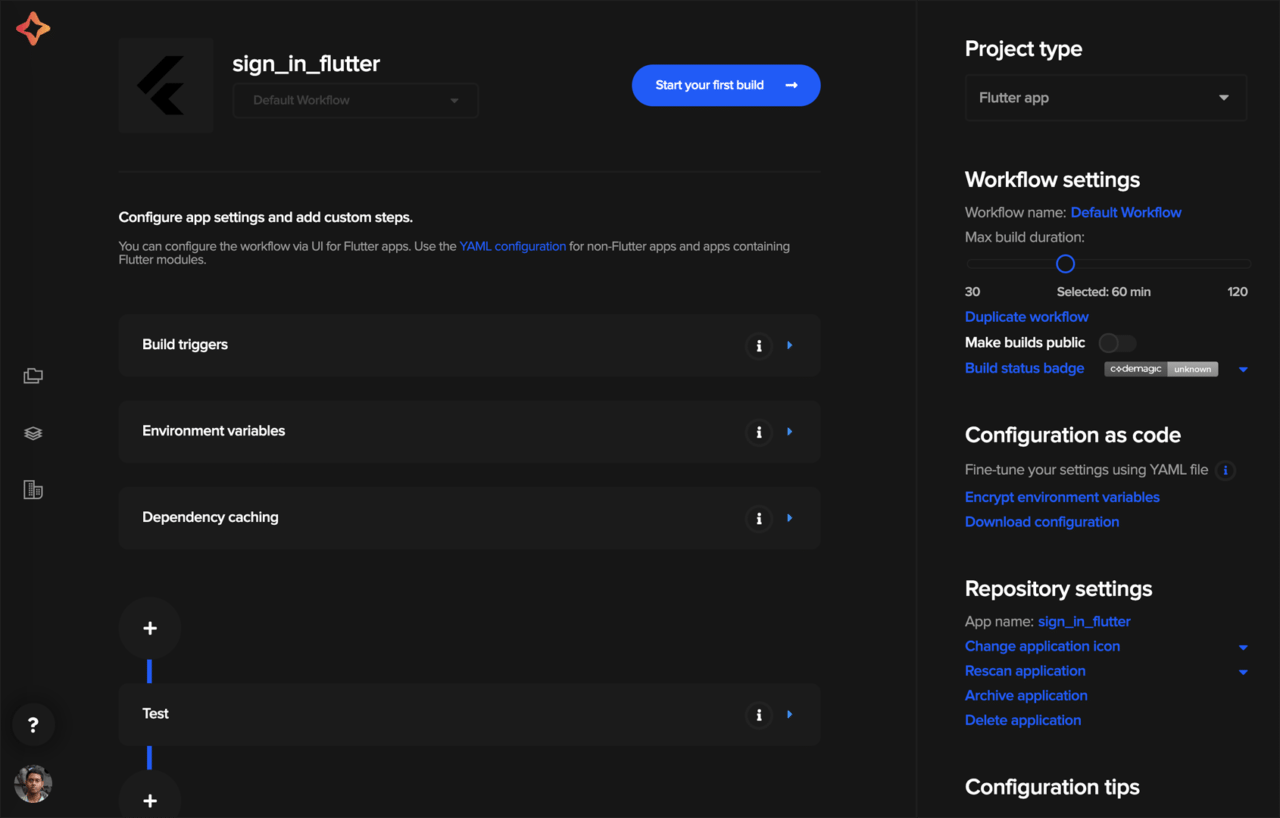
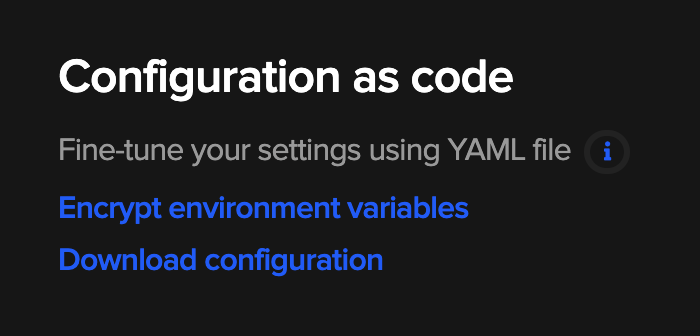
If you want more precise control over your build workflow, you can use the codemagic.yaml file by clicking on the Download configuration button.
You can make any modifications to your workflow using this file. Just commit it to your VCS by placing it in the root directory of the project. Codemagic will automatically detect the file if it is present in the repository.
You can click on Set up build button for starting a quick build of your Flutter app. If you have not modified the workflow, it will use a default workflow with the following steps:
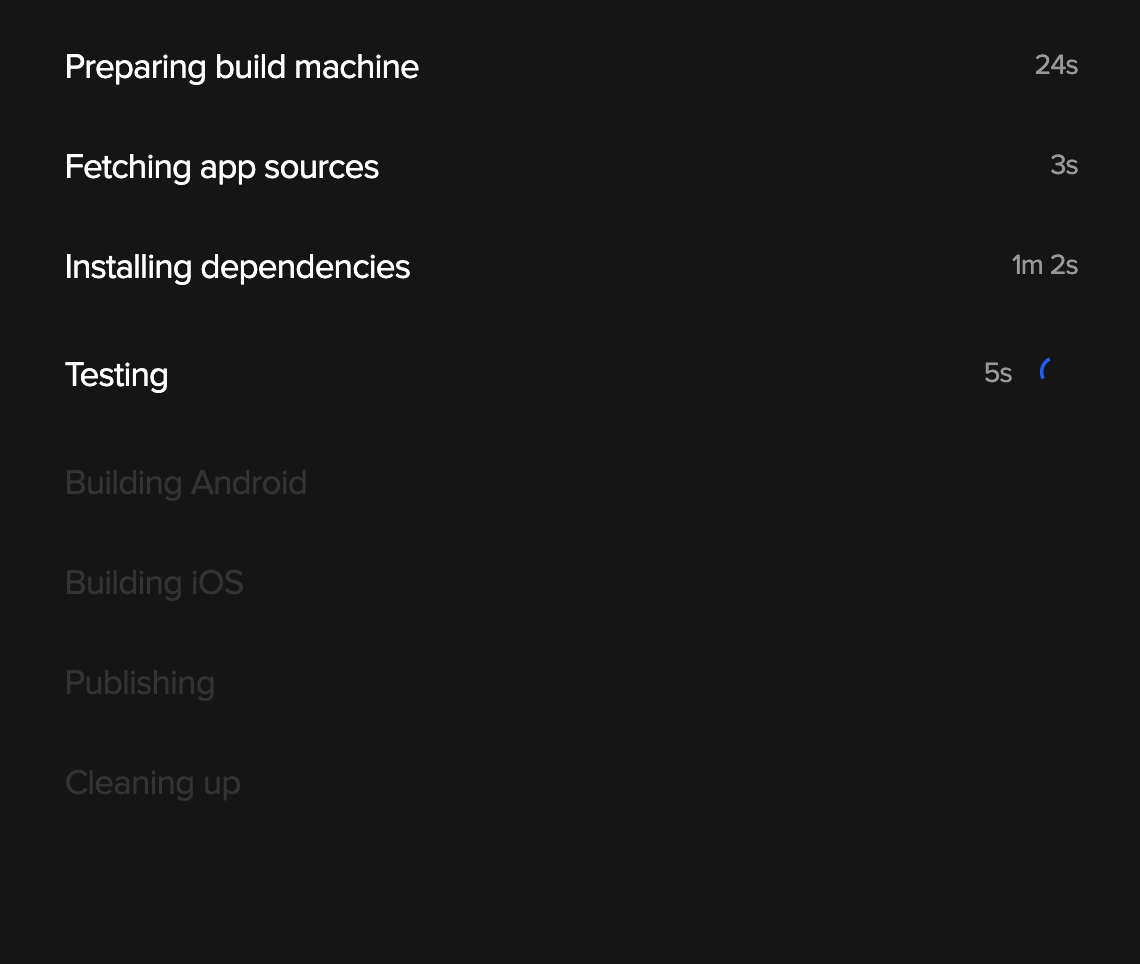
The steps include preparing the build machine, checking out the source code, installing Flutter dependencies, running tests, building the apps and publishing the artifacts. That’s what you need for a basic CI/CD workflow. Codemagic reports the log of each step when you expand the steps.
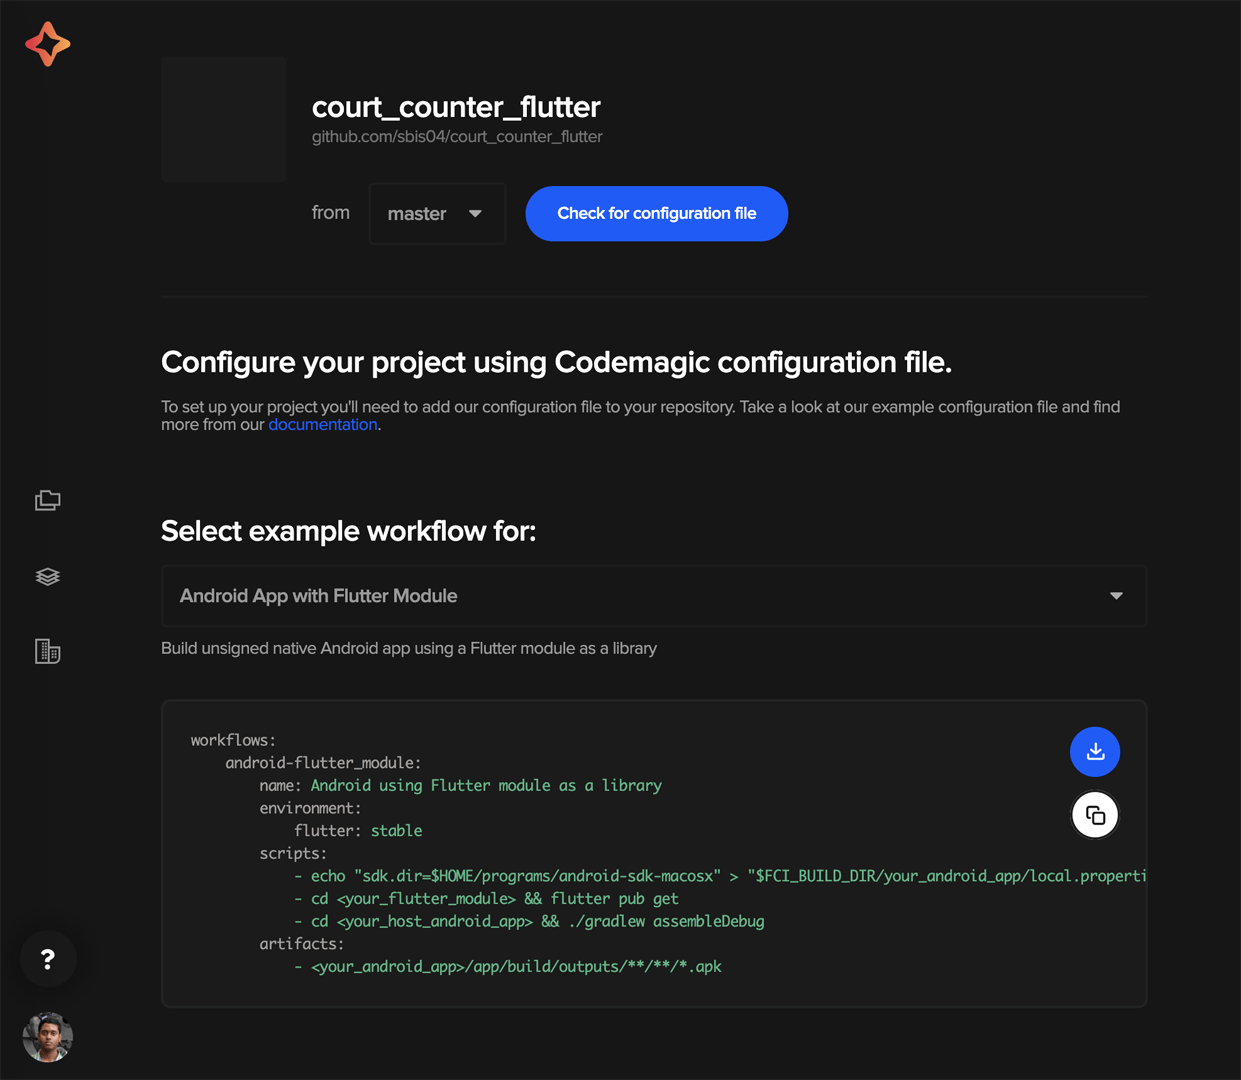
Other configurations
If you are building any other project other than Flutter (native Android, iOS, React Native, or using a Flutter Module), then you you need to use the codemagic.yaml file for configuring the workflow. You will get a template according to the type of project you have selected.
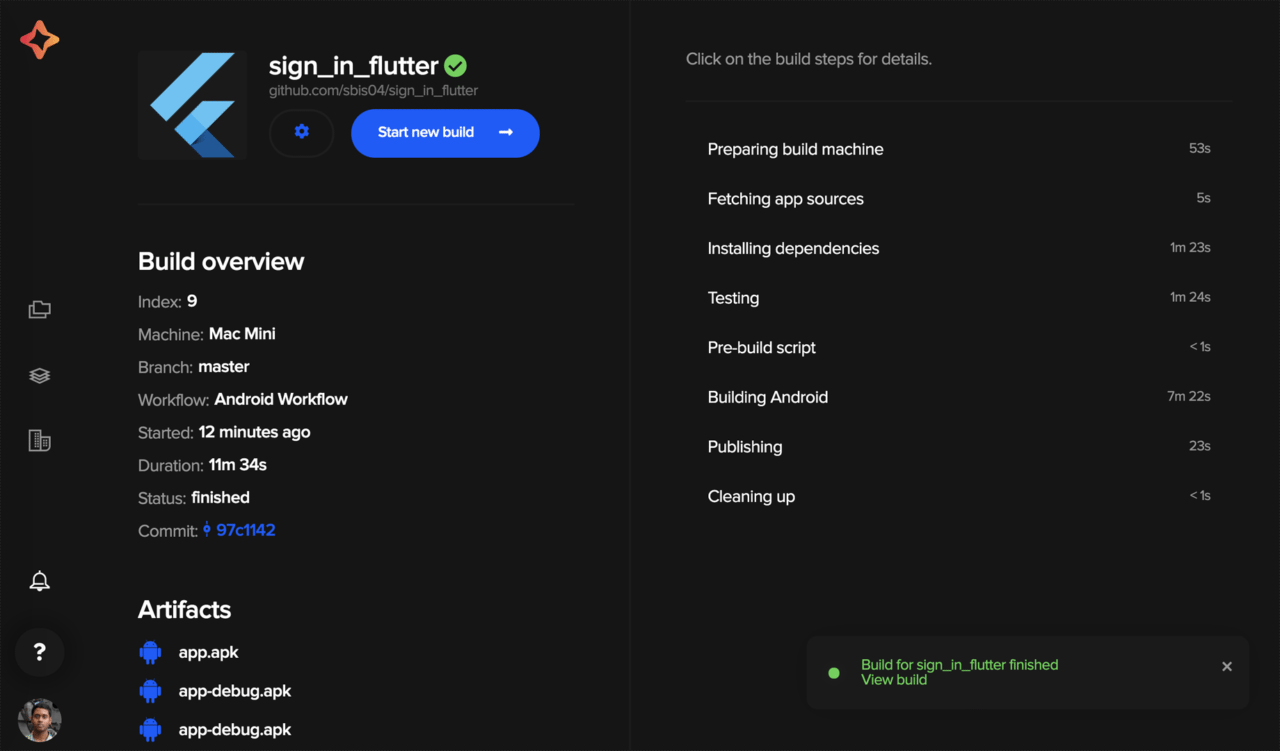
Build report
At the end of the build, you will see a build overview with all the details, like build time, build status and commit, on Codemagic dashboard. It looks like this:
On top of this, you will also get an email with the status of the build and artifacts for both iOS and Android apps by default. The email will look like this:
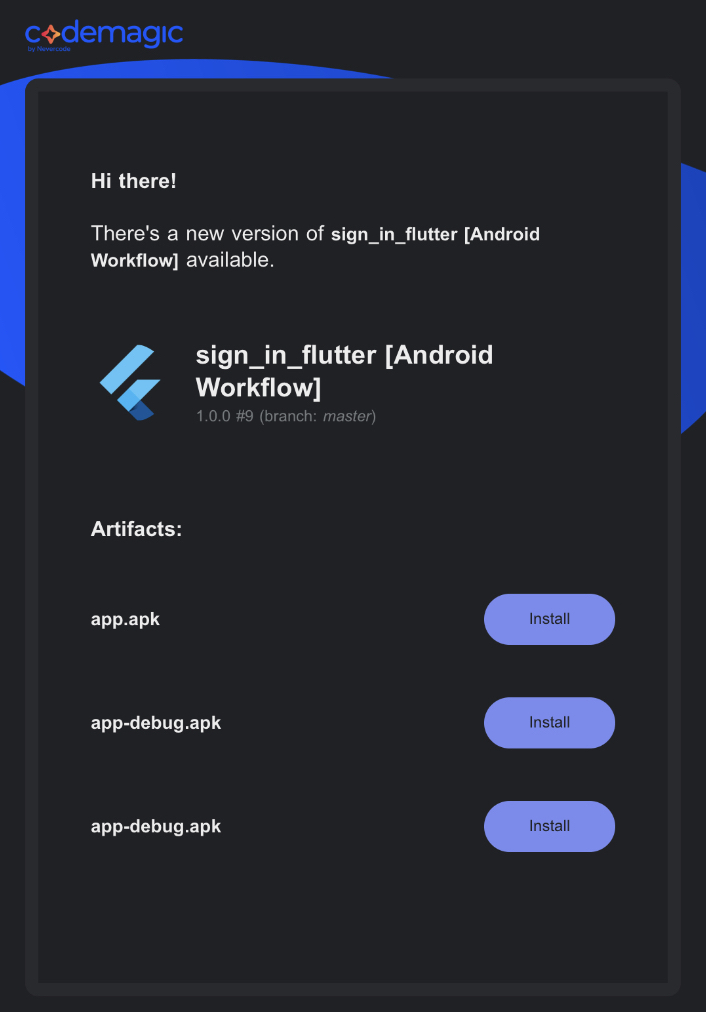
You can even configure Slack if you want to have build reports in your Slack channel.
That’s it! You have just added CI/CD support for your Flutter apps without any configuration. This is the magic of Codemagic.
Build failures
We have just covered a happy path scenario where everything was working perfectly, but in real world, that’s not always the case. We get build failures, test failures or some other problems that need investigation. Codemagic provides detailed logs of each step, no matter if the step passes or fails. These logs are extremely useful for debugging build failures. In our case, we have a failing unit test, and the build failure is logged with all the details.
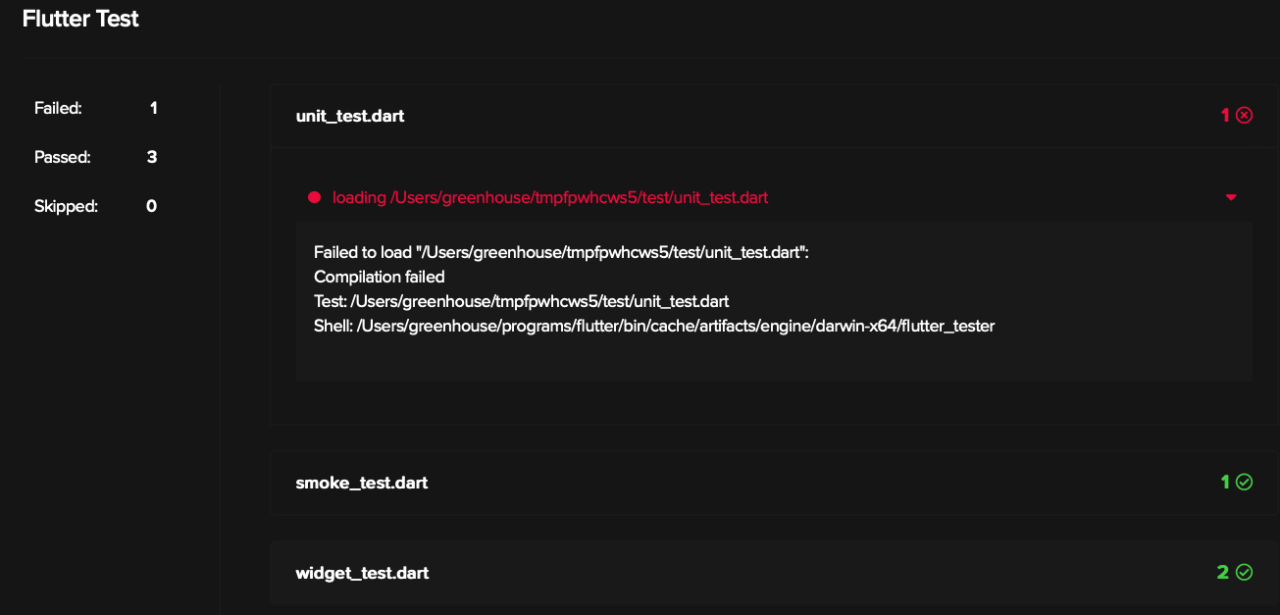
As can be seen, my integration tests and widget tests are passing, but the unit test is failing in the above screen. We can then fix the problem to fix the build. When tests fail, you will also get an email about the test failure with link to the build logs.
Read more about the top 12 configuration mistakes that will fail your mobile CI build
Default workflow vs custom workflow
The default build workflow covers the basic things needed for the CI/CD workflow, but most of the time, we need to add some custom things as part of the build process. For example, you may want to send the build status to Slack or other third-party communication channel, or publish the build artifacts on other services, like Fabric or HockeyApp, etc. In these scenarios, you can create a custom workflow and run custom scripts to achieve this. Now, we will see how we can customize a workflow as per the project’s needs.
Build phase
The Codemagic build phase of Flutter apps has various options to define the build process. You can start by selecting which branches to build and how to trigger builds.
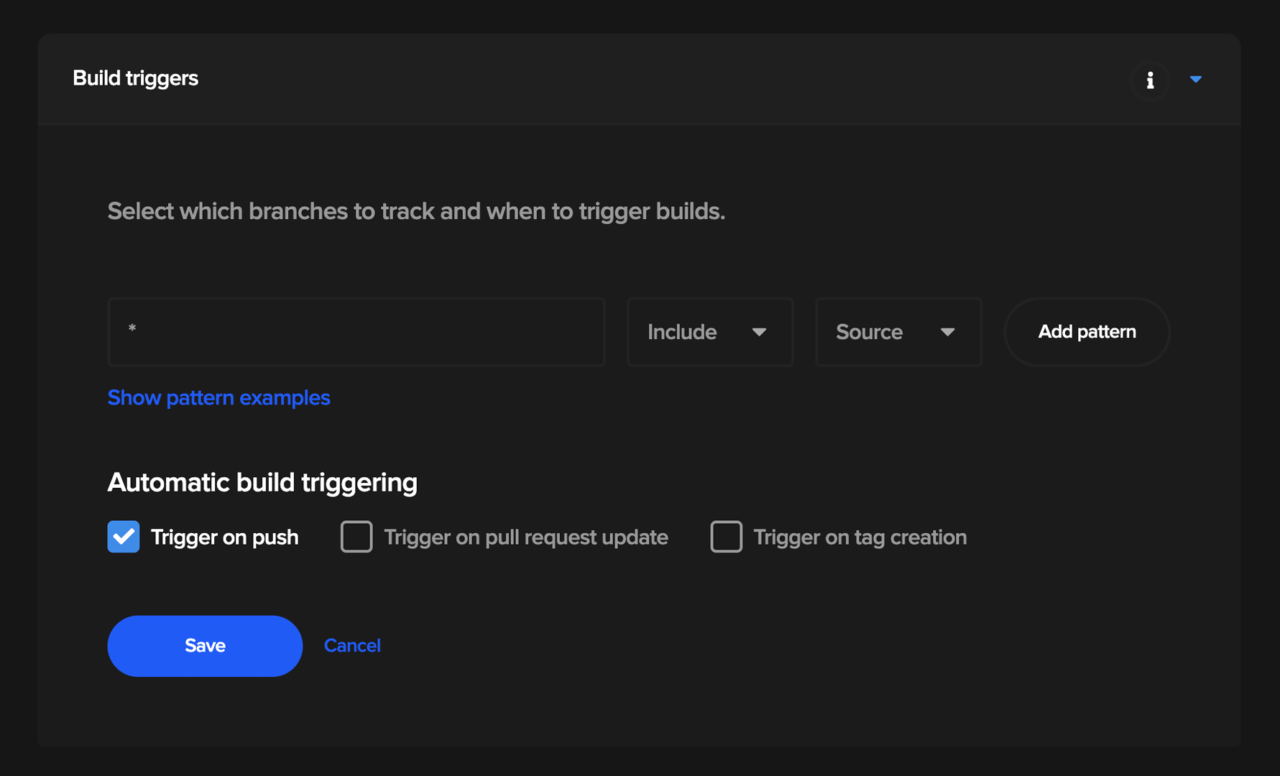
Next, Codemagic allows us to go into more details and select
- Flutter version;
- build configuration for building apps, e.g debug or release;
- platforms like iOS or Android or both;
- Xcode version;
- custom build arguments.
The default workflow selects the following settings as part of the build.
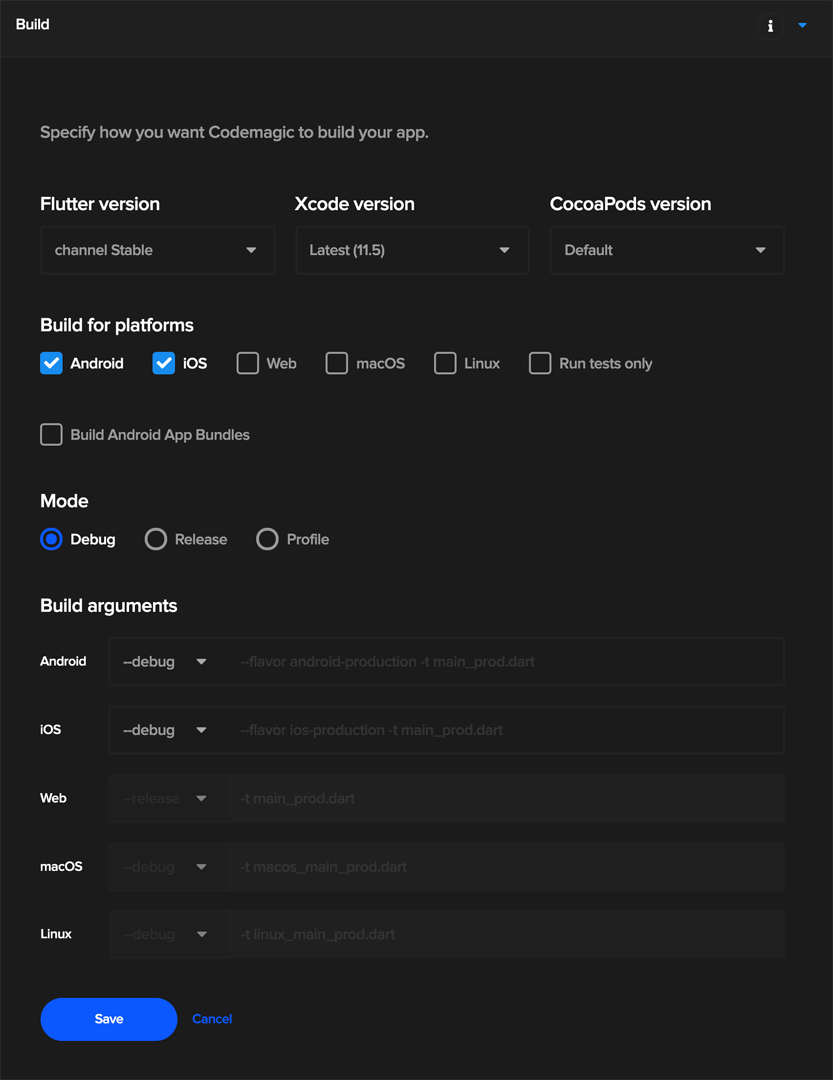
However, you can always customize the build process by changing the default behavior in accordance with the project’s needs. You can build the app with a different Xcode version or with a different release configuration by changing these options and using a custom workflow.
Another great feature of Codemagic is the ability to add a custom script before every phase. This allows developers to run arbitrary commands before and after each phase. In order to set up the custom scripts, you just need to click on the + sign on top of each phase, e.g. build, test or publish. Here is an example of the script that you can put before the build phase.
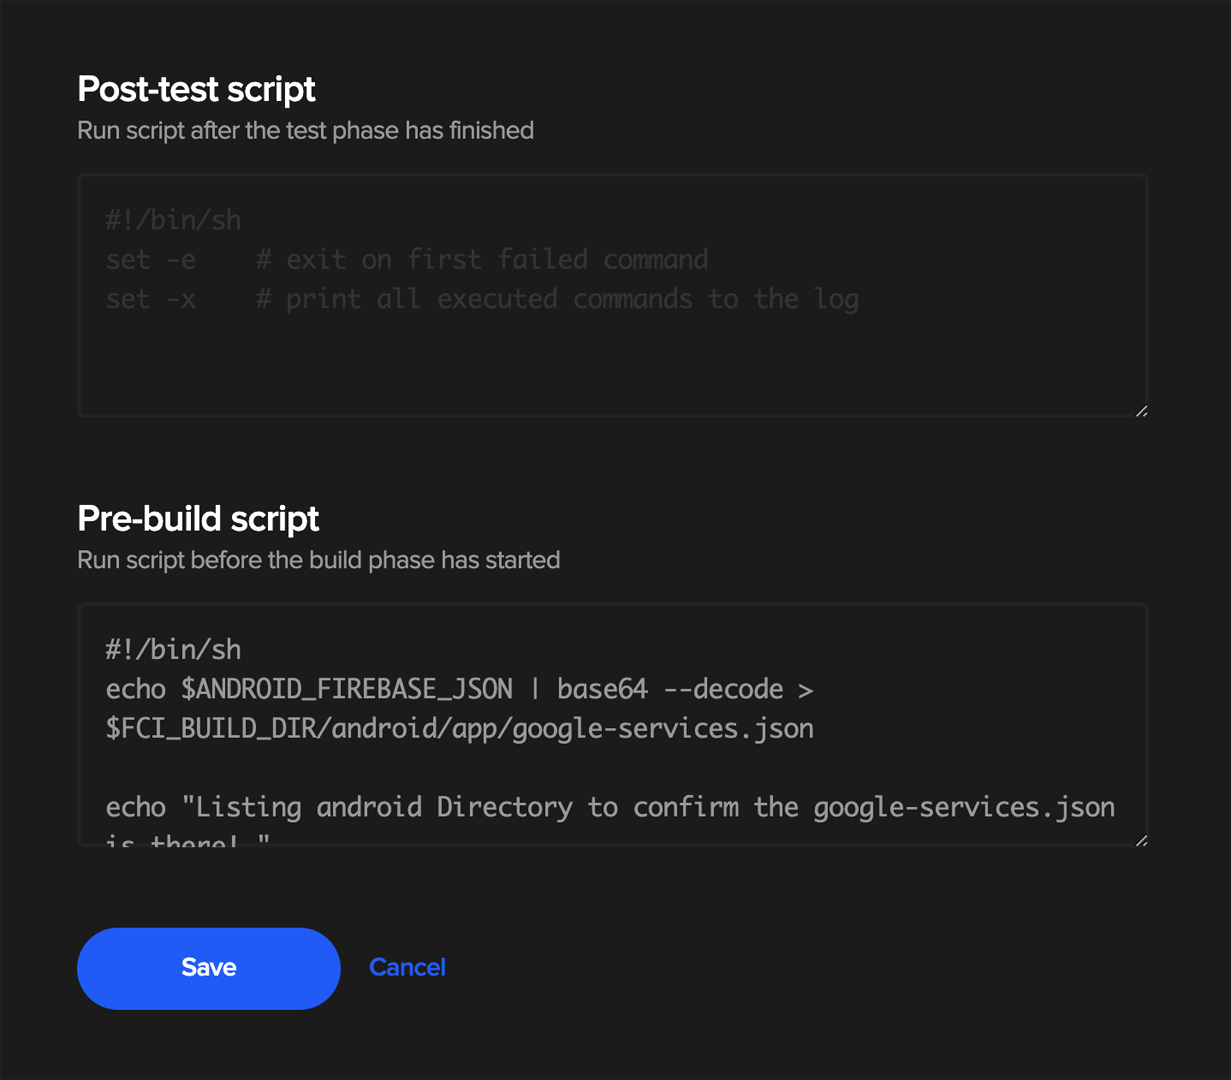
You can add any commands in the Pre-build script, e.g. installing some project-specific dependencies.
Test phase
In the test phase of Codemagic, developers can enable or disable the test execution. You can select the type of Flutter tests to run on your project. Also, you can provide any additional arguments to use during testing. If you are using Flutter Driver tests in your project, you can specify the type of emulator to use. You can also benefit from Firebase Test Lab.
You can find detailed information about the Flutter Tests here.
However, you can use custom test commands by disabling the default behavior. For example, if you want to run just UI tests from command line, you can add a pre-test phase with the command
$flutter drive --target=test_driver/main.dart
This will execute this command instead of using the default test workflow.
Publish phase
In the publish phase of Codemagic, there are various things that need to be configured for publishing the build reports and artifacts. By default, only email is configured if you have provided it with GitHub/Bitbucket/GitLab.
You will have to explicitly configure any other aspects of the Publishing phase, including:
- Uploading the code signing assets for both iOS and Android
- Setting up Slack webhook
- Entering Google Play and/or App Store Connect details for publishing.
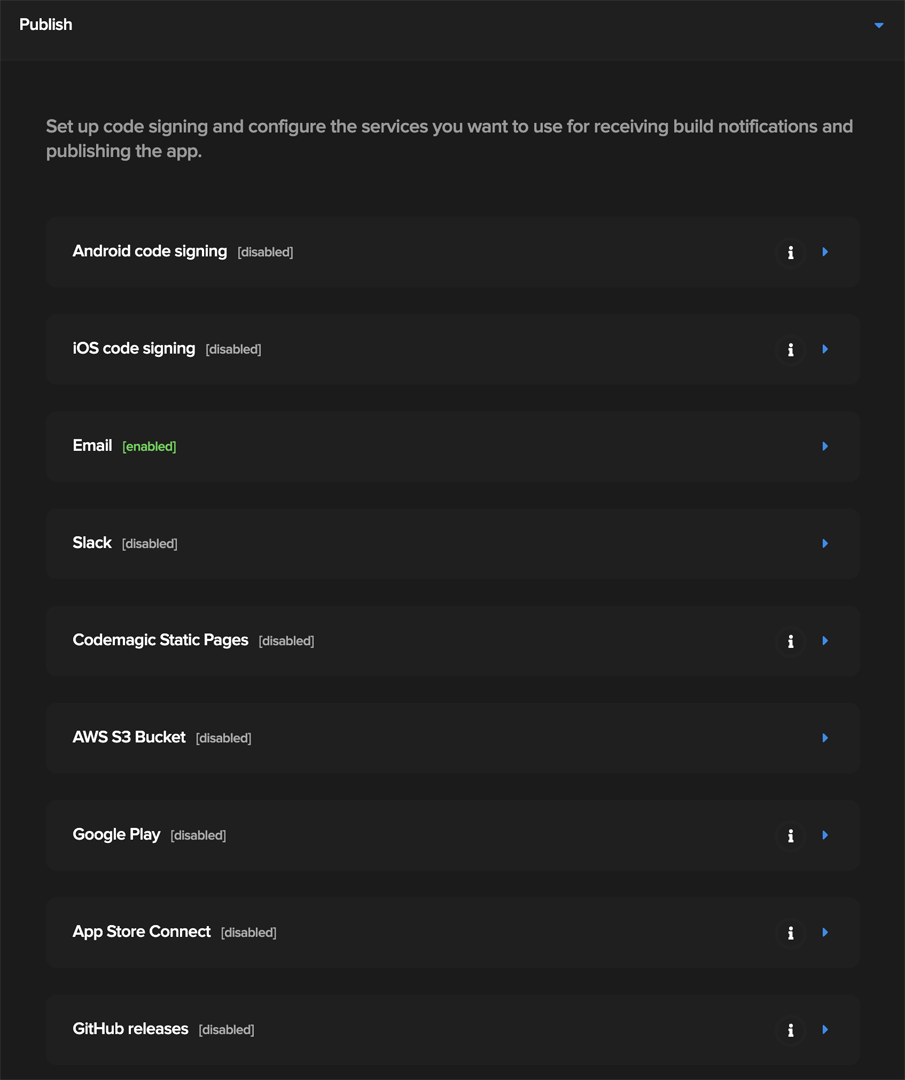
On top of these, you can also write some custom scripts to deploy the artifacts to third-party services like Fabric.
With the great power of scripting, you can configure custom workflows in Codemagic to define a stronger build process for your apps.
Multiple workflows
Codemagic allows you to create multiple workflows to meet the requirements of different configurations and versions of softwares. In Codemagic, you can create a new workflow by duplicating the existing workflow and renaming it. In order to do this, follow these steps:
- Go to your app settings.
- In the Workflow settings section, click Duplicate workflow. The duplicated workflow will appear in the list below the app name as “Default Workflow (Copy)”. Select the workflow and rename it.
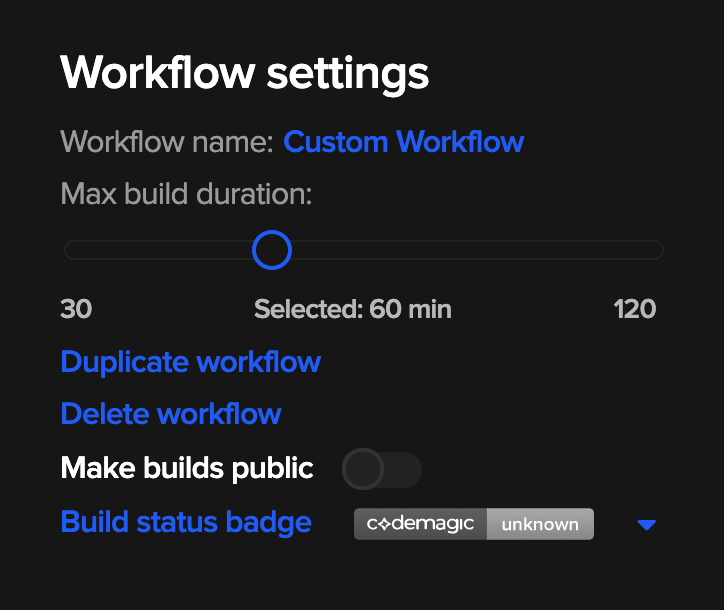
In the screen above, we have renamed the default workflow as “Custom WorkFlow”. You can create many workflows for testing Flutter apps with different versions of Xcode, debug vs release configuration, and so on.
CI/CD for Flutter: conclusion
Although Codemagic started as an official CI/CD solution dedicated just for Flutter apps, it now welcomes all mobile projects to the fastest CI/CD. With the magic of Codemagic, you can build, test, and publish Flutter apps with zero configuration and run builds in controlled environments using custom workflows. If you have a native Android, iOS, or React Native app, Codemagic has got your back, just use the codemagic.yaml file and you are ready to lift off!
Now let’s take a look at how to configure the codemagic.yaml file for building React Native projects on Codemagic CI/CD and what are the main reasons to use Codemagic CI/CD tool for React Native apps.
In case you are not a Codemagic user yet, you can sign up here:
Top reasons to use Codemagic CI/CD for React Native apps
Easy project setup
Getting started with building React Native apps is easy thanks to ready-made configuration templates. Simply select React Native App as the starter workflow and kick off your project.
Customizable workflows for iOS and Android
Codemagic was built with cross-platform app development in mind. Have full control over your React Native pipeline with workflows for iOS and Android that fit the needs of your development team.
Seamless code signing for iOS and Android
Simply upload your Android keystore and iOS code signing files to receive signed artifacts. With automatic code signing for iOS, Codemagic can take care of creating and managing signing certificates and provisioning profiles for you.
Unit and integration tests
Assure the quality of your React Native apps with automated tests. Run unit tests with Jest or test the full app on the simulator/emulator or real devices with Appium or Detox.
Distribute React Native apps with ease
Distribute the latest version of your app to testers on TestFlight, Google Play or Firebase App Distribution, or configure your workflows to automatically publish to the Apple App Store or Google Play.
First-class support
Codemagic Slack workspace community has more than 3,000 members. Find quick solutions and discuss your projects with fellow developers.


Getting started with Codemagic CI/CD for React Native apps
Let’s get started with continuous integration and delivery for React Native apps. After signing up, you can use React Native workflows by creating a new project in Codemagic and simply selecting the React Native App from the options.
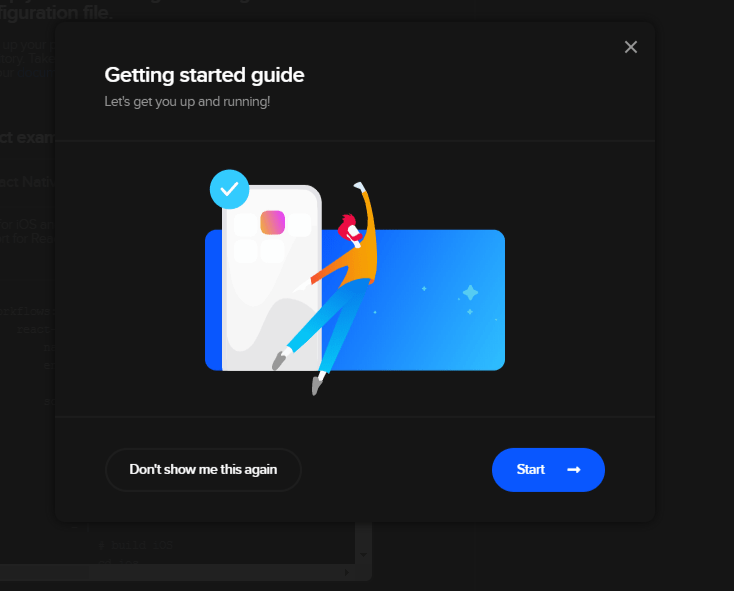
Clicking on it will open up the “Getting started guide” for React Native:
Hitting Next shows us our codemagic.yaml file.
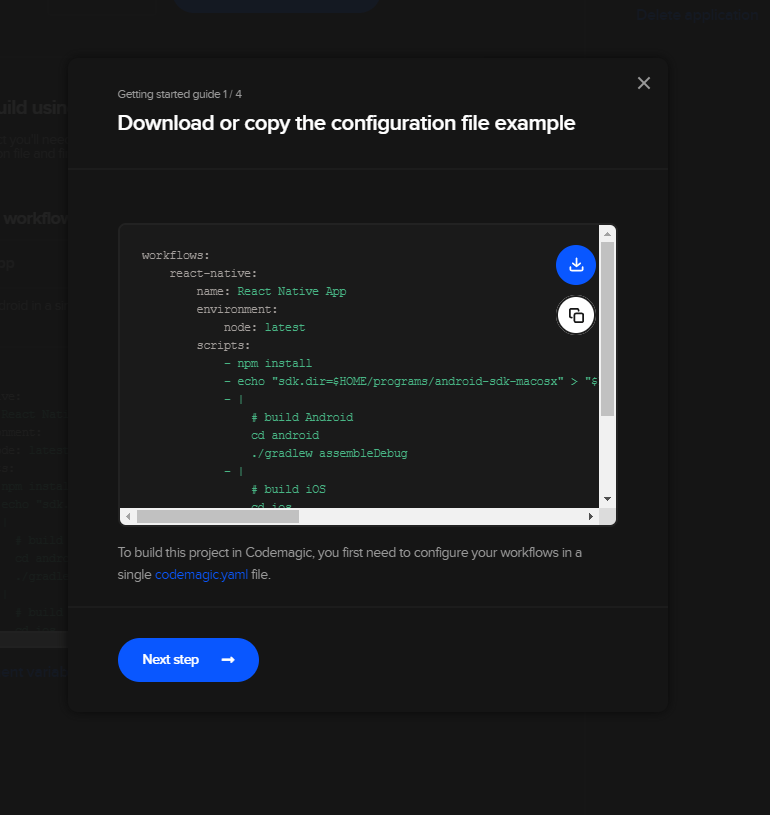
We can download this and add it to our local repository. This configures our Codemagic pipelines, so Codemagic knows how to run our React Native build on its build servers.
Modifying the YAML file for our build
The next step in this process is to modify our codemagic.yaml file to get it to build our solution, so let’s see what this file looks like:
# Check out https://docs.codemagic.io/getting-started/building-a-react-native-app/ for more information
# Please review and update values in curly braces

workflows:
  react-native:
    name: React Native App
    environment:
      vars:
        XCODE_WORKSPACE: '{{ ADD WORKSPACE NAME HERE }}'
        XCODE_SCHEME: '{{ ADD SCHEME NAME HERE }}'
      node: latest
    scripts:
      - npm install
      - echo "sdk.dir=$ANDROID_SDK_ROOT" > "$CM_BUILD_DIR/android/local.properties"
      - |
        # build Android
        cd android
        ./gradlew assembleDebug
      - |
        # build iOS
        cd ios
        pod install
        xcodebuild build -workspace "$XCODE_WORKSPACE.xcworkspace" -scheme "$XCODE_SCHEME" CODE_SIGN_IDENTITY="" CODE_SIGNING_REQUIRED=NO CODE_SIGNING_ALLOWED=NO
    artifacts:
      - android/app/build/outputs/**/**/*.apk
      - $HOME/Library/Developer/Xcode/DerivedData/**/Build/**/*.app
Clearly, there are some changes that we need to make to this YAML to get a successful build.
The required changes
Android
Broadly speaking, you almost never want to build a debug version of your app in your CI/CD pipeline. We need to tell the build process to build a release build instead. To do this, we just update the lines under #build Android to look more like this:
- |
  # build Android
  cd android
  ./gradlew assembleRelease
The build process will now follow the path as defined in our build.gradle. Code signing is a topic in itself (covered in depth here), so we’ll just describe the necessary steps to get the build to work.
In your App level build.gradle (that’s under YourProjectDirectory\android\app), we need to add in our release signing details. But we need to use the release signing details only when our build is being run on Codemagic, and not locally.
We then configure the build process to read the signing details from the release file.
signingConfigs {
    debug {
        storeFile file('debug.keystore')
        storePassword 'android'
        keyAlias 'androiddebugkey'
        keyPassword 'android'
    }

    release {
        if (System.getenv()['CI']) { // CI=true is exported by Codemagic
            storeFile file(System.getenv()['CM_BUILD_DIR'] + '/keystore.jks')
            storePassword System.getenv()['CM_KEYSTORE_PASSWORD']
            keyAlias System.getenv()['CM_KEY_ALIAS']
            keyPassword System.getenv()['CM_KEY_PASSWORD']
        }
        else {
            def keystorePropertiesFile = rootProject.file('key.properties')
            def keystoreProperties = new Properties()
            keystoreProperties.load(new FileInputStream(keystorePropertiesFile))
            keyAlias keystoreProperties['keyAlias']
            keyPassword keystoreProperties['keyPassword']
            storeFile file(keystoreProperties['storeFile'])
            storePassword keystoreProperties['storePassword']
        }
    }
}
What’s actually happening here? In a nutshell, if we are running in a release build, we check if the CI environment variable is declared (Codemagic build machines declare this variable). If we are, then we fetch the location of the keystore and appropriate signing details from the environment variables. Otherwise, we use the local key.properties for these details, and fetch the details from there instead. This means that our builds continue to run not only locally but also on Codemagic, which is a nice bonus.
Our local debug key.properties might look something like this (this is for a debug keystore, so yours will be different):
storePassword=android
keyPassword=yourpassword
keyAlias=androiddebugkey
storeFile=keystore.keystore
These are just the keys for the debug keystore, but normally, these are incredibly sensitive details. We don’t want just anyone to be able to read these settings, so checking these files into source control is a really bad idea. Instead, we will encrypt them in Codemagic and have the build process decrypt the required details just before the build runs.
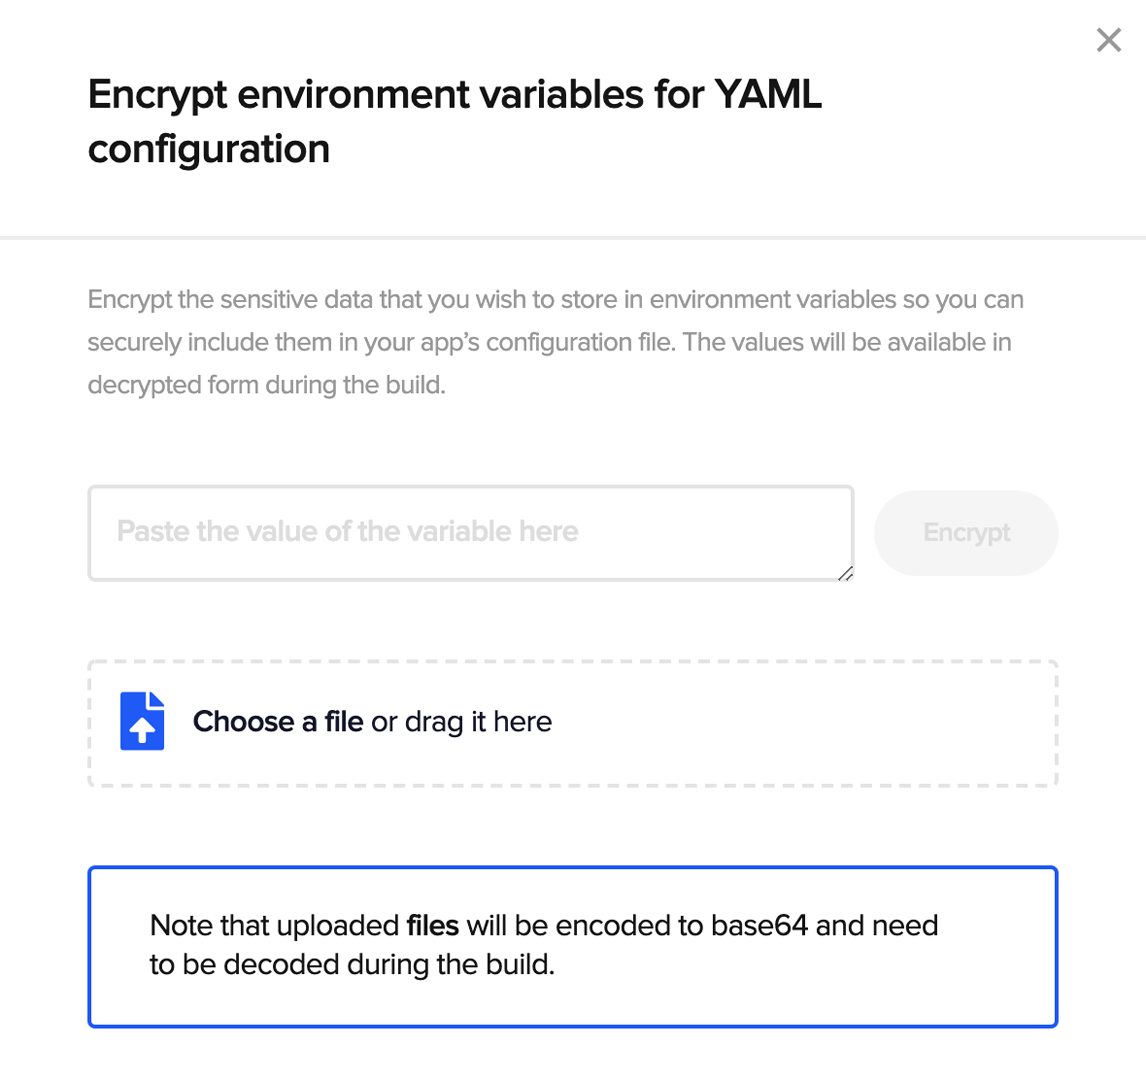
Encrypting our build time dependencies
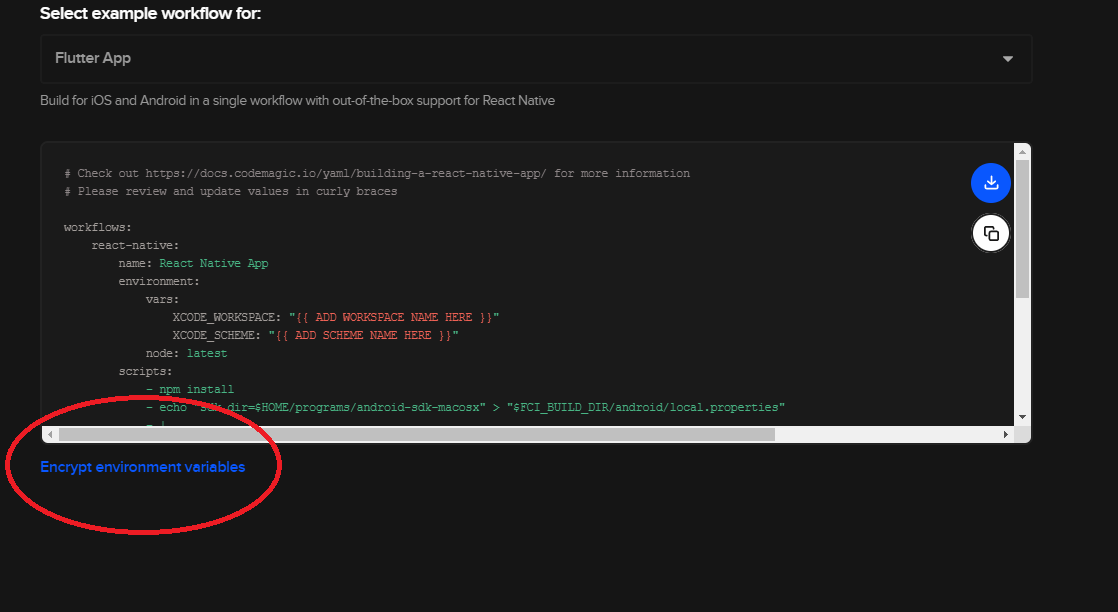
On our project configuration page, we can use the Encrypt environment variables button to convert sensitive details into a format that can be securely checked in.
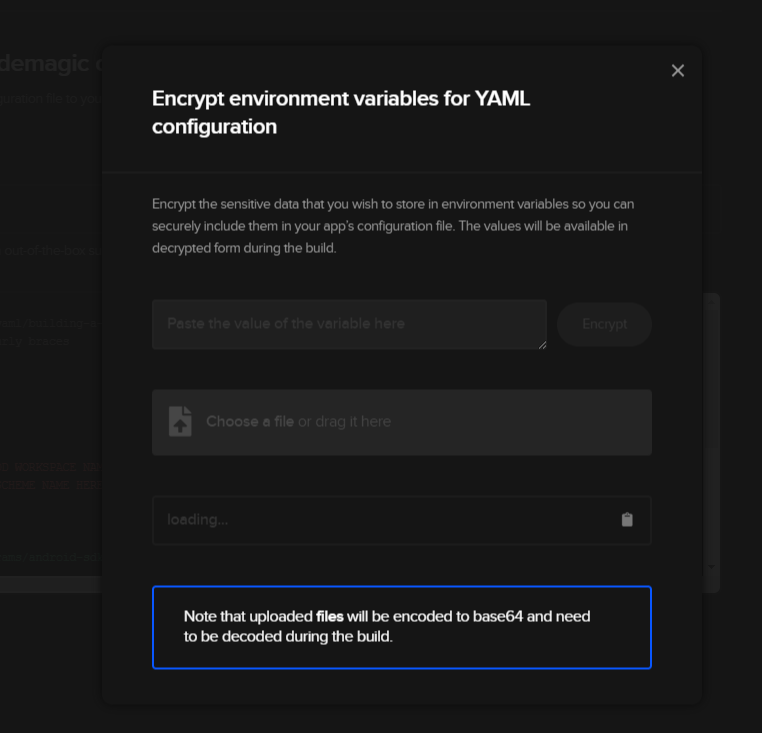
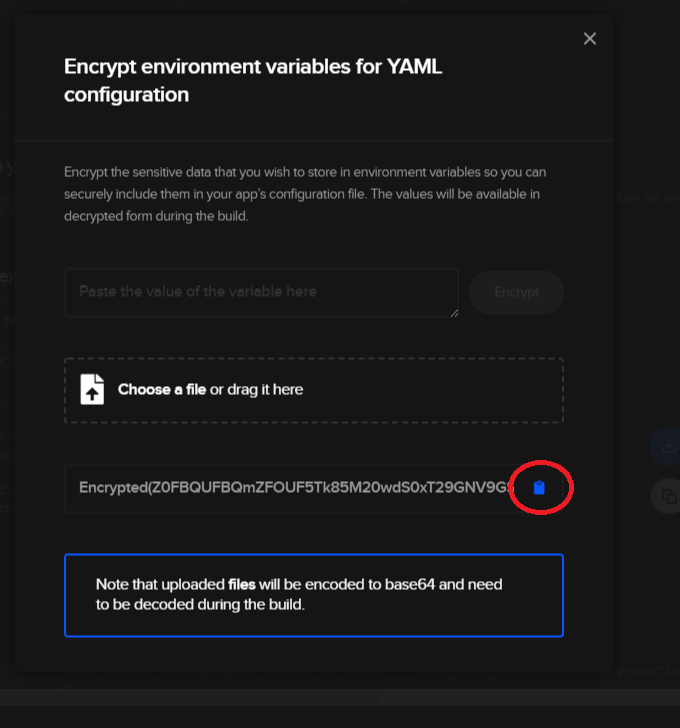
Next, we can drag our keystore file into this window and receive an encrypted variable containing our keystore. We just click the little clipboard next to the icon to copy the encrypted keystore variable to our clipboard.
We can also use this screen to encrypt individual variables, like the keystore alias and password. We’ll do this now, and paste these values into our codemagic.yaml file. When we’re done, it should look a little bit like this:
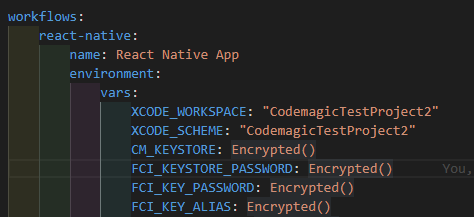
We’ve configured our build variables, so we can now use them in our build process later on. With these four environment variables encrypted (the keystore, the keystore password, the key alias and password), we’re good to go.
Build script
For our Android builds, we want to:
- Make the cloned directory writable (I was getting build failures without this, hence the
chmod) - Write the keystore file into our repository so it can be used by the build process
- Switch to the Android directory and run the
assembleReleasegradle task, which will produce a signed APK.
In the codemagic.yaml file, it looks like this:
- npm install
- echo "sdk.dir=$ANDROID_SDK_ROOT" > "$CM_BUILD_DIR/android/local.properties"
- |
  chmod -R 777 $CM_BUILD_DIR
  echo $CM_KEYSTORE | base64 --decode > $CM_BUILD_DIR/keystore.jks
  # build Android
  cd android
  ./gradlew assembleRelease
For Android, it’s really that easy! For iOS, it’s a little more involved …
iOS
In order for our builds to complete successfully, we need to load both our certificate and the .mobileprovision file from App Store Connect onto the build agent. In this example we have encrypted the signing certificate as CM_CERTIFICATE, the password for the certificate as CM_CERTIFICATE_PASSWORD and the provisioning profile as CM_PROVISIONING_PROFILE.
Build script
This looks a bit more complicated than the Android equivalent, and also uses ✨ fancy Codemagic CLI functionality ✨to make it work. Here’s what we’re doing in this build:
- Running
keychain initializeto prepare for the import of our signing certificate into the build agent - Setting
PROFILES_HOMEto where our mobile provisioning certificate is about to be, and then creating that directory - Setting
PROFILE_PATHto a temporary location withinPROFILES_HOME - Writing our PROVISIONING_PROFILE to
PROFILE_PATH, with a temporary name - Writing our signing certificate (CM_CERTIFICATE) to
/tmp/certificate.p12 - Adding this certificate to the build box’s local certificate store, using CM_CERTIFICATE_PASSWORD to do so
- Running the
xcode-project use-profilescommand - And then just basically changing into the iOS directory, running
pod install, and usingxcode-project build-ipato build our app, while specifying a workspace and scheme to use
- keychain initialize
  - |
    # set up provisioning profiles
    PROFILES_HOME="$HOME/Library/MobileDevice/Provisioning Profiles"
    mkdir -p "$PROFILES_HOME"
    PROFILE_PATH="$(mktemp "$PROFILES_HOME"/$(uuidgen).mobileprovision)"
    echo ${CM_PROVISIONING_PROFILE} | base64 --decode > "$PROFILE_PATH"
    echo "Saved provisioning profile $PROFILE_PATH"
  - |
    # set up signing certificate
    echo $CM_CERTIFICATE | base64 --decode > /tmp/certificate.p12
    keychain add-certificates --certificate /tmp/certificate.p12 --certificate-password $CM_CERTIFICATE_PASSWORD
  - xcode-project use-profiles
  - |
    # build iOS
    cd ios
    pod install
  - xcode-project build-ipa --workspace "ios/$XCODE_WORKSPACE.xcworkspace" --scheme "$XCODE_SCHEME"
The finished codemagic.yaml
After all that, you should have a codemagic.yaml file that looks a bit like this:
workflows:
  react-native:
    name: React Native App
    environment:
      vars:
        XCODE_WORKSPACE: 'CodemagicTestProject2'
        XCODE_SCHEME: 'CodemagicTestProject2'
        CM_KEYSTORE: Encrypted(...)
        CM_KEYSTORE_PASSWORD: Encrypted(...)
        CM_KEY_PASSWORD: Encrypted(...)
        CM_KEY_ALIAS: Encrypted(...)
        CM_CERTIFICATE: Encrypted(...)
        CM_CERTIFICATE_PASSWORD: Encrypted(...)
        CM_PROVISIONING_PROFILE: Encrypted(...)
      node: latest
    scripts:
      - npm install
      - echo "sdk.dir=$ANDROID_SDK_ROOT" > "$CM_BUILD_DIR/android/local.properties"
      - |
        chmod -R 777 $CM_BUILD_DIR
        echo $CM_KEYSTORE | base64 --decode > $CM_BUILD_DIR/keystore.jks
        # build Android
        cd android
        ./gradlew assembleRelease
      - keychain initialize
      - |
        # set up provisioning profiles
        PROFILES_HOME="$HOME/Library/MobileDevice/Provisioning Profiles"
        mkdir -p "$PROFILES_HOME"
        PROFILE_PATH="$(mktemp "$PROFILES_HOME"/$(uuidgen).mobileprovision)"
        echo ${CM_PROVISIONING_PROFILE} | base64 --decode > "$PROFILE_PATH"
        echo "Saved provisioning profile $PROFILE_PATH"
      - |
        # set up signing certificate
        echo $CM_CERTIFICATE | base64 --decode > /tmp/certificate.p12
        keychain add-certificates --certificate /tmp/certificate.p12 --certificate-password $CM_CERTIFICATE_PASSWORD
      - xcode-project use-profiles
      - |
        # build iOS
        cd ios
        pod install
      - xcode-project build-ipa --workspace "ios/$XCODE_WORKSPACE.xcworkspace" --scheme "$XCODE_SCHEME"
    artifacts:
      - android/app/build/outputs/**/**/*.apk
      - build/ios/ipa
A small note - the Encrypted(...) are placeholder values. You’ll need to encrypt your own values on Codemagic that suit your build process.
And that’s it! Your React Native app should build with Codemagic now. If you have any questions or comments, be sure to drop into Codemagic’s Slack channel and let us know. Happy developing!
To start using Codemagic, sign up here:
Let’s move on with continuous integration & delivery (CI/CD) for iOS apps.
Getting started with Codemagic CI/CD for native iOS apps
Let’s see how to use the codemagic.yaml file to build, test and deliver native iOS apps on Codemagic.
It is recommended to go through the article for better understanding, but if you already have experience with using
codemagic.yamlfile, you can get the YAML template for native iOS project here.
Getting started
Make sure that your native iOS project is uploaded to a code hosting platform (like GitHub, Bitbucket or GitLab) using a version control system. Follow the steps below to get the codemagic.yaml file template:
-
Log in to Codemagic.
-
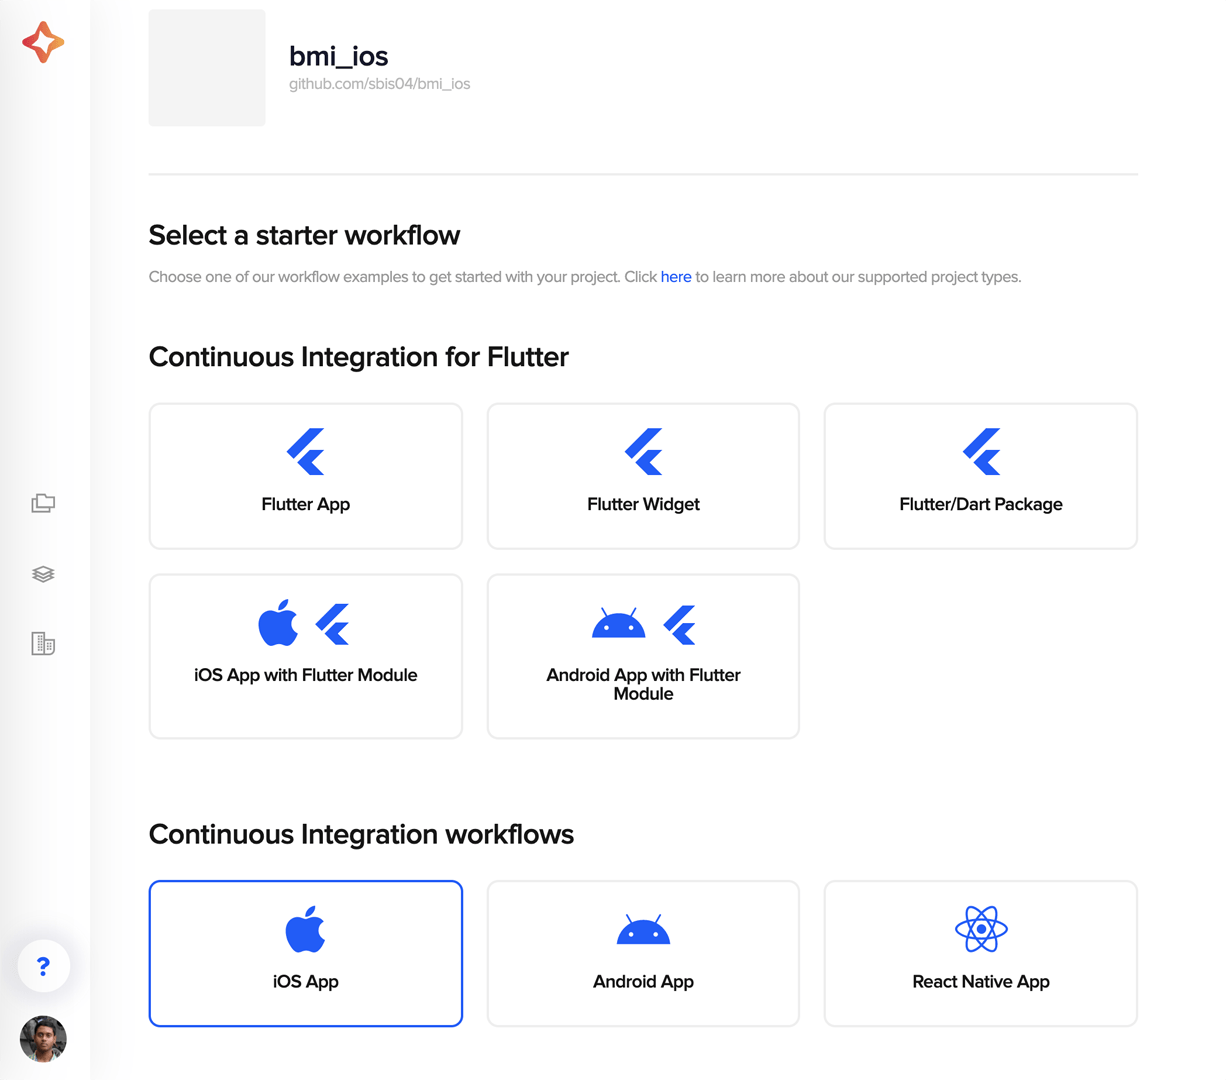
In the Applications overview, search for your project and click Set up build.
-
Select iOS App as the starter workflow.
-
You can download the YAML template for native iOS by clicking the download button.
-
Now, open the
codemagic.yamlusing any code editor.
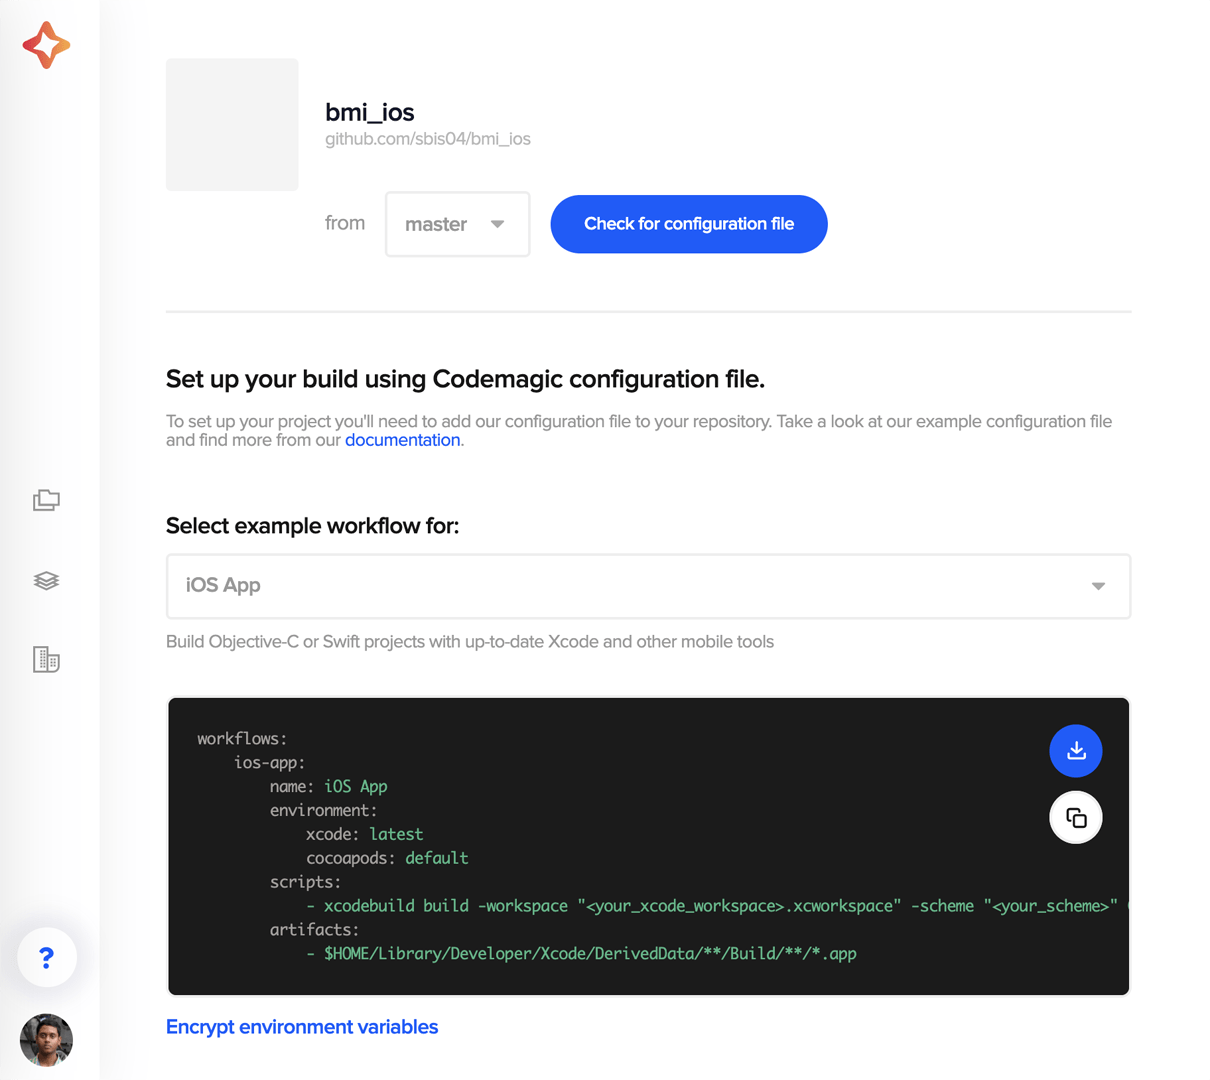
The file contents will look like this:
# Workflow setup for building Native iOS project
workflows:
  ios-project: # workflow ID
    name: iOS project # workflow name
    environment:
      xcode: latest
      cocoapods: default
    scripts:
      - xcodebuild build -workspace "<your_xcode_workspace>.xcworkspace" -scheme "<your_scheme>" CODE_SIGN_IDENTITY="" CODE_SIGNING_REQUIRED=NO CODE_SIGNING_ALLOWED=NO
    artifacts:
      - $HOME/Library/Developer/Xcode/DerivedData/**/Build/**/*.app
Default YAML file
You will see that a default workflow ID and workflow name is specified, but you can change them as you wish. The workflow uses the latest versions of both Xcode and CocoaPods.
The default iOS workflow specified in the YAML file is very simple and will only generate a .app file of your iOS app.
Make sure to replace the two angle brackets with Xcode workspace name and Scheme respectively. You can also use
-projectflag instead of-workspaceif you want to specify the Xcode project name.
In order to generate the .ipa file, you will need to set up code-signing.
Setting up code signing
For code signing, you will need two files:
- Certificate
- Provisioning profile
If you just want to generate the .ipa file for personal use, you can use the iOS Development Certificate.
To publish your app on App Store Connect, you need to use iOS Distribution Certificate. You can follow the article here.
Follow the steps below:
-
Open Xcode.
-
Go to
Xcode > Preferencesfrom the navigation bar. -
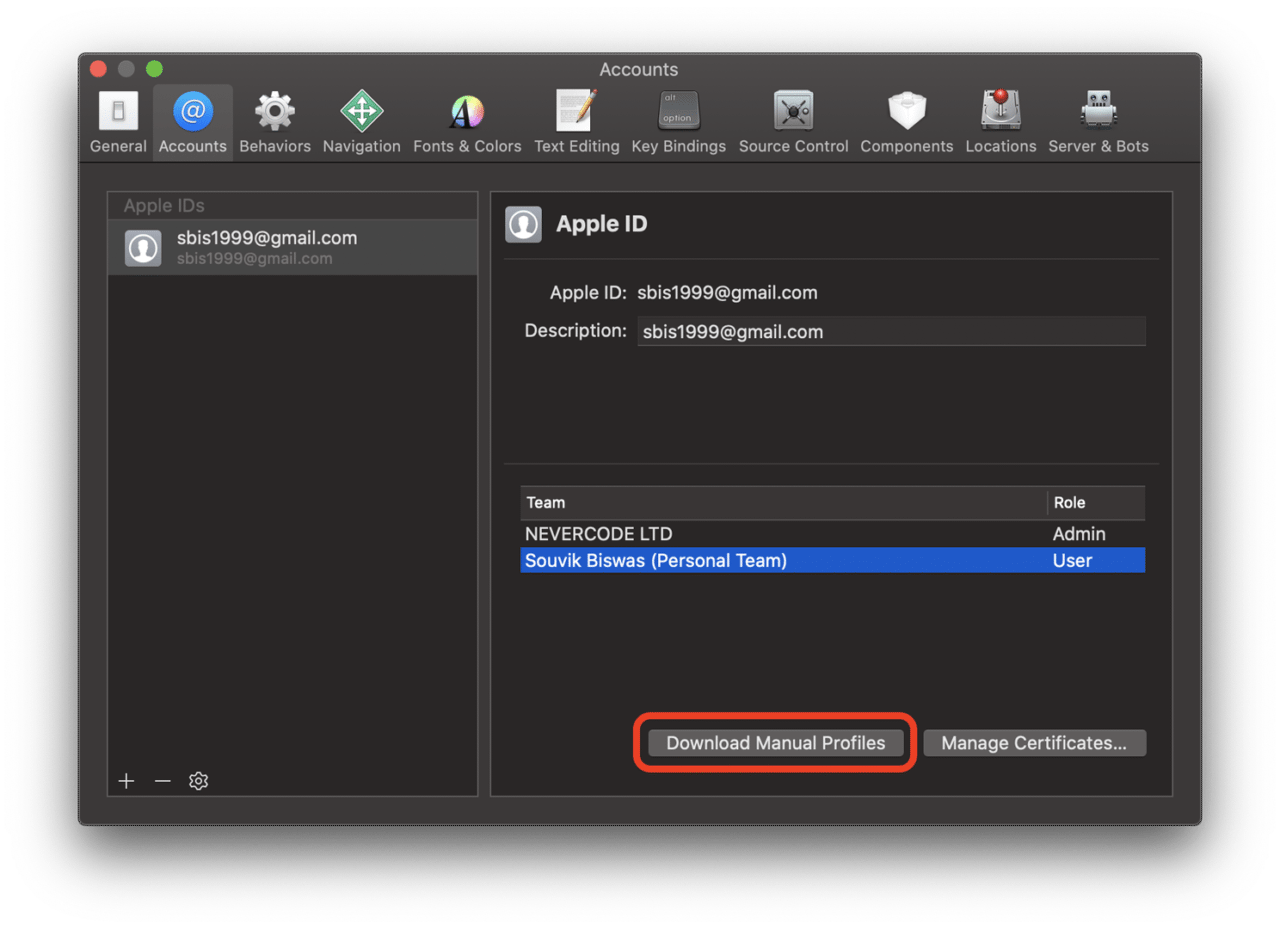
From the top menu of the window, select Accounts.
-
Now, select the Team under your Apple ID for which you want the certificate.
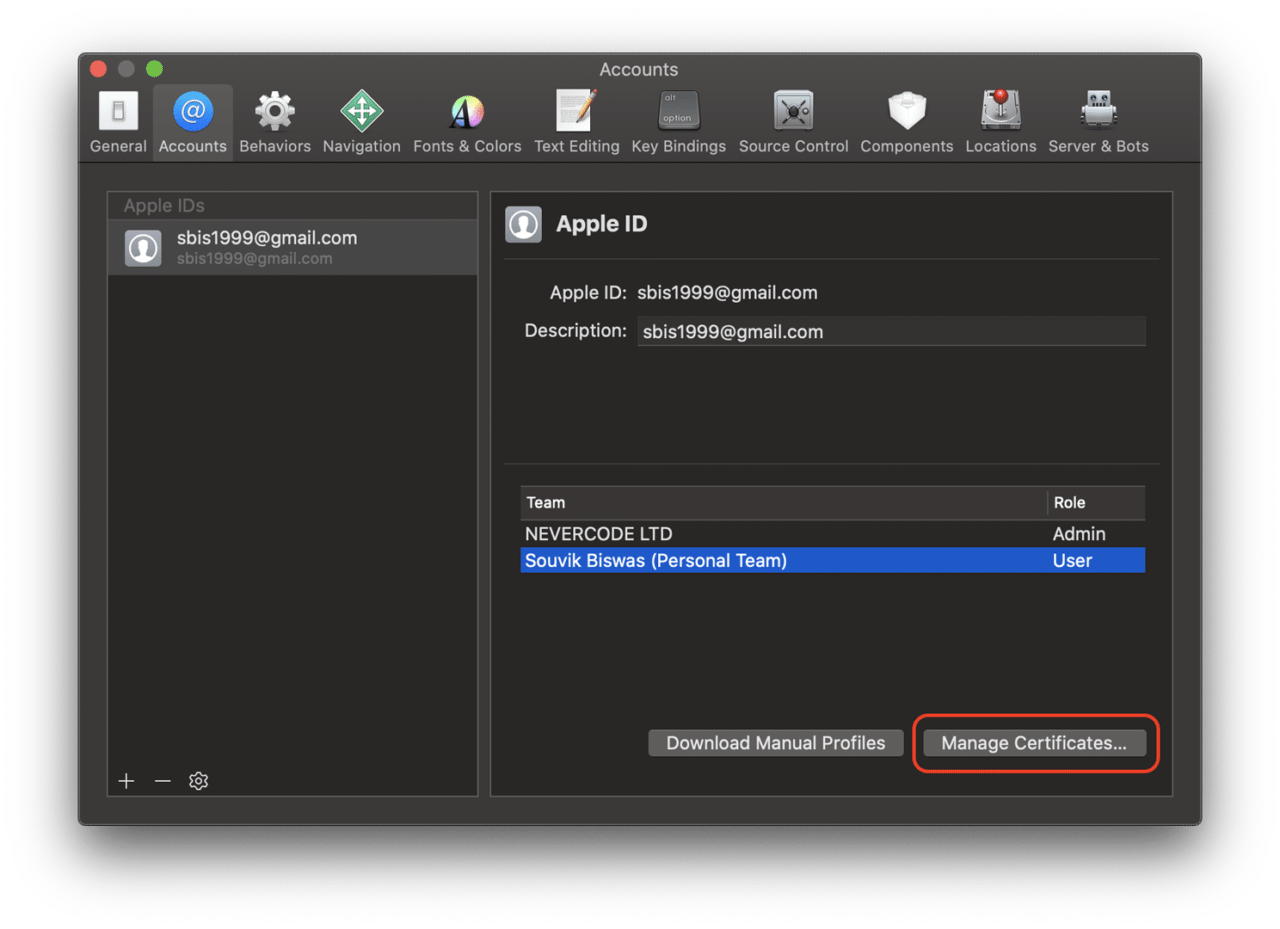
-
Click Manage Certificates.
-
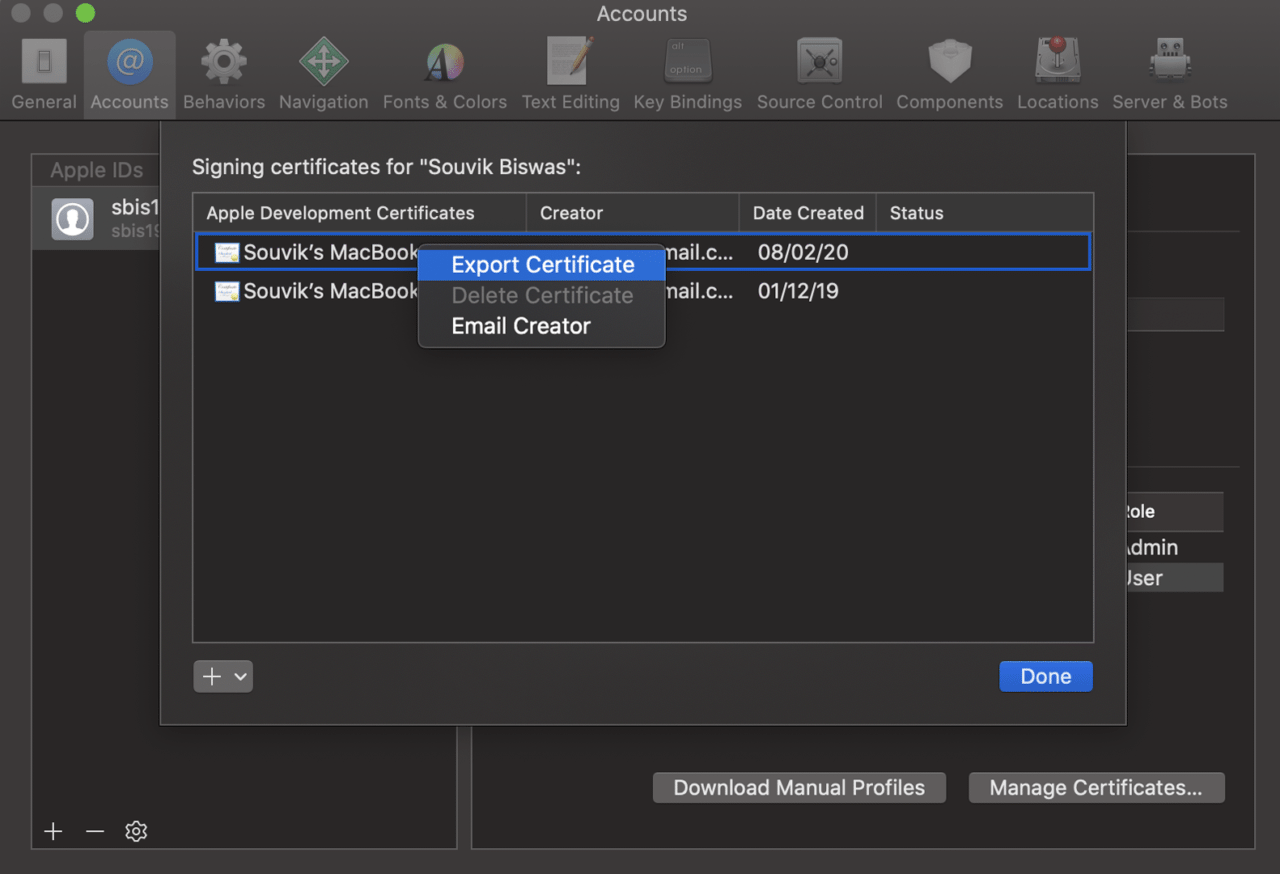
Right click the Development Certificate and select Export Certificate.
-
Enter the certificate name, password and path for storing the certificate.
-
To generate the provisioning profile, click Download Manual Profiles.
This will save the profile in the directory
~/Library/MobileDevice/Provisioning Profiles/
Deep dive into YAML
Let’s take a closer look at the codemagic.yaml file.
The default script is only for generating the .app file. To generate the .ipa of your iOS app, you have to add some environment variables for code signing.
Adding environment variables
You need to add the certificate and the provisioning profile in encrypted form as key-value pairs in the environment variables section of the codemagic.yaml file.
We will be adding the following keys:
- CM_CERTIFICATE (encrypted version of the certificate)
- CM_CERTIFICATE_PASSWORD (encrypted version of the certificate password)
- CM_PROVISIONING_PROFILE (encrypted version of the provisioning profile)
You can generate the encrypted version of these files/variables by following these steps:
-
Go to the project settings.
-
Click Encrypt environment variables.
-
Here, you can drag and drop the files or enter the variables to generate their encrypted version.
Modifying scripts
You need to make some changes to the script to generate the .ipa file of the app.
-
Initialize the keychain.
- keychain initialize -
Decode the provisioning profile and place it in a folder where it can be accessed during the code signing process.
PROFILES_HOME="$HOME/Library/MobileDevice/Provisioning Profiles" mkdir -p "$PROFILES_HOME" PROFILE_PATH="$(mktemp "$PROFILES_HOME"/$(uuidgen).mobileprovision)" echo ${CM_PROVISIONING_PROFILE} | base64 --decode > "$PROFILE_PATH" echo "Saved provisioning profile $PROFILE_PATH" -
Decode the signing certificate and add it to the keychain.
echo $CM_CERTIFICATE | base64 --decode > /tmp/certificate.p12 keychain add-certificates --certificate /tmp/certificate.p12 --certificate-password $CM_CERTIFICATE_PASSWORD -
Run tests.
xcodebuild \
-project BMI\ Calculator.xcodeproj \
-scheme BMI\ Calculator \
-sdk iphonesimulator \
-destination 'platform=iOS Simulator,name=iPhone 11 Pro Max,OS=13.4' \
clean build test CODE_SIGN_IDENTITY="" CODE_SIGNING_REQUIRED=NO
If you face any errors related to the
-destinationflag while running the tests, just make sure that theIPHONEOS_DEPLOYMENT_TARGETversion in theproject.pbxprojfile is matching the destination Simulator OS version of this command. -
Use the profile and build the
.ipafile.xcode-project use-profiles xcode-project build-ipa --project "BMI Calculator.xcodeproj" --scheme "BMI Calculator"
Collecting artifacts
You need to define the path to the generated .ipa file to retrieve it from the Codemagic build system.
artifacts:
  - build/ios/ipa/*.ipa
Publishing
To get a report of the build along with the generated artifacts in your email, specify the following:
publishing:
  email:
    recipients:
      - name@example.com # enter your email id here
For more information about publishing, refer to this link.
You have successfully completed the workflow setup for building a native iOS app.
Building on Codemagic
Before starting a build on Codemagic, make sure that your have the codemagic.yaml file committed to the version control system.
Follow the steps below to start a build:
-
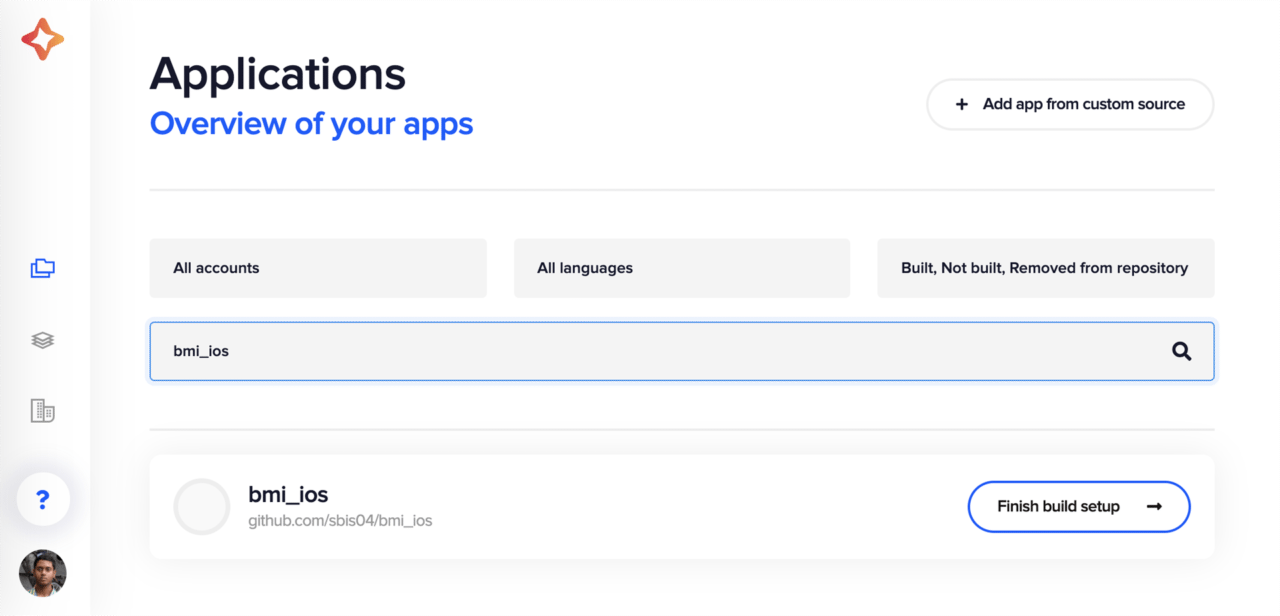
In the Applications dashboard, click Finish build setup.
-
Click Check for configuration file.

-
Then, click Start your first build.

-
Select the workflow from the
codemagic.yamlfile and click Start new build.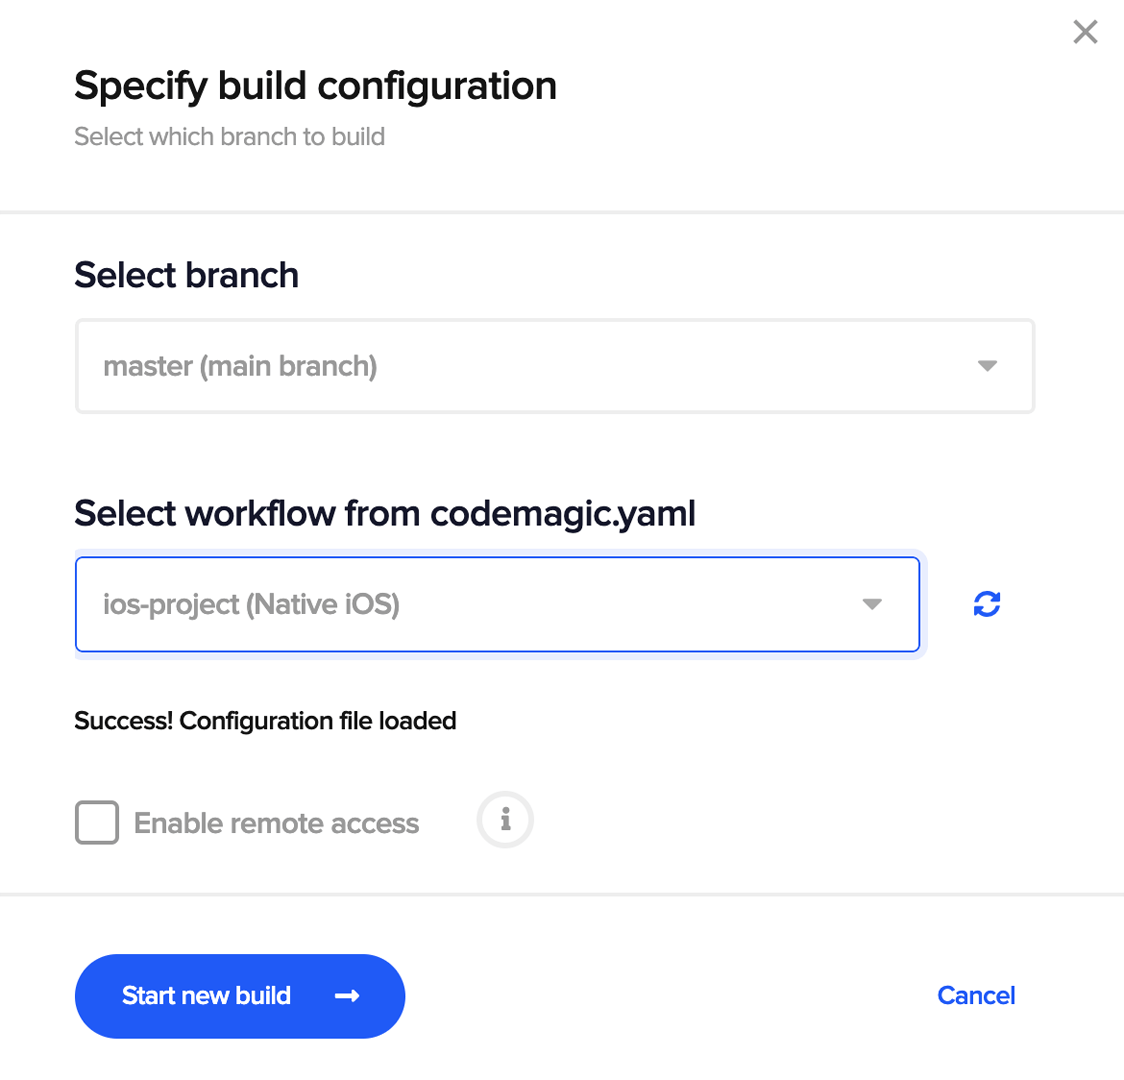
This will start a new build for your native iOS project.

Useful links and references
-
More information about iOS code signing is available here
-
The GitHub repo of the sample project is here.
Let’s move on and take a look at the continuous integration & delivery (CI/CD) for Android apps.
Getting started with Codemagic CI/CD for native Android apps
Make sure that your native Android project is uploaded to a code hosting platform (like GitHub, Bitbucket or GitLab) using a version control system.
-
Log in to Codemagic.
-
In the Applications overview, search for your project and click Set up build.
-
Select Android App as the starter workflow.
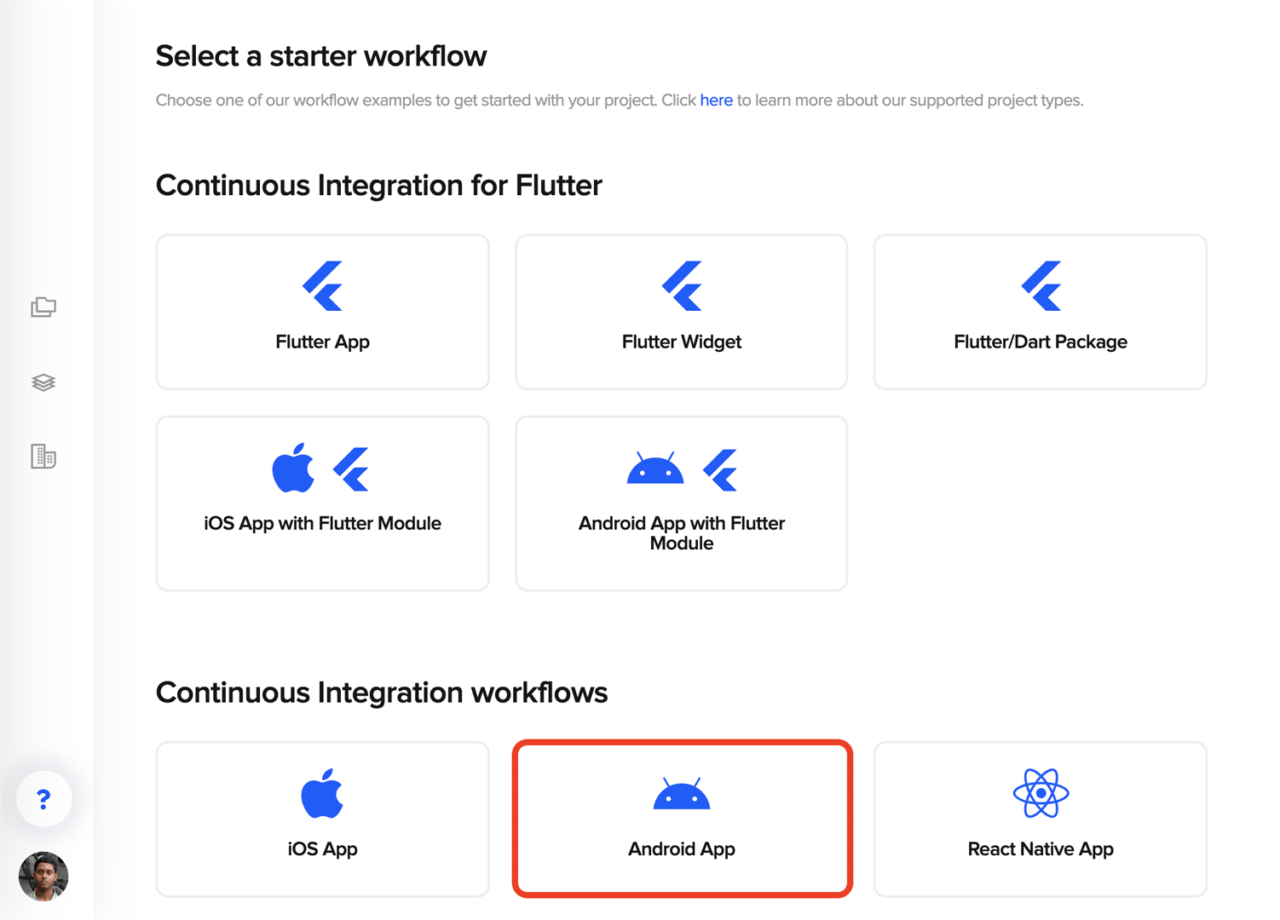
-
You can download the YAML template for native Android by clicking on the download button.
-
Now, open the
codemagic.yamlfile using any code editor. The YAML file contents will look like this:
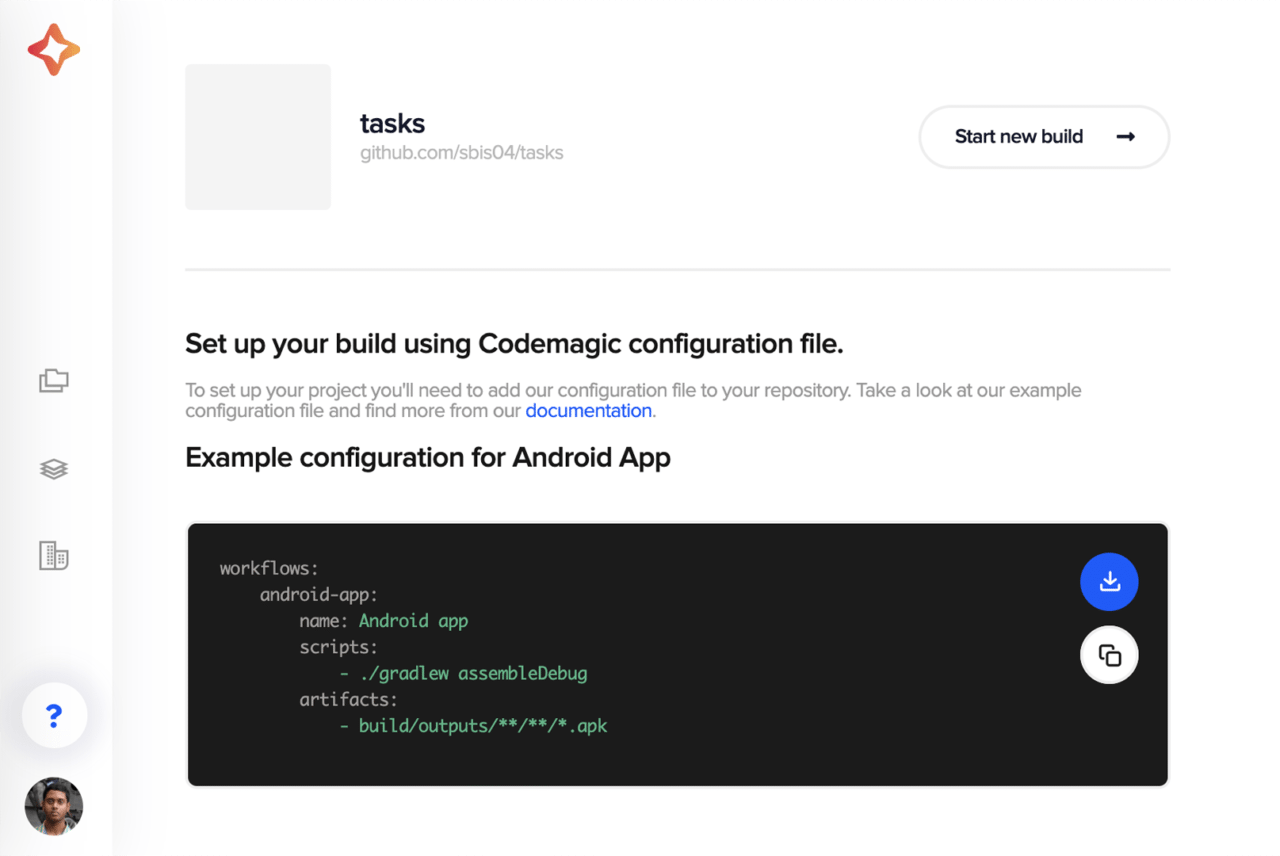
# Workflow setup for building Native Android project
workflows:
  android-app: # workflow ID
    name: Android app # workflow name
    scripts:
      - ./gradlew assembleDebug
    artifacts:
      - build/outputs/**/**/*.apk
Android workflow and a default YAML file
You will see that a default workflow ID and workflow name is specified, but you can change them however you wish.
The default Android workflow specified in the codemagic.yaml file is very simple and will help you get started if you want to generate a debug build of your Android app.
Deep dive into YAML
Let’s take a closer look at the codemagic.yaml file and understand the real power of it.
Scripts
In order to generate a debug build, you will need a debug.keystore file. The following is the code for generating the file:
keytool -genkeypair \
-alias androiddebugkey \
-keypass android \
-keystore ~/.android/debug.keystore \
-storepass android \
-dname 'CN=Android Debug,O=Android,C=US' \
-keyalg 'RSA' \
-keysize 2048 \
-validity 10000
Running local unit tests:
./gradlew test
Running instrumented unit tests:
./gradlew connectedAndroidTest
You will also need to start up an Android emulator in order to run the instrumented unit tests. Add the following command:
emulator -avd emulator > /dev/null 2>&1 &
The & is used in the end of this command to run it in the background, otherwise the emulator command blocks the terminal and prevents any further commands from execution. > /dev/null 2>&1 is used to ignore all outputs of this command.
TIPS: It is better to add this command at the beginning of the script, as the emulator takes some time to start up.
Building the app in debug mode:
./gradlew assembleDebug
Artifacts
You can get the generated .apk file by adding its path under the artifacts. Normally, the path is like this:
artifacts:
  - app/build/**/outputs/**/*.apk
Publishing
To get a report of the build along with the generated artifacts in your email, specify the following:
publishing:
  email:
    recipients:
      - name@example.com # enter your email id here
For more information about publishing, refer to this link.
Setting up your Android project for a release build
First of all, you have to set up code signing for generating release build.
Generating a keystore
If you don’t already have a keystore created, you can use the following command from your Terminal to generate one.
keytool -genkey -v -keystore keystore_name.keystore -alias alias_name -keyalg RSA -keysize 2048 -validity 10000
Configuring your project
Follow the steps below to prepare your project for a release build:
-
Open your project using Android Studio.
-
Switch to the Project View.
-
Inside the root project folder, create a new file called
key.properties. -
Add the following to this file:
storePassword=<enter keystore password>
keyPassword=<enter key alias password>
keyAlias=<enter key alias name>
storeFile=<enter .keystore file path>
Replace the angle brackets and its content with the appropriate values. -
Save the file and add it to
.gitignore, so that you do not commit this file by mistake. -
Now, switch to the Android View, and go to the app level
build.gradle. -
Add the following to this file:
def keystorePropertiesFile= rootProject.file("key.properties") def keystoreProperties = new Properties() keystoreProperties.load(new FileInputStream(keystorePropertiesFile)) // Add above this line android { -
Add the signingConfigs:
signingConfigs { config { keyAlias keystoreProperties['keyAlias'] keyPassword keystoreProperties['keyPassword'] storeFile file(keystoreProperties['storeFile']) storePassword keystoreProperties['storePassword'] } } -
Inside buildTypes release, add the following:
buildTypes {
    release {
        //...
        signingConfig signingConfigs.config
    }
}
Modifying YAML for code signing
You will need the keystore file to sign your build. To get access to it, you will also need the key.properties file.
As you have added the key.properties file to .gitignore, it won’t be available during build on Codemagic. So you can encrypt all the sensitive information and add it to the codemagic.yaml file for generating the key.properties file which can be used in turn to unlock the .keystore file.
Follow the steps below to encrypt your sensitive information:
-
Go to your project Settings on Codemagic.
-
Click Encrypt environment variables.
-
You can drag and drop files here or enter the value to generate an encrypted version of them.

Now, create a new workflow called release-workflow for the release build and add the following:
release-workflow:
  name: Native Android
  max_build_duration: 60
  environment:
    vars:
      CM_KEYSTORE: # Add encrypted keystore file
      CM_KEYSTORE_PASSWORD: # Add encrypted keystore password
      CM_KEY_ALIAS_PASSWORD: # Add encrypted alias password
      CM_KEY_ALIAS_USERNAME: # Add alias name
  scripts: # Add the build configurations here
  artifacts:
    - app/build/**/outputs/**/*.apk
  publishing:
    email:
      recipients:
        - sbis1999@gmail.com
Let’s define the build script now.
First of all, you have to decrypt the .keystore file and generate the key.properties file.
scripts:
  # ...
  - |
    # set up release keystore
    echo $CM_KEYSTORE | base64 --decode > /tmp/keystore.keystore
    cat >> "$CM_BUILD_DIR/key.properties" <<EOF
    storePassword=$CM_KEYSTORE_PASSWORD
    keyPassword=$CM_KEY_ALIAS_PASSWORD
    keyAlias=$CM_KEY_ALIAS_USERNAME
    storeFile=/tmp/keystore.keystore
    EOF
Then, you can add tests as usual and use the following command for generating a release build:
./gradlew assembleRelease
You have successfully completed the setup for generating a release build of your app.
Building an Android project on Codemagic
Before starting a build on Codemagic, make sure that you have the codemagic.yaml file committed to the version control system.
Follow the steps below to start a build:
-
In the Applications dashboard, click Finish build setup.
-
Click Check for configuration file.

-
Then, click Start your first build.

-
Select the workflow from the YAML file and click Start new build.

This will start a new build for your native Android project.
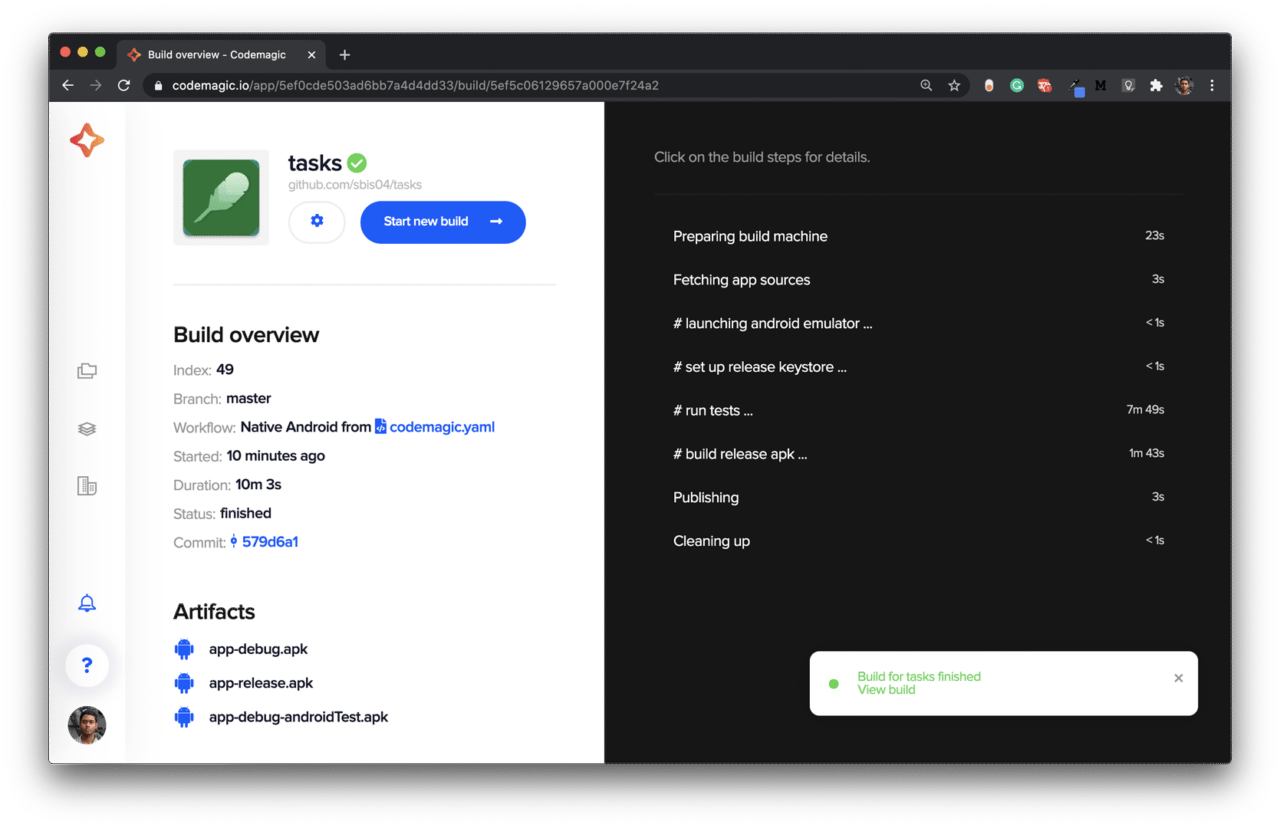
Awesome! Your first Android build with Codemagic CI/CD is complete! Congratulations!
Conclusion
Ultimately, CI/CD results in a much faster and consistent deployment workflow with fewer bugs, produce great end-user products. A good CI/CD pipeline helps to build faster, deploy faster and as a team, grow faster. A dedicated CI/CD for new emerging technologies (like Flutter) is great to have because it simplifies the deployment workflow to a large extent.
Although Codemagic started as an official CI/CD solution dedicated just for Flutter apps, it now welcomes all mobile projects to the fastest CI/CD. You can easily build, test, and publish your Android, iOS, React Native and Flutter apps with Codemagic CI/CD.
As you can see, building apps on Codemagic using the codemagic.yaml file is really simple. There is also an added advantage, as YAML makes it a lot easier to manage your workflows and keep your build configurations more organized. Also, it gets automatically detected from the version control system when starting any build on Codemagic.

