


TestFlight lets you provide release notes that appear in the ‘What to Test’ section in the TestFlight app so you can let your testers know what you would like them to test in each new build. This guide will show you how you can use Codemagic to automate adding release notes in multiple languages.
Prerequisites
In order to follow this guide, you will need the following:
- Apple Developer Program membership.
- An iOS project that you want to distribute to TestFlight with release notes.
- You have already set up code signing and publishing to the App Store with Codemagic.
- If you are building iOS apps using codemagic.yaml you can find out how to configure code signing here App Store publishing with Codemagic here.
- If you are using the Flutter Workflow Editor you can learn how to set up code signing here and how to set up App Store publishing with Codemagic here.
- You have set up an ‘internal testing’ group in TestFlight.
Add a release notes file to your project
Create a file called release_notes.json to the root of your repository. Inside this file you should create a JSON array with an object for each language you want to add release notes for. Each object in the array should have a ‘language’ and ‘text’ property. It should look similar to the following:
[
    {
        "language": "en-GB",
        "text": "British English release notes text"
    },
    {
        "language": "en-US",
        "text": "The US English release notes text"
    },
    {
        "language": "fr-FR",
        "text": "Notes de version"
    }
]
The value of the ‘language’ property should be set to the locale code for the language you want to provide release notes for. For example, you would use the local code “en-GB” for British English. Click here to see more information about available locale codes.
The value of the ‘text’ property should be written in the language you want to provide release notes for using standard charters which means you cannot use special characters such as emojis.
Formatting release notes
Formatting options for release notes are extremely limited, but if you want to highlight certain items and add line spacing then consider using asterisks and line breaks. For example:
[
    {
        "language": "en-GB",
        "text": "*Test new fingerprint login\n\n*Test password reset\n\n*Test 2FA functionality\n\nPlease also investigate timeout issue when submitting data to the server from the submit job page."
    }
]
Publishing release notes
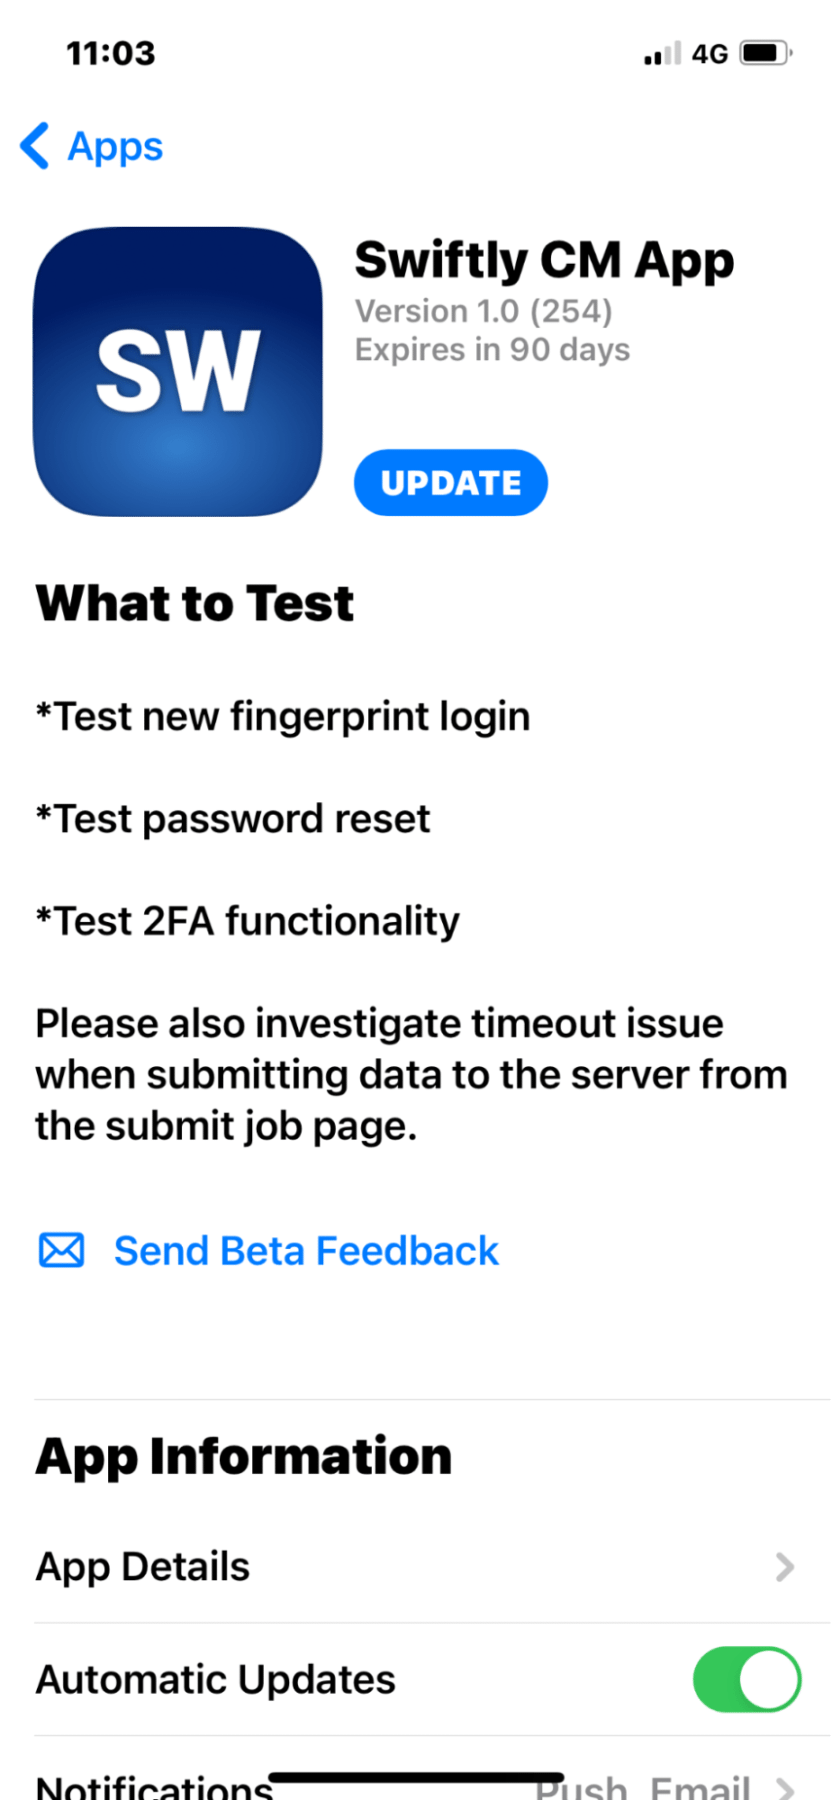
All you need to do now is start a new build. Codemagic will automatically detect the release_notes.json file in the root of your project and take care of adding these to the ‘What to test’ section in TestFlight for any of the languages you specified in your JSON file. The results will look like this in the TestFlight app:
If you’re facing issues uploading your app to App Store Connect, check out this article.
Post-processing a.k.a ‘Magic actions’
When your app build has finished, you will see that the app publishing and uploading of the release notes take place as a post-processing task or what we like to call a ‘Magic action’.
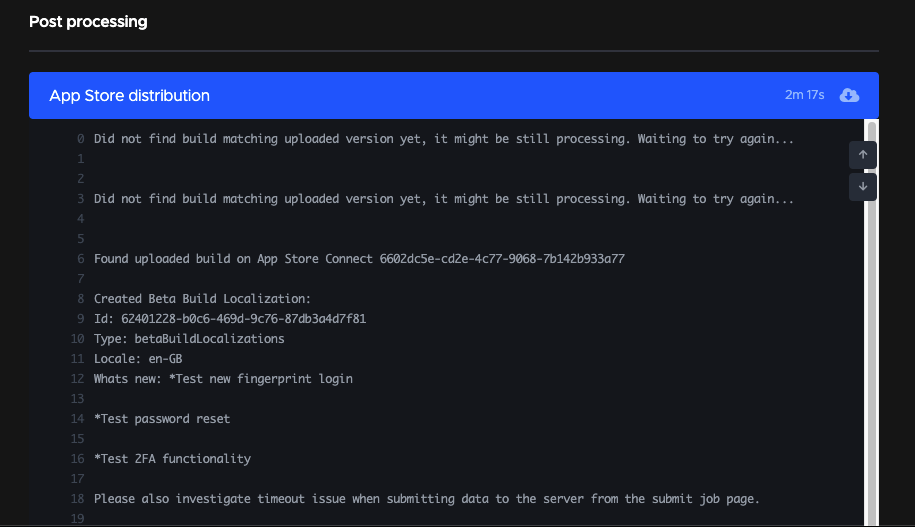
Codemagic’s Magic actions will asynchronously upload your iOS app and release notes after the build has finished. There is a 60 minute timeout for this which does not count towards your build minutes or concurrencies. You can get on with development without having to wait for Apple to process your uploads. That’s it! After a successful build your release notes should be visible in the TestFlight app for your testers to see what to test.


