Written by Souvik Biswas
While building an application which deals with messaging, the most important part is keeping track whether they are online/offline (formally known as User Presence). But, if you are using Firebase Cloud Firestore as your database, then handling this is pretty challenging.
In this article, I will show you how to manage user presence in a Flutter app using Cloud Firestore as it’s database.
We will be using Realtime Database and Cloud Functions to achieve this.
Disclaimer: Knowledge of JavaScript is recommended, as you have to write Cloud Functions using JS.
Sample app
The app that we will be building for this demonstration will contain a simple Google Sign In for the authentication of users on Firebase. Firestore database will be used for storing some user-specific information. User presence and last seen time will be tracked using a combination of Realtime Database, Cloud Functions and Firestore.
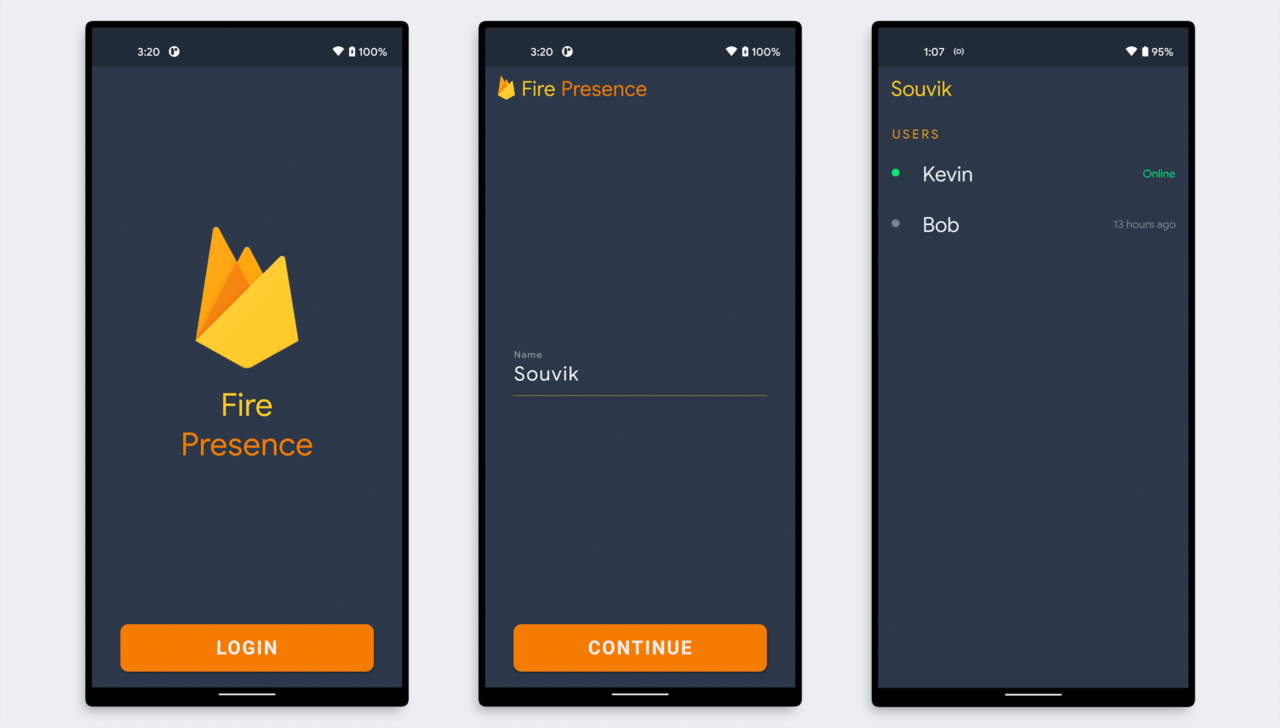
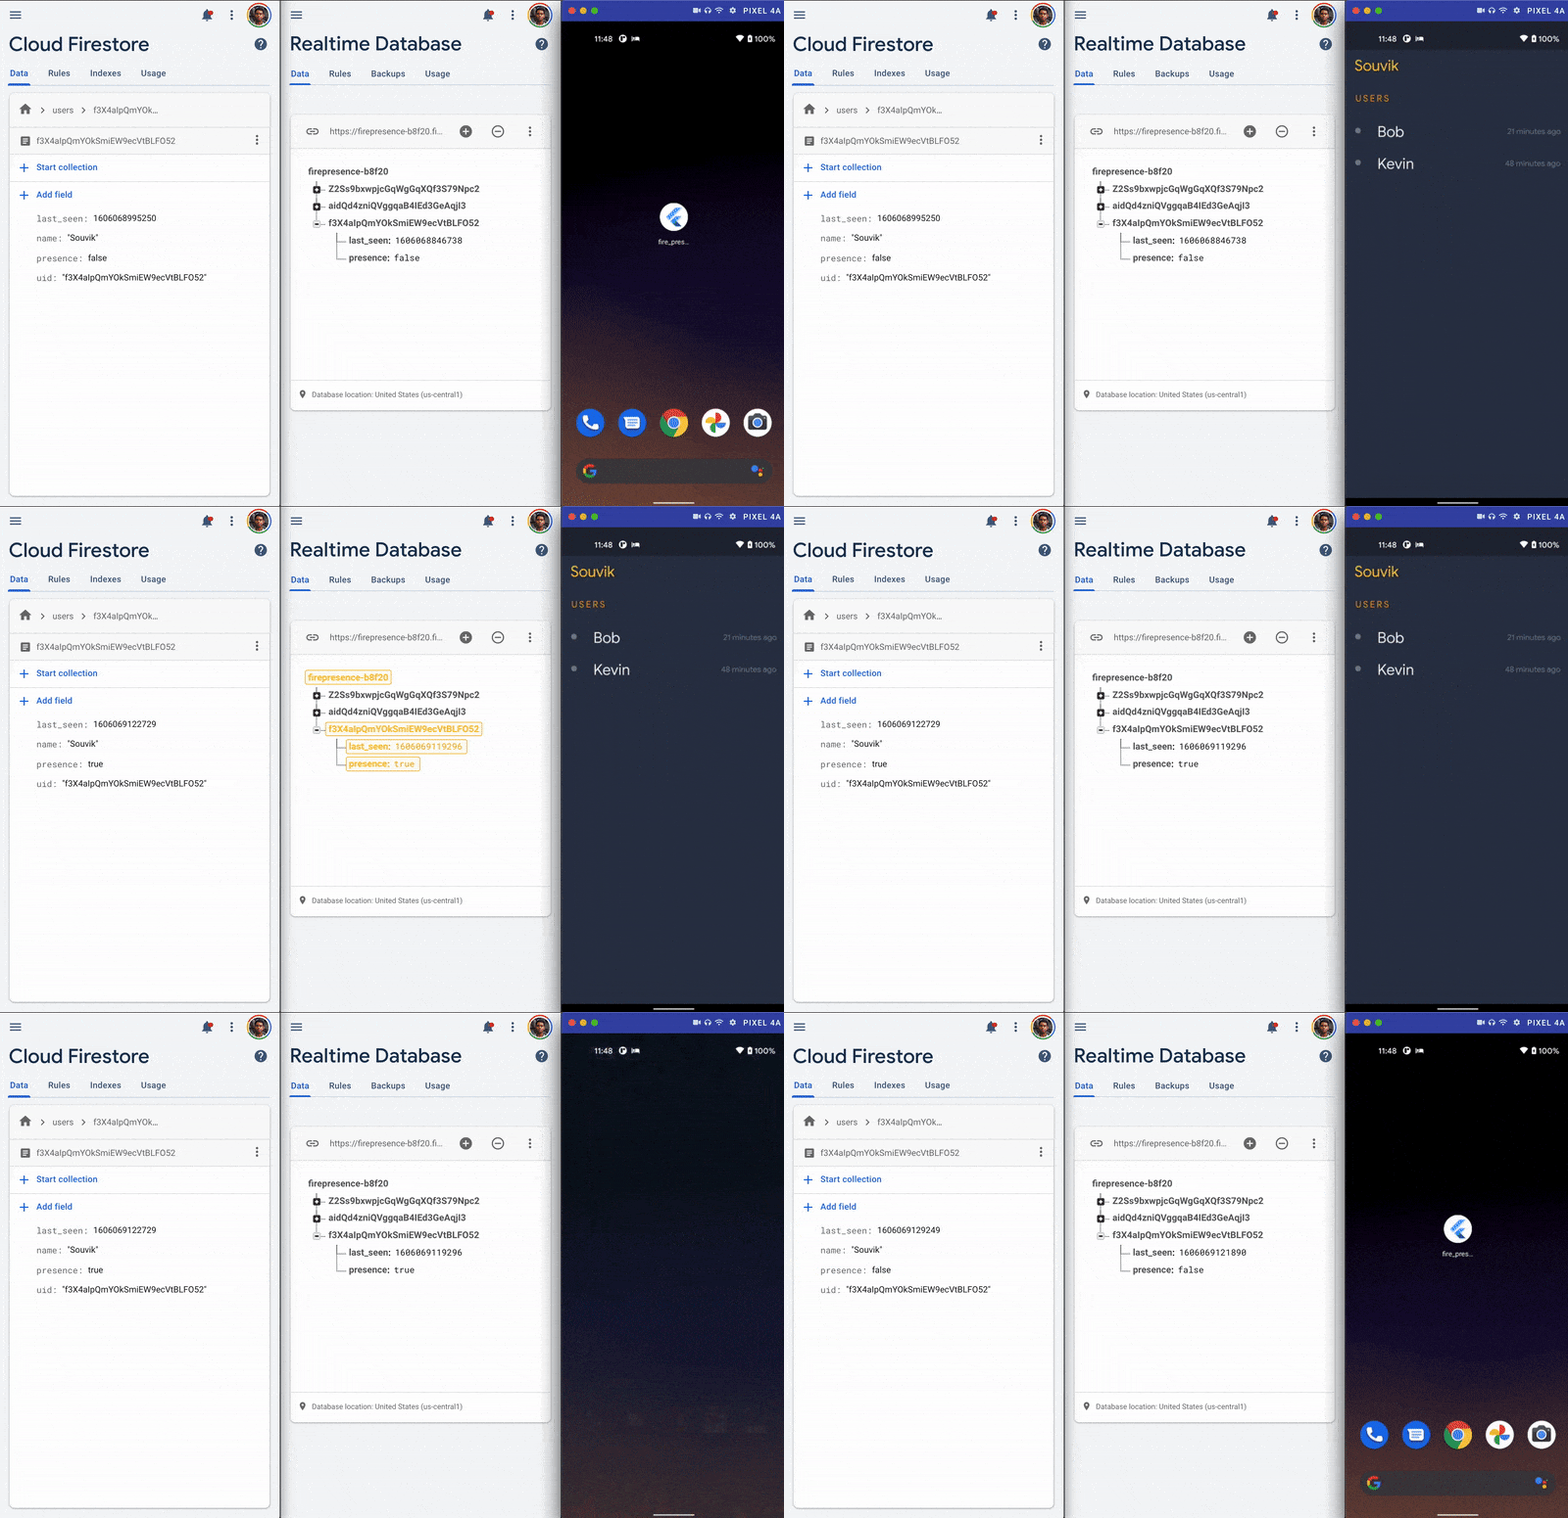
Presence tracking in action

Firebase set up
As we are using Firebase as the backend for our app, it is required to complete the Firebase set up first.
You can follow this article in order to complete the Firebase and Google Sign setup.
Some brief about the steps you need to follow:
Create a new project using Firebase console.
Configure the Android & iOS app to use Firebase.
Add your support email by going to the Firebase project settings.
Enable Google Sign In on Firebase Authentication.
Complete the platform-specific configuration to use Google Sign In.
Enable Cloud Firestore and Realtime Database.
Specify Security rules for both of them.
For now, you can just define the security rules, so that it checks if the user is authenticated:
// Cloud Firestore security rules
rules_version = '2';
service cloud.firestore {
  match /databases/{database}/documents {
    match /{document=**} {
      allow read, write: if request.auth != null;
    }
  }
}
// Realtime Database security rules { "rules": { ".read": "auth != null", ".write": "auth != null" } }If you are working on a production app, don’t forget to modify these security rules for better protection.
Let’s start building the app now.
In this tutorial, I will focus on the major functionalities of the app. So, if you want to see the UI code of the app, check out my GitHub repo (present at the end of this article).
Required plugins
Before diving into code, add the plugins required for building the app to your pubspec.yaml file:
- firebase_core: for initializing Firebase.
- firebase_auth: for using Firebase authentication.
- google_sign_in: to implement Google Sign-In.
- cloud_firestore: for accessing Cloud Firestore.
- firebase_database: for accessing Firebase Realtime Database.
- shared_preferences: for caching some user data on device (required for auto login).
Authenticating user
We will define two methods for authenticating an user to Firebase using Google Sign In. Create a new file called authentication.dart, and add the following methods:
- signInWithGoogle()
- signOutGoogle()
- getUser()
In the signInWithGoogle() method, we will first initialize the Firebase app, and then retrieve the credentials from the Google account to authenticate the user in Firebase.
The signOutGoogle() method will help the user to sign out of the currently logged in Google account.
You can define one more method, called getUser() to retrieve the user information when an already logged in user returns back to the app (also known as auto-login).
I am not going deep into these methods, you can check out this article for a more detailed explanation (with code snippet), or find the GitHub repo of this app at the end of this article.
Storing data on Firestore
Some of general user information, and most importantly user presence and last seen time should be stored in the Cloud Firestore. Create a new file called database.dart, we will be defining two basic methods there:
- storeUserData(): To upload the user information to the Firestore when a new user logs in.
- retrieveUsers(): To retrieve all user details from Firestore.
The database structure of Firestore will be like this:
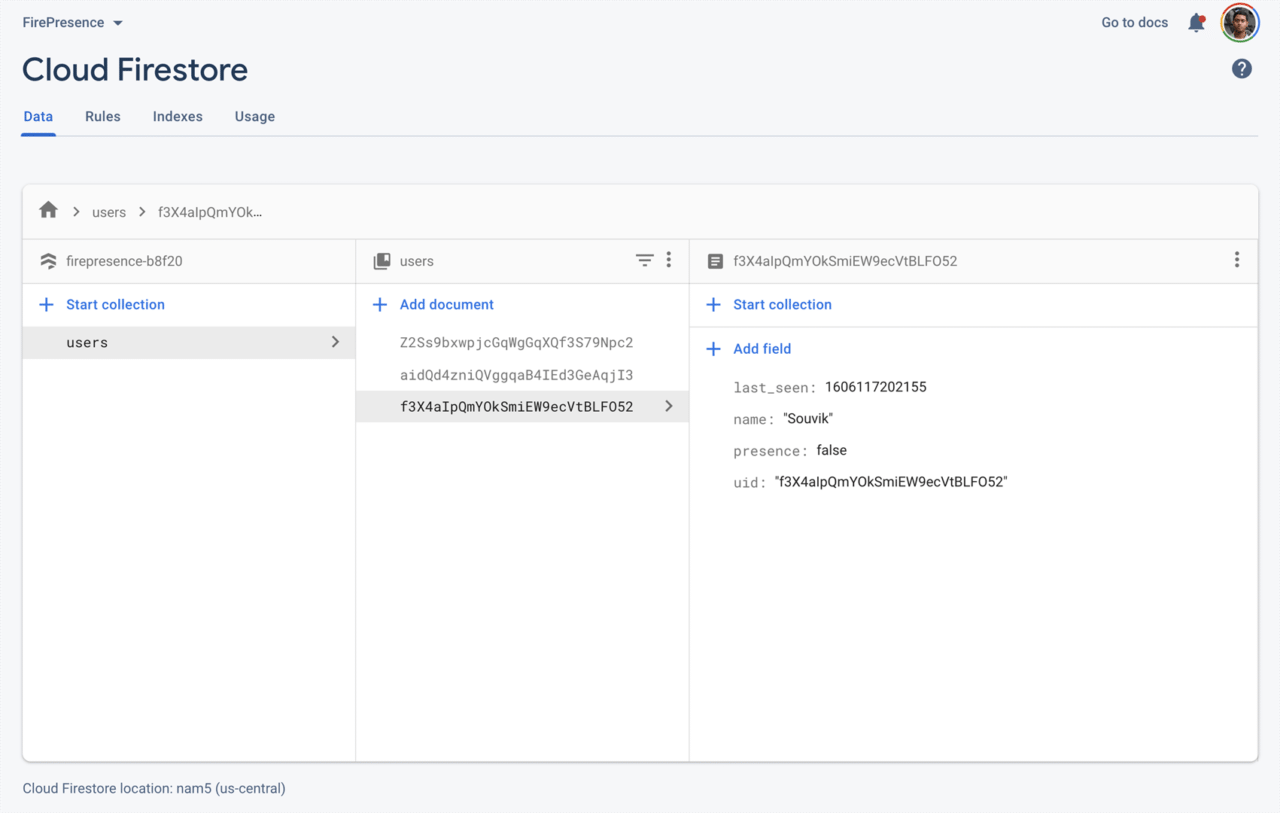
Inside a class called Database, we will first store a reference to the main collection of Firestore.
class Database {
  /// The main Firestore user collection
  final CollectionReference userCollection = FirebaseFirestore.instance.collection('users');

  storeUserData({@required String userName}) async {}

  Stream<QuerySnapshot> retrieveUsers() {}
}
Let’s define the storeUserData() method which will store the user details under a document according to their uid.
storeUserData({@required String userName}) async {
  DocumentReference documentReferencer = userCollection.doc(uid);

  User user = User(
    uid: uid,
    name: userName,
    presence: true,
    lastSeenInEpoch: DateTime.now().millisecondsSinceEpoch,
  );

  var data = user.toJson();

  await documentReferencer.set(data).whenComplete(() {
    print("User data added");
  }).catchError((e) => print(e));
}
Here, you can use a model class to easily handle the data. In this example, I am using a model class called User:
class User {
  String uid;
  String name;
  bool presence;
  int lastSeenInEpoch;

  User({
    @required this.uid,
    @required this.name,
    @required this.presence,
    @required this.lastSeenInEpoch,
  });

  User.fromJson(Map<String, dynamic> json) {
    uid = json['uid'];
    name = json['name'];
    presence = json['presence'];
    lastSeenInEpoch = json['last_seen'];
  }

  Map<String, dynamic> toJson() {
    final Map<String, dynamic> data = new Map<String, dynamic>();

    data['uid'] = this.uid;
    data['name'] = this.name;
    data['presence'] = this.presence;
    data['last_seen'] = this.lastSeenInEpoch;

    return data;
  }
}
In order to retrieve the list of all users, you can define the retrieveUsers() method like this:
Stream<QuerySnapshot> retrieveUsers() {
  Stream<QuerySnapshot> queryUsers = userCollection
      .orderBy('last_seen', descending: true)
      .snapshots();

  return queryUsers;
}
Handling user presence
The problem with Cloud Firestore is, it doesn’t provide any method using which you can track when the user navigates away from this app or terminates it. But, another Firebase service called Realtime Database provide a dedicated method to track user presence, named as onDisconnect(). Whenever the client loses the connection to the database, this gets triggered automatically.
Define a new method inside the database.dart file called updateUserPresence(). This method will store the user presence and last seen time to the Firebase Realtime Database.
class Database {
  final DatabaseReference databaseReference = FirebaseDatabase.instance.reference();

  updateUserPresence() async {
    Map<String, dynamic> presenceStatusTrue = {
      'presence': true,
      'last_seen': DateTime.now().millisecondsSinceEpoch,
    };

    await databaseReference
        .child(uid)
        .update(presenceStatusTrue)
        .whenComplete(() => print('Updated your presence.'))
        .catchError((e) => print(e));

    Map<String, dynamic> presenceStatusFalse = {
      'presence': false,
      'last_seen': DateTime.now().millisecondsSinceEpoch,
    };

    databaseReference.child(uid).onDisconnect().update(presenceStatusFalse);
  }
}
You may also skip storing the
last_seenproperty on Realtime Database, because we can directly set it using Cloud Functions in the later step.
As the onDisconnect() method gets triggered, the presence status will be updated on the Realtime Database.
Syncing user presence
Now coming to the most important part of the article, synchronizing user presence information present on the Realtime database to the Cloud Firestore. You can use an awesome service provided by Firebase called Cloud Functions, which helps to run backend code on Google’s servers in response to the events triggered by Firebase features.
In order to write and deploy Cloud Functions, you will need to initialize Firebase using Firebase CLI tools:
Download and install node.js.
Install Firebase CLI by running the following command:
npm install -g firebase-toolsLogin to your Firebase account:
firebase loginInitialize Firebase by running the following inside the project directory:
firebase initChoose
Functions: Configure and deploy Cloud Functionsfrom the list.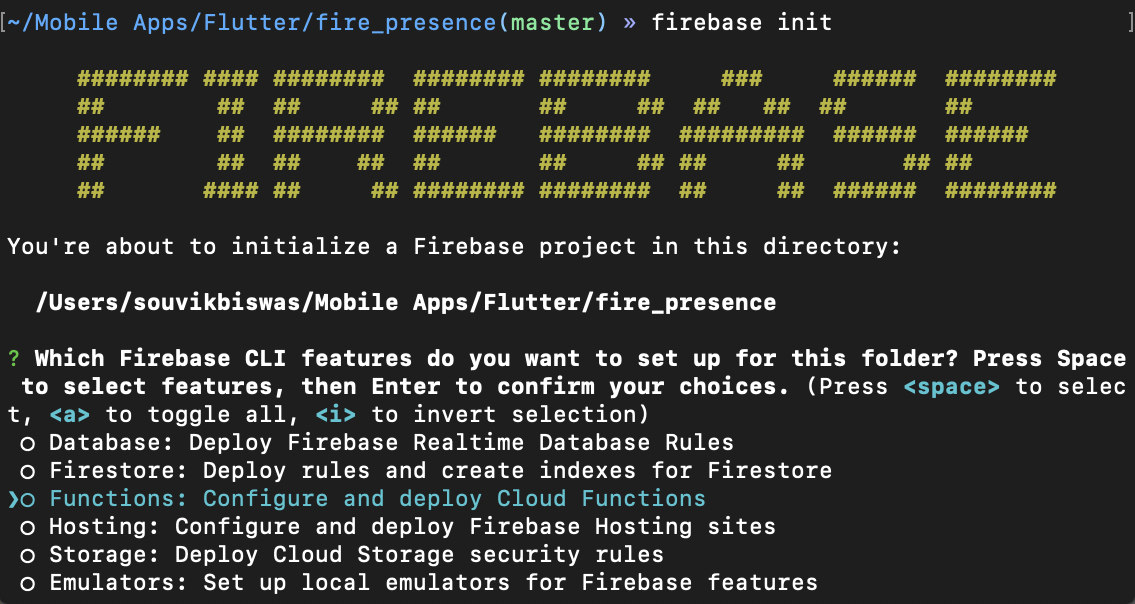
In the Project Setup section, select
Use an existing projectand choose the project from the list.
In the Functions Setup section, select the language as
JavaScript, and enable ESLint.
When prompted to install dependencies, choose
yes.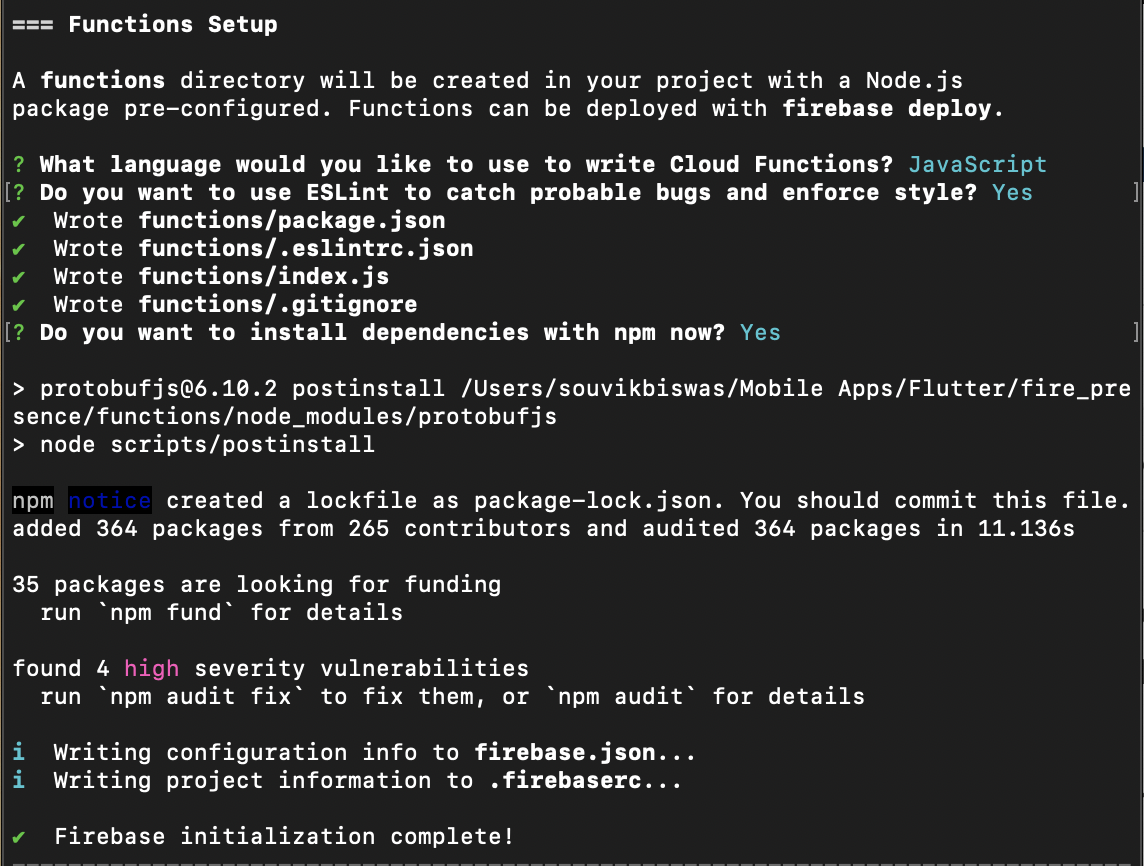
You might see a message saying “high severity vulnerabilities”, but just ignore them. This is shown as Firebase CLI uses
node.js 8by default.Also,
node.js 8is deprecated now, and they will stop supporting it on Firebase soon.
But in order to use
node.js 10, you will need to upgrade your Firebase project to their Blaze Plan. So, we will be usingnode.js 8for our project, but the same cloud function will also work while usingnode.js 10.
This completes the Firebase initialization. You will now see some new files created inside your root project directory.
Navigate to the functions > index.js present inside your root project directory. Here, you can define the cloud function.
We just need to update the presence and last_seen field of the Cloud Firestore according to the value present in the Realtime Database. You can achieve that as follows:
const functions = require("firebase-functions");
const admin = require("firebase-admin");
admin.initializeApp();

const firestore = admin.firestore();

exports.onUserStatusChange = functions.database
  .ref("/{uid}/presence")
  .onUpdate(async (change, context) => {
    // Get the data written to Realtime Database
    const isOnline = change.after.val();

    // Get a reference to the Firestore document
    const userStatusFirestoreRef = firestore.doc(`users/${context.params.uid}`);

    console.log(`status: ${isOnline}`);

    // Update the values on Firestore
    return userStatusFirestoreRef.update({
      presence: isOnline,
      last_seen: Date.now(),
    });
  });
Now, you can deploy this Cloud Function by running:
firebase deploy

Upon successful deployment, this will get triggered as soon as the user presence status changes in the Realtime Database.
Conclusion
Cloud Functions makes it a lot easier to run backend code in an effectively serverless environment. You can trigger them using other Firebase services or directly using an HTTP request. Using Cloud Functions and Realtime Database, user presence can be tracked and updated seamlessly on Cloud Firestore.
References
- GitHub repo of the sample app
- Cloud Functions for Firebase Docs
- Build presence in Cloud Firestore Docs
- Google sign-in & Firebase authentication using Flutter
Souvik Biswas is a passionate Mobile App Developer (Android and Flutter). He has worked on a number of mobile apps throughout his journey. Loves open source contribution on GitHub. He is currently pursuing a B.Tech degree in Computer Science and Engineering from Indian Institute of Information Technology Kalyani. He also writes Flutter articles on Medium - Flutter Community.


