


This article is written by Gianfranco Papa
In this blog post, we will explore the process of building a back end using only Dart. With the numerous options available for achieving this, it’s normal to feel overwhelmed or unsure of where to begin. Thus, this post is primarily directed at Flutter developers who are considering Dart for their back end for its various benefits, which we will discuss later on. However, even if you’ve already developed a Dart back end, you’ll find this post intriguing since we’ll compare various options and assess their trade-offs to help you select the best tool for your needs.
Why should you build a back end in Dart?
First, let’s delve into why, as a Flutter developer, building your back end in Dart can be advantageous. There are several compelling reasons to consider this approach, including the following:
Context switching
This is one of the most important benefits of using Dart for your back end. As a Flutter developer, you may have encountered the need to perform certain tasks related to the back end, relying on a Backend-as-a-Service (BAAS) like Firebase. In such cases, you often have to switch to a different programming language. For instance, when using Firebase, you might need to write cloud functions in TypeScript. Despite the similarities between Dart and JavaScript syntax, this context switching between programming languages can decrease your productivity and disrupt your development experience.
Sharing code
Although the front end and back end operate differently, they share the same objective. Consider the benefits of sharing model definitions between the two: It provides a single source of truth, mitigates communication problems, prevents unexpected bugs, and parses errors. This is just one instance of how using the same language in both the back end and front end can be beneficial. Sharing libraries and tools can also be valuable. Imagine taking all your knowledge on different Flutter libraries and using it to develop a Dart back end.
To give a brief example, let’s examine the following code:
import 'package:equatable/equatable.dart';
import 'package:json_annotation/json_annotation.dart';

part 'user.g.dart';

@JsonSerializable()
class User extends Equatable {
  const User({
    required this.id,
    required this.email,
  });

  factory User.fromJson(Map<String, dynamic> json) => _$UserFromJson(json);

  final String id;
  final String email;

  Map<String, dynamic> toJson() => _$UserToJson(this);

  User copyWith({
    String? id,
    String? email,
  }) =>
      User(
        id: id ?? this.id,
        email: email ?? this.email,
      );

  @override
  List<Object?> get props => [id, email];
}
In this code, we can see that we are defining a class User that uses json_serializable, equatable, and build_runner as dependencies. Can you tell whether this class is being used in a front end or back end? Well, if you answer both of them, you’re right! In essence, we can save time by defining a single class shared across the entire stack instead of defining the same thing on both sides.
Back-end options
Now that we have a better understanding of the benefits of sharing the same language, we are going to dive into some options for creating back ends in Dart.
Shelf
Of course, we have to start our journey with Shelf, but what exactly is it? It’s difficult to define it, but the documentation describes it as follows:
“Shelf makes it easy to create and compose web servers and parts of web servers.”
Basically, Shelf is not a full server framework like other options out there. For example, if you’re familiar with Python, you may use Django or Flask. Instead, Shelf lets you compose web servers in a modular way. You can add as many libraries as needed, such as shelf_router or shelf_static. One of Shelf’s main advantages is that it is maintained by the Dart team. It was used to develop the back end of pub.dev, for example. Additionally, there is a vast array of libraries written for Shelf — not only official ones made by the Dart team but also many created by the community.
The easiest way to start with Shelf is to create a Dart project using one of its templates.
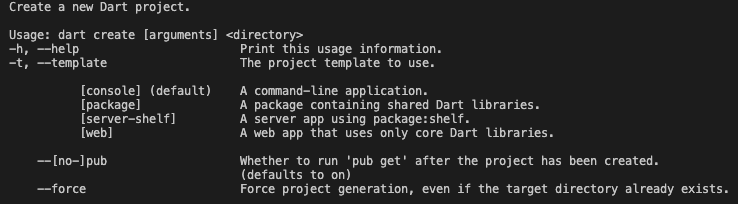
You can see there is a server-shelf template, so we can simply run the command below:
dart create --template=server-shelf server
And the result will be as follows:
├── .dart_tool
├── bin
│    └── server.dart
├── test
│    └── server_test.dart
├── .dockerignore
├── .gitignore
├── analysis_options.yaml
├── CHANGELOG.md
├── Dockerfile
├── pubspec.lock
├── pubspec.yaml
└── README.md
As we can see, we have created a basic server with a few dependencies already established. Let’s delve deeper into what we have here. Within the server folder, there is a bin folder containing a server.dart file where all the server-related operations occur.
import 'dart:io';

import 'package:shelf/shelf.dart';
import 'package:shelf/shelf_io.dart';
import 'package:shelf_router/shelf_router.dart';

// Configure routes.
final _router = Router()
  ..get('/', _rootHandler)
  ..get('/echo/<message>', _echoHandler);

Response _rootHandler(Request req) {
  return Response.ok('Hello, World!\n');
}

Response _echoHandler(Request request) {
  final message = request.params['message'];
  return Response.ok('$message\n');
}

void main(List<String> args) async {
  // Use any available host or container IP (usually `0.0.0.0`).
  final ip = InternetAddress.anyIPv4;

  // Configure a pipeline that logs requests.
  final handler = Pipeline().addMiddleware(logRequests()).addHandler(_router);

  // For running in containers, we respect the PORT environment variable.
  final port = int.parse(Platform.environment['PORT'] ?? '8080');
  final server = await serve(handler, ip, port);
  print('Server listening on port ${server.port}');
}
Inside our pubspec.yaml file, we can see several dependencies, including Shelf (the core library) and shelf_router, which we have to add to manage routing. Additionally, there are other files, such as the linter analysis_options.yaml and a Dockerfile, created to containerize the server.
Despite the bare-bones structure of the project, it’s sufficient to expose a single endpoint. In fact, we will notice something if we run the following command within our server project:
dart bin/server.dart
We’ll see that our server will successfully be listening to requests in port 8080. Say that we hit the URL using the following command:
curl http://localhost:8080
We can see a message saying, “Hello, World!” This is our first example of how to create a server using Shelf and expose a “Hello, World!” endpoint. One of the advantages of using Shelf is that it’s effortless to get started with; it comes with Dart as a template. As a result, we can have our server up and running with only two commands.
Creating your first route using Shelf
After you’ve learned how to create a Dart back end with Shelf, you may be interested in creating custom routes. Custom endpoints are a crucial part of any back end, and we will cover this topic in detail. We will not only examine how this works with Shelf but also explore other alternatives.
To create a custom endpoint, we need to modify the Router slightly. To keep things simple, we will add another get method in addition to the one we already have. Let’s add a todos endpoint:
// Configure routes.
final _router = Router()
  ..get('/', _rootHandler)
  ..get('/echo/<message>', _echoHandler)
  ..get('/todos', _todosHandler);
Now, we only need to provide the _todosHandler that will, in essence, receive a Request and return a Response. We can use jsonEncode to return a list of todos:
Response _todosHandler(Request req) {
  final todo = {
    'id': '1',
    'name': 'First Todo',
  };
  final todos = [todo];

  return Response.ok(jsonEncode(todos));
}
And that’s it! We can now fetch our hard-coded todos list by using the /todos endpoint exposed by our shelf server. Let’s quickly check that in our terminal:
curl http://localhost:8080/todos
We can see we get [{"id":"1","name":"First Todo"}] as a response — awesome!
Dart Frog
Dart Frog is our second option for building a back end in Dart. According to the docs, it is a “fast, minimalistic backend framework for Dart.”
We now have a fascinating tool to continue our research: Dart Frog, a lightweight framework built on top of Shelf by Very Good Ventures. If you find Shelf difficult to understand or feel that it has too much boilerplate code, Dart Frog may be an excellent starting point. Essentially, it aims to simplify all the concepts we’ve covered with Shelf, and we’ll soon discover why.
To start using Dart Frog, we first need to install its CLI globally:
dart pub global activate dart_frog_cli
Once we’ve done that, we will be able to create our first project. As we did previously, we will create a server folder. Inside the folder, we’ll run this command:
dart_frog create --project-name server .
Let’s analyze the output:
├── .dart_tool
├── routes
│    └── index.dart
├── test
│    └── routes_test.dart
│       └── index_test.dart
├── .dockerignore
├── .gitignore
├── analysis_options.yaml
├── pubspec.lock
├── pubspec.yaml
└── README.md
We can see that the folder structure is almost the same, with the exception of the routes folder instead of the bin folder containing the server.dart file. There’s no need to declare a server file, as this is handled for us by Dart Frog. However, we still have the flexibility to declare an entry point if needed. Dart Frog takes a more opinionated approach to routing and handles most of the boilerplate for us.
To start our server, we just need to use another Dart Frog CLI command:
dart_frog dev
This will initialize the server powered up with hot reload, meaning we will be able to perform changes in the server, and they will be refreshed for us automatically without needing to manually restart the server. Let’s hit the URL again with the following:
curl http://localhost:8080
We can now see a message saying, “Welcome to Dart Frog!”
Creating your first route in Dart Frog
Let’s take a closer look at how Dart Frog handles routes for communicating between the front end and back end via an API. Similar to other frameworks such as Next.js, Dart Frog provides a way to define a routing system based on the file system and folder structure, eliminating much of the boilerplate required to create endpoints.
To create an endpoint in Dart Frog, we simply need to create a folder and files that match the desired URL endpoint. As an example, let’s create basic todos endpoints to retrieve a list of all todos. Our goal is to be able to execute the following:
Let’s go over an example of how to create basic todos endpoints to get all of our todos in a list.
We want to be able to do the following:
curl http://localhost:8080/api/v1/todos
Then we want to get a response with a list of todos in a JSON format. Our folder structure inside the routes should look like this:
├── routes
│    ├── api
│    │   ├──v1
│    │   │    └── todos
│    │   │        └── index.dart
Inside our index.dart file, we just need to declare our method to actually handle the request. By convention, we need to define it like this:
import 'package:dart_frog/dart_frog.dart';

Response onRequest(RequestContext context) {
  return Response(body: 'Welcome to Dart Frog!');
}
In this case, we are also sending a message like “Welcome to Dart Frog!” But if we want to perform custom logic, such as calling a database to retrieve the todos list, this should be the place to do it.
We are not going to cover a complete end-to-end example of Dart Frog yet, but by presenting this, we can see some particularities of the framework. In summary, when we say Dart Frog provides a layer of abstraction on top of Shelf, we can see that it makes everything simple for us. We don’t have to deal with setting up the server or configuring the routes. The framework itself hides all of this but facilitates the creation of the endpoints.
Furthermore, it also takes a similar approach to be modular. For instance, if you want to use WebSockets using Dart Frog, there is another library called dart_frog_web_socket (also built on top of shelf_web_socket) that allows us to work with them.
Dart Frog has the strong advantage of being able to quickly start a server with minimal setup. While it’s true that Shelf offers more features and some developers might not like Dart Frog’s opinionated approach to routing, it is still a promising option. Particularly, it was developed by a reputable company, Very Good Ventures. It also relies on Shelf, which is maintained by the Dart team, ensuring stability and reliability. Despite being relatively new, Dart Frog has the potential to become a solid choice for production apps.
Serverpod
Let’s take a look at the last option in this blog, Serverpod. We will analyze how it works and the main differences between Shelf and Dart Frog.
According to Serverpod’s docs, it is “an open-source, scalable app server written in Dart for the Flutter community.”
At the time of writing this blog post, Serverpod has reached version 1.0, so it has great momentum behind it, and it’s a good time to start working with it.
Similar to Dart Frog, Serverpod comes with a CLI that we need to install before we can start using it.
dart pub global activate serverpod_cli
We now have access to the CLI, so let’s create our project!
serverpod create my_app
Notice that in this case, more things were generated, which is why we’ve named our project my_app instead of server as we did previously. We are not creating a single back-end project but rather both the front end and back end. This is one of the first differences we notice: Serverpod also creates the front end in Flutter with some boilerplate code to facilitate the integration with its back end. However, as we will see, the main focus is on the server. It’s a nice touch that it also creates the Flutter app. We can see that at its core, Serverpod is trying to enhance the experience of creating a full-stack app in Dart.
Let’s analyze what Serverpod just created for us:
├── .github
├── my_app_client
├── my_app_flutter
└── my_app_server
We have three different projects:
- Our back end (my_app_server)
- Our front end (my_app_flutter)
- One intermediate project (my_app_client) that helps the Flutter app to communicate with the back end smoothly
Let’s focus on our back end (my_app_server). A lot of files were generated inside our project. This is another key difference compared with our previous options: We don’t have a bare-bones structure but rather a more advanced one to begin with. This might be more intimidating because we have to understand more concepts.
Serverpod relies on auto-generating code based on YAML files, so whenever we make changes that require generating new code, we should run the command below:
serverpod generate
One key tool you need to be familiar with when getting started with Serverpod is Docker. Although it’s not strictly necessary to create your project, you can skip that configuration. (You might have seen it if you installed it without having Docker installed.) Serverpod is tightly integrated with Postgres and Redis. Postgres is a SQL database, whereas Redis is primarily an in-memory data store. The easiest way to get these services up and running is to have Docker installed on your machine so that you can pull Docker images for both services.
If we inspect our docker-compose.yaml file, we’ll see the following:
version: '3.7'

services:
  postgres:
    image: postgres:14.1
    ports:
      - '8090:5432'
    environment:
      POSTGRES_USER: postgres
      POSTGRES_DB: my_app
      POSTGRES_PASSWORD: "PGPNuKIKeZbf_7AAB1f81UI8_B12R8f0"
    volumes:
      - my_app_data:/var/lib/postgresql/data
  redis:
    image: redis:6.2.6
    ports:
      - '8091:6379'
    command: redis-server --requirepass "78vp_SftKZXEvwOvHZXnodNbO7s7hKMs"
    environment:
      - REDIS_REPLICATION_MODE=master
volumes:
  my_app_data:
There are two different services: Postgres and Redis. They are listening in ports 5432 and 6379, respectively. We have a few configuration variables, such as the user and password. We won’t cover everything related to Docker, but to run our server, we will need to install Docker and then run the following:
docker-compose up --build -d
If everything worked as expected, you should see something like this:
[+] Running 2/2
 ⠿ Container my_app_server-postgres-1 Started
 ⠿ Container my_app_server-redis-1     Started
That means that your services started in a container and are ready to be used. We can verify everything is running with the following Docker command:
docker ps

CONTAINER ID   IMAGE           COMMAND                  CREATED        STATUS              PORTS                    NAMES
75662c5294c6   redis:6.2.6     "docker-entrypoint.s…"   18 hours ago   Up About a minute   0.0.0.0:8091->6379/tcp   my_app_server-redis-1
dafc62138343   postgres:14.1   "docker-entrypoint.s…"   18 hours ago   Up About a minute   0.0.0.0:8090->5432/tcp   my_app_server-postgres-1
After doing this, we run Postgres and Redis in the background so that we can start our server and connect to them.
To run our server, we simply need to run the command below:
dart bin/main.dart
You should expect the following output:
Insights listening on port 8081
Server default listening on port 8080
Webserver listening on port 8082
So, if we now run curl http://localhost:8080, we should see an “Ok” response with a timestamp.
Creating your first route in Serverpod
Let’s explore how to create a route using Serverpod. To get started, we need to navigate to the lib folder located under src/endpoints. In this folder, we’ll find a sample file called example_endpoint.dart. By examining this file, we can discover the following:
import 'package:serverpod/serverpod.dart';

class ExampleEndpoint extends Endpoint {
  Future<String> hello(Session session, String name) async {
    return 'Hello $name';
  }
}
In this example, we can see that we have a ExampleEndpoint class that has a hello method. Let’s hit that URL using the following:
curl -X POST http://localhost:8080/example \
   -H 'Content-Type: application/json' \
   -d '{"method":"hello", "name": " world!" }'
The server will respond with “Hello, world!” However, this is a simple instance of how routes work in Serverpod. Let’s create a more custom example. To achieve this, we’ll create a new Endpoint class called TodosEndpoint.
Next, we create our todos_endpoint.dart file under lib/src/endpoints:
import 'package:serverpod/serverpod.dart';

class TodosEndpoint extends Endpoint {
  Future<List<Map<String, dynamic>>> todos(Session session) async {
    final todo = {
      'id': '1',
      'name': 'First Todo',
    };
    final todos = [todo];

    return todos;
  }
}
In the code above, we return a list of Map<String, dynamic> that represents the Todo object. Don’t forget to use the generate command in Serverpod to generate the required code. Once the code is generated, we can restart the server and hit our endpoint with the following:
curl -X POST http://localhost:8080/todos \
   -H 'Content-Type: application/json' \
   -d '{"method":"todos"}'
We see our response in the terminal is [{"id":"1","name":"First Todo"}]. Awesome!
Comparison between Shelf, Dart Frog, and Serverpod
Now that we have a deeper understanding of how each of these three options works, we can compare them and identify scenarios in which each of them would be the best fit, as well as situations in which they should be used with caution or avoided altogether.
Shelf
As we discussed earlier, Shelf is the option with the fewest features out of the three we’ve analyzed today. However, it is highly customizable, and you can combine different shelf libraries in a modular way to achieve more advanced functionality. While this approach can be more time-consuming, it provides greater flexibility than the other options. I recommend starting with Shelf.
Dart Frog
If you’re new to back-end development in Dart and want to take advantage of the benefits we’ve discussed without spending too much time configuring and understanding Shelf, then Dart Frog might be the perfect fit for you.
As we’ve seen, Dart Frog is easy to get started with and provides a simple framework for working on top of Shelf without the need to write a lot of boilerplate code. Additionally, it’s highly flexible, allowing you to choose your preferred database and build your desired architecture.
The only potential limitation of Dart Frog is the way routes work, which is a somewhat opinionated decision of the framework. However, it’s still easy to set up and use, and you can rely on tools like mason to generate the basic folder structure for you.
Serverpod
Serverpod is the most advanced framework of the three we’ve analyzed, but it is also the most complex to get started with. There are many prerequisites to cover, such as Docker, Postgres, and Redis, to name a few. Additionally, there are more advanced topics that we did not cover in this post, which might require additional learning.
However, if you’re looking for a framework that provides a solid structure and comprehensive infrastructure management, including AWS deployment, then Serverpod is a great option. Like any framework, it requires some initial learning to get started, but it isn’t overly complex once you start using it.
Overall, I highly recommend Serverpod for those who want to take their back-end development to the next level and are willing to invest the time and effort needed to master its features and infrastructure management.
Conclusions and next steps
So, after everything we’ve covered, who is the winner? Well, as you might have guessed, there are no winners here because it really depends on what you are trying to accomplish.
The main purpose of this blog post is to present and compare each tool so that you can make that decision wisely. I hope this information has been useful for you, and I really encourage you to try Dart in the back end for your project, especially if you are a Flutter developer who already knows Dart. You’ll be amazed at how much you can accomplish!


